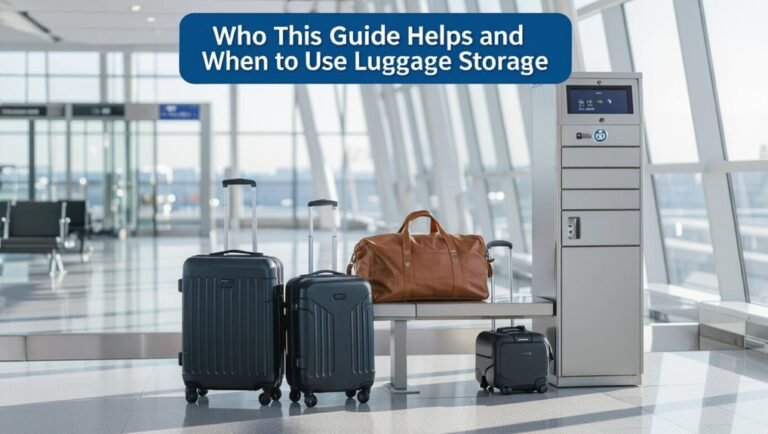
Are Photo Frames Allowed in Hand Luggage Rules Explained
You can usually carry photo frames in your hand luggage, but it depends on size, material, and how you pack them. Slim, lightweight frames—especially acrylic or thin aluminum—pass more easily than heavy metal or thick glass, which risk extra inspection or gate check. Wrap frames in bubble wrap, use corner protectors, and keep them accessible for X-ray checks; declare unusual items if needed. Continue for practical packing tips, airline limits, and security tricks to avoid surprises.
Search Intent: What People Mean by “Flying With Photo Frames
When people search for “flying with photo frames,” they usually want quick answers about whether frames are allowed in carry-on bags, how to pack them to avoid damage, and any size or material restrictions that could cause problems at security checkpoints.
You’re likely asking about fragile glazing, sharp edges, and weight limits, plus whether framing materials trigger extra screening or need declaration.
Quick Answer: Can You Carry a Photo Frame in Hand Luggage?
Yes — but it depends on the frame’s size, material, and how thick it is, since airlines and security screeners vary on what fits in overhead bins and what passes X-ray.
If it’s compact, lightweight, and not dangerously sharp or bulky, you’ll usually be allowed in hand luggage, though you may need to remove it for screening.
Check your airline’s size rules and be ready to show the frame at security to avoid surprises.
Frame Size Limits
Although rules vary by airline and airport security, you can usually carry a photo frame in your hand luggage if it fits the cabin size limits and passes the X-ray screening; check dimensions with your carrier before travel to avoid surprises. Measure your frame, consider orientation, and pack it flat or between clothes to protect it.
| Aspect | Tip |
|---|---|
| Max size | Check airline policy |
| Orientation | Try flat |
| Packing | Between soft items |
| Screening | Must be X-rayed |
| Damage | Use padding |
Material And Thickness
Frame materials and thickness matter because they affect whether security lets your photo frame through and how well it survives transit.
Choose lightweight, flexible, and shatterproof options when possible to reduce damage and bulk.
- Thin plastic or acrylic is light and safer than glass
- Foam-backed frames cushion the photo
- Metallic frames add weight
- Thick glass risks breakage
- Consider padding around edges
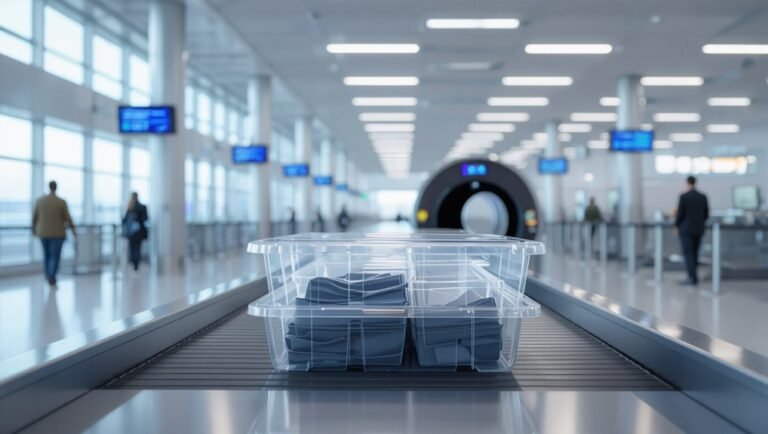
Security And Screening
Having chosen a lightweight, shatterproof frame, you’ll still need to contemplate airport security and screening rules before packing it in your carry-on.
Expect X-ray inspection; frames with metal or dense backing might trigger checks.
Remove the photo, wrap the frame, and place it flat or within a clear bin when requested.
If questioned, declare it promptly to speed screening and avoid delays.
Why Airport Security Inspects Photo Frames
You’ll notice security often checks photo frames because their glass, backing, and internal supports can create unclear X-ray images that need a closer look.
Frames made from metal, dense wood, or layered materials can also hide prohibited items or mimic suspicious shapes.
Knowing how material and construction affect screening helps you pack smarter and speed up checks.
Security X-Ray Issues
Because photo frames often contain dense materials, airport X-ray scanners flag them for closer inspection. That’s why security officers sometimes ask you to open or remove them from your carry-on.
You should cooperate, show contents, and follow directions to speed screening.
Common X-ray concerns include:
- Hidden compartments
- Metal fittings obscuring images
- Ambiguous shapes
- Overlapping items
- Electronics inside frames
Material And Construction
Photo frames often combine glass, dense matboard, metal hangers, and sometimes backing materials that look similar to prohibited items on X-rays, so security officers pull them for inspection to confirm what’s inside. You should expect checks for thickness, concealment, or hazardous inserts; pack frames where they’re visible and detachable.
| Component | Concern | Tip |
|---|---|---|
| Glass | Breakage | Wrap |
| Matboard | Dense mass | Remove |
| Hanger | Metal | Detach |
| Backing | Concealment | Open |
| Contents | Unknown | Declare |
What Commonly Triggers Alarms During X-Ray?
When your carry-on goes through the X-ray, dense or irregularly shaped items often trigger alarms because machines flag shapes and materials that resemble weapons or prohibited electronics.
Metal frames, packed chargers, batteries, and layered objects are common culprits. You should expect additional inspection for items that obscure contents or look anomalous.
- Metal picture frames
- Loose or spare batteries
- Multiple chargers/cables
- Thick layered packaging
- Electronics with hidden compartments
How the TSA Treats Photo Frames in the US
When packing photo frames for US travel, you should check size limits to make sure larger frames fit in carry-on or checked bags.
Pay attention to materials—glass, metal, or decorative bits can affect safety and screening decisions.
Expect TSA to X-ray carry-ons and possibly pull frames aside for hand inspection if they obscure contents.
Frame Size Limits
TSA doesn’t specify exact dimensions for picture frames, but size still matters because oversized frames can trigger additional screening or be rejected at the checkpoint.
If your frame fits in the X-ray bin and doesn’t interfere with other carry-ons, you’ll usually pass through without issue.
- Measure before packing
- Fit frames upright or flat
- Avoid blocking bin visibility
- Use protective sleeves
- Be ready for extra inspection
Material And Safety
Size is only part of the equation — what your frame is made of affects how security handles it. If it’s metal, bulky, or contains wiring, TSA may flag it for inspection or additional screening.
Lightweight plastic or wooden frames usually pass without issue, but fragile glass can be questioned. Declare anything unusual and pack frames to prevent breakage or suspicion.
Carry-On Screening
Although photo frames usually sail through X-ray machines without drama, agents may pull them aside for closer inspection if materials or shapes look suspicious.
You’ll be asked to remove or open frames if opaque backing or wiring obscures views. Cooperate, and you’ll speed screening.
- Expect hand inspection
- Remove covers if requested
- Declare unusual electronics
- Pack frames accessibly
- Follow officer instructions
How EU Airport Screening Handles Frames
When you pass through EU airport security, officers focus on contents and materials rather than just the frame’s appearance, so expect photo frames to be X-rayed and, if they contain glass, removed from your bag for separate screening.
You should pack frames flat, protect glass to avoid breakage, declare unusual materials, and follow officer instructions promptly to speed checks and prevent delays.
How UK Security Rules Affect Photo Frames
Because UK security focuses on safety and efficiency, expect photo frames in hand luggage to be treated much like other screens and fragile items: they’ll go through X-ray and may be pulled aside for manual inspection if glass, metal mounts, or unusual backing raise concerns.
- Pack frames flat to avoid pressure
- Wrap glass to reduce breakage
- Remove suspicious fasteners
- Declare large or heavy items
- Follow staff instructions promptly
Differences in Rules Across Other Major Countries
The UK approach—screening frames like other screens, inspecting glass or metal, and asking you to wrap or declare bulky items—gives a good baseline, but rules and practices vary elsewhere.
In the US, TSA treats framed glass cautiously and may require removal from bags.
EU nations mirror UK guidance with minor differences. Some countries ban oversized or unwrapped glass; always check local guidance before travel.
Carry-On Size Limits for Photo Frames
Check your airline’s carry-on size restrictions first, since overall dimensions determine whether a photo frame fits in the cabin.
Pay attention to frame thickness limits too, because a bulky frame can exceed permitted depth even if length and width are okay.
Measure your frame precisely—include any backing or glass—and compare those numbers to the carrier’s published limits.
Airline Size Restrictions
While airlines set different carry-on size limits, most will allow reasonably compact photo frames if you measure them across their longest dimensions and include any protruding hooks or matting.
You should:
- Check your airline’s published carry-on dimensions.
- Compare frame length and width to limits.
- Include packaging in measurements.
- Remove or secure loose parts.
- Ask gate staff if unsure.
Frame Thickness Limits
Thickness matters: most airlines don’t just care about length and width—you’ll need to factor in how thick your frame is, especially when packing it flat or in a padded sleeve. You’ll aim for slim profiles to fit overhead bins or under seats; bulky frames may be refused or need gate check.
| Situation | Recommendation |
|---|---|
| Slim frame | OK in overhead |
| Padded sleeve | Protects edges |
| Bulky frame | Might be checked |
| Rigid frame | Use gate check |
Measuring Frame Dimensions
If your frame’s profile already affects whether it fits in overhead bins, you’ll next want to measure its overall dimensions to match airline carry-on limits.
You should measure length, width, and depth, compare to your carrier’s max, and account for padding or protective sleeves so it won’t exceed size or cause rejection at gate.
- Measure length
- Measure width
- Measure depth
- Add protective padding
- Compare with airline limits
Glass vs Acrylic: Which Is Safer for Flying?
Because airline security and baggage handling can be unpredictable, choosing acrylic over glass for your photo frames usually reduces the risk of breakage and makes passing through checkpoints easier.
Acrylic is lighter, shatter-resistant, and less likely to trigger concerns during screening. You’ll minimize damage, avoid creating hazardous shards, and often comply better with carry-on weight limits while keeping your pictures protected.
Metal Frames and Sharp Edges: Screening Risks
While metal frames can look sleek and durable, they also bring screening risks you should consider: sharp corners, protruding hardware, and metal density can set off X-ray alarms or be flagged during manual inspections.
You should inspect, pad, and pack frames to minimize issues and answer questions calmly.
- Check for sharp edges
- Remove loose hardware
- Wrap with padding
- Position away from electronics
- Declare if asked
Can Mirrored or Reflective Photo Frames Be X-Rayed?
You’ll usually see mirrors and reflective surfaces clearly on X-ray images because glass and backing materials show distinct densities.
Security staff may ask you to remove or adjust a mirrored frame so they can get a better look and avoid glare or unclear outlines.
If an item’s reflections or coatings obscure the image, expect additional screening or a manual inspection.
X-Ray Visibility Of Mirrors
Mirrors and reflective surfaces in photo frames show up clearly on X-ray scanners, so you should expect them to be visible during security screening.
You’ll be asked to remove or present items if unclear. Images and metal backing create distinct outlines.
- They appear as bright, dense shapes
- Metal frames show strong contrast
- Glass reflections can obscure contents
- Expect secondary checks
- Pack accessibly for inspection
Handling Reflective Surfaces
If a frame’s reflective surface caught attention on the scanner, you’ll want to know whether mirrored or highly reflective frames can be X-rayed at all.
Yes—most airports X-ray them like any flat object, but reflections can obscure details. You’ll be asked to remove the frame for separate screening or open packaging.
Cooperate, follow staff instructions, and pack frames accessibly to speed checks.
Backing Materials That Concern Security Officers
Because some backing materials can hide sharp edges, electronics, or powders, security officers will scrutinize the rear side of any photo frame you carry in hand luggage.
You should choose plain, thin, and non-metallic backs, label any padding, and be ready to remove layers for inspection.
- Cardboard
- Foam core
- Padded fabric
- Thin plywood
- Metal sheet
Photograph Your Framed Item as Proof: How and Why
When you photograph your framed item before travel, you create clear evidence of its condition, contents, and any identifying marks that can simplify security checks or help resolve disputes.
Take sharp, well-lit images of front, back, frame edges, labels, and serial numbers.
Timestamp or save photos with metadata, keep copies on your phone and cloud, and show them to officers if questions arise.
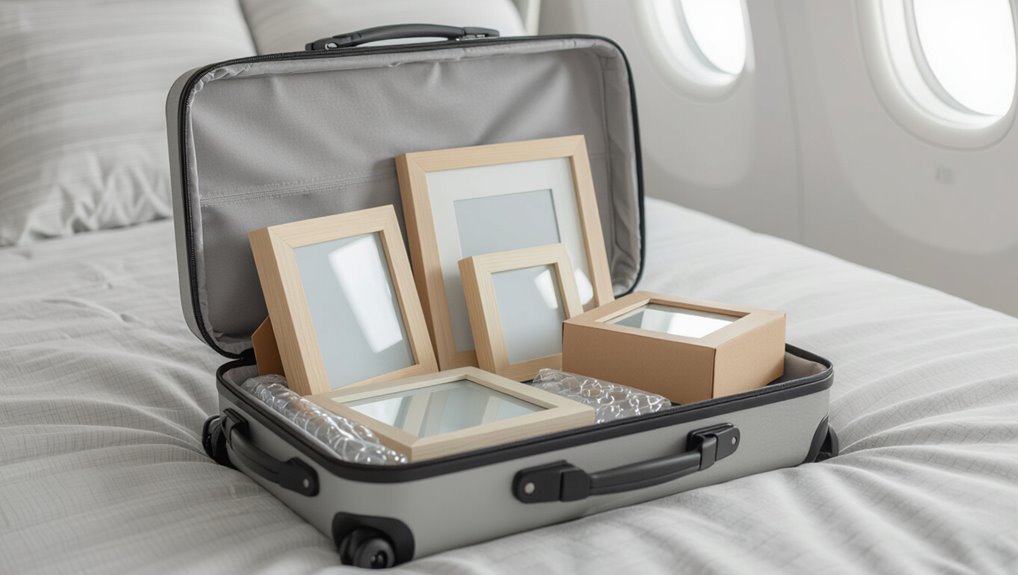
How to Pack a Framed Photo in a Carry-On
Check your airline’s size limits so your framed photo fits in the overhead or underseat space.
Wrap the frame in bubble wrap or a padded sleeve and pad the edges with clothing to prevent cracks.
At security, be ready to remove the frame from your bag for X-ray screening and explain if officers ask about fragile contents.
Frame Size Limits
Airlines set carry-on size limits for a reason, so before you pack a framed photo make sure it fits within your carrier’s maximum dimensions for cabin baggage.
Most U.S. and international airlines allow single items up to about 22 x 14 x 9 inches (56 x 36 x 23 cm), but framed pieces can vary, so measure the frame—including any mat or protective backing—then compare it to your airline’s rules.
- Measure length, width, depth
- Check airline dimensions online
- Consider gate-check options
- Confirm carry-on count limits
- Verify size-only vs. weight policies
Protection And Padding
If you want your framed photo to survive transit, wrap it in layers that cushion against shocks and prevent glass breakage:
remove loose backing, cover the glass with tape in an X pattern, wrap in bubble wrap, then place in a padded sleeve or clothing.
Use corner protectors and a rigid carrier or hard-sided bag.
Label fragile and pack upright to minimize pressure.
Security Screening Tips
After you’ve wrapped and cushioned the frame, think about how it’ll pass through airport security: carry-on screening will often require quick inspection, so pack the frame where TSA agents can access it without unwrapping everything.
Place it upright, near the top, and keep documentation handy to speed checks.
- Position upright
- Use clear protective sleeve
- Keep near top pocket
- Carry proof of contents
- Remove quickly if asked
Wrapping Glass Frames for Carry-On
When you’re packing glass photo frames in your carry-on, wrap each piece individually with bubble wrap or thick clothing to cushion edges and absorb shocks.
Place frames flat between soft items, secure with tape or elastic bands so they won’t shift, and keep heavier items below.
Carry fragile frames in an easily accessible pocket for quick inspection and to avoid unnecessary handling during travel.
Using Bubble Wrap and Corner Protectors Correctly
Because fragile corners take the brunt of impacts, wrap each frame in bubble wrap and slip on foam corner protectors to create a secure, shock-absorbing barrier; overlap wrap by a few inches, tape it snugly without compressing the bubbles, and check that corners sit fully inside the protectors so nothing pokes through during handling.
Wrap frames in overlapping bubble wrap, add foam corner protectors, tape snugly, and ensure corners are fully covered.
- Use at least two bubble layers
- Seal edges with cloth tape
- Cushion the glass side extra
- Test for movement
- Label as fragile
Best Placement for a Frame in a Soft-Sided Bag
Place the wrapped frame flat against the bag’s back panel, spine-first and centered between soft clothing layers, so it stays supported, away from zippers and external pressure points.
Tuck softer items around edges, keep heavier objects away, and avoid tight compartments.
Use padding at corners and a barrier layer toward the bag opening to prevent jostling during transit.
Packing Frames in Hard-Shell Carry-Ons
Hard-shell carry-ons give frames rigid protection, so wrap your picture securely, lay it flat against the case’s interior panel, and pad all sides to prevent movement.
You’ll avoid scratches and glass shifts by using cushioning and steady placement. Check airline size rules and keep fragile tags visible.
- Use bubble wrap
- Place foam corner guards
- Lay frame flat
- Fill gaps with clothing
- Mark as fragile
Preventing Crushing Under Other Luggage
Now that you’ve secured the frame inside a hard-shell carry-on, protect it from being crushed under other bags by choosing a spot away from heavy items and reinforcing its surroundings.
Place the frame upright between soft clothing, use rigid inserts or small foam blocks to brace edges, and keep it near the top of your bag.
Check placement after packing to guarantee stability.
Label Fragile Frames to Reduce Rough Handling
Label your frame clearly and visibly so handlers spot it at a glance, using bright stickers or a waterproof marker near the edges.
Use simple “FRAGILE” and “HANDLE WITH CARE” wording and add arrows to show which side should stay up.
Pack the frame with padding and tell staff at check-in if you want extra caution during handling.
Labeling Best Practices
If you’re packing delicate frames in your carry-on, mark them clearly as fragile so handlers and fellow passengers treat them with care.
Use bold, visible labels and waterproof tape, place labels on multiple sides, include a brief handling note inside, and secure corners.
Clear labeling reduces risk without extra bulk.
- Bold “FRAGILE” stickers
- Tape over edges
- Label multiple faces
- Add internal note
- Protect corners
Fragile Handling Tips
When you pack fragile frames in your carry-on, make handling easier by placing visible “FRAGILE” stickers on at least two sides and reinforcing them with waterproof tape so labels stay put through transit.
Also tuck a brief note inside the frame bag explaining orientation and care, and pad corners with foam or bubble wrap to prevent damage from bumps.
Carry frames upright, use a rigid case, and notify gate staff if oversized.
What to Do If Asked to Unwrap Your Frame at Security
Because security officers need to see what’s inside, be prepared to unwrap your photo frame quickly and politely when asked.
Stay calm, cooperate, and follow instructions to speed the process.
- Remove outer wrapping before the scanner if allowed
- Hold glass face-down if instructed
- Point out fragile corners
- Keep small parts together
- Ask for replacement packing if available
How to Respond If a Frame Is Flagged at X-Ray
If your frame is flagged at x-ray, stay calm and cooperate with security personnel.
You can offer to open the frame so they can inspect it without delays.
If anything’s unclear, ask for a brief explanation of the concern and the next steps.
Stay Calm And Cooperative
Don’t panic if a photo frame gets flagged at the X-ray checkpoint—stay calm, follow instructions, and be cooperative so the process moves quickly.
You should speak clearly, answer questions, and keep movements slow to avoid delays.
- Keep ID ready
- Listen to officers
- Explain contents briefly
- Avoid sudden movements
- Follow any directed steps
Offer To Open Frame
Offer to open the frame when an officer asks to inspect it — this shows you’re cooperative and speeds up the screening.
Carefully remove photos and any backing, hand components to the officer, and follow instructions.
If the frame has fasteners, undo them; if it’s glued, explain that while offering access.
Stay polite, move promptly, and keep documents handy to avoid delays.
Request Clear Explanation
When a frame shows up on the X-ray and an officer flags it, ask for a clear explanation of what they’ve seen so you know what’s at issue and how to respond.
Stay calm, answer truthfully, and offer to open or remove the item if asked.
- Ask what feature triggered concern
- Request a visual description
- Clarify if it’s a safety or policy issue
- Offer identification or receipt
- Ask next steps and timing
When and Why Security Might Confiscate a Frame
If a frame looks like it could hide prohibited items or has sharp edges that pose a safety risk, security officers may take it aside for inspection and possibly confiscate it.
You’ll be asked to open or remove suspicious components. They’ll confiscate items that fail screening, are unsafe, or violate local rules.
Cooperate, ask for clarification, and accept final security decisions.
Alternatives If Your Frame Won’t Pass Security
Should a photo frame fail security screening, don’t panic—there are several quick options you can try.
If a photo frame trips security, stay calm—you can quickly remove the glass, swap, mail, or use inspection services.
You can remove glass and pack the photo only, request secondary inspection, check airline or airport left-luggage, swap for a soft-backed frame, or mail the frame home from the airport.
Choose what’s fastest and safest for your schedule and sentimental value.
- Remove glass and pack photo only
- Request secondary inspection
- Use left-luggage/mail services
- Swap to soft-backed frame
- Mail home from airport
Ship Framed Photos vs Carry Them: Pros and Cons
While shipping can spare you airport hassles, carrying a framed photo gives you direct control over its safety and timing.
If you ship, you’ll avoid security checks and risk of confiscation but face transit damage or delays.
If you carry it, you’ll manage handling and arrival but must meet size and security rules.
Weigh cost, fragility, and schedule flexibility.
Removing Glass and Packing the Print Instead
1 clear step you can take is to remove the glass from your framed photo and pack just the print for travel; doing so cuts weight, eliminates the biggest breakage risk, and makes the item far easier to fit into carry-on size limits.
Pack the print flat, protect corners, label it, and stash it where it won’t fold.
- Use acid-free tissue
- Reinforce with cardboard
- Avoid folding
- Keep it accessible
- Note airline size limits
Transporting Just the Photo in a Protective Sleeve
If you’re carrying only the photo, slip it into a clear, archival-grade protective sleeve to keep moisture and smudges off the surface and make handling easier at security checkpoints.
Then place the sleeved print in a rigid document folder or between cardboard sheets to prevent bending.
Label it fragile, carry it in an accessible pocket, and avoid overstuffing to reduce pressure and creasing.
Travel Frames Designed for Flying: Options
You’ll want to choose a frame that keeps your photo safe without weighing down your carry-on.
Consider lightweight protective frames made from thin aluminum or sturdy plastic for rigid protection, or flexible collapsible frames that bend flat for easy packing.
Think about how much rigidity you need versus how compact you want your luggage to be.
Lightweight Protective Frames
When you’re packing photos for a flight, lightweight protective frames give you the best balance of safety and carry-on convenience: they’re made from materials like thin aluminum, rigid plastic, or foam-core with a hard outer shell to absorb shocks without adding bulk.
Many models include secure corner guards or snap closures that keep glass and prints from shifting.
- Choose thin aluminum for sturdiness
- Prefer shatterproof acrylic
- Use foam-core for lightness
- Look for corner guards
- Pick snap closures for security
Flexible Collapsible Frames
Lightweight protective frames work great for many trips, but sometimes you need something that packs flatter and more flexibly—enter collapsible travel frames.
You’ll find fabric-backed, fold-flat frames and snap-together models that protect prints without rigid bulk. They slip into carry-ons, compress under clothing, and usually meet airline size limits.
Choose padded cases and durable seams to prevent creasing during transit.
Custom Foam Inserts and DIY Frame Cases
If you want to protect frames in hand luggage without buying a commercial case, custom foam inserts and DIY frame cases give you a precise, low-cost solution.
You’ll cut foam to fit, cushion corners, and secure glass with tape or cardboard. Pack snugly to prevent shifting and label fragile for screening.
- Measure frame precisely
- Use high-density foam
- Reinforce corners
- Wrap glass first
- Test fit before travel
Bringing Frames as Checked Baggage: Risks and Benefits
Although checked baggage can spare you the hassle of squeezing frames into carry-on, it also exposes them to rough handling, pressure changes, and theft risk—so weigh convenience against potential damage.
You’ll save space and avoid gate-check hassles, but expect possible breakage, crushed corners, or lost luggage.
Use rigid packing, padding, and clear labeling to minimize harm and improve recovery chances.
Insurance for Valuable Framed Photos in Transit
You should start by assigning a realistic value to your framed photo, considering the artwork, frame, and sentimental worth.
Once you’ve valued it, compare insurance options like travel insurance add-ons, specialized art transit policies, and declared-value coverage through the carrier.
That way you’ll know which policy covers loss, damage, or delay for the amount you need.
Valuing Framed Photos
When you pack a framed photo for carry-on, assess its full replacement cost—not just the print—so you can buy adequate transit insurance that covers the frame, glass, matting, and any restoration or framing fees.
You should document provenance, photograph details, note dimensions, estimate current market value, and keep receipts for accurate claims.
- Photograph condition and labels
- Frame materials
- Glass type
- Provenance documents
- Purchase receipts
Insurance Options Overview
If you’re moving a valuable framed photo in your carry-on, assess insurance options early so you’re not scrambling after damage or loss occurs.
Check whether your homeowner’s or renter’s policy covers transit, and consider airline liability limits.
Buy transit-specific insurance for high-value items, document condition with photos, keep receipts, and understand claim deadlines and deductible amounts before you travel.
How Different Airlines Treat Photo Frames
Airlines vary widely in how they handle photo frames in carry-on bags, so check each carrier’s rules before packing.
Airlines differ on photo-frame rules—always check your carrier’s carry-on policies before packing.
You’ll find size limits, material restrictions, and security screening differences that affect whether a frame’s allowed or needs extra inspection.
- Verify carry-on dimensions per airline
- Prefer lightweight, shatterproof frames
- Remove frames for X-ray if requested
- Note international variations
- Pack frames between soft items
How Gate Agents and Ground Staff Can Help Fragile Items
Ask gate agents and ground staff for help with fragile photo frames—they can often offer cushioning materials, advise on best storage aboard, and flag delicate items for careful handling. You should request padding, ask about overhead bin placement, and confirm tagging for fragile handling.
| Service | What to Ask | Benefit |
|---|---|---|
| Padding | Foam/sleeves | Shock absorption |
| Tagging | Fragile sticker | Gentle handling |
| Placement | Bin advice | Safer storage |
Special Handling Requests for Fragile Frames
Having gate staff pad and tag your frame is a great start, but you can also request specific handling instructions to further protect it.
Having gate staff pad and tag your frame helps — also request specific handling instructions to further protect it.
You should ask staff to label fragile, place in a carry-on bin with soft items, and note special handling in the flight log while you stay nearby.
- Request “fragile” tag
- Ask for soft-bin placement
- Request upright storage
- Notify cabin crew
- Get handling confirmation
Are Sentimental Photos Exempt From Screening?
Even if a photo has deep personal value, security screening rules don’t give it a blanket exemption—you’ll still need to place it through X-ray or a hand inspection if requested.
You can politely ask for careful handling or offer to unwrap protective materials, but final screening decisions rest with officers.
Keep fragile items cushioned and arrive early to allow time for inspections.
Traveling Internationally With Framed Photos: Key Tips
When traveling internationally with framed photos, check airline and TSA size limits so your frame fits carry-on and security bin requirements.
Remove or secure loose glass and backing to make screening faster and reduce breakage.
If you’re unsure, contact your airline or pack the photo in checked luggage to avoid surprises at the checkpoint.
Frame Size Limits
If you’re flying internationally with framed photos, check size limits before packing so you don’t hit unexpected carry-on or gate-check restrictions.
Most airlines treat large frames as carry-on baggage only if they fit the cabin-size allowance; otherwise, you’ll have to gate-check or ship them.
- Measure frame dimensions (including frame and glass)
- Compare to airline carry-on limits
- Note weight restrictions
- Consider removable frames
- Pack protective wrapping
Security Screening Tips
Security screening can be straightforward if you prepare your framed photos before you reach the checkpoint: expect agents to ask you to remove frames from bags, place them in bins, or open them for inspection, and plan accordingly.
Wrap glass with clothing, carry lightweight frames to simplify handling, label sentimental items, and arrive early.
Declare unusual or oversized frames to officers to avoid delays and damage.
Customs Rules When Bringing Framed Photos Across Borders
Because customs officers assess items differently by country, you should check rules before packing framed photos to avoid delays, duties, or confiscation.
Because customs vary by country, check rules before packing framed photos to avoid duties, delays, or confiscation.
You’ll declare items when required, note material restrictions, and follow import limits for gifts or personal effects. Pack documentation and be ready for inspections.
- Declare valuable or commercial items
- Check wood/glass restrictions
- Follow import limits
- Prepare permits
- Expect inspection
How to Prove Ownership and Value at Customs
You’ll want to carry proof of purchase for any valuable frames to show ownership and declared value.
Take clear photos of the front, back, and any maker’s marks, and keep appraisals or certificates handy for antiques or high-value pieces.
These documents make it easier to answer customs questions and avoid delays or fines.
Proof Of Purchase
When you’re carrying photo frames in your hand luggage and might need to declare them, having clear proof of purchase makes the process fast and hassle-free; keep receipts, invoices, or digital order confirmations that show the seller, date, and price.
- Keep originals or clear scans
- Show payment method details
- Include serial or model numbers if present
- Note warranty or appraisal documents
- Organize files by trip for quick access
Photographic Documentation
Alongside receipts, clear photographs provide quick, unmistakable evidence of ownership and condition if customs officers ask questions.
You should photograph frames from multiple angles, include close-ups of serial numbers or maker’s marks, and capture provenance documents in the same shots.
Store images on your phone and cloud backup, label files with dates and purchase locations, and present them promptly to speed inspection and clarify value.
Appraisals And Certificates
Even if you’ve got receipts and photos, customs officers often want formal appraisals or certificates to confirm a frame’s value and provenance; having these documents ready speeds processing and reduces the chance of fines or delays.
You should carry originals or certified copies, contact details for the appraiser, and clear valuation dates.
- Certified appraisal
- Purchase receipt
- Provenance certificate
- Appraiser contact info
- Valuation date
Packing Multiple Frames for Relocation or Exhibit Transport
If you’re moving several framed photos or sending them to an exhibit, pack them as a unit so they stay protected and easy to handle; stack frames face-to-face with interleaving acid-free paper.
Wrap corners with foam or cardboard, and secure with straps in a rigid crate or padded box.
Label contents fragile, note orientation, and keep inventory and contact details accessible for handlers and customs.
Pre-Flight Checklist for Carrying a Framed Photo
Before you head to the airport, check your carrier’s size limits to make sure the framed photo fits in the cabin or a personal item.
Wrap the frame with bubble wrap or corner protectors and secure the glass with tape or a cardboard sandwich to prevent cracks.
Be ready to remove the frame at security and explain its contents so screening goes smoothly.
Frame Size Limits
When you’re packing a framed photo in your carry-on, check the airline’s maximum dimensions for personal items and cabin baggage so the frame won’t be rejected at the gate or need to be gate-checked.
Measure height, width, and depth; compare to both carry-on and personal item limits; consider orientation; factor in case or sleeve thickness; confirm with airline if borderline.
- Measure frame dimensions
- Check airline limits
- Compare both baggage categories
- Allow for protective case thickness
- Call airline if uncertain
Protective Wrapping Tips
Pack your framed photo with layers that absorb shock and prevent scratches: wrap the glass face-to-face with clean tissue or a microfiber cloth, cover the frame corners with foam or bubble wrap, and secure everything with removable tape so it stays snug but won’t damage finishes when removed.
Add a rigid flat backing—cardboard or thin foam board—then place the package inside a padded sleeve or hard-sided case.
Security Screening Prep
If you’re carrying a framed photo through airport security, have it ready to present and easy to inspect: remove any loose straps or coverings, keep protective wrap minimal and removable, and place the frame in a location of your carry-on where TSA or security officers can access it without unpacking everything.
You’ll speed screening and reduce handling.
- Keep frame accessible
- Remove bulky wrap
- Separate fragile items
- Inform officers if needed
- Carry a soft sleeve
Common Mistakes That Cause Damage or Confiscation
Because airport security has strict rules and little patience for fragile or restricted items, you can easily end up with broken frames or confiscated photos if you don’t take care.
Real Traveler Cases: What Happened and Lessons Learned
You’ve probably heard warnings about fragile frames and restricted mounts, but real traveler stories show what really goes wrong at checkpoints.
You’ll learn quick, practical takeaways from mishaps so you avoid fines, delays, or broken glass.
- Gate agent flagged a metal easel as a tool
- Bulky frame triggered extra screening
- No paperwork for antique frame caused seizure
- Tape over glass didn’t help
- Friendly explanation saved a sentimental print
Tools and Supplies to Pack in Your Carry-On for Frames
When you pack a frame in your carry-on, bring a few compact tools and supplies that can prevent damage and smooth security checks:
When packing a frame in your carry-on, bring compact tools and supplies to prevent damage and ease security checks.
- a microfiber cloth,
- corner protectors or bubble wrap,
- small roll of packing tape,
- resealable plastic bag for loose parts,
- a screwdriver set with non-metallic handles if possible,
- and a printed photo of the frame’s contents for quick inspection.
How to Choose a Travel-Friendly Photo Frame
If you want a frame that stands up to airport handling and fits in overhead bins, look for lightweight, shatter-resistant materials like acrylic or flexible composite rather than glass.
Choose a slim profile that slips into your carry-on, secure backing with screws or a locking clip, and simple, nonprotruding hardware so it won’t snag or trigger security concerns.
- Choose acrylic over glass
- Prefer slim, padded cases
- Use screw-backed closure
- Avoid ornate protrusions
- Verify dimensions for overhead bins
When to Buy a Replacement Frame at Your Destination
1 smart move is to buy a replacement frame at your destination when your original gets damaged, doesn’t meet local display styles, or would cost too much to repair or ship home.
You’ll save time and avoid extra fees. Look for lightweight, affordable options in local shops or markets, match dimensions, and choose materials suited to souvenir transport and local humidity.
Cost Comparison: Repair, Replace, or Ship?
Buying a replacement at your destination can be the quickest fix, but you’ll want to weigh the costs of repairing the original, replacing it there, or shipping it home.
Consider time, value, and risk when choosing.
- Repair cost vs. sentimental value
- Local replacement price and availability
- Shipping fees and insurance
- Time until return trip
- Risk of damage in transit
Quick Decision Tree: Keep, Check, or Ship Your Frame
When you’re deciding whether to keep your photo frame in carry-on, check it at the gate, or ship it home, run through a quick set of practical checks: assess fragility and size, verify airline carry-on rules and gate-check options, compare the cost and speed of shipping versus replacing at your destination, and factor in sentimental value and insurance coverage.
If fragile or oversized, ship or gate-check; otherwise carry-on.
Top 5 Packing Solutions for Framed Photos (Short Reviews)
If you decide to carry, gate-check, or ship your frame, you’ll want a reliable packing method that matches that choice—so here are five compact solutions you can use right away.
- Bubble-wrap and corner protectors: snug, shock-absorbing.
- Cardboard sandwich: rigid, low-cost.
- Padded frame sleeve: slim, carry-on friendly.
- Hard-case carry box: maximum protection.
- Photo tube with wrap: for rolled prints only.
Key Takeaways and a Printable Checklist
Since you’ll want an easy reference at the airport or before you ship, this checklist condenses the essentials so you can pack and protect framed photos quickly and confidently.
Pack frames in carry-on when possible, use bubble wrap and rigid flat supports, remove glass or replace with acrylic, declare oversized items, check airline and TSA limits, secure corners, label fragile, and carry documentation for appraisal or provenance.
Frequently Asked Questions
Can a Framed Certificate With a Seal Be Treated Differently at Security?
Yes — security might treat a framed certificate with a seal differently: you’ll be asked to unwrap or remove it from luggage for inspection, especially if the seal looks dense or metallic, so be prepared to show it.
Do Photo Frames With Embedded Electronics (LEDS) Pose Extra Issues?
Yes — you’ll face extra screening because embedded LEDs or batteries can trigger alarms and may need removal or separate inspection; declare them, carry spare batteries in carry-on limits, and expect possible refusals on some flights.
Will Humidity-Controlled Storage at Airports Protect Delicate Frames?
Yes — humidity-controlled airport storage can protect delicate frames by preventing warping, mold, and electronic corrosion. You’ll still want sealed packaging and silica gels, and check storage facility specs and liability policies before leaving items.
Can I Bring Oversized Frames in the Cabin if Purchased as Duty-Free?
Yes — you can usually bring oversized duty-free frames into the cabin, but you’ll need airline approval and space availability; don’t assume guaranteed carriage, so check dimensions with the retailer and airline before boarding to avoid refusal.
Are There Special Documentation Rules for Antique or Culturally Significant Frames?
Yes — you’ll usually need documentation for antique or culturally significant frames: provenance, export permits, or certificates from cultural authorities, and customs declarations. Check both departure and destination regulations and carry originals to avoid confiscation or delays.
Conclusion
You can usually bring photo frames in your carry-on, but be ready for extra screening and potential restrictions if they contain glass, metal, or thick backing. If the frame’s fragile or valuable, consider wrapping it well, using a padded case, or checking it to avoid damage—though checked luggage has its own risks. When in doubt, ship large or priceless frames ahead. Use the checklist to decide: keep, check, or ship based on size, value, and fragility.