Where Can I Find My Tsa Redress Number Easy Guide
You can usually find your TSA Redress Number in DHS TRIP emails or mailed letters, on past airline reservations, or in your airline or Trusted Traveler profile, so check those first and search email keywords like “DHS TRIP” or “redress.” If you can’t find it, contact your airline or request a duplicate through the DHS TRIP website with ID and travel docs. Keep the number in your profile and bookings for smoother screening, and keep going to learn how to apply or recover it.
Find Your Redress Number Right Now

Want to stop getting flagged at airport security?
You can retrieve your redress number by checking prior correspondence from DHS Traveler Redress Inquiry Program (TRIP), logging into your TRIP account, or contacting their support if you’ve applied before.
Look through emails, confirmation letters, or the TRIP portal; if you never applied, you won’t have a number to find.
What a Redress Number Is
A TSA redress number helps you resolve mistaken identity and repeated travel screening problems by linking your travel records to a single file.
You get one by applying through the DHS TRIP system and providing documentation about the issues you’ve faced.
Once assigned, you’ll include it on reservations and travel forms to reduce future hassles.
Purpose Of Redress
When travelers keep getting flagged by security systems or mistaken for someone else, a Redress Number gives you a reliable way to fix those errors and move through screening more smoothly.
It helps resolve identity mismatches, reduces repeated secondary screenings, and guarantees your travel records match your identity.
You’ll experience fewer delays, clearer communication with agencies, and more predictable screening outcomes.
How To Obtain
If you’re repeatedly misidentified by watchlists or face frequent secondary screenings, you can apply for a DHS Traveler Redress Inquiry Program (TRIP) redress number to correct your records and streamline future travel.
You’ll submit a TRIP form, ID copies, and travel details; DHS reviews and issues a redress number if warranted.
- Complete online TRIP form
- Attach ID
- Provide travel history
- Await review
- Receive number
Who Needs a Redress Number
If your name is repeatedly flagged or misspelled in travel records, you should consider getting a Redress Number to clear up misidentifications.
You’ll also benefit if your frequent-flier profile or travel history is often confused with someone else’s and causes extra screening.
Applying can cut down on delays and mistaken identity problems at checkpoints.
Travelers With Name Issues
Anyone whose name on travel documents doesn’t match TSA or airline records should consider applying for a Redress Number.
You should get one if mismatches cause delays, denials, mistaken identity, security screenings, or travel stress. It helps streamline checks and avoids repeated questioning.
- name spelling differences
- added or missing middle names
- maiden vs. married surnames
- initials vs. full names
- transliteration variations
Frequent Flyer Confusion
Ever wondered whether your frequent flyer status could make security checks harder?
If you travel often and hold elite status or multiple loyalty accounts, you might trigger misidentification or watchlist hits.
You should apply for a TSA redress number if repeated screening delays, mistaken identity, or itinerary mismatches occur.
It helps resolve recurring issues and speeds future security processing.
Quick Summary: DHS TRIP Process
When travel screening flags you or you’re repeatedly delayed, DHS TRIP lets you file a redress request to resolve identity and watchlist issues.
If travel screening flags you or causes repeated delays, file a DHS TRIP redress request to resolve identity and watchlist issues.
You’ll submit an online form, provide supporting documents, and attend an interview if needed so the Department of Homeland Security can review and correct your records.
- Submit form online
- Upload IDs and evidence
- Track your case status
- Attend interview if requested
- Receive redress determination
Step‑by‑Step DHS TRIP Application
Before you start the DHS TRIP application, gather your required documentation like IDs, travel records, and any incident paperwork.
Then go to the online form and fill each section carefully, attaching the documents where prompted.
If something’s unclear, pause and double‑check to avoid delays.
Prepare Required Documentation
Now you’ll gather the documents DHS TRIP needs to verify your identity and resolve the issue.
You’ll scan and upload clear, legible copies that match your application details.
Include:
- Government photo ID (passport or driver’s license)
- Proof of citizenship or immigration status
- Recent boarding passes or itineraries
- Police or incident reports, if any
- Supporting correspondence or travel receipts
Complete Online Form
With your documents scanned and ready, start the DHS TRIP online form and work through each screen carefully.
You’ll enter personal details, incident specifics, and upload IDs. Double-check names, dates, and attachments before submitting.
Use clear descriptions, stick to facts, and answer required fields.
Save confirmation numbers and print the submission receipt for your records; you’ll need them for follow‑up.
DHS TRIP Required Documents
When you apply for DHS TRIP, you’ll need to bring specific identification and supporting documents to prove your identity, travel history, and the nature of your screening issue.
You’ll provide clear, verifiable evidence to support your claim and speed review.
- Government-issued photo ID
- Passport or travel documents
- Boarding passes or itineraries
- Correspondence with airlines or agencies
- Any prior redress or screening notices
Typical DHS TRIP Processing Times
Although processing times can vary, DHS TRIP reviews typically take several weeks to a few months, and you’ll usually hear back within 30–60 days. Expect longer waits for complex cases or additional checks. Prepare documents promptly and respond to requests quickly to avoid delays.
| Stage | Typical Time | Notes |
|---|---|---|
| Initial review | 2–4 weeks | Basic checks |
| Investigation | 4–8 weeks | Complex cases |
| Resolution | 2–4 weeks | Final decision |
How to Check Your DHS TRIP Status
You can check your DHS TRIP case status online to see updates and any required actions.
If your contact information has changed, update it right away so DHS can reach you.
Keeping both the status and your contact details current helps avoid delays.
Check Case Status
Wondering how to see where your DHS TRIP case stands? You can track progress online or by phone, get status updates, and prepare next steps.
Check your case regularly so you know timelines.
- Visit DHS TRIP portal
- Sign in with your case number
- Review current status notes
- Note response deadlines
- Contact DHS TRIP for clarifications
Update Contact Information
After checking your case status, make sure DHS TRIP has your current contact details so you don’t miss updates or deadlines. Log in, verify your email and phone, and update mailing address if needed. You’ll get notifications about decisions and requests. Keep records of changes and confirmation numbers for reference.
| Item | Action |
|---|---|
| Verify/update | |
| Phone | Verify/update |
| Address | Update if changed |
| Records | Save confirmations |
Check Your DHS TRIP Confirmation Email
Once you submit your DHS TRIP application, check your email for a confirmation message that includes your case number and next steps; save it so you can reference the case ID when tracking progress or communicating with DHS.
- Note sender and subject line
- Save the email and case ID
- Screenshot or download attachments
- Verify contact details listed
- Follow stated timelines for responses
Search TSA Correspondence Letters for the Number
You’ll often find your TSA Redress Number on formal correspondence from the Transportation Security Administration, so scan any letters or envelopes you’ve received for a printed or typed “Redress Number,” “Redress Control Number,” or “DHS TRIP Case Number.”
Check header sections, near case details, or beside barcodes.
Keep those letters handy or photocopy the page with the number for future travel and record-keeping.
Find It on Airline or CBP Notices
If you didn’t spot the redress number on TSA mail, check any correspondence from your airline or U.S. Customs and Border Protection; they sometimes include it.
Look closely at notices, boarding issues, or watchlist letters. You’ll find it in headers or reference sections.
- Airline confirmation emails
- Boarding pass issue notes
- CBP traveler notices
- Watchlist correspondence
- Claim or appeal letters
Search Your Email With Smart Keywords
Looking for your redress number in a sea of emails? Use targeted searches: try “DHS TRIP,” “redress number,” “Redress Control Number,” “TSA TRIP,” or your full name plus “redress.”
Filter by sender domains like @dhs.gov or airlines. Sort by date and attach keywords to subject-only searches.
Mark the message, save a screenshot, and flag it for quick future access.
Where to Look If You Mailed/Faxed
Wondering where a mailed or faxed redress confirmation might show up? You’ll want to check physical and digital spots where confirmations land.
Look in the following places:
- Home mailbox for lettered confirmations
- Fax machine or service printouts
- Scanned copies you saved on your computer
- Mailroom or reception at your workplace
- Records or filing system where you keep travel docs
How Travel Agents or Airlines Can Help
Contact your travel agent or airline directly — they can check your reservation for a TSA Redress Number, add it to bookings, and advise on any travel-screening notes you should expect. They’ll update profiles, confirm boarding passes, and note any alerts so you avoid delays.
| Service | What they do | Timeframe |
|---|---|---|
| Agent | Verify/add number | Same day |
| Airline | Attach to PNR | Within hours |
| Support | Explain alerts | Immediately |
What to Do If You Forgot Your Email
If your travel agent or airline can’t find your TSA Redress Number because you forgot the email you used to apply, don’t panic — you can still recover it.
Check saved documents, search inboxes for “redress” or “DHS TRIP,” and contact the program with identity info.
Try:
- look through old booking confirmations
- search all your email accounts
- check saved passwords
- call your airline
- gather ID and travel details
Request a Duplicate From DHS TRIP
1 simple way to get your TSA Redress Number back is to request a duplicate directly from DHS TRIP — they’ll verify your identity and reissue the number if your record matches.
Visit the DHS TRIP website, complete the online form, and upload ID copies.
Expect confirmation by email; respond promptly to any follow-up to speed up reissuance and avoid delays.
Add Your Redress Number When Booking
When you book your flight, add your TSA Redress Number to your passenger details or loyalty profile so airlines can match your record and prevent mistaken identity delays.
Enter it in the booking form or contact the airline if fields are unclear. Keep confirmation handy and verify on boarding passes.
- Booking form
- Customer service
- Reservation notes
- Mobile app
- Email confirmation
Add It to Your Airline Profile
Once you’ve added your Redress Number to individual bookings, put it into your airline profile so it automatically attaches to future reservations.
Log into your frequent flyer or airline account, find personal details or traveler info, and enter the Redress Number in the designated field.
Save changes and confirm it appears on upcoming itineraries to prevent misidentification and streamline check-in.
Redress Number and TSA PreCheck/Global Entry
Your redress number helps prevent mistaken identity on security watchlists, so you’ll want to understand its purpose before you travel.
You can add it to TSA PreCheck and Global Entry applications or to your existing membership to reduce screening problems. Linking the number correctly guarantees you get the benefit without delays.
Redress Number Purpose
Think of a redress number as your identity correction code: it helps the TSA and other agencies distinguish you from travelers with similar names or problematic watchlist records.
It can be linked to programs like TSA PreCheck or Global Entry to streamline screening when disputes or mismatches have occurred.
- Resolve misidentification
- Speed security reviews
- Reduce false positives
- Clarify travel records
- Support appeals processes
Linking Redress To Programs
Although a redress number won’t automatically grant you expedited screening, it can be linked to programs like TSA PreCheck and Global Entry so agencies correctly apply your trusted-traveler status when past misidentification issues might otherwise block benefits. You’ll add the number to applications or your profile. Check confirmations to verify it’s recorded.
| Program | Where to Add | Result |
|---|---|---|
| TSA PreCheck | Application/Profile | Matches records |
| Global Entry | CBP Profile | Prevents denials |
What to Expect at Security Checkpoints
When you approach the security checkpoint, expect a clear, step-by-step process: present your ID and boarding pass, place carry-ons on the conveyor, remove laptops and liquids, and step through the metal detector or body scanner when directed.
You’ll follow instructions, may be screened further, and should stay patient.
- Follow officer directions
- Keep documents ready
- Remove prohibited items
- Claim screened bags promptly
- Ask questions calmly
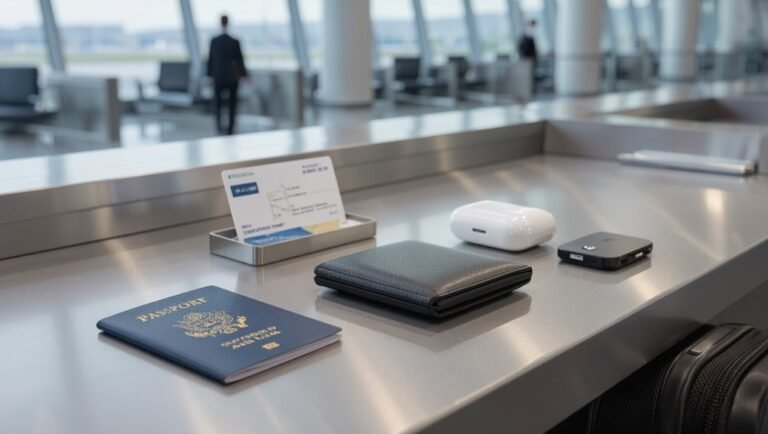
How to Show Your Redress Number at Security
When you book or check in, add your redress number to your boarding pass so it’s linked to your reservation.
At the security checkpoint, show your boarding pass with the number and your photo ID to the TSA officer.
You can also save the boarding pass (with the redress number visible) in your mobile wallet for quick access.
Add It To Boarding
Add your TSA Redress Number to your boarding pass and travel profile so security agents can quickly match it to your ID and avoid mistaken delays.
Add it when you book, check in online, or update your airline profile. Carry documentation if prompted.
Tips:
- Enter number in “Known Traveler/Redress” field
- Verify on mobile boarding pass
- Update frequent flyer account
- Print a copy
- Save screenshot for backup
Show It At Checkpoint
After you’ve stored your Redress Number on your booking and boarding pass, show it at the security checkpoint to speed screening and avoid additional ID checks.
Present your boarding pass and ID, point out the redress number if TSA staff don’t notice, and verbally provide it when asked.
Be polite, keep documents accessible, and confirm officers have recorded it before proceeding through security.
Use Mobile Wallet
Tap your boarding pass in your mobile wallet to display your Redress Number quickly at security.
You’ll open the pass, verify the field, and present it to officers. Keep it accessible and updated.
- Add Redress Number to pass notes
- Pin boarding pass to top
- Sync across devices
- Enable offline access
- Verify before arrival
Still Getting Flagged? Troubleshooting Steps
If you’re still getting flagged despite having a TSA Redress Number, don’t panic — there are a few targeted troubleshooting steps you can take to resolve the issue.
Verify your name, birthdate, and passport match airline reservations; add your redress number to your frequent flyer profiles and future bookings; carry printed DHS TRIP confirmation; contact the airline’s customer service and TSA Cares before travel.
Common Reasons DHS TRIP Is Denied
Even with the steps above, DHS TRIP can still be denied for clear reasons you can check and correct.
You should verify your application and fix issues promptly:
- Incomplete or inconsistent personal information
- Missing supporting documents or IDs
- Prior unresolved alerts or holds
- Typographical errors in names/dates
- Submitting duplicate or conflicting requests
Address these to improve your chances.
How to Appeal or Follow Up
When your DHS TRIP request is denied or stalls, act promptly to appeal or follow up so you don’t lose momentum; gather your case number, supporting documents, and any correspondence before contacting DHS to make your inquiries clear and efficient.
Call the DHS TRIP helpline or use the online portal, reference deadlines, submit new evidence succinctly, and request status updates until you get a definitive resolution.
Protecting Personal Data in the Process
When you submit a redress request, only share the minimum personal data required and skip optional details that aren’t needed.
Keep copies of your documents in a secure, encrypted folder or a locked physical file.
That way you reduce exposure and can quickly produce records if TSA asks for proof.
Limit Personal Data Shared
Limit the personal data you share to only what’s required for your redress application and supporting documents.
You should verify requests, omit optional extras, and limit copies.
- Provide full name and DOB only when asked
- Share identification numbers sparingly
- Avoid unnecessary contact details
- Don’t upload unrelated documents
- Use minimal explanations for incidents
Keep control of what you disclose.
Secure Document Storage
After you decide what personal data to share, store the files securely so they won’t fall into the wrong hands. Use encrypted folders, strong passwords, and backups. Limit access and review permissions regularly. Consider cloud services with zero-knowledge encryption and physical safes for originals.
| Method | Strength | Tip |
|---|---|---|
| Encrypted folder | High | Use AES-256 |
| Cloud zero-knowledge | High | Enable MFA |
| Physical safe | Medium | Fireproof model |
| Backup drive | Medium | Disconnect after use |
When to Update or Correct Records
If you spot an error in your TSA Redress Number application or your travel records, fix it promptly to avoid repeated screening or boarding delays.
You should update records when:
- personal details change
- passport or name is corrected
- travel document numbers update
- recurring misidentification occurs
- airline or TSA requests verification
Act quickly, follow TSA guidance, and keep confirmation records for future trips.
How Long Redress Numbers Last
Once you’ve corrected errors and kept your confirmation, you’ll want to know how long your redress number remains valid.
Redress numbers don’t expire automatically; they stay tied to your record while relevant. You should keep your contact info updated and reuse the number for future bookings.
If circumstances change considerably, check with DHS/TRIP to confirm continued applicability.
Using a US Redress Number Abroad
When you travel abroad, your U.S. redress number can still help prevent misidentification on international itineraries and when interfacing with U.S. carriers, but it won’t automatically affect foreign government watchlists or screening systems.
You should:
- Provide your redress number when booking with U.S. airlines.
- Add it to your frequent flyer profile.
- Show it at check-in when possible.
- Keep documentation handy.
- Expect local screening to follow host-country rules.
Redress Numbers for Families and Groups
If you’re applying for redress for multiple family members, you’ll want to know how the group application process works and what documentation is required.
You can often include dependents on a single application, but each person typically needs their own identifying information.
We’ll also cover whether and how a single redress number can be shared or must remain individual.
Group Application Process
Although each traveler needs their own TSA redress number, you can apply as a group to streamline the process and guarantee everyone’s information is submitted together.
You’ll collect documents, complete individual forms, pay per applicant, and submit together for coordinated review. Follow these steps:
- Gather IDs and supporting documents
- Assign a group coordinator
- Complete separate applications online
- Pay required fees individually
- Submit as one batch
Shared Redress Use
Because each traveler is supposed to have their own redress number, you should avoid sharing one across family members or groups. Using someone else’s number can cause delays or screening mismatches at checkpoints.
Apply for individual numbers for each traveler, even children. Link related cases in your application notes when appropriate, and carry each traveler’s TSA correspondence to speed verification and reduce confusion.
Temporary Alternatives If You Need Faster Help
When you need faster help than the TSA redress process can provide, try alternatives that get you moving sooner:
- Contact the airline’s customer service desk for immediate ID or booking issues.
- Use TSA Curbside or expedited lines if eligible.
- Request on-site supervisor assistance at the airport.
- Bring extra documentation (passport, driver’s license).
- Consider trusted traveler enrollment for future speed.
Real Scenarios Where a Redress Number Helped
If you’ve ever been stopped at security, a redress number can cut through repeated delays by proving you’ve already cleared identity or watchlist issues—so agents can verify your record quickly and let you proceed.
You’ll avoid missed connections, smoother inspections when names match flagged records, and fewer invasive secondary screenings.
Many travelers reclaim time and confidence after filing and using their redress number at checkpoints.
Common Mistakes When Searching for It
When you’re searching for your TSA Redress Number, small errors can cost you time and access.
Misspelling your name, uploading the wrong documents, or overlooking confirmation emails are common slip-ups that derail requests.
Check spellings, double‑check files, and watch for confirmation messages to avoid delays.
Misspelling Your Name
1 common mistake people make is typing their name the way it appears on a nickname or social profile instead of matching the exact spelling on travel documents, which can prevent you from finding or linking your TSA Redress Number.
You should check and correct common errors:
- Missing middle name or initial
- Transposed letters
- Accented characters omitted
- Hyphens and spaces inconsistent
- Suffixes (Jr., Sr.) excluded
Using Wrong Documents
Because your TSA Redress Number must match the exact information on your official travel documents, using the wrong ID or an expired document can block your search or linking process.
Double-check which ID you used when applying, confirm passport or driver’s license numbers and expiry dates match, and don’t mix documents.
Correcting mismatches early prevents delays and repeated verification requests.
Ignoring Confirmation Emails
If you skip confirmation emails, you’ll miss key links and codes needed to search or link your redress number, and that often causes needless delays.
Check your inbox, spam, and trash promptly. Save confirmation messages and follow instructions immediately.
- Verify sender address
- Open attachments safely
- Note deadlines
- Copy reference codes
- Archive for travel records
Quick Checklist: Find or Apply Today
Start by checking whether you already have a TSA Redress Number—look at past travel confirmations, your Trusted Traveler profile, or any emails from DHS—then apply online through DHS TRIP if you don’t.
Gather ID, travel dates, and incident details. Complete the form, upload documents, and note your confirmation.
Follow up if you don’t hear back within the expected timeline.
Official DHS TRIP and TSA Links
When you’re ready to apply or check status, use the official DHS Traveler Redress Inquiry Program (DHS TRIP) site and the TSA’s dedicated pages—these are the only authoritative sources for filing, tracking, and finding contact info, so bookmark them and avoid third-party sites that charge fees or give outdated guidance.
- DHS TRIP application
- DHS TRIP status tracker
- TSA redress info page
- Contact & FAQ pages
- Official privacy policy
How to Keep Travel Smooth Afterward
After you get a TSA Redress Number, keep it handy and add it to your airline profiles, frequent-flyer accounts, and reservation records so you avoid repeat screening and mistaken identity delays.
Also share it with travel agents, input it when booking, and confirm it appears on itineraries. Carry a copy when you travel, check for updates before trips, and mention it at check-in if issues arise.
Frequently Asked Questions
Can Non-U.S. Citizens Apply for a U.S. Redress Number?
Yes—you can apply for a U.S. redress number even if you’re not a U.S. citizen. You’ll submit information through DHS TRIP, provide identification and travel details, and they’ll review and issue a redress number if warranted.
Will My Redress Number Affect Trusted Traveler Interview Outcomes?
Yes — your Redress Number can help resolve past screening issues and reduce mistaken watchlist matches, so it may improve Trusted Traveler interview outcomes; bring documentation, explain circumstances, and they’ll consider it during your enrollment decision.
Can Employers Request My Redress Number on My Behalf?
Yes — employers can request your redress number, but you shouldn’t share it unless you trust their purpose. You’ll want to confirm how they’ll use and protect it, and you can refuse or limit disclosure if uncomfortable.
Is There a Fee to Obtain or Renew a Redress Number?
No, there’s no fee to obtain or renew your redress number through DHS TRIP; you’ll submit your application and any supporting documents online, and DHS processes it without charging you for issuance or renewal of the redress number.
How Is a Redress Number Different From a Criminal Background Check?
A redress number addresses travel-screening misidentification and resolves security-check errors, while a criminal background check examines your criminal history for hiring or legal purposes; you’ll use redress for travel relief, not as a criminal-record verification.
Conclusion
Now that you know what a redress number is and where to get one, don’t wait—check DHS TRIP if you’ve had travel hassles or misidentification. Apply online, follow the checklist, and double‑check documents to avoid delays. Keep your redress number handy in profiles and reservations, and update it after approval. Doing this saves time and frustration at the airport, helping your trips go through security more smoothly and confidently.