How to Use Luggage Scale to Avoid Overweight Fees
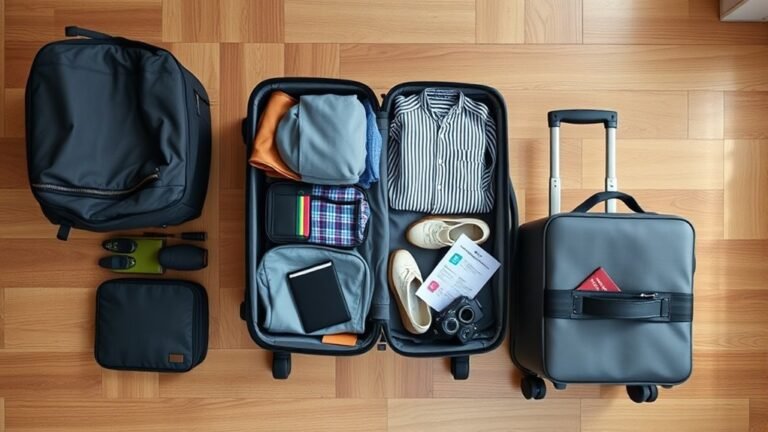
Weigh your bags at home with a handheld or bathroom scale so you don’t get hit with surprise fees at the counter. Check your airline’s weight and size limits, weigh each checked and carry-on bag separately, then shift heavy items into a lighter bag or your carry-on until all are within limits. Use packing cubes, small containers, and repeat weighings for accuracy. Follow a final pre-trip weigh-in and you’ll know exactly how to adjust if needed.
Why Weigh Luggage Before You Check In
Why weigh your luggage before you check in? You’ll avoid surprise fees that drain travel budgets and delay your trip at the counter.
Weigh your luggage before check-in to avoid surprise fees and wasted time at the counter.
By weighing beforehand, you’ll spot overpacked items and redistribute or remove them calmly, rather than making rushed choices under airline staff pressure.
You’ll also protect fragile items by choosing carry-on when needed, and keep your checked bag within safe handling limits to reduce damage risk.
Weighing gives you control: adjust clothing, swap bulky shoes for lighter pairs, or shift heavy items to personal bags.
That small habit keeps travel smoother, cheaper, and less stressful.
Read Airline Baggage Weight Limits Fast
Before you pack, check the airline’s weight limits so you know what’s allowed. Confirm whether your fare, frequent-flier status, or ticketed allowance changes the weight or piece limits.
That quick check helps you decide if you need to redistribute, repack, or purchase extra allowance.
Know Airline Limits
Because airlines set different size and weight rules, you should check your carrier’s baggage limits before you pack. Look up both weight and linear dimensions for checked and carry-on bags, and note whether limits differ by route, class, or fare.
Pay attention to per-piece versus weight‑based allowances so you won’t assume pooled totals. Note special rules for sports gear, strollers, or fragile items that may carry separate charges.
Save screenshots or emails of the allowance and any exemptions. Before you leave, confirm limits again—airlines update policies—and adjust packing so your luggage stays within the limits.
Check Allowance Types
When you read an airline’s baggage policy, focus on the allowance type—per‑piece, weight‑based, or pooled—so you can quickly tell how fees will apply and what to weigh. You’ll check if the rule limits each bag, total weight for all checked pieces, or lets you split kilos among travelers. Use your scale to confirm individual and combined weights before leaving. That prevents surprises at check‑in and helps you rearrange items or pay for an extra bag in advance.
| Allowance | What it means | What to weigh |
|---|---|---|
| Per‑piece | Fee per bag | Each bag |
| Weight‑based | Total kg limit | Total weight |
| Pooled | Shared allowance | Combined bags |
Quick Checklist: Weigh and Adjust Before Leaving Home
If you’re packing for a trip, grab your luggage scale and run through a short checklist so you don’t get hit with surprise fees at the airport. Weigh each bag, note the number, and compare it to your allowance.
Shift heavy items between bags to balance weight and keep both under limits. Remove nonessentials—extra shoes, bulky toiletries, duplicates—and replace them with lighter alternatives or travel sizes.
Consolidate items into carry-on if allowed. Reweigh after adjustments. Secure zippers and redistribute weight for stability.
Tag bags and stash the scale; you’ll leave home confident and fee-free.
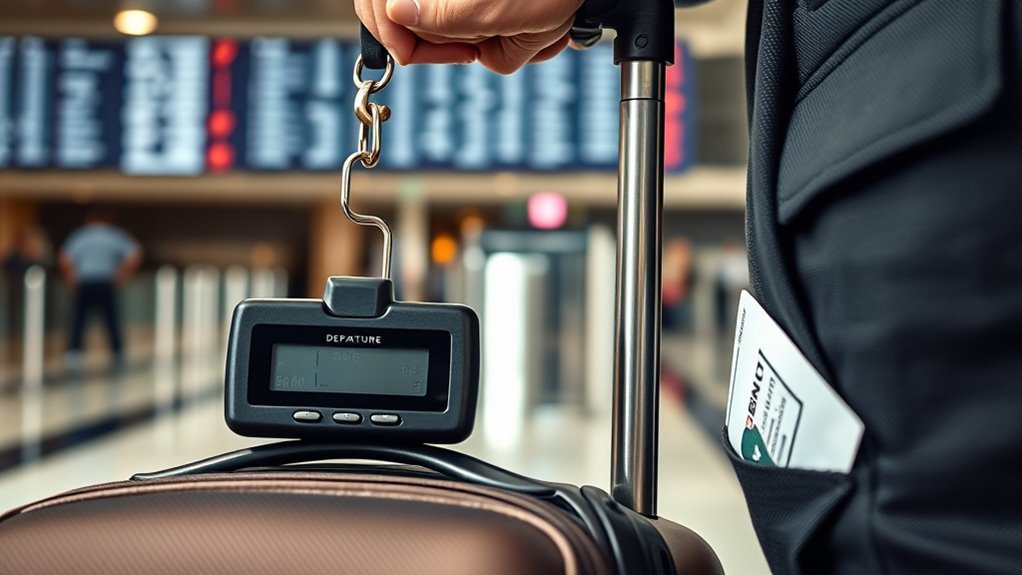
Weigh Luggage With a Handheld Scale: Step-by-Step
Pick a reliable handheld scale with a clear display and a sturdy strap so you get accurate readings every time.
Hold the scale steady, hook it to your luggage handle, lift straight up until the weight stabilizes, and read the number.
If the weight’s over the limit, you can quickly shift items or repack before you leave.
Choose The Right Scale
Because a reliable handheld scale gives you quick, accurate readings, you’ll want one that’s sturdy, easy to use, and within a reasonable weight range for your luggage. Pick a compact model with a clear display, tare function, and durable strap.
Look for scales rated to at least 50–70 lb (23–32 kg) and with 0.1–0.5 lb (50–200 g) accuracy. Battery life and a backlit screen help in dim areas.
Compare weight of the scale itself so it won’t eat into your allowance.
- Max capacity and precision
- Build quality and strap strength
- Display and battery life
- Portability and weight
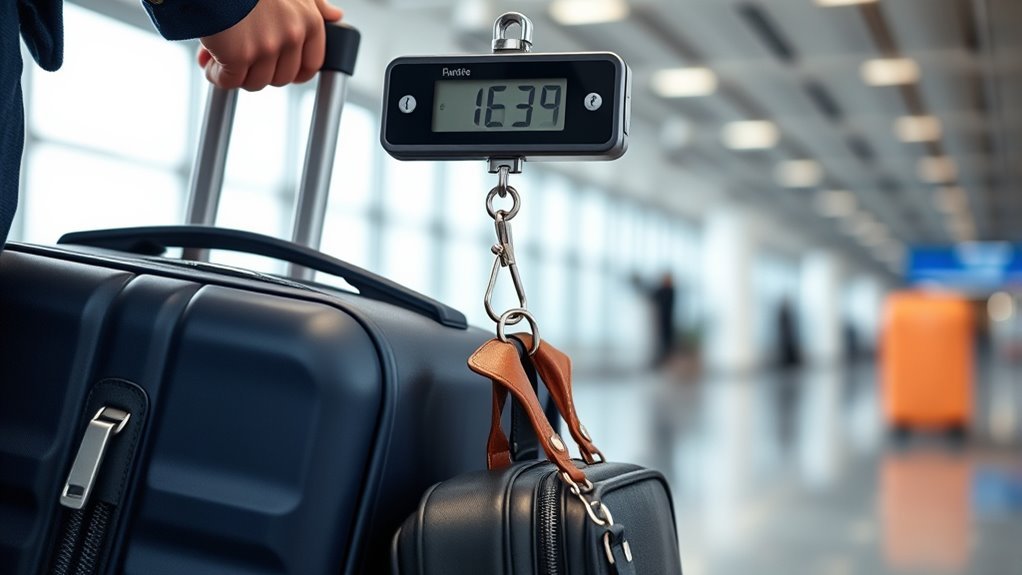
Step-By-Step Weighing
When you’re ready to weigh your bag, secure the scale’s strap around the handle, lift steadily, and read the display once the number stabilizes. This prevents sudden jerks that can give inaccurate readings.
Hold the bag close to your body, keep your feet shoulder-width apart, and avoid swinging. Note the weight, then set the scale to zero and weigh again if you adjust contents.
Compare the reading to airline limits and redistribute or remove items if needed. For multi-compartment suitcases, weigh each piece separately.
Store the scale charged or with fresh batteries so it’s ready when you travel.
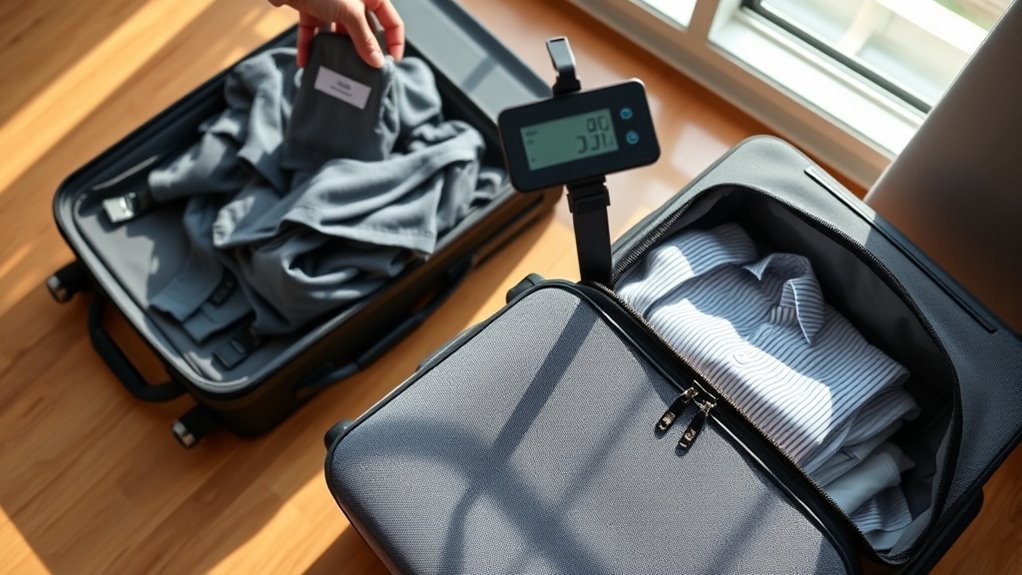
Weigh a Suitcase on a Bathroom Scale Accurately
Want to be sure your suitcase won’t push you over the airline’s limit? Use your bathroom scale simply and accurately. Place the empty suitcase on the scale first to zero it mentally, then add your packed bag and note the difference.
Want to avoid overweight baggage fees? Weigh an empty suitcase, then packed—subtract to get the exact packed weight.
If your scale fluctuates, step on and off once to reset, then stand beside the scale placing the suitcase to center weight.
For best results:
- Put the suitcase empty, record weight.
- Pack, then place suitcase centered, record total.
- Subtract empty weight to confirm packed weight.
- Repeat once to verify consistency.
Weigh Multiple Bags and Combine Weights Correctly
If you’re traveling with more than one piece of luggage, weigh each bag separately and then add the weights to get your total; this lets you spot an overweight bag and rebalance items before you reach the airport. Weigh each bag on the same scale, on flat ground, and record numbers. Add carry-on separately later (see next section). If a checked bag exceeds the limit, move items to another checked bag and reweigh both until each complies.
| Bag | Weight (lbs/kg) | Notes |
|---|---|---|
| Bag A | ||
| Bag B |
Weigh Carry-On Bags to Avoid Gate-Check Surprises
After you’ve balanced checked bags, don’t forget to weigh your carry-on so you don’t get stuck gate-checking at the last minute. You’ll avoid surprises by checking weight, not just size. Use a handheld luggage scale or your bathroom scale, and redistribute items between personal item and carry-on if needed. Keep essentials accessible in a lighter bag so security and boarding don’t slow you.
- Weigh each bag before leaving home.
- Remove nonessentials if you’re over limit.
- Shift dense items into checked luggage if possible.
- Keep scale in your carry-on for last-minute checks.
Weigh Checked Luggage to Prevent Overweight Fees
Because airlines charge steep fees for overweight checked bags, weigh each checked piece at home so you can adjust contents or upgrade your allowance before you get to the airport. Use a handheld scale, hang the bag by its handle, and read the weight precisely. Compare against the airline limit and remove items if needed. Pack heavier items low and centered for balance. Reweigh after adjustments. If you’ll pay for extra weight, decide ahead to avoid gate stress.
| Item | Location | Weight |
|---|---|---|
| Shoes | Bottom | 4 lb |
| Toiletries | Middle | 2 lb |
| Jacket | Top | 1 lb |
| Tech | Side pocket | 3 lb |
Redistribute Weight Between Two Bags Efficiently
First weigh both bags to see where the excess is.
Then shift heavy items from the overweight bag into the lighter one until both are within limits.
Use your luggage scale after each transfer to confirm you’ve balanced them.
Weigh Both Bags
If one bag’s over the limit, weigh both pieces so you can move items and hit the airline’s allowance without guessing. Use your scale on each bag, note both weights, then calculate how much to shift to balance under limits. Work methodically so you don’t create a new overweight bag.
- Place bag on scale, record weight, repeat for second bag.
- Subtract lighter bag from heavier bag to find transferable weight.
- Remove items incrementally, reweigh after transfers until both comply.
- Keep essentials in carry-on and use soft packing to compress remaining items.
Shift Heavy Items
Now that you’ve measured both bags and know how much one exceeds the limit, shift heavy items to even the load and avoid fees. Start by moving dense items—shoes, books, toiletries—into the lighter bag, keeping weight near the frame to protect structure.
Repack systematically: take one item at a time, reweigh, and aim for a small safety margin under the limit. Distribute weight so both bags sit comfortably on the scale; balance prevents surprises at check-in.
Use packing cubes for organization and consider wearing the heaviest clothing. Repeat weighing until both bags meet airline requirements.
Use Personal Items and Carry-Ons Strategically
When packing, think of your personal item and carry-on as tools for shifting weight off checked bags so you won’t face surprise fees. Use both to balance weight smartly: put heavier, allowed items in your carry-on and dense, fragile things in your personal item for cushioning.
Prioritize valuables, documents, medication, and one change of clothes in carry-on to avoid checked baggage access. Check airline size and weight limits so you don’t transfer the problem.
Keep valuables, documents, meds, and a spare outfit in your carry-on — and confirm airline size and weight limits.
- Place shoes or packed toiletries in carry-on pockets.
- Keep electronics and chargers in the personal item.
- Distribute books between bags.
- Weigh each bag before leaving.
Remove or Rearrange Items to Cut Ounces Quickly
Shifting items between your carry-on and checked bag is a good start, but you can shave off ounces faster by removing or rearranging things inside the checked bag itself. Open pockets and compartments; small items like chargers, books, or spare socks add up.
Pull out nonessentials and tuck heavier items toward the center so the zipper closes without strain. Flatten bulky clothes, roll lighter garments, and consolidate toiletries into one small pouch (leave full bottles for carry-on if allowed).
Weigh after each change to confirm progress. Repeat until you hit your target weight, then secure loose items to prevent shifting.
Avoid Hidden Weight From Shoes and Toiletries
Ever checked your shoes and toiletries and been surprised by their combined weight? You can cut hidden ounces by choosing lighter footwear, wearing bulkiest shoes on the plane, and consolidating toiletries.
Weigh shoes separately on your luggage scale so you know what’s eating your allowance. Transfer lotions into travel-size bottles, use solid shampoo and soap, and ditch duplicates.
- Weigh each shoe and note total.
- Swap heavy sneakers for light alternatives when possible.
- Decant liquids into labeled travel bottles under 100ml.
- Pack multipurpose items (solid soap, convertible clothing).
These steps keep your checked bag under the limit.
Pack Smart: Compress Clothing and Use Packing Cubes
If you want to fit more without exceeding weight limits, compress your clothes and use packing cubes to organize and reduce bulk. Roll or fold garments tightly, then place them in a compression cube or vacuum-style bag to squeeze out air.
Use cubes by category—tops, underwear, activewear—so you can swap items without unpacking everything. Keep heavier items near the suitcase wheels to balance weight.
Fill gaps with socks or belts to prevent shifting. Weigh after packing and adjust cubes to meet limits. Smart compression saves space and helps you avoid last-minute overweight fees.
Long-Term Packing Habits to Stay Under Limits
When you make smart packing a habit, staying under airline weight limits becomes second nature rather than a last-minute scramble. You’ll weigh strategically, track essentials, and resist impulse extras. Build routines that shrink what you bring without sacrificing comfort.
- Rotate versatile clothing you actually wear, so each item earns its place.
- Keep a running travel kit checklist and update it after every trip.
- Pre-weigh bags weekly during packing season to spot creeping excess.
- Choose multiuse gear and replace items only when worn out, not “just in case.”
These habits cut stress and keep fees from sneaking up.
When to Buy Extra Baggage Allowance vs. Repack
If your bag is only slightly over the limit and the excess is concentrated in a few heavy items, you’ll want to repack and shift things into your carry-on or wear bulky items.
If you’re well over the limit, traveling with donations or gifts, or need the extra space for a long trip, buying additional allowance may be the smarter, less stressful choice.
Consider cost, convenience, and how easily you can redistribute weight before making the call.
When To Repack
Although it’s tempting to just pay a fee, you’ll save time and money by weighing and evaluating your bag first. If the scale shows a slight overage, repack instead of buying extra allowance. Focus on redistribution, removing nonessentials, and shifting heavy items to carry-on.
Ask yourself: can items be worn, shared, or left behind?
- Move dense items (shoes, books) to carry-on or wear them.
- Remove duplicates and noncritical extras.
- Compress clothing with packing cubes or roll technique.
- Weigh after each change until you meet the limit.
When To Buy Allowance
Deciding whether to buy extra baggage allowance or repack comes down to cost, convenience, and time—so weigh those factors before you act.
If overweight fees exceed the price of an extra bag or higher allowance, buy it. Choose allowance when items are bulky, fragile, or essential and you’d rather not risk damage by compressing. Also buy if packing time is limited at the airport or you’re traveling with others who can’t help redistribute weight.
Repack when fees are minor, you can shift items into carry-on, or you have time and space to reorganize efficiently.
How Airline Scale Discrepancies Happen (And What to Do)
When you step up to the check-in scale and your carefully weighed bag suddenly reads several pounds heavier, it’s not always because you mispacked—airline scale discrepancies can come from calibration issues, uneven floor surfaces, worn-out equipment, or differing zero-point settings between devices.
- Reweigh on a nearby counter scale if available; airport floor scales can be misaligned.
- Remove extras (shoes, coats) and retare handheld or personal scales before weighing.
- Ask staff to recalibrate or test the scale if numbers seem off; a quick check can reveal errors.
- Adjust your packing strategy margin to accommodate small, occasional variances.
Document Bag Weights for Disputes at Check-In
If you expect to challenge a check-in weight, document your bag’s measurements before you arrive so you’ve got clear evidence to show staff. Weigh the packed bag on your luggage scale, note the exact weight, and photograph the scale display and the packed bag. Include date, time, and scale brand in the photo or a brief note.
If possible, weigh again on a second scale to corroborate results. Keep receipts for scale purchases or rentals.
Presenting tidy, timestamped documentation helps you contest discrepancies quickly without arguing about numbers, letting staff verify the claim and resolve the issue more efficiently.
Handle Overweight Charges Politely at the Counter
If the scale at check-in shows your bag is overweight, ask the agent politely to reweigh it to confirm the reading.
If the weight still exceeds the limit, offer to shift items into your carry-on or request approval to bring a small personal item onboard instead.
Staying calm and cooperative usually makes agents more willing to help you find a low-cost solution.
Ask For Reweighing Politely
Although an overweight tag can be stressful, you can handle it calmly by asking the agent to reweigh your bag—politely request a second measurement and mention that you moved or repacked items before the first weigh-in.
Stay calm, smile, and use brief, clear language so the agent knows you want a fair check. If staff agree, step aside and adjust or open the bag if allowed. Keep receipts or a photo of your luggage scale reading handy to support your claim without argument.
- Ask politely and state you repacked.
- Show your scale reading.
- Request a quick reweigh.
- Thank the agent.
Negotiate Carry-On Options
Wondering if you can save your bag from an overweight fee? You can often negotiate carry-on options calmly. Ask the agent if you can move heavier items to your carry-on or personal item instead of paying.
Offer to consolidate or remove nonessentials, and suggest placing a small item under the seat to balance weight. Be polite and concise—agents are likelier to help when you’re cooperative.
If staff won’t allow redistribution, ask about discounted fees or priority boarding alternatives. Keep your luggage scale handy to prove weights and show you’ve tried reasonable solutions before accepting charges.
Choose the Right Baggage Scale for Your Travel Style
Because your travel habits determine what features matter most, pick a baggage scale that matches how and where you travel. You want something reliable, portable, and suited to the types of trips you take.
Because your travel habits shape which features matter, choose a reliable, portable baggage scale suited to your trips.
- Frequent flyer: choose a lightweight, durable scale that fits in a pocket or carry-on.
- Family traveler: get a simple-to-read model with a high weight limit and easy grip for kids’ bags.
- Adventure traveler: prioritize ruggedness and water resistance for rough conditions.
- Occasional traveler: a basic, affordable scale with clear markings and battery longevity will do.
Digital vs. Analog Luggage Scales: Which to Buy
When you need quick, precise readings and easy unit switching, a digital scale usually wins; if you prefer simplicity, no batteries, and durability, an analog (spring) scale can be better. You’ll pick based on convenience: digital gives backlit screens, tare functions, and memory, while analog offers ruggedness and instant feedback without power. Consider travel habits, how often you weigh bags, and whether you want extra features. Below’s a simple comparison to help you decide.
| Feature | Note |
|---|---|
| Power | Digital needs batteries |
| Readability | Digital = clear display |
| Durability | Analog is rugged |
| Functions | Digital more features |
| Maintenance | Analog low upkeep |
Luggage-Scale Features: Capacity, Accuracy, Ergonomics
Think about the maximum weight capacity so your scale can handle your heaviest checked bag without maxing out.
You’ll also want measurement precision and consistency so readings don’t jump around between weighings.
Finally, consider ergonomics—how the handle, display, and size affect how quickly and comfortably you can weigh luggage.
Maximum Weight Capacity
Most travel scales top out between 50 and 110 pounds, so check a model’s rated capacity before you buy to make sure it covers your heaviest bags. You’ll want a buffer above airline limits so the scale doesn’t max out when you’re close to the cutoff.
Consider durability: higher capacity often means sturdier straps and hooks that won’t deform under load. Remember battery life can drop with heavier weights, so choose a reliable brand.
- Match capacity to the heaviest bag you pack.
- Allow a 10–20% safety margin.
- Inspect straps and hooks for strength.
- Prefer metal fittings over plastic.
Measurement Precision and Consistency
Because small differences matter at the check-in counter, you’ll want a scale that’s both accurate and consistent so readings don’t fluctuate each time you weigh a bag.
You should check the stated accuracy (± value) and look for repeats: weigh the same bag several times to confirm stability.
Prefer scales with tare and calibration features so you can reset baseline after battery changes.
Digital displays with fine increments (0.1–0.2 lb or 50–100 g) reduce rounding surprises.
Read reviews about long-term consistency and battery performance.
Consistent precision helps you pack confidently and avoid last-minute airport fees.
Best Lightweight Scales for Frequent Flyers
When you’re on the road constantly, a lightweight luggage scale becomes one of your best travel tools — it’s easy to stash, quick to use, and saves you from surprise fees at the gate. You’ll want a durable, accurate, and compact model with a clear display and comfortable strap.
Battery life and tare functions matter when you’re juggling carry-ons. Consider build quality and a reliable weight range so you don’t second-guess results mid-trip.
- Small digital hook scale — fast readings, easy storage.
- Folding pocket scale — rigid, protective design.
- Strap-handle scale — ergonomic for heavy bags.
- Keychain scale — ultra-portable for quick checks.
Affordable Scales for Occasional Travelers
If you only travel a few times a year, you’ll want a compact, lightweight scale that won’t add bulk to your bag.
Look for budget-friendly digital picks that give accurate readings without breaking the bank.
Also consider multipurpose models that double as a handheld or hanging scale to get more value from one small device.
Compact And Lightweight Options
Looking for an easy, budget-friendly way to avoid overweight fees? You’ll want a compact, lightweight luggage scale that slips into a pocket or suitcase.
Pick one with a simple hook or strap, a clear display, and a reliable tare function so you’ll get accurate readings fast.
Battery life matters—choose a scale that uses a common cell battery.
You’ll appreciate models under 6 ounces that don’t add bulk.
- Small hook/strap design for easy packing
- Clear, quick-to-read display
- Tare function and consistent accuracy
- Long battery life with common batteries
Budget-Friendly Digital Picks
You don’t need to spend much to get a reliable digital luggage scale—especially if you only travel a few times a year. Look for simple, accurate models with a clear LCD, tare function, and a maximum capacity around 50 kg (110 lb).
Choose ones with a comfortable strap or hook and a quick, stable readout so you can pack confidently at home. Battery life and spare batteries matter; many use a CR2032 cell.
Check customer reviews for consistency rather than fancy features. Affordable scales save you overweight fees without adding bulk or complexity to your travel routine.
Multipurpose Traveler-Friendly Models
When you need a single, affordable scale that does more than just weigh suitcases, pick a compact digital model with a sturdy strap or S-hook, quick readout, and a max capacity around 50 kg (110 lb). That combo handles checked bags, carry-ons, and odd-shaped items like duffels or camera cases without fuss.
You’ll want simple tare/zero, auto-off that’s optional, and a backlit display for dim airports. Durable casing and a replaceable battery keep it useful for years.
Carry it in a travel pouch so it’s ready when packing or at the counter.
- Durability
- Accuracy
- Portability
- Ease of use
Maintain and Calibrate Your Luggage Scale for Accuracy
Because even a small error can cost you dearly at the counter, keep your luggage scale clean, stored properly, and checked regularly for drift.
Wipe sensors and hooks with a soft cloth, avoid moisture, and remove batteries during long storage.
Calibrate using a known weight—like gym plates or a sealed package with stated mass—following the manufacturer’s procedure.
Test at multiple points (empty, mid-range, near limit) to confirm linear accuracy.
Replace batteries when readings wobble, and swap the scale if calibration fails or errors persist.
Record calibration dates so you’ll know when to recheck before travel.
How Loyalty Status and Cabin Class Affect Weight Limits
If you’ve earned elite status or booked a premium cabin, expect different baggage allowances than standard economy passengers—airlines often grant higher weight limits, extra bags, or waived overweight fees as perks of loyalty tiers and premium fares.
- Check your airline’s rules so you know exact weight and piece limits tied to your tier or cabin.
- Use your luggage scale at home to confirm whether those perks cover the current load.
- Remember carry-on allowances can also vary by cabin; don’t assume uniform policies.
- If unsure, call customer service before check-in to avoid surprises and potential charges.
How Travel Season and Route Change Baggage Allowances
While airlines mostly post standard baggage rules, seasonal demand and specific routes can change what you’re allowed and what you’ll pay, so weigh and check your bags before you head to the airport.
Peak travel periods—holidays, summer, major events—often tighten free allowance or raise excess fees, and carriers may enforce stricter size checks when flights are full.
Short-haul or regional routes sometimes limit checked pieces due to aircraft size, while long-haul international flights often permit more weight.
Always verify baggage policies for your exact flight and date; use your luggage scale to adjust content and avoid last-minute charges.
Combine a Luggage Scale With Travel Habits to Save Long-Term
When you pair a luggage scale with smarter packing routines, you’ll cut fees and stress over time. Use measurement to form habits: weigh segments, limit nonessentials, and tweak for each trip. Track what pushes you over limits and remove or replace heavy items before departure.
- Weigh packed bags nightly to learn patterns.
- Swap bulky items for lighter alternatives after a few trips.
- Prioritize versatile clothing and share gear with companions.
- Keep a pre-packed “light” kit for shorter stays.
Over months, these small adjustments lower checked-bag charges and make travel smoother.
Final Pre-Trip Weighing Checklist and Next Steps
Because last-minute surprises cost time and money, do a final weigh-in with your luggage scale before you leave. Check each bag, including carry-ons, and confirm weights match airline limits. Redistribute items or remove nonessentials if any bag’s overweight.
Verify straps, handles, and wheels won’t add unexpected bulk. Note battery-powered items and liquids to meet security rules. Record each bag’s final weight on your packing list or phone.
If you expect shopping, leave a margin under the limit. At the airport, reweigh at check-in if possible. You’ll reduce fees, stress, and last-minute shuffling.
Frequently Asked Questions
Can Airport Staff Refuse to Accept My Personal Luggage Scale Reading?
Yes, they can refuse your personal luggage scale reading if they doubt its accuracy, require their own equipment, or follow airline policy; you’ll need to comply with the airport or airline’s official weighing procedures and possible reweigh.
Do International Airlines Enforce Weight Limits Differently Than Domestic Carriers?
Yes — you’ll find international airlines often enforce stricter and more consistent weight limits than domestic carriers, and they’ll charge or refuse overweight bags more rigidly, so you should weigh and pack carefully to avoid surprises.
Will Battery Failure in a Digital Scale Affect Airline Liability for Overweight Fees?
No — if your digital scale fails, airlines won’t assume liability for overweight fees; you’re responsible for checked baggage weight, so you’ll need to pay or repack at the airport, even if your scale malfunctioned.
Can Wearable Tech (Smartwatches/Phones) Measure Luggage Weight Accurately?
You can’t reliably measure luggage weight with smartwatches or phones; they’ll give rough estimates using sensors or apps, but they’re not calibrated for accurate loads, so don’t rely on them to avoid airline overweight fees.
Are There Legal Weight Tolerances Airlines Must Adhere to at Check-In?
No, airlines aren’t legally bound to uniform weight tolerances at check-in; you’ll find carrier-specific policies and occasional regulatory guidance, so you should check your airline’s limits, fees, and any published tolerance before traveling.
Conclusion
Weighing your luggage before you leave can save you time, stress and unexpected fees, so get into the habit of checking limits, packing smart and using a reliable scale. Quickly verify your airline’s allowance, weigh and adjust at home with a handheld or bathroom scale, and remember how status, cabin class and route affect limits. Do this every trip and you’ll avoid surprises, travel lighter and keep more money in your pocket.