How to Print Luggage Tags for Princess Cruise Easy Step Guide
You can quickly download your Princess luggage tag PDF from your booking email or the Princess account, fill in names and stateroom details, then print at home on sturdy paper or adhesive labels. Set printer to 100% scale and 300–600 DPI, test barcode scannability, and reinforce holes or use plastic sleeves. Attach tags with zip ties for checked bags and straps for carry‑ons, keep backups, and pick up Princess-issued tags at the terminal if needed — keep going to get tips on templates, troubleshooting, and terminal reprints.
Quick Steps: Print and Attach Princess Luggage Tags
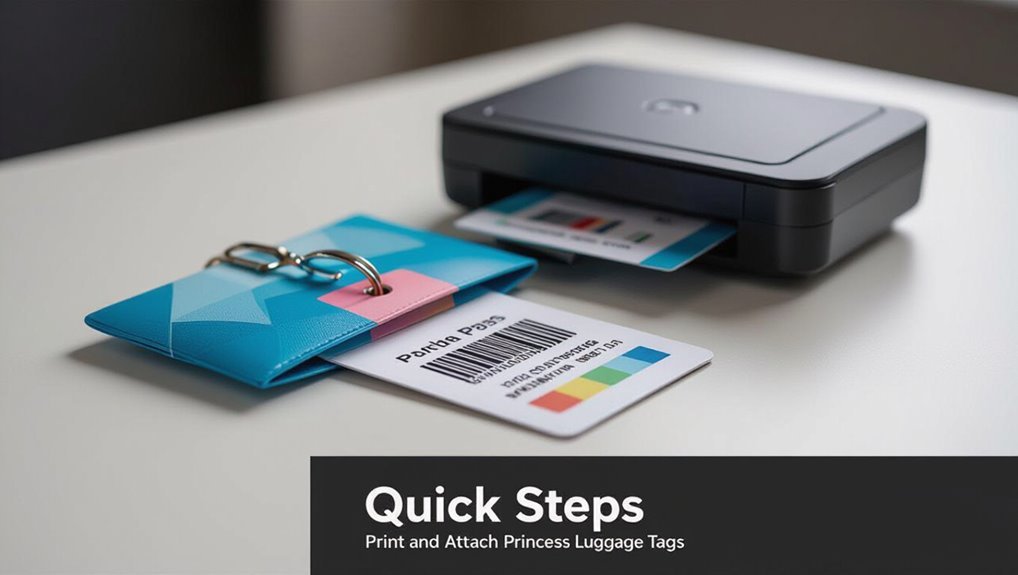
Start by downloading and printing your Princess luggage tags from the cruise account.
Then attach them to each checked bag before you leave for the terminal.
Check names, sailing date, and stateroom number for accuracy.
Verify names, sailing date, and stateroom number are correct before you travel.
Secure tags to sturdy handles with the provided strap or a zip tie.
Keep a photo of each tag on your phone in case one goes missing.
What to Have Ready: Documents, Devices, and Materials
Before you print, gather your required travel documents like booking confirmation and passport details, plus any destination paperwork.
Have a computer or phone with the Princess app or website and the right software or browser ready.
Make sure your printer has labels or sturdy paper, adhesive sleeves or zip ties, and enough ink.
Required Travel Documents
When you’re preparing for your Princess cruise, gather the documents, devices, and materials you’ll need so check-in goes smoothly: valid passport or government ID, cruise boarding pass/eticket, travel visas (if required), proof of vaccination or negative test results when applicable, travel insurance info, and any medical or emergency paperwork.
Also bring copies of reservations, contact numbers, and a list of medications with dosages.
Devices And Software
Since you’ll need to print and access documents quickly, have a reliable device and the right software ready: a laptop or tablet with Wi‑Fi, a browser or the Princess Cruises app, and a PDF reader (Adobe Reader or browser built‑in) so you can open and print your boarding pass and luggage tags without hiccups.
Also verify your device battery’s charged, updates are installed, and files are downloaded ahead.
Printing Supplies And Materials
Paper, ink, and clear instructions — have them all ready so you can print your Princess luggage tags quickly and accurately. Gather your PDF files, a color printer, card stock, scissors, and clear laminating pouches. Test a single tag first. Use this quick checklist:
| Item | Purpose | Notes |
|---|---|---|
| Card stock | Durability | 200–300 gsm |
| Ink | Visibility | Color or black |
| Laminates | Protection | Optional |
| Scissors | Trim | Sharp |
| Print file | Correct name/details |
Where to Find Your Princess Booking Confirmation and Tag PDF
First, check your email for the Princess booking confirmation—it’s usually sent right after you book and includes a link to your documents.
If you can’t find it, log in to your Princess account and open your reservation to access the tag PDF.
Download and save the tag file so you’re ready to print.
Find Booking Email
Want to get your luggage tags printed quickly? Check the email you used to book: look for messages from Princess Cruises, your travel agent, or the booking platform.
Search keywords like “confirmation,” “eTicket,” or your reservation number. Also check spam/junk and any secondary addresses.
If you still can’t find it, contact Princess customer service or your agent to resend the confirmation.
Access Tag PDF
Once you have your booking email, open the confirmation and look for a link or attachment labeled eTicket, luggage tags, or “Print Tags.”
Click it to download the PDF or open it in your browser. If you don’t see it, sign into your Princess account, view your reservation, and select Documents/Print Tags.
Save or print the PDF with clear tag fields and barcodes.
Print at Home vs. Get Princess‑Issued Tags
When deciding whether to print your own luggage tags or pick up the ones Princess issues, weigh convenience against control: You can print at home for customization and early prep, or grab Princess‑issued tags at boarding for simplicity. Consider durability, ink quality, and time. Compare options below.
| Option | When to choose |
|---|---|
| Print at home | You want control |
| Princess‑issued | You want ease |
| Both | Backup plan |
How to Download Official Luggage Tag Templates From Princess
You can get the official luggage tag templates directly from Princess’ website—look under the “Prepare for Your Cruise” or forms/downloads section.
The templates usually come in PDF and JPG formats, so make sure your device can open those files.
Below I’ll walk you step‑by‑step through locating and downloading the correct template.
Official Template Location
If you need the official Princess luggage tag template, head to Princess Cruises’ website and go to the “Guest Forms” or “Embarkation” section—there you’ll find downloadable PDF tags that match their current branding and barcode requirements.
Download the PDF, save it to your device, and open it in a PDF reader. Use the site’s version to guarantee compatibility with onboard scanning and processing.
Required File Formats
After downloading the official PDF from Princess Cruises, check which file formats are accepted for printing and editing so your tags stay scannable and properly sized.
Use PDF for direct printing, PNG or JPG for image editors, and SVG or EPS if you need vector scaling.
Confirm resolution (300 DPI recommended) and color profile (CMYK or sRGB) to preserve barcodes and layout integrity.
Downloading Step-by-Step
While preparing your documents, follow these steps to download the official Princess luggage tag template so it prints correctly:
Visit princess.com, open the “Plan” or “Before You Go” section, locate “Luggage Tags” or “Forms,” choose the correct ship and sail date, select the PDF template, and click download.
Save the file as PDF, then open and check page size and print settings before printing.
Best Paper & Labels for Princess Luggage Tags
Paper choice matters when you’re printing Princess luggage tags, so pick materials that withstand handling, moisture, and airport sorting.
Use heavyweight waterproof or synthetic cardstock (10–14 pt) or laminated paper for durability.
For adhesive tags, choose permanent, weatherproof label sheets compatible with your printer.
If you need extra protection, laminate or cover tags with clear packing tape to prevent smudging and tearing.
Prep Your Printer for Barcode‑Safe Printing
Now that you’ve chosen sturdy, weatherproof materials, get your printer ready so the barcode on each tag scans reliably.
Clean printhead and rollers, remove dust, and use fresh ink or toner.
Load labels straight, verify sensor alignment for die-cut sheets, and run a quick test print on plain paper to confirm feed and margins before using your actual tags.
Recommended Print Settings for Clear Barcodes and Text
Before you print your tags, set your printer to high-quality or “best” photo mode and choose a 300–600 DPI resolution so barcodes and small text stay sharp and scannable.
Use matte or semi-gloss cardstock, disable image enhancements that smooth edges, and print in black or dark gray for barcode contrast.
Enable “actual size” in printer dialog and perform a quick test print to verify clarity.
How to Size and Scale the Tag PDF to Print True‑to‑Size
Before you print, check the PDF page size to make sure it matches the tag template (usually 3.5″ x 2″ or whatever the file specifies).
Set your printer dialog to 100% or “Actual Size” rather than “Fit” or “Scale to Fit” so the tag prints true-to-size.
After printing a test copy, verify dimensions with a ruler and adjust the print scaling if needed.
Check PDF Page Size
Start by confirming the PDF’s actual page size so your printer doesn’t shrink or enlarge the tag unexpectedly.
Open the PDF properties or document info in your reader to see dimensions (inches or mm). If it lists the correct tag size, proceed.
If not, export or resize the PDF to the desired page dimensions in your editor before printing to guarantee true-to-size output.
Set Print Scaling
Now that you’ve confirmed the PDF’s page size, set your printer’s scaling so the tag prints at actual size.
Open Print dialog, choose “Actual size” or 100% scaling. Disable “Fit to page” or “Scale to fit.”
Select correct paper tray and orientation. Preview to guarantee edges align.
Apply settings and print a single test tag before printing multiples.
Verify With Ruler
Grab a ruler and measure the printed tag to confirm it matches the PDF’s dimensions—check width, height, and any marked crop or bleed lines so you know the print is true-to-size.
Then verify key points:
- Measure outer edges against specs.
- Check any registration/crop marks.
- Confirm barcode or text sizing.
If off, rescale in print settings and reprint.
How to Add Guest Names and Stateroom Details If Your Tags Are Editable
If your printable luggage tags are editable, open the file in the program it was created with (PDF editor, Word, or the cruise line’s online tool) and click into each name and stateroom field to type the guest details. Save after each change, proofread for spelling, and keep names concise.
| Field | Example |
|---|---|
| Guest | Jane Doe |
| Stateroom | 1205 |
| Phone | +1-555-1234 |
| Notes | Hand luggage only |
How to Test Barcode Scannability Before Printing All Tags
Before you print all your luggage tags, print and scan a single barcode sample to confirm readability; doing this saves time and prevents wasted sheets if adjustments are needed.
- Use the same printer, paper, and settings you’ll use for the full run.
- Scan with your phone app and a handheld scanner if available.
- Check contrast, size, and quiet margins.
- Adjust DPI or scaling, then re-test once.
Quick Troubleshooting Guide for Barcode Scan Failures
When a barcode won’t scan, don’t panic—you can usually fix it quickly by checking a few common causes: guarantee the print contrast is sharp (dark bars, light background), confirm barcode size and resolution meet scanner specs, verify there’s no smudge, crease, or glare, and reprint at higher DPI if needed.
Test with a phone app and adjust spacing or quiet zone before printing more.
How to Print on Self‑Adhesive Labels vs. Cardstock Tags
Fixing barcode scan problems is handy, but you’ll also want to pick the right material for printing your luggage tags—self-adhesive labels and cardstock tags print differently and suit different needs.
- Use label sheets for thermal or inkjet printers; they stick firmly to bags.
- Choose heavy cardstock for durability and hole-reinforcement.
- Adjust printer settings for thicker media to prevent jams.
- Test one tag first to confirm alignment and legibility.
Cutting and Trimming Tips for Neat, Durable Luggage Tags
Since neat edges help tags last through handling and baggage systems, trim carefully using the right tools and a steady hand.
Use a metal ruler and sharp craft knife or rotary cutter for straight, clean cuts. Cut slowly, maintain consistent pressure, and change blades when they drag.
Round corners slightly to prevent peeling and snagging. Wipe edges to remove fibers for a professional finish.
How to Reinforce Holes and Loops for Secure Attachment
If your luggage tags are going to face zippers, conveyor belts, and rough handling, reinforce the holes and loops so they don’t tear or loosen.
Use these quick, durable methods to protect attachment points:
- Apply clear adhesive tape over holes for temporary strength.
- Use metal eyelets with a setter for permanent reinforcement.
- Wrap strips of strong fabric or Tyvek around loops.
- Heat-seal plastic edges to prevent fraying.
Best Ways to Attach Tags to Checked Luggage and Carry‑Ons
Once the attachment points are reinforced, choose methods that keep tags visible and secure through baggage handling.
For checked bags, use zip ties through reinforced holes and tuck the tag under the handle.
For carry-ons, loop a sturdy strap or luggage tag clip around the handle; place an extra tag inside a clear sleeve in an external pocket.
Check for snug, tamper-resistant fittings.
If a Printer or File Error Stops Printing
If your printer or the luggage-tag file stops printing, check basic printer troubleshooting steps like power, connection, and paper jams first.
Make sure the file is in a compatible format (PDF is usually safest) and that your printer drivers are up to date.
If that doesn’t work, use alternate printing options like a different computer, a local print shop, or the cruise terminal’s printing service.
Printer Troubleshooting Steps
Because printer hiccups can happen at the worst time, you’ll want a quick checklist to get your luggage tags printing again without redoing the file.
Try these steps, stopping when it works:
- Check cable/wireless connection and restart printer.
- Confirm ink/toner and paper tray.
- Clear print queue and resend the job.
- Reboot your computer and open the file again before printing.
File Format Compatibility
Sometimes a printer refuses a file not because of hardware but because the format isn’t compatible, so you’ll want to confirm the file type and settings before troubleshooting further.
Check that your luggage tag is a supported format (PDF, JPEG, PNG) and that fonts are embedded.
Verify color mode (RGB vs. CMYK), page size, bleed, and resolution.
Convert or export correctly, then retry printing.
Alternate Printing Options
What’s the quickest backup when your printer or file won’t cooperate?
You can still get tags printed and ready by using alternate options—choose one based on speed and access.
- Use a hotel or business center printer nearby
- Email files to a friend with a working printer
- Visit a local print shop or FedEx Office
- Save as PDF and print at the cruise terminal kiosks
How to Print Tags From a Smartphone or Tablet
If you prefer printing luggage tags from your smartphone or tablet, you can do it quickly by downloading the Princess Cruises app or accessing your reservation on the cruise website.
Open your boarding documents, and use your device’s built-in share or print options to send the tag file to a nearby printer or cloud-print service.
Confirm the PDF opens, select paper size and orientation, then print or save to cloud storage for later.
Print Multiple Guests’ Princess Luggage Tags (Fast Workflow)
Get all guests’ full names, stateroom numbers, and booking IDs ready before you start so you won’t stop mid-process.
Use a batch-print feature or a label template to queue multiple tags at once. That way you can print and attach tags quickly without repeating steps for each guest.
Prepare Guest Info
Before you open the printer dialog, gather each guest’s full name, stateroom number, and any special handling notes so you can enter them quickly and avoid interruptions while printing.
You’ll prepare a simple list to copy from, preventing mistakes and delays.
- Full name (as on booking)
- Stateroom number
- Special handling notes
- Contact phone or email
Batch Print Labels
Now that you’ve gathered each guest’s details, open your template and set up the batch print: load the correct paper size and label layout, confirm printer settings (orientation, scale, and number of copies per sheet), and select all guest records you prepared. Then preview, run a test sheet, and print batches confidently.
| Step | Action |
|---|---|
| 1 | Preview |
| 2 | Test print |
| 3 | Print batches |
How to Reprint or Replace Lost Tags at the Terminal
If you lose your luggage tags or need to reprint them at the terminal, head straight to the Princess Cruise check-in or baggage desk where staff can issue replacements—bring your boarding documents or government ID and your reservation confirmation to speed things up.
- Tell staff your name and stateroom number.
- Show ID and booking confirmation.
- Request printed tags and attach them securely.
- Ask about expedited baggage handling if needed.
Common Printing Mistakes and How to Avoid Them
Once you’ve replaced lost tags at the terminal and attached them properly, double-check your prints to avoid common mistakes that can slow boarding or misroute your bags.
Verify barcodes scan, names and stateroom numbers match your boarding documents, and print contrast is dark enough.
Use recommended paper, avoid smudging, and guarantee trimming doesn’t cut important info so handlers can read tags quickly.
Travel‑Day Checklist to Keep Tags Readable and Attached
- Pack smart: secure tags and keep them legible. Check prints, laminate if possible, and use clear tape over barcodes. Remove old tags to avoid confusion.
- Verify names and booking numbers before travel
- Attach tags tightly to handles with strong loops
- Protect with plastic sleeves or clear tape
- Recheck after transfers and at boarding counters
When to Opt for Princess‑Issued Baggage Tags Instead of Printing
Although printing your own tags saves time, you should choose Princess‑issued baggage tags when you want assured compatibility and tracking support.
Opt for ship tags if your itinerary includes transfers, special handling, oversized or fragile items, or if you’re concerned about lost luggage.
Princess tags guarantee staff recognition, electronic scanning, and smoother claims, so take them at departure for complex or high‑risk baggage.
Frequently Asked Questions
Can Luggage Tags Be Printed in Other Languages for International Sailings?
Yes — you can print luggage tags in other languages for international sailings. Check Princess Cruise’s website or your booking portal for language options, or download editable templates and customize text before printing to suit your needs.
Will Printed Tags Work for Special-Needs or Oversized Items Like Wheelchairs?
Yes — printed tags will work for special-needs or oversized items like wheelchairs, as long as you attach them securely and include clear contact and stateroom info; you should also notify the cruise line about mobility equipment.
Do Printed Tags Affect Travel Insurance or Baggage Liability Coverage?
No, printed tags won’t usually alter travel insurance or the cruise line’s baggage liability; you’ll still be covered if policy terms and carrier rules are met. Make sure tags are legible, attached securely, and keep receipts and documentation.
Can I Customize Tags With Extra Branding or Personal Designs Safely?
Yes — you can customize tags with extra branding or personal designs, but keep required info legible and barcode area clear. Don’t obstruct official markings; use durable materials. Check cruise policies to avoid rejected tags.
Are There Size or Material Restrictions for Cruise Line Security Inspections?
Yes — you’ll follow size and material rules: tags must be durable, non-metallic, and scannable; avoid sharp edges, adhesives that obstruct barcodes, and oversized or bulky attachments that could hinder inspections or damage baggage during security checks.
Conclusion
You’ve got this—printing your Princess luggage tags is quick and simple if you follow the steps and pack the right supplies. Make sure your booking confirmation and PDF are ready, print on sturdy paper, and attach tags securely so they stay legible throughout travel. If anything goes wrong, reprint at the terminal or ask guest services for replacements. With a little prep, your bags will arrive with you—stress less and enjoy the cruise.