Can You Bring Food on the Airplane Flight
Yes — you can bring most solid foods on a plane, but you’ll need to follow rules for liquids, perishables, and international customs. Pack solids in airtight, leakproof containers and put sauces, soups, or gel-like foods in 3.4 oz (100 ml) containers inside a clear quart bag. Declare restricted items when crossing borders, keep chilled items insulated with approved ice packs, and expect some snacks to be confiscated. Keep this guide handy to learn specific tips and exceptions.
Quick Answer: Can You Bring Food on a Plane?
Yes—you can bring food on a plane. You’re allowed solid snacks and prepared meals in carry-on or checked baggage, but liquids or gels over 3.4 ounces must follow TSA rules.
Declare restricted items when required and follow destination import rules.
Pack airtight containers, avoid strong odors, and be ready to dispose of prohibited items during security checks to prevent delays.
What This Guide Covers and How to Use It
This guide walks you through what foods you can bring, how to pack them, and the security and customs rules you’ll need to follow, so you can plan meals that travel well and avoid delays.
You’ll find clear sections on carry-on vs checked items, packaging tips, documentation for special foods, and quick checklists. Use it to make informed, hassle-free choices before every trip.
Top 5 Caveats Before Packing Food for a Flight
Before you pack, remember a few hard rules that’ll affect what you can bring through security and into another country.
You’ll need to follow TSA liquid limits for sauces and gels, check international customs rules for food items, and weigh the risks of perishable items spoiling en route.
Keep these caveats in mind so you don’t get stuck tossing food at the checkpoint or facing fines abroad.
TSA Liquid Limits
When you’re packing food for a flight, remember that TSA’s 3-1-1 rule still applies to sauces, soups, and other liquids or gels, so plan accordingly to avoid surprises at security.
Pack liquids in containers 3.4 ounces (100 mL) or less inside a single clear quart-sized bag, or check larger quantities.
Declare baby formula or medically necessary liquids at screening.
International Customs Rules
You’ve handled liquid limits for the security line, but international travel brings a different set of rules — customs restrictions can mean that snacks you bought at home won’t be allowed into another country.
Check destination rules for fruits, meats, dairy, and plant products; declare what’s required; keep receipts and original packaging; and be prepared to surrender prohibited items to avoid fines or delays.
Perishable Food Risks
Although bringing fresh food can keep you fed and save money, perishable items pose specific risks you should know before packing them for a flight.
You’ll need to manage time, temperature, and regulations to avoid spoilage or seizure:
- Short safe window without refrigeration
- Ice packs may violate liquid rules
- Airline delays increase risk
- Customs can confiscate fresh produce
TSA Liquids: Sauces, Soups, and Drinks Rule
Because the TSA limits liquids, gels, and aerosols in carry-ons, you’ll need to plan how to pack sauces, soups, and drinks for a flight.
Put liquids in containers 3.4 ounces (100 ml) or less inside a single quart-sized clear bag, or pack larger amounts in checked baggage.
Freeze soups solid to pass, and declare any medically necessary beverages.
What Inspectors Look for at Security
When you approach the security checkpoint, inspectors scan both your carry-ons and checked items for prohibited foods, unusual packaging, and anything that could hide liquids or sharp objects.
You should expect them to check for signs of tampering, undeclared liquids, and dense or oddly shaped items. They’ll also verify labeling and may open containers:
- Unlabeled packages
- Homemade foods
- Gel-like substances
- Hidden compartments
Packing Essentials: Containers and Spill-Proof Tips
Pick leakproof containers with tight seals to keep sauces and juices from escaping.
Layer containers inside resealable bags and soft padding for extra protection against bumps.
Label fragile or perishable items and tape lids shut so you — and TSA — know what’s inside.
Choose Leakproof Containers
A sturdy, well-sealed container can make or break your in-flight meal—so choose ones that truly lock out liquids and odors.
You’ll want durable, food-safe options that fit carry-on rules and resist pressure changes.
- Use rigid plastic or stainless steel with gasketed lids.
- Avoid flimsy snaps and thin films.
- Test seals before packing.
- Label contents and keep sauces upright.
Layering For Extra Protection
Think in layers: you’ll want multiple barriers between your food and the cabin to prevent leaks, squashes, and odor transfer.
Wrap containers in paper towels or cling film, seal them in zip-top bags, then place in a rigid lunchbox.
Add absorbent pads for wet items and tuck fragile foods between soft clothing.
This staged approach minimizes mess and protects neighboring luggage.
Secure Packaging And Labels
Once your layers are set, focus on secure packaging and clear labels to stop leaks and confusion before they start.
Use sturdy containers, seal lids with tape, and label contents and dates. Pack absorbent cloths for accidents. Follow rules for liquids.
- Airtight, leakproof containers
- Tamper-evident tape or bands
- Clear ingredient/date labels
- Absorbent padding between layers
Insulated Bags, Coolers, and Carry-On Size Limits
While most airlines let you bring food aboard, you’ll need to contemplate how big your insulated bag or cooler is and whether it meets carry-on size limits, since oversized containers may be gate-checked or refused.
Check airline dimensions and pack compact, soft-sided coolers to squeeze into overhead bins or under seats.
Use ice packs that comply with TSA liquid rules and label perishable contents for quick inspection.
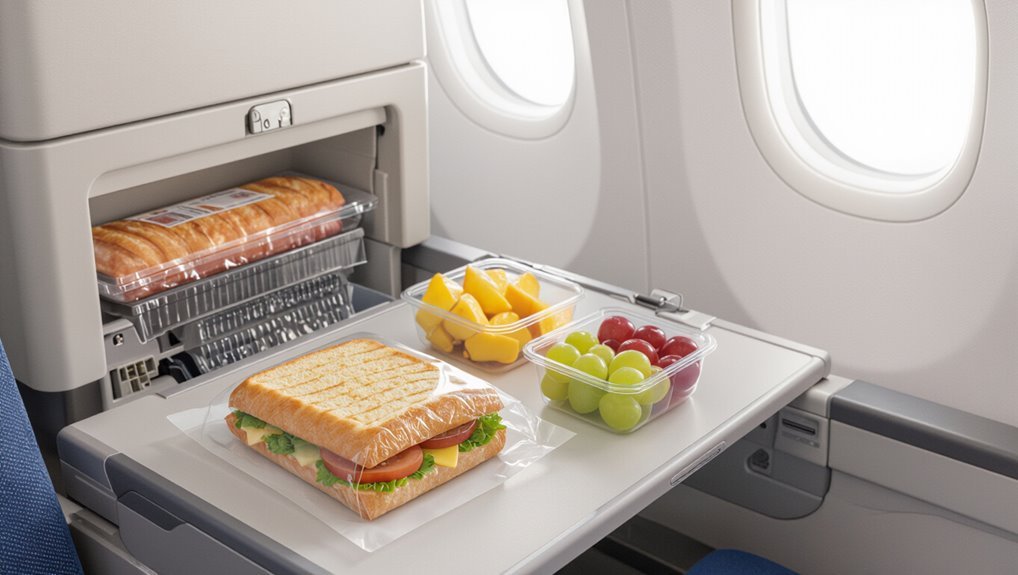
Bringing Homemade Sandwiches on a Plane
If you’re packing homemade sandwiches for a flight, choose ingredients that stay safe and fresh without refrigeration for several hours and won’t trigger security issues.
Pack tightly, wrap individually, and declare any liquids like spreads if asked.
Consider these tips:
Consider these tips: choose safe, nonperishable fillings, pack tightly, and be ready for inspection.
- Use sturdy bread and nonperishable fillings
- Skip mayonnaise or switch to shelf‑stable alternatives
- Keep sandwiches cool until boarding
- Store in clear packing for inspection
Packing Salads and Fresh Fruit for Travel
Sandwiches are great, but you might also want something lighter like a salad or fresh fruit for your flight; these need different packing and safety steps.
Pack washed, dry greens in airtight containers and keep dressings separate in leakproof bottles.
Choose sturdy fruits—apples, grapes, oranges—and slice them before travel.
Chill perishables in an insulated bag with ice packs until you board.
Transporting Dairy, Cheese, and Yogurt
When you’re bringing dairy, cheese, or yogurt on a flight, keep temperature and leak prevention front and center:
- Pack in an insulated cooler with ice packs to stay cold.
- Use airtight containers to stop spills and odors.
- Declare large quantities at security if needed.
- Prefer hard cheeses and shelf-stable yogurt pouches for convenience and safety.
Eggs, Sushi, and Protein-Rich Items on Flights
You can bring hard-boiled eggs on most flights if they’re fully cooked and packed to avoid leaks.
If you’re traveling with sushi, keep it chilled and check whether the airline or destination has restrictions on raw fish.
For other protein-rich items — like cooked meats, tofu, or protein bars — pack them securely and be mindful of strong odors and customs rules.
Bringing Eggs Onboard
Although whole raw eggs and many homemade egg dishes can seem convenient, airlines and security rules treat them like other liquids and gels, so you’ll need to plan how you pack, transport, and declare them.
- Check TSA and airline limits for liquids and gels.
- Pack hard‑boiled eggs in checked bags when possible.
- Declare jarred sauces, custards, or lima‑bean salads with eggs.
- Consider pasteurized or vacuum‑sealed alternatives for carry‑on.
Traveling With Sushi
If you’re bringing sushi or other protein-rich items on a flight, plan for both safety and security: pack chilled sushi in an insulated container with ice packs, keep it sealed to avoid leaks, and declare any liquids or sauces if required.
Check TSA and airline rules for perishables, transport times, and customs restrictions when flying internationally to prevent spoilage or confiscation.
Flying With Protein-Rich Foods
When you bring eggs, sushi, or other protein-rich foods on a flight, pack them so they stay cold, contained, and easy to inspect; use insulated containers with ice packs, seal items to prevent leaks, and keep sauces in containers that meet TSA liquid limits or are declared.
- Chill items thoroughly
- Use sturdy, leakproof packaging
- Label contents for inspection
- Consume or discard before arrival
Can You Bring Hot Food or a Thermos on a Plane?
Wondering whether you can carry hot food or a thermos through airport security? You can bring a sealed thermos or hot food in your carry-on, but TSA may require you to taste or discard liquids over the 3.4-ounce limit.
Hot items must clear screening and won’t be reheated onboard. Pack securely to avoid spills, and check airline policies for any cabin restrictions.
Frozen Food and Ice Packs Through Security
Because frozen food and ice packs behave differently than liquids, you should know TSA’s limits before packing them in your carry-on.
You can bring solid frozen items; thawed or partially melted items that’re liquid-like may be subject to the 3.4 oz rule.
Consider these tips:
- Pack fully frozen items in insulated bags
- Label ice packs as frozen
- Separate suspect items for screening
- Keep receipts handy
How to Handle Sauces, Dressings, and Dips
Remember the TSA liquid rule when packing sauces and dressings in your carry-on — containers must be 3.4 ounces (100 ml) or less and fit in a single quart-size bag.
For larger quantities, put them in your checked bag or ship them ahead, and double-bag or use leakproof containers to prevent spills.
Always test lids and seal jars with tape or silicone bands so your clothes and gear stay protected.
TSA Liquid Rule
If you’re bringing sauces, dressings, or dips through airport security, know they’re treated as liquids and must follow the TSA 3-1-1 rule:
- Each container 3.4 oz (100 ml) or less.
- All containers fit in one clear quart bag.
- One quart bag per traveler.
- Declare unusual items and move the bag through screening separately.
Packing In Checked
TSA limits won’t apply once your sauces and dressings go into checked baggage, so you can pack larger containers—but you’ll still need to protect them from spills and pressure changes.
Choose sturdy, sealed jars or resealable pouches, place containers upright in the center of a suitcase, surround them with clothing for cushioning, and consider double-bagging to prevent ruined clothes if any container fails.
Secure Leak Prevention
Because sauces, dressings, and dips can turn a trip’s wardrobe into a mess in seconds, you’ll want a simple, fail-safe system to keep them sealed and contained.
Use these steps to prevent leaks and soggy snacks:
- Transfer into small, leakproof containers.
- Wrap lids with tape or plastic wrap.
- Place containers in zip-top bags.
- Stash bags upright in a hard-sided pouch.
Packaged Snacks, Candies, and Sealed Goods Rules
Although rules are generally straightforward, you’ll want to know how packaged snacks, candies, and sealed goods are treated so you can breeze through security and enjoy your trip.
You can bring commercially sealed items in carry‑on or checked bags; declare anything questionable at screening. Avoid large liquids like jarred sauces.
Keep packaging intact to prove contents, and remember some countries restrict certain food imports.
Baking and Desserts: Cakes, Cookies, and Pies
When you’re bringing cakes, cookies, or pies on a flight, think about shape, fragility, and temperature—these factors determine how easy they’ll be to pack and whether they’ll survive screening.
- Choose sturdy, compact containers for transport.
- Chill creams and custards to reduce spoilage.
- Wrap slices separately to prevent smushing.
- Keep utensils and napkins handy for tidy in-flight serving.
Alcoholic Beverages: What Airlines Allow
If you plan to bring baked goods, you might also be thinking about bringing a celebratory bottle or small spirits to enjoy later—airlines and security have specific rules you’ll need to follow.
You can pack unopened alcohol under 100ml in carry-ons per TSA liquids rules, or larger bottles in checked baggage if allowed by airline limits and destination regulations.
Don’t drink your own alcohol onboard.
Baby Food, Formula, and Special Dietary Liquids
Because security recognizes that infants and people with medical needs require liquids beyond the usual 3.4-ounce limit, you can bring baby food, formula, breast milk, and prescribed dietary liquids in quantities needed for the trip—just declare them at the checkpoint for inspection.
Security allows baby food, formula, breast milk, and prescribed dietary liquids in needed quantities—just declare them at screening.
Follow these practical tips:
- Pack measured portions you’ll need
- Keep items accessible for screening
- Use insulated containers if needed
- Label homemade or prescribed items
Medication and Medical Dietary Items to Declare
When you pass through security, declare any medications and medical dietary items so screening agents know what you’re carrying.
Keep prescriptions or a doctor’s note with you to verify special diets or therapeutic foods.
If something needs to stay cool, pack it in an insulated bag with gel packs and be ready to explain its temperature requirements.
Declare Medications At Security
Tell the TSA officer about any medications, medical liquids, or dietary items you’re carrying before screening begins.
Declare items clearly, remove containers for inspection when asked, and keep meds accessible. Bring enough for the trip.
- Prescription pills in original bottles
- Liquid meds above 3.4 oz allowed if declared
- Insulin and supplies
- Medical nutrition drinks (declare for screening)
Carry Documentation For Diet
If you rely on prescription meds, medical nutrition drinks, or other dietary items for a health condition, carry concise documentation that verifies their medical necessity and matches the items you’ll present at security.
Bring a doctor’s note or prescription showing names, dosages, and diagnosis. Keep originals or printed copies accessible.
Present documentation proactively to officers to speed screening and avoid confusion.
Packing Temperature-Sensitive Items
1. You’ll need to declare medications and dietary items that require cooling; notify security and crew.
Pack smartly:
- Use insulated pouches or coolers with gel packs
- Keep meds in original labeled containers and bring prescriptions
- Carry a doctor’s note for special foods or meds
- Place items in carry-on to control temperature
Follow airline rules and declare at screening to avoid delays.
Traveling With Pet Food and Animal Supplies
When you’re flying with pets, planning their food and supplies is as important as booking the right carrier—airports, carriers, and crews all have rules you’ll need to follow.
Check airline policies on carry-on versus checked pet food, declare medications and supplements, pack sealed portions and disposable bowls, and bring extra in case of delays.
Label everything and secure perishable items with ice packs if allowed.
Airline Meal Service vs. Your Own Food
You’ve already sorted your pet’s food and supplies, so now think about what you’ll eat onboard and whether to rely on the airline’s meals or bring your own.
- Airline meals save packing and fit timing.
- Your food gives control over diet and portions.
- Consider storage: refrigeration isn’t available.
- Check comfort: avoid strong smells or messy items for neighbors.
How Airline Policies Can Affect Onboard Food
Because airlines set rules about carry-ons, liquids, and food safety, your choices for onboard meals can be limited — so check policies before you pack.
You’ll need to avoid banned items, follow liquid restrictions, and consider space and odor rules.
If you’re flying with special meals or medical dietary needs, contact the airline in advance to confirm allowances and rehearse packing compliant, spill-proof containers.
International Flights: Customs Basics for Food
Anyone bringing food across borders must declare it and know that rules vary widely by country.
You’ll face inspections, possible confiscation, and fines if you don’t comply. Prepare by checking entry forms and official sites. Pack receipts and original packaging.
Consider these tips:
- Declare all food items honestly.
- Keep items sealed and labeled.
- Carry documentation when possible.
- Ask customs officers if unsure.
Country Bans and Restricted Agricultural Items
You’ll need to check country-specific import rules before you pack any food, since each nation sets its own restrictions.
Many places outright ban fresh produce, meats, dairy, or seeds, so don’t assume an item is allowed.
Always declare food on arrival and be prepared for inspection to avoid fines or confiscation.
Country-Specific Import Rules
When planning to bring food across borders, check the destination’s import rules first so you don’t face fines, confiscation, or delays at customs.
You should:
- verify allowed packaged foods and quantity limits
- declare all items honestly on arrival forms
- consult embassy or customs websites for updates
- prepare receipts or ingredient lists to speed inspections and avoid surprises
Banned Agricultural Products
Because agricultural bans vary widely and are enforced strictly, check prohibited lists before packing any plant, fruit, meat, dairy, seeds, or soil-based items.
You should avoid bringing fresh produce, unprocessed meats, live plants, or untreated seeds.
Many countries forbid certain cheeses, cured meats, and soil on tools.
If unsure, leave items at home or buy compliant packaged products to prevent fines and confiscation.
Declaration And Inspection Requirements
Although rules differ by country, you’ll usually have to declare most animal and plant products on your customs form and be prepared for inspection; failing to declare restricted items can lead to hefty fines, confiscation, or delays.
- Declare meats, dairy, fruits, plants
- Follow specific country guidance
- Present items for inspection when asked
- Expect confiscation or fines if you don’t comply
How to Check Customs Rules Before You Travel
Before you pack snacks, check the customs rules for your destination and any countries you’ll pass through so you don’t risk confiscation, fines, or delays. Visit official customs websites, contact embassies, and review airline policies. Keep receipts and declare as required to avoid penalties.
| Source | Action |
|---|---|
| Customs site | Read food rules |
| Embassy | Ask specifics |
| Airline | Check limits |
| Receipts | Keep handy |
Bringing Cultural or Religious Meals Across Borders
If you’re traveling with cultural or religious meals, plan ahead so you can respect dietary rules and avoid problems at borders. You should:
- Verify allowed ingredients with destination customs.
- Pack documentation or certification for special foods.
- Use airtight, labeled containers to show contents.
- Declare items honestly to officers to prevent confiscation and delays.
Transit and Layover Rules for Food Items
When you have a layover or transit through another country, check that the foods you’re carrying are allowed at each connecting airport and through customs, since rules can change between countries and even terminals.
Confirm transit visa or baggage rules, declared items, and any restrictions on meats, dairy, produce, and packaged goods.
Pack sealed items with receipts and know quarantine procedures to avoid fines or confiscation.
Duty-Free and Airport Purchases: Bringing Them on Board
When you buy duty-free liquids or packaged foods in the airport, you’ll need to follow special carry-on rules so items don’t get confiscated at security.
Know the liquid limits and sealed-bag requirements for duty-free purchases and check how packaged snacks should be presented during screening.
If you’re connecting, confirm transfer rules so your airport purchases will be allowed on the next flight.
Duty-Free Liquids Rule
Although airport shops let you buy larger bottles, the duty-free liquids rule still affects what you can bring through security and onto the plane, so you’ll need to know how purchases are packaged, what receipts are required, and the limits for connecting flights.
- Keep liquids sealed in tamper-evident bags provided.
- Hold receipts for verification.
- Check transfer rules for connecting airports.
- Know carry-on limits if seal is broken.
Packaged Food Rules
If you buy packaged snacks or meals in duty-free shops or airport stores, you can usually bring them on board—just keep them in their original, sealed packaging and hold onto your receipt for security checks and any connecting-flight transfers.
Check airline rules for specific items like alcohol or perishables, and pack fragile containers securely to prevent spills or damage during handling and stowage.
Airport Security Screening
After you’ve bought duty-free or airport snacks, you’ll still need to get them through security checkpoints and possibly through customs at connecting airports.
You should know rules and keep receipts handy.
- Liquid limits apply to creams, sauces, and alcohol.
- Seal purchases in tamper-evident bags.
- Declare items at customs when required.
- Carry receipts to prove point-of-sale origin.
Food Safety Tips to Avoid Spoilage and Illness
When you’re packing food for a flight, plan for temperature control, sanitary storage, and easy access to perishables so you can prevent spoilage and illness. Pack chilled items in insulated bags with ice packs, separate raw from ready-to-eat foods, and wash hands before eating. Discard anything with odd odors or textures.
| Item | Tip | Risk |
|---|---|---|
| Dairy | Keep cold | Bacterial growth |
| Sandwiches | Wrap tightly | Cross-contam. |
| Fruit | Rinse, dry | Mold |
Keeping Food Fresh During Long Trips
You’ll keep food fresher on long trips by packing insulated containers or cooler bags to maintain temperature.
Choose stable, nonperishable items like nuts, dried fruit, hard cheeses, and vacuum-sealed snacks that won’t spoil quickly.
Combine insulation with durable choices to minimize waste and avoid food-safety risks.
Pack With Insulated Containers
A well-chosen insulated container keeps your meals fresh and safe across long travel days, letting you bypass expensive airport food and unpredictable layover options.
- Pick a size that fits your bag and portions.
- Use reusable ice packs to maintain temperature.
- Seal containers tightly to prevent leaks and odors.
- Clean and dry containers before packing to avoid contamination.
Choose Stable, Nonperishables
If you want meals that survive long travel days without refrigeration, choose stable nonperishables that resist spoilage and handle jostling in transit.
Pick shelf-stable proteins like jerky or canned tuna, shelf-stable cheeses, nuts, dried fruit, and whole-grain crackers.
Portion into resealable bags, pack a small utensil and hand sanitizer, and rotate items on longer trips to avoid stale or rancid flavors.
Best Containers for Spill-Free Packing
Think practical: choose containers that seal tightly, resist leaks, and fit airline and security rules so your food arrives fresh and mess-free.
You’ll want durable, lightweight options that stack and compress.
- Silicone bags with double seals
- Leakproof glass jars with locking lids
- BPA-free plastic containers with snap rims
- Insulated lunch boxes with tight zippers
Pack smart to prevent spills and odors.
Packing Utensils, Napkins, and Disposable Dishes
Pack a compact kit of utensils, napkins, and disposable dishes so you can eat cleanly and comfortably without relying on airport or airline supplies.
Include a reusable fork, spoon, and knife (or spork), a small cloth napkin, antibacterial wipes, and lightweight disposable plates or bowls.
Tuck them in an easy-access pocket to avoid spills and make inflight meals simple and sanitary.
Nut-Free, Gluten-Free, and Allergy-Aware Packing
When you pack for a flight, choose clearly labeled nut-free snacks like fruit, seeds, and individually wrapped bars to keep you and nearby passengers safe.
Pack gluten-free options in separate containers and bring ingredient lists or packaging in case you need to show them.
Tell flight attendants and travel companions about your allergies so accommodations and seating can be arranged.
Nut-Free Snack Choices
Choosing nut-free snacks for air travel doesn’t have to be limiting—you can bring tasty, gluten-free, and allergy-aware options that are safe and satisfying.
- Rice cakes with seed butter packets
- Fresh fruit like apples or grapes
- Veggie sticks with hummus cups
- Yogurt or dairy-free alternatives in sealed containers
Pack labeled, single-serving items and check airline rules before boarding.
Gluten-Free Packing Tips
If you need gluten-free options for flight travel, focus on simple, sealed items and clear labeling so you and airline staff can spot safe choices quickly.
Pack individually wrapped rice snacks, certified gluten-free bars, and sealed jerky. Include a printed ingredient list and allergy icons on packaging.
Use airtight containers to prevent cross-contact, and keep foods separate from others in your carry-on.
Communicate Allergy Needs
Because airlines and fellow passengers may not know your restrictions, clearly communicating your nut-free or gluten-free needs makes travel safer and less stressful.
Tell staff, label your food, and request allergy announcements when possible.
- Notify airline during booking or check-in
- Pack sealed, labeled meals and snacks
- Carry medication and prescriptions
- Politely remind nearby passengers and crew
Quick Snacks to Pack for Short Domestic Flights
Pack a few compact, no-mess snacks that keep you satisfied without attracting attention or creating crumbs.
Choose protein bars, mixed nuts (in resealable bags), dried fruit, and cheese sticks. Fresh fruit like grapes or apple slices works if pre-cut and packed.
Bring a small napkin and hand sanitizer. Avoid strong odors and messy spreads to keep fellow passengers comfortable.
Best Foods for Long-Haul and Overnight Flights
Long-haul and overnight flights call for foods that keep you full, hydrated, and comfortable over many hours.
Choose items that travel well, soothe sleep, and maintain energy without mess.
- Greek yogurt and granola for protein and texture
- Fresh fruit and cut veggies to hydrate
- Nuts and seeds for sustained energy
- Whole-grain sandwiches or wraps for balanced carbs and protein
Cost-Saving: Pack Your Own vs. Buy at the Airport
You can save a lot by packing snacks strategically—think compact, non-perishable items that satisfy hunger.
Check prices for the airport shops or terminal cafes ahead of time so you know when it’s worth buying on the go.
Don’t forget airport markups; a quick cost comparison often makes bringing your own the smarter choice.
Pack Snacks Strategically
Because airport prices add up fast, bringing your own snacks usually saves you money and keeps you in control of what you eat.
Pack compact, nonperishable items that travel well and follow security rules:
- Nuts and seeds for protein and energy
- Dried fruit for sweetness without mess
- Whole grain crackers for fiber and satiety
- Individual portions to avoid waste and fuss
Compare Prices Ahead
After packing smart snacks, it pays to compare prices so you know when bringing your own really saves money versus buying at the airport. Check item costs, portion size, and convenience to decide. Use a quick table to compare.
| Item | Pack | Buy |
|---|---|---|
| Sandwich | $2 | $7 |
| Bottle water | $0.50 | $3 |
| Fruit | $0.75 | $4 |
Consider Airport Markups
While airports have captive customers and steep overheads, you can beat their markups by bringing your own food. Packing saves money and time, and lets you control quality.
Consider portability, security rules, and freshness before you go.
- Pack nonperishables or chilled items in an insulated bag
- Skip pricey gate snacks
- Check TSA rules for liquids
- Plan easy-to-eat portions
TSA PreCheck, Global Entry, and Food Screening
If you use TSA PreCheck or Global Entry, you’ll breeze through security faster, but you should still know how those programs affect bringing food on flights—some snacks clear screening with little fuss, while others may need extra inspection or disposal depending on texture, liquid content, and destination rules. You should pack solid snacks, label containers, and expect occasional checks.
| Food Type | Allowed | Notes |
|---|---|---|
| Solid snacks | Yes | Usually fine |
| Liquids/gels | Limited | Follow 3-1-1 |
| Fresh produce | Restricted | Check destination rules |
Faster Security With Food: Tips to Speed Up Screening
Pack snacks where you can grab them quickly so you’re not fumbling at the checkpoint.
Put food in a separate bin or clear bag to speed X-ray screening, and label any jars or sauces.
Remember TSA liquid rules for things like yogurt or dressings so you won’t be asked to discard them.
Pack Easily Accessible Snacks
1. You’ll move through security faster if your snacks are easy to grab. Pack a small pouch near the top of your carry-on so you won’t fumble.
Keep portions tidy and labeled to ease inspection.
- granola bars
- fresh fruit (whole)
- nuts or trail mix
- pre-wrapped sandwiches
Grab, show, go — simple, organized, stress-free.
Separate Food For Screening
Security lines move quicker when you separate food for screening, so pull snacks into an easily accessible bag before you reach the checkpoint.
Place solid items together and keep them near the top of your carry-on or in a clear pouch so officers can glance without unpacking.
Alert TSA agents if you have special diets or baby food to streamline inspection and avoid delays.
Follow TSA Liquid Rules
Because liquids, gels, and aerosols have strict limits, you’ll want to organize any sauces, drinks, or spreads before you reach the checkpoint.
Pack compliant containers, label items, and keep them accessible so screening is quick. Consider solid substitutes when possible.
- Use 3.4 oz (100 ml) containers
- Fit all containers in a single clear bag
- Keep the bag separate
- Declare unusual items
What to Do If TSA Confiscates Your Food
If TSA takes your food, stay calm and act quickly to protect your options and minimize loss.
If TSA confiscates your food, remain calm and act quickly to preserve choices and limit loss.
Ask the officer why it was confiscated and whether you can mail it home or dispose of it yourself.
Document the item and officer’s name, keep receipts if incurred, and request a supervisor if you disagree.
File a complaint with TSA later for reconsideration or reimbursement.
Sneaking Food Onboard: Myths vs. Reality
Though you might’ve heard tricks about hiding snacks in shoes or wrapping liquids in foil, most “sneaky” tactics won’t get you past TSA rules and can create bigger problems than they solve.
- Don’t conceal prohibited items; you’ll be delayed.
- Don’t risk contamination or spills.
- Don’t assume agents won’t inspect cleverly wrapped items.
- Do follow packing rules and declare questionable foods to avoid surprises.
Real Examples: Allowed vs. Confiscated Food Items
Air travel rules can be confusing, so here are concrete examples to help you tell what typically passes through security and what usually gets taken away:
You can bring whole fruits, sandwiches, hard cheeses, sealed snacks, and baked goods.
Whole fruits, sandwiches, hard cheeses, sealed snacks, and baked goods typically pass through airport security without issue.
Liquids, gels, yogurt, soups, and spreads over 3.4 oz (100 ml) are often confiscated.
Frozen items must stay solid; otherwise they’ll be treated as liquids.
Checklist: What to Pack and What to Leave Behind
1 clear checklist will save you time and stress at security: pack whole fruits, sandwiches, hard cheeses, sealed snacks, and solid frozen items, and leave liquids, gels, yogurts, soups, and spreads over 3.4 oz (100 ml) in checked baggage or at home.
- Pack ready-to-eat solids
- Seal commercially packaged snacks
- Keep sauces and drinks checked
- Discard or consume oversized gels before screening
Frequently Asked Food-On-Plane Questions (Short Answers)
Now that you’ve got a simple packing checklist, you probably have quick questions about specifics — what’s allowed, what gets confiscated, and how to handle special foods. You can bring most solids, limit liquids to security rules, declare restricted items, and pack perishables in a cooler. Check local rules for produce.
| Item | Tip | Action |
|---|---|---|
| Solids | OK | Pack sealed |
| Liquids | Limit | Follow TSA |
| Produce | Varies | Declare |
Quick Reference Checklist of Key Food Rules
Use this quick checklist to keep your food items compliant and hassle-free: pack solid snacks sealed, keep liquids within TSA’s 3-1-1 limits or buy them after security, declare restricted produce or animal products at customs, and store perishables in an approved cooler with ice packs that won’t melt.
- Check country-specific food bans.
- Label homemade items clearly.
- Keep receipts for purchased food.
- Pack allergy-safe options.
Frequently Asked Questions
Can I Bring Ice Cream in a Cooler Past Security?
Yes — you can bring ice cream in a cooler past security if it’s solid or frozen; once it melts into a liquid, TSA may treat it as a liquid subject to the 3.4-ounce rule, so keep it frozen.
Are Food Delivery Services Allowed to Hand Meals to Passengers at Gate?
Yes, airlines generally allow gate delivery services to hand meals to passengers, but you’ll need airline and airport approval, follow TSA rules, and meet airline boarding policies; coordinate with staff to avoid security or boarding conflicts.
Can I Reheat My Packed Meal in Airline Ovens or Galleys?
No, you usually can’t reheat your packed meal in airline ovens or galleys; crews rarely allow passenger use for safety and sanitation reasons, but you can ask staff—they might heat small items onboard or offer alternatives.
Do Duty-Free Food Gifts Need to Be Declared Entering Another Country?
Yes — you’ll usually need to declare duty-free food gifts when entering another country; customs rules vary, so declare perishables, meats, dairy, fruits, and high-value items to avoid fines, inspections, or confiscation upon arrival.
Can I Bring Herbs, Spices, or Powdered Seasonings Internationally?
Yes — you can usually bring herbs, spices, and powdered seasonings, but you’ll need to declare them and follow agricultural rules for your destination; some countries restrict or confiscate certain plant products, so check specific customs regulations first.
Conclusion
You can bring most solid foods on a plane, but you’ll need to watch liquids, gels, and anything that looks like a sauce. Pack solid snacks and sandwiches in clear bags, keep soups and drinks within the 3.4-ounce rule or buy them past security, and declare any large amounts or unusual items when required. Use airtight containers for mess-free travel, follow destination rules, and double-check perishability and customs limits before you fly.