Can I Put Luggage on Top of My Car Safety Rules Explained
Yes — you can put luggage on your car roof if you do it right. Use a proper roof rack or box, stay within your vehicle’s and rack’s weight limits, and distribute weight evenly. Secure items with quality straps, check fastenings before and during the trip, and slow down for wind and weather. Know local laws about overhangs and load fastening to avoid fines. Keep going and you’ll learn specific checks, gear, and legal tips to follow.
Quick Answer: Can You Put Luggage on Your Car Roof?
Wondering if you can put luggage on your car roof? You can, but only with proper roof racks or cargo boxes rated for your vehicle.
Secure loads to avoid shifting, keep weight within the roof limit, and distribute items evenly. Check fastenings before driving and follow speed recommendations.
Without appropriate equipment or limits, you risk damage, instability, and legal issues.
Why This Guide Helps You Load a Roof Safely
You already know you can carry luggage on your roof if you use the right rack and secure it properly; this guide shows you how to do that reliably and safely.
It gives step‑by‑step loading, tie‑down techniques, weight distribution tips, and checks for wind, clearance, and visibility.
Follow these concise instructions to reduce risk, prevent damage, and stay legal on the road.
When Rooftop Cargo Makes Sense Versus Using the Trunk or Trailer
When space inside the car is limited or bulky items would block your view, rooftop cargo makes sense because it frees cabin room and keeps odd-shaped gear secure; choose a trunk or trailer instead when weight, height clearance, fuel economy, or legal limits matter more.
When cabin space is tight or items are bulky, rooftop cargo frees room—but switch to a trunk or trailer for weight, clearance, or fuel concerns.
- Use roof for light, bulky items.
- Use trunk for heavy, compact loads.
- Use trailer for very heavy or oversized gear.
- Consider loading convenience and trip length.
Legal Basics and Regional Differences
Shifting from practical choices about where to put your gear, you also have to follow laws that vary by region.
You’ll find rules on load securing, overhang limits, and visibility requirements differ by country, state, or province.
Some places demand specific straps or flagging for protrusions; others set weight limits per roof.
Ignoring local rules can mean fines or safety risks.
How to Check Local Laws and Vehicle Codes Before You Travel
Before you hit the road, check your state’s vehicle code or transport department website for up-to-date rules on luggage and loads.
Confirm weight and size limits for your vehicle and any trailers so you don’t exceed legal limits.
Also verify secured-load requirements—how items must be tied down or covered—to avoid fines and stay safe.
Check Vehicle Code Online
Wondering what local rules apply to roof racks, cargo straps, or weight limits? Check your state’s vehicle code online before you leave.
Use official DMV or government sites, search for “load securement” or “roof cargo” and note penalties.
- Visit state DMV or transport department site
- Read towing and load sections
- Save screenshots or links
- Verify any city ordinances
Confirm Weight And Size Limits
If you’re loading gear onto your roof or into a trailer, confirm the weight and size limits that apply to both your vehicle and the roads you’ll use.
Check your owner’s manual for roof and hitch capacities, then review local vehicle codes and highway rules online or via DMV.
Note axle, gross vehicle weight, and overhang restrictions before you pack to avoid fines and safety hazards.
Verify Secured Load Requirements
When you’re planning a trip with roof racks, trailers, or open beds, check the secured-load rules that apply along your route and to your vehicle so you don’t get fined or cause a safety hazard.
You should:
- Check state and local vehicle codes for load limits.
- Verify tie-down and covering requirements.
- Confirm overhang and marking rules.
- Keep documentation and permits accessible.
Find Your Vehicle’s Roof Load Limit
Check your owner’s manual first to find the manufacturer’s roof load limit.
Remember the gross roof load includes both your cargo and the weight of any roof rack or carrier.
Don’t exceed that number to keep handling and safety intact.
Check Owner’s Manual
Before you load anything onto your roof, grab the owner’s manual and find the roof load limit so you know exactly how much weight your vehicle is rated to carry.
Check specifics, including:
- Gross roof load value.
- Rack or rail limitations.
- Tire and suspension notes.
- Manufacturer warnings and packing tips.
Follow those limits to avoid damage or unsafe handling.
Know Gross Roof Load
After you’ve reviewed the owner’s manual, find your vehicle’s gross roof load so you know the absolute weight limit for items placed on the roof, including any roof rack hardware.
Don’t guess—use the specified number. Divide total cargo among passengers and roof weight allowances, and weigh bulky items before loading.
Exceeding the limit risks structural damage, impaired handling, and voided warranties.
Include Roof Rack Weight
Because roof load limits include the weight of any installed rack, you need to count the rack itself when calculating how much extra cargo you can put up top.
Check your owner’s manual, weigh the rack, and subtract that from the roof limit before loading.
- Find roof load spec
- Weigh rack and accessories
- Subtract from limit
- Load remaining capacity
Understand Roof Rack and Crossbar Capacity
When you’re loading gear on top of your vehicle, know the weight limits for both the roof rack and each crossbar—exceeding them can damage the rack, affect handling, or void warranties.
Check the owner’s manual or rack labels for maximums, and add luggage weights before loading.
Distribute weight evenly, secure items to prevent shifting, and recheck fastenings during stops to maintain stability.
Why Manufacturer Limits Include Roof Accessories and Passengers
Although it might seem like roof accessories and passengers are separate concerns, manufacturers count both toward your vehicle’s gross roof load and overall weight limits, so you need to include them when planning loads.
Remember: manufacturers count roof accessories and passengers together toward your roof and vehicle weight limits.
You should:
- Add fixed accessory weight to luggage totals.
- Account for passenger weight distribution.
- Check vehicle placard limits.
- Avoid exceeding dynamic/impact load margins.
Rooftop Systems: Hard Box, Soft Bag, Bare Crossbars, and Roof Basket
Rooftop systems come in four main styles—hard box, soft bag, bare crossbars, and roof basket—and each balances protection, capacity, aerodynamics, and ease of use differently, so you should pick the type that matches your cargo, vehicle, and driving habits. Choose by weight, weather resistance, installation speed.
| Type | Best for | Trade-off |
|---|---|---|
| Hard box | Fragile gear | Weight, cost |
| Soft bag | Seasonal storage | Less protection |
| Basket | Bulky items | Wind drag |
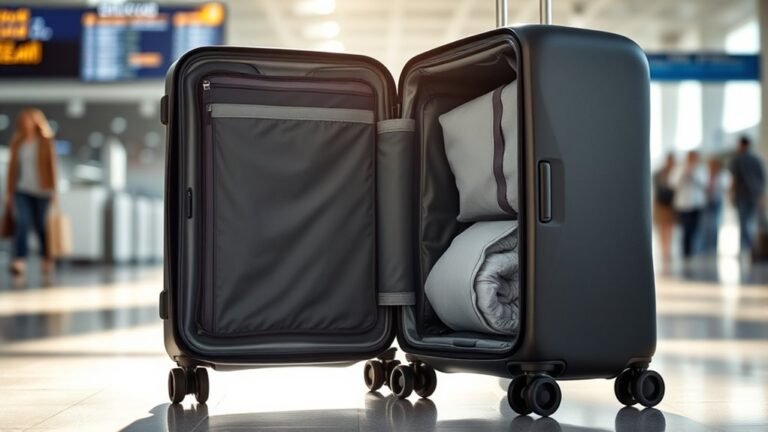
Choose Between a Rooftop Box and a Soft Cargo Bag
When you’re deciding between a rigid rooftop box and a soft cargo bag, weigh the box’s better security and aerodynamics against the bag’s lighter weight and easier storage.
Think about the loads you’ll carry and how often you’ll need quick access, plus whether you’ll face heavy rain or snow that favors a sealed box.
Match your choice to your gear, weather exposure, and how much roof weight your vehicle can safely handle.
Rooftop Box Pros
1 key advantage of a hard rooftop box is protection: it shields your gear from rain, dust, and road debris while keeping items organized and secure, so you won’t have to worry about soggy bags or crushed boxes on long trips.
You’ll also benefit from:
- Improved aerodynamics reducing wind noise.
- Lockable security for valuables.
- Durable weatherproof construction.
- Easy mounting and access.
Soft Bag Benefits
Although a hard box offers rigid protection, a soft cargo bag gives you flexible, lightweight storage that’s easier to pack and stow when not in use.
You’ll appreciate lower cost, simpler mounting, and less aerodynamic drag when empty.
Soft bags conform to odd-shaped items, zip closed for quick access, and often compress for storage at home. They’re ideal if you value space, convenience, and portability.
Load And Weather Considerations
Soft bags handle odd shapes and save space, but you’ll want to rethink your choice once you factor in load weight and weather.
Consider these points to choose smartly:
- Weight limits — check roof and rack ratings.
- Aerodynamics — boxes reduce drag, soft bags flap.
- Waterproofing — boxes beat many soft options.
- Access — soft bags are flexible but less secure.
When to Pick a Roof Basket or Open Carrier
When you’re hauling awkward, oversized, or oddly shaped gear that won’t fit in a closed box, pick a roof basket or open carrier for easier loading and better airflow. They let you strap items down securely and give you more usable space than a hard shell for the same footprint.
Choose a basket when weight and flexibility matter, and pick an open carrier if you need quick access and simpler tie-downs.
Install Crossbars and Roof Racks: Essential Steps
Before you load anything on top, install the crossbars and roof rack correctly so your gear stays secure and your car’s handling isn’t compromised.
You’ll align rails, tighten mounts to torque specs, and check fitment. Follow manufacturer guides, then:
- Measure spacing for load balance.
- Torque bolts per manual.
- Verify clamps sit flush.
- Recheck after first drive.
Mount a Rooftop Cargo Box Securely
If you’ve already got crossbars snugged to spec, secure the rooftop cargo box by aligning its mounting hardware with the bars, fastening each clamp or U-bolt to the manufacturer’s torque, and locking every latch—then give each attachment a firm pull to confirm it’s seated.
Tighten backup straps, distribute weight evenly inside, close and lock the lid, and recheck fastenings after a short test drive.
Attach a Soft Cargo Bag Properly to Crossbars
Start by placing the soft cargo bag centered on your crossbars. Then thread the straps through the bars’ loops and cinch them snugly to the manufacturer’s tension recommendations. You’ll want each strap flat and free of twists to prevent shifting.
Start with the cargo bag centered on the crossbars, threading and cinching flat, untwisted straps to spec.
- Check bag alignment front-to-back.
- Spread load evenly inside.
- Close all zippers and covers.
- Retighten after a short test drive.
Strapping Techniques: Webbing, Ratchet Straps, and Tie-Down Best Practices
When securing a load, choose the right strap and route it so tension pulls directly against the anchor points; webbing straps are lightweight and forgiving for soft cargo, while ratchet straps give you mechanical advantage for heavier, rigid items.
Inspect straps for wear, keep webbing flat, avoid twists, cinch snugly, lock ratchets, use edge protectors, and recheck tension after short drives to prevent shifting.
Anchor Points for Rooftop Straps on Different Cars
Check your car’s factory roof rails first, since they’re designed to take rooftop loads and make strap routing simple.
If you don’t have rails, use the door frame anchor points and run straps through the closed door to avoid stressing trim.
Always confirm each anchor is rated for cargo and inspect straps for secure, damage-free attachment before you drive.
Factory Roof Rails
Many cars come with factory roof rails that give you secure anchor points for rooftop straps, but the design and load limits vary by make and model.
You should check your manual, inspect mounting hardware, and use rated straps.
Consider:
- Weight capacity
- Rail type (raised/flush)
- Attachment method
- Corrosion or damage
Secure loads to rails only as specified.
Door Frame Anchor Points
You should inspect manufacturers’ specs, use padded protectors to avoid paint damage, route straps through specified openings, and tighten to rated tension.
Don’t substitute anchors or exceed per-point capacities; secure gear evenly.
Prevent Straps From Loosening: Knots, Tensioners, and Safety Loops
When you secure luggage with straps, you’ll want knots and tensioners that stay tight under movement; otherwise loads can shift or straps can slip.
You should use reliable knots, ratchet tensioners, and safety loops, check tension frequently, and anchor to solid points.
- Use cinch or trucker’s hitch knots
- Prefer ratchets over cam buckles
- Add secondary safety loops
- Inspect mid-trip
Weight Distribution: Pack Heavy Items Near the Center and Low to the Roofline
Keep heavy items near the vehicle’s center to lower the center of gravity and improve stability.
Place weight low, close to the roofline rather than stacked high, to reduce sway and rollover risk.
You’ll handle turns and sudden stops more safely when weight is balanced and centered.
Center Of Gravity
A car handles best when you place the heaviest items low and close to the vehicle’s centerline—this lowers the center of gravity and reduces roll and sway during turns or sudden maneuvers.
- Keep mass centered to stabilize steering.
- Load heavy gear near the cabin, not the edges.
- Secure items to prevent shifting under braking.
- Check handling after loading; adjust if you feel lean or pull.
Roofline Weight Placement
1 simple rule applies to roofload packing: place heavy items toward the vehicle’s centerline and as low on the roofline as possible so you minimize sway and preserve handling.
You should balance weight fore-to-aft, secure items to prevent shifting, and keep bulky or irregular loads centered.
Use straps and soft padding, check roof-rack limits, and re-check tightness during stops.
Aerodynamics and Fuel Economy: What Rooftop Luggage Costs You
Although rooftop cargo gives you extra room for gear, it also makes your car work harder—raising aerodynamic drag and cutting fuel economy.
You’ll notice higher consumption, especially at highway speeds. Consider these factors:
- Increased drag raises fuel use.
- Heavier loads amplify consumption.
- Box shape matters more than weight.
- Remove carriers when not needed to save fuel.
Speed and Handling: How Rooftop Loads Change Braking and Steering
You’ll save some gas by removing a rooftop box, but keeping weight up top affects more than fuel economy—it changes how your car brakes, steers, and responds to sudden maneuvers.
You’ll notice longer stopping distances, increased body roll, and slower steering return.
Drive slower, allow greater following distance, brake earlier and progressively, and avoid abrupt lane changes to maintain control and reduce rollover risk.
Wind Noise and Vibration: Minimize Rattle and Fatigue on Long Trips
To cut wind noise and hand fatigue on long trips, reduce the gap between your roof rack and the load so air flows smoothly.
Make sure any loose cargo is tightly secured to stop rattles that wear you out and can distract you.
Consider aerodynamic accessories like wind deflectors or low-profile boxes to further quiet the ride.
Reduce Roof Rack Gap
When your roof rack sits too far from the crossbars or the load, it can create noisy wind turbulence and annoying vibration that wears on your nerves during long drives.
You should reduce gaps to cut noise and fatigue:
- Adjust bar height and position.
- Use low-profile racks.
- Add aerodynamic fairings.
- Pack closer to crossbars to limit airflow and movement.
Secure Loose Cargo
Even with gaps reduced, loose items can still rattle against bars, roof boxes, or each other and turn a calm drive into a noisy, tiring ordeal. You should pad, tie, and separate gear so it won’t vibrate, check straps often, and stop if noise worsens.
| Sound | Feeling | Action |
|---|---|---|
| Rattle | Annoyance | Re-tension |
| Buzz | Fatigue | Add padding |
| Clang | Alarm | Redistribute |
Use Aerodynamic Accessories
Because wind is the main culprit behind roof-rack noise and steady vibrations, fit streamlined fairings, low-profile crossbars, and tapered roof boxes to cut turbulence and keep your trip quieter and less tiring.
You’ll reduce fatigue and prevent rattles by choosing and installing aerodynamic accessories correctly.
- Choose low-drag gear
- Match fit to roof profile
- Tighten mounts to spec
- Test at highway speeds
Protect Fragile or Valuable Items on the Roof
If you’re carrying fragile or valuable items on the roof, secure them in rigid, weatherproof containers and pad them well to prevent shocks and movement.
Then anchor containers with rated straps to roof racks, avoiding over-tightening that could crush contents.
Keep weight low and centered, use soft blocks to stop sliding, and check fastenings periodically during travel to guarantee nothing shifts or loosens.
Weatherproofing: Keep Luggage Dry and Clean in Rain or Snow
Rain and snow can ruin bags, electronics, and paperwork fast, so waterproofing your luggage is essential before you hit wet roads.
You should seal, cover, and check fasteners to prevent leaks and road spray.
- Use waterproof duffels or rain covers.
- Wrap electronics in dry bags.
- Tape seams and zippers.
- Recheck straps after heavy precipitation.
Secure Odd-Shaped or Oversized Items Like Bikes, Kayaks, and Skis
When you haul bikes, kayaks, or skis, pick a roof rack or carrier rated for the weight and shape of your gear.
Use proper tie-downs and straps, tighten them to prevent shifting, and use bow/stern lines for long loads.
Protect contact points with padding or soft mounts to avoid scratches and stress on both the gear and vehicle.
Proper Roof Rack Selection
Although roof racks look simple, choosing the right system matters a lot when you’re hauling bikes, kayaks, or skis—pick a rack rated for the item’s weight and shape, match it to your vehicle’s roof type, and guarantee compatible mounts and accessories to secure odd-shaped gear safely.
- Confirm weight capacity.
- Match rack to roof style.
- Choose item-specific cradles.
- Check lock and anti-theft features.
Secure Tie-Down Techniques
After you’ve picked the right roof rack and mounts, secure tie-downs make the difference between a safe trip and a disaster on the road.
Use cam straps or ratchet straps rated for load weight, loop through anchor points, and avoid sharp edges.
Cross straps for stability, plus a bow and stern line for long items, will prevent shifting and reduce wind lift.
Protecting Gear Surfaces
If you’re carrying bikes, kayaks, or skis, wrap contact points with soft padding—moving blankets, foam pool noodles, or neoprene sleeves—to prevent scratches and pressure dents.
Protect surfaces by securing and isolating gear, and check fasteners often.
- Pad mounts and racks thoroughly.
- Use straps that won’t abrade.
- Cover exposed metal joints.
- Inspect after each stop.
Night and Low-Visibility Rules: Flags, Lights, and Marker Requirements
When visibility drops at dusk or in bad weather, you should mark any protruding or oversized luggage with bright flags, reflective tape, and approved lights so other drivers can see it from a distance.
Secure markers so they won’t detach, use battery-backed or vehicle-powered lighting for nighttime travel, and follow local regulations on color, size, and placement to remain visible and avoid citations.
Common Mistakes That Lead to Lost or Damaged Rooftop Loads
You’ll often see rooftop loads fail because straps weren’t tightened or tied off properly, so always double-check your tie-downs before you drive.
Don’t pack beyond your roof’s weight limit or you’ll strain the rack and risk losing cargo.
Also watch for strong winds and low clearances like bridges or garages, since both can shred or dislodge items.
Poorly Secured Tie-Downs
Because straps can loosen and knots can slip, poorly secured tie-downs are a leading cause of lost or damaged rooftop loads.
You should check and recheck fastenings before departure, and during long trips. Use rated straps and proper anchor points. Inspect for wear and replace damaged gear.
- Tighten straps evenly
- Use locking buckles
- Cross straps for stability
- Secure loose ends
Overloading Beyond Capacity
Strapping gear well won’t help if you’ve packed more than the roof or rack can handle. You risk crushed cargo, damaged mounts, and a shifting load that tears straps or detaches entirely.
Check your vehicle and rack weight limits, distribute weight evenly, and remove nonessential items. When in doubt, downsize or move items inside the car to protect people and property.
Ignoring Wind And Clearance
If you ignore wind and clearance, your rooftop load can catch gusts, snag overhangs, or strike low bridges and signs—often with destructive results.
You should check height, secure straps, and plan routes to avoid hazards. Consider how wind affects handling and stability.
- Measure total height before departure
- Inspect and tighten anchors
- Choose lower-profile packing
- Avoid narrow, tree-lined roads
Quick Pre-Trip Rooftop Safety Checklist to Use Every Time
Before you hit the road, run a quick rooftop safety checklist to confirm your load is secure, balanced, and won’t threaten you or other drivers.
Check straps and mounts for tightness and wear, center weight evenly, lock cargo boxes, cover soft items with waterproof ties, confirm antenna and sunroof clearance, and verify legal height.
Note tire pressure and remove loose debris.
Mid-Trip Checks: What to Inspect at Gas Stops or Rest Areas
While you’re stopped for gas or a break, take a quick focused inspection of your rooftop load—check that straps haven’t loosened, mounts and racks are still tight, and nothing’s shifted toward an edge.
While fueling or stretching your legs, quickly check the roof load—straps, mounts, and positioning for safety.
- Re-tension straps if fingers feel slack.
- Verify mounting hardware hasn’t loosened.
- Shift weight back toward center if needed.
- Confirm cargo covers and latches are secure before driving.
Emergency Fixes If a Strap Fails or a Box Shifts on the Road
If a strap fails or a box shifts, pull over safely and stop before you do anything else.
Assess the load quickly and secure any loose items immediately to prevent further movement.
Use available temporary tie-downs—belts, rope, or bungee cords—until you can make a proper repair or re-pack.
Stop Safely And Assess
When a strap snaps or a box shifts, pull over somewhere safe right away and don’t try to fix things in traffic; you need to stop, assess the load, and plan a quick, secure repair before you drive on.
You should:
- Check for damage and shifting.
- Reposition items if reachable safely.
- Use spare straps or rope.
- Call for help if uncertain or load unstable.
Secure Loose Items Immediately
Grab whatever’s safe to reach and secure it fast—loose straps or shifting boxes can become deadly projectiles, so act immediately to prevent further movement. Stay calm, pull over safely, and stabilize items with whatever’s at hand. If you can’t reach, flag down help. Check straps, reposition loads, and re-evaluate before driving on.
| Action | Priority | Time |
|---|---|---|
| Pull over | High | Immediate |
| Stabilize | High | 1–3 min |
| Reassess | Medium | 2–5 min |
Use Temporary Tie-Downs
One quick, secure tie can stop a load from becoming a deadly projectile, so carry and use temporary tie-downs whenever straps fail or a box shifts on the road.
When you spot movement, act fast: secure, inspect, drive slowly.
- Use ratchet straps or rope
- Anchor to roof rack points
- Double-check knots and tension
- Recheck after a short drive
How to Handle Sudden Weather Changes or High-Wind Sections
Because weather can change fast and gusts can catch you off guard, secure loose items inside and outside your vehicle before conditions worsen.
Weather can shift quickly—secure loose items inside and outside your vehicle before gusts catch you off guard.
Tighten straps, check anchors, and lower or remove rooftop loads if winds pick up.
Reduce speed, increase following distance, and avoid bridges or exposed ridges.
Pull over safely to recheck gear when visibility or stability decreases.
Insurance for Rooftop Cargo Losses: What Auto and Home Policies Cover
After you secure gear against sudden winds, you should also understand how losses on your roof are handled by insurance.
You’ll need to check policies for coverage limits, deductibles, and liability after cargo shifts.
Consider:
- Auto extensive/collision applicability
- Personal belongings exclusions
- Homeowners/renters coverage for off-premises items
- Claim documentation and police reports required
When to Avoid Rooftop Transport Altogether
If you’re hauling oversized, heavy, or unusually shaped items, don’t use the roof—choose a trailer, hitch carrier, or professional delivery instead.
Also avoid rooftop transport when you expect severe weather, high winds, long highway stretches, or when your vehicle’s roof load capacity is unclear.
If securing loads would block visibility, exceed your lifting ability, or complicate emergency stops, keep cargo off the roof.
Alternatives to Rooftop Cargo: Hitch Carriers, Trailers, and Interior Solutions
When the roof’s not the right choice, look to hitch-mounted carriers, small trailers, or smart interior packing to move gear safely and efficiently.
You’ll choose based on space, access, and vehicle limits.
Consider:
- Hitch baskets for bulky items.
- Cargo trailers for heavy loads.
- Fold-flat interior systems for secure stowage.
- Soft saddlebags for awkward shapes.
Cost vs Benefit: Compare Fuel, Time, and Gear Safety for Each Option
Because every transport choice affects your trip differently, weigh fuel costs, time overhead, and how well your gear stays protected before you decide.
Rooftop loads raise drag and fuel use but save interior space; trailers can carry more but add setup time and handling complexity; interior stowing is cheapest and safest for gear but limits passengers and comfort.
Choose based on priorities.
Recommended Products and Specs for Safe Rooftop Travel
Now that you’ve weighed fuel, time, and gear protection across transport options, let’s look at specific rooftop solutions that balance those trade-offs.
Now that you’ve weighed fuel, time, and gear protection, consider rooftop gear that balances load, aerodynamics, and durability
You should choose sturdy crossbars, low-profile cargo boxes, and quality straps; match load capacity to vehicle specs and keep aerodynamics in mind.
- Aluminum crossbars: rustproof, rated load
- Low-profile box: ≤ roofline drag
- Ratchet straps: UV-resistant
- Load-rated mounting kit
Manufacturer and Road-Tripper Tips for Safe Rooftop Loads
Although manufacturers set the baseline for safe rooftop loads, you should follow both their specs and seasoned road-trippers’ hands-on advice: stick to the vehicle and rack weight limits, use the recommended mounting patterns and torque settings, inspect attachment points before every trip, and secure soft items with weatherproof covers and secondary tie-downs to prevent shifting.
| Tip | Action |
|---|---|
| Weight | Know limits |
| Mounting | Follow pattern |
| Inspection | Check fasteners |
| Securing | Use backups |
Quick Decision Flow: Is Rooftop Luggage Right for Your Next Trip?
Want to put gear on the roof or keep it inside? Use this quick flow to decide:
- Evaluate load weight vs. roof limit.
- Check wind, distance, and highway time.
- Consider item size, weather protection, and locks.
- Assess installation confidence and emergency access.
If any step fails, pack inside or trim cargo—roof boxes help, but safety comes first.
Frequently Asked Questions
Can Roof Cargo Affect My Car’s Warranty Coverage?
Yes, it can void or limit warranty coverage if roof cargo causes damage or isn’t installed per manufacturer guidelines. You’ll want to follow weight limits, use approved racks, keep records, and consult your dealer to avoid disputes.
How Do Roof Loads Impact Vehicle Rollover Risk?
Roof loads raise your center of gravity, increasing rollover risk during sharp turns, sudden maneuvers, or high winds. You’ll want to limit weight, distribute it low and centered, and drive slower to reduce that risk.
Are There Age or Licensing Limits for Drivers Carrying Rooftop Cargo?
There aren’t specific age or licensing limits just for rooftop cargo in most places, but you’ll need a valid driver’s license and must follow local load, vehicle class, and towing restrictions; check regional laws and insurer requirements first.
Can I Transport Pets on the Roof With Proper Restraints?
No, you shouldn’t transport pets on the roof even with restraints; it’s unsafe, often illegal, and exposes animals to wind, debris, temperature extremes, and risk of escape or injury. Use inside cabin crates or secured carriers instead.
Do Roof Racks Interfere With Garage Door Openers or Parking Sensors?
They usually won’t interfere, but they can. You’ll avoid issues by mounting racks properly, keeping antennas clear, and testing sensors and garage opener range. If problems appear, reposition or use compatible low-profile racks and adjust sensor alignment.
Conclusion
You can put luggage on your car roof, but only if you prepare and secure it properly. Check local laws, your vehicle’s roof load limit, and use quality racks, straps, and a weatherproof box or bag. Balance weight, avoid overloading, and tie things down low and tight. Remember increased wind resistance, changed handling, and fuel costs. When in doubt, split loads, use a trailer, or choose trunk space to keep your trip safe and stress-free.