How to Replace Ricardo Luggage Wheels Simple Guide
You can replace Ricardo luggage wheels yourself with basic tools: screwdrivers, pliers, a socket or hex driver, and a rivet tool if needed. Flip the case onto a padded surface, remove screws or pry out the housing, then pull the axle and old wheel. Measure diameter, width, and shaft size to order matching spinners or dual wheels. Secure new wheels with screws or rivets, test under load, and lubricate bearings. Keep photos and receipts for warranty and keep going to learn tips for fit and troubleshoot.
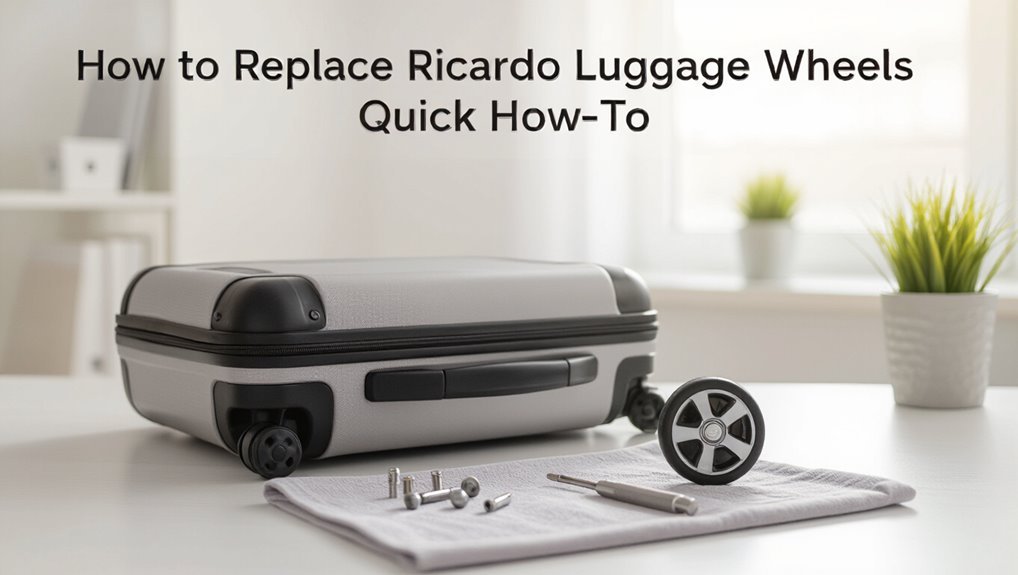
Ricardo Luggage Wheel Replacement: Quick How-To
Start by gathering a few basic tools—a screwdriver, needle-nose pliers, replacement wheels that match your Ricardo model, and some threadlocker or Loctite—and set the suitcase on a sturdy surface with the wheel side up.
Remove the wheel housing screws, extract the old wheel and axle, fit the new wheel, secure the axle, apply threadlocker, and test rotation before reattaching housing.
Which Ricardo Models Commonly Need New Wheels
Wheels wear out faster on lightweight and frequent-travel models, so you’ll most often see replacements needed for Ricardo’s carry-ons and spinner suitcases designed for budget-conscious travelers.
You’ll also find medium-checked hardside cases with twin-wheel setups showing wear, especially after rough handling.
Inspect older entry-level collections and seasonal clearance styles first, since cheaper components and heavy use cause the most failures.
How to Confirm Your Ricardo Model and Wheel Type
First, locate and note the model number on your Ricardo—it’s usually on a tag inside the case or on the luggage frame.
Then inspect the wheel style (spinner, inline skate, or fixed) and measure or photograph it for reference.
Finally, check the manufacturer label for part numbers or contact info to match the correct replacement.
Identify Model Number
Want to be sure you order the right replacement wheels? Check the luggage tag, inside pocket, or manufacturer’s label—Ricardo prints model numbers there.
If you can’t find a label, open the shell near the zipper seam; model info may be stamped or on a sticker.
Note the full model number and any production codes, then record measurements and photos before ordering replacements.
Inspect Wheel Style
Before you order parts, confirm the wheel style so you get a perfect match: inspect whether your Ricardo has single or double wheels, recessed or external mounts, and whether the wheel housing is integrated into the shell or bolted on.
Check these features closely and note measurements:
- Wheel count (single vs. double)
- Mount type (recessed vs. external)
- Housing style (integrated vs. bolted)
Check Manufacturer Label
When you flip your Ricardo over to check the label, look for the model number and manufacturing code—those details tell you which wheel assemblies were original and which replacement parts will fit.
Note production date, SKU, and any wheel-specific notes. Photograph the label, then compare codes with replacement listings or contact Ricardo support to confirm axle type, wheel diameter, and mounting style before ordering.
Single-Spinner vs Dual-Wheel: Which to Pick
Which wheel setup should you choose: single-spinner or dual-wheel? You’ll pick based on handling, stability, and terrain.
Single spinners swivel easily; dual-wheels add steadiness. Consider how you travel and carry loads.
- Single-spinner: nimble, great for smooth floors.
- Dual-wheel: more stable, better for uneven surfaces.
Your choice: prioritize maneuverability or stability.
Replacement Wheel Types That Fit Ricardo Suitcases
If you’ve settled on single or dual wheels based on handling and terrain, the next step is matching the right replacement type to your Ricardo suitcase.
Check whether your model uses molded casters, universal swivel assemblies, or bolt-on wheels.
Determine if your Ricardo uses molded casters, universal swivel assemblies, or bolt-on wheels before ordering replacements
Pick replacements designed for Ricardo luggage hinge points and shell thickness.
Choose durable materials and compatible mounting patterns to guarantee secure fit and smooth rolling.
How to Read Wheel Specs: Size, Axle, Bearing, Material
Getting the right replacement starts with reading a wheel’s specs: size, axle type, bearing style, and material determine fit and performance, so you’ll want to compare each detail to your Ricardo suitcase before buying.
- Check diameter and width to match clearance and load.
- Match axle type and length for secure mounting.
- Choose bearing style and material for smooth roll and durability.
How to Measure an Existing Wheel Correctly
Now that you know which specs matter, grab the tools and your suitcase so you can measure the wheel accurately.
Remove the wheel if possible. Measure wheel diameter, width, axle length and shaft diameter with calipers.
If you can, remove the wheel and use calipers to measure diameter, width, axle length, and shaft diameter.
Note bearing type and distance between mounting holes. Record measurements in millimeters and double-check.
Photograph mounting points for reference when ordering replacements.
Where to Buy Authentic Ricardo and Compatible Wheels
Start with Ricardo’s official parts store and authorized dealers to guarantee you get genuine wheels that match your model; they’ll list part numbers and sometimes photos to confirm fit.
- Check Ricardo’s site first for OEM listings and serial-match filters.
- Use reputable retailers like major luggage shops or Amazon with verified sellers.
- Consider specialty luggage repair shops that offer compatible replacements and return policies.
How to Check Wheel Quality: Materials and Bearings
When checking replacement wheels, you’ll want to compare materials like hard plastic, polyurethane, and rubber for durability and floor grip.
Inspect the bearing type—sealed ball bearings usually roll smoother and last longer than plain bushings.
These two factors together tell you whether a wheel will perform reliably or need replacing again soon.
Wheel Materials Comparison
Materials matter a lot when you’re judging luggage wheels: harder plastics, thermoplastic elastomers (TPE), polyurethane, and rubber each perform differently on durability, roll smoothness, and noise.
You’ll choose based on travel style and surfaces. Consider:
- Hard plastic: durable, noisy on rough surfaces.
- TPE: balanced, forgiving on bumps.
- Polyurethane/rubber: quiet, smooth, less prone to wear.
Bearing Type Inspection
Although wheel material affects ride and wear, bearings determine how smoothly and quietly your luggage rolls—so you’ll want to inspect them closely.
Check for shielded or sealed bearings, spin each wheel to gauge resistance and noise, and wiggle axles for play.
Replace rusty, gritty, or loose bearings. Match size and type when buying replacements to guarantee smooth, reliable performance.
How to Choose Screw-Mount vs Rivet-Mount Wheels
Wondering whether to go with screw-mount or rivet-mount wheels? You’ll pick based on repairability, strength, and toolbox access.
Screw-mounts are removable; rivet-mounts are permanent and tougher. Consider how often you travel and whether you’ll replace wheels yourself.
- Screw-mount: easy DIY, needs matching screws
- Rivet-mount: durable, shop replacement
- Travel frequency: dictates convenience vs. strength
How to Inspect the Wheel Housing and Axle
Now that you know whether your case uses screw- or rivet-mount wheels, check the wheel housing and axle for wear before you buy parts or start work.
Turn the case, spin each wheel, and look for wobble, cracks, corrosion, or loose fasteners.
Measure axle straightness and housing alignment.
Note damaged threads or bent axles so you can source correct replacements.
How to Spot Worn Parts vs Broken Parts
Start by comparing symptoms: worn parts show gradual degradation—flattened wheel treads, smooth but loose bearings, or shallow cracks—while broken parts present sudden failure like snapped axles, missing chunks of housing, or stripped threads.
- If movement is gritty or noisy, it’s wear; expect replacement soon.
- If components wobble or fall apart, it’s breakage; replace immediately.
- Inspect fit and fasteners: loose fit suggests wear, deformed parts signal breakage.
Tools You’ll Need for Ricardo Wheel Repair
You’ll want a small set of hand tools—screwdrivers, pliers, a socket set, and a hex driver—to take off the old Ricardo wheel and hardware.
Have replacement wheel assemblies, axles, and any manufacturer-specific fasteners ready so you’re not improvising mid-repair.
With the right tools and parts on hand, the swap goes quickly and cleanly.
Essential Hand Tools
A small set of reliable hand tools will make Ricardo wheel repair faster and prevent damage to your suitcase; you’ll only need basics you can keep in a toolbox.
Use these essentials to remove fasteners, pry gently, and secure replacements without scratching surfaces:
- Precision screwdriver set (flat and Phillips)
- Small adjustable wrench or pliers
- Plastic pry tool or spudger for trim panels
Replacement Wheel Parts
Before you begin swapping parts, gather the specific replacement wheels, axles, bearings, and mounting hardware that match Ricardo’s suitcase model so you won’t pause mid-repair. You’ll need matched wheels, correct axle length, sealed bearings, screws, and brackets. Check fit before installing.
| Item | Size | Quantity |
|---|---|---|
| Wheel | 50mm | 2 |
| Axle | 3mm x 20mm | 2 |
| Bearing | 608 | 4 |
| Screws | M3 | 4 |
| Bracket | Model-specific | 2 |
Fasteners, Brackets, Washers, and Spacers to Gather
Start by laying out the fasteners, brackets, washers, and spacers you’ll need so you don’t pause mid-repair to hunt for parts.
Check compatibility with your Ricardo wheel model and arrange items cleanly. Bring small containers for tiny pieces to avoid loss.
Confirm parts fit your Ricardo wheel, lay them out neatly, and use small containers to keep tiny pieces safe.
- Replacement axle bolts and compatible nuts
- Mounting brackets (matched shape/size)
- Flat washers and nylon spacers
Workspace Setup: Lighting, Padding, and Tool Layout
Set up bright task lighting so you can see fasteners and wheel mounts clearly.
Lay the suitcase on a padded surface to protect its shell and keep parts from rolling away.
Arrange your tools nearby in a simple order so you can work efficiently without searching.
Adequate Task Lighting
While you’re working on replacing luggage wheels, make sure you have bright, focused task lighting so you can clearly see small fasteners, bearings, and alignment marks; a single overhead light often isn’t enough.
Use adjustable, shadow-free lights and keep cords tidy. Consider brightness and color temperature.
- Position a gooseneck lamp at wheel level
- Add a portable LED worklight for angles
- Use battery backups if needed
Protective Surface Padding
Good lighting helps you spot small parts, but you also need a soft, stable work surface to protect both the luggage and the floor from scratches and dents.
Lay a thick towel, foam mat, or folded blanket where you’ll work. Keep the suitcase balanced and close to the table edge for access.
Replace padding if it shifts or compresses during the repair.
Organized Tool Layout
Arrange your tools within arm’s reach so you won’t fumble mid-repair, laying each item out by task—screwdrivers, replacement wheels, fasteners, and any specialty bits in a clear order.
Keep bright lighting, a soft padded surface, and small containers for parts. Label items if needed for quick swaps.
- Screwdrivers and bits
- Wheels and axles
- Fasteners and clips
How to Safely Empty and Secure Your Luggage
Start by clearing a flat, clean surface and unzip your bag completely so you can see and access everything; this makes it easier to remove items systematically and spot hidden debris or damage.
Empty pockets and compartments, setting hardware, documents, and fragile items aside.
Secure loose straps and external attachments with tape or bands.
Lock zippers or store parts in a labeled container to prevent loss.
How to Remove Interior Liners and Zippers for Access
Start by locating the zipper anchors along the lining so you know where the liner is secured.
Then detach any interior fasteners—Velcro, snaps, or stitches—keeping track of removed pieces.
Finally, remove the liner carefully to expose the wheel housing without tearing or stretching the fabric.
Locate Zipper Anchors
Before you remove the interior liner, locate the zipper anchors so you can detach the fabric without tearing it or losing stitching; these small metal or plastic stops sit where the zipper tape meets the luggage frame and mark the points you’ll need to undo.
- Inspect corners and ends for visible stops.
- Feel along the tape for raised anchors.
- Use a flashlight to spot hidden or stitched-over anchors.
Detach Interior Fasteners
With the zipper anchors identified, you can move on to freeing the interior fasteners so the liner and zippers come away cleanly; work methodically and keep small parts organized.
Undo Velcro tabs, pry out plastic clips with a flat tool, and remove rivets or screws holding the lining.
Label parts as you go, set hardware in separate containers, and avoid forcing fabric to prevent damage.
Remove Liner Carefully
Carefully peel back the lining and zipper assemblies so you can access the wheel housings without tearing fabric or misplacing parts.
You’ll work slowly, keeping stitches intact and noting clip locations. Use a tray for fasteners and avoid sharp tugs.
- Check zipper stops and sliders
- Fold fabric gently to expose screws
- Label clips and pockets before removal
How to Remove the Old Wheel Assembly (Step-by-Step)
Start by flipping your suitcase so the wheel side faces up and prop it securely on a soft surface to prevent scratches.
Locate the wheel assembly, remove visible screws with a proper screwdriver, and set them aside.
Gently pry the wheel housing free, detaching any clips or brackets.
Extract the wheel and axle, keep parts organized, and inspect the cavity for damage before installing the replacement.
How to Deal With Stuck or Rusted Screws
First check the screw to see if it’s stripped, rusted, or just tight so you know how much force or care you’ll need.
If it’s corroded, apply a penetrating oil and let it sit for several minutes to loosen the threads.
Then use the proper screwdriver or socket and a steady, controlled force to avoid rounding the head.
Assess Screw Condition
Before you remove a wheel, inspect the screws holding it in place to see if they’re stripped, rusted, or stuck; that determines which tools and techniques you’ll need.
Check head type, corrosion level, and tightness. Use appropriate driver bits, backups, or clamping methods.
- Phillips vs. flathead vs. Torx
- Surface rust vs. deep corrosion
- Slightly snug vs. immovable
Apply Penetrating Oil
Spray a penetrating oil onto any stuck or rusted screws to loosen corrosion and cut through grime; let it soak for at least 10–15 minutes so the lubricant can penetrate threads and break bonds.
After soaking, tap the screw head gently with a screwdriver handle to help vibration free seized threads.
Reapply if needed, then try turning slowly to prevent stripping.
Use Proper Tools
Grab the right tools so you don’t round off screw heads or make the job harder. Use quality drivers, penetrating oil, and patience for stuck or rusted screws.
Try taps gently, heat, or extraction only when needed.
- Use a correctly sized screwdriver or bit.
- Apply penetrating oil and wait.
- Heat or use an extractor if screws won’t budge.
Remove Rivets Safely Without Damaging the Shell
Start by supporting the shell near the rivet with a small block of wood or a padded clamp so the force you apply won’t flex or crack the plastic; then use a center punch and a drill bit slightly smaller than the rivet head to break it free, drilling slowly and keeping the bit aligned to avoid wandering.
After the head’s removed, gently pry the leftover shaft out with needle-nose pliers, protecting the shell edge with tape to prevent scratches.
Drill Out Rivets and Prep New Mounting Holes
Now that the old rivets are out, you’ll drill through any remaining stubs and clean the holes so they sit flush.
Use the new wheel’s bracket as a template to mark the exact positions for the replacement holes.
Double-check alignment and spacing before you drill to avoid miscuts.
Removing Old Rivets
Remove the old rivets carefully so you don’t damage the shell or hardware beneath.
Use a drill with a correctly sized bit, hold the shell steady, and stop when the rivet head detaches.
Clean burrs and test fit the new wheel plate.
Remember to:
- Wear eye protection and clamp the luggage.
- Drill slowly to avoid cracking.
- Remove metal shavings completely before mounting.
Marking New Hole Positions
After you’ve cleared away the old rivet heads and smoothed the area, mark the new hole positions by aligning the replacement wheel plate and tracing each mounting hole with a fine-tip marker or scriber.
Double-check alignment, ensuring the plate sits flush and wheels spin freely. Center-punch each mark to prevent drill wandering, then drill appropriate-sized holes, deburr edges, and test-fit before final riveting.
How to Clean and Prep the Wheel Cavity
Start by clearing out loose debris from the wheel cavity so you can see what you’re working with — dirt, old lubricant, and small stones can hide damage or prevent a new wheel from seating properly.
Then clean, inspect, and dry the cavity thoroughly before installing.
- Use a soft brush and compressed air.
- Remove rust with a wire brush.
- Wipe with isopropyl alcohol.
Install Replacement Wheels With Screw Mounts
Position the suitcase so the wheel cavity faces you and line up the replacement wheel with the screw holes; you’ll typically need a Phillips or Torx driver.
Hold the wheel steady, insert screws, and tighten evenly to avoid misalignment. Check rotation and clearance before fully seating screws.
If wobble remains, loosen, realign, and retighten. Verify firmness and test by rolling the suitcase.
Install Replacement Wheels With Rivet Mounts
To install rivet-mounted wheels, you’ll first remove the old rivets using a drill or punch.
Take care to support the luggage so you don’t damage the shell as the rivets come out.
Then position the new wheel and secure it with replacement rivets, making sure each one’s properly set.
Remove Old Rivets
Grab a drill with a bit slightly larger than the rivet head and clamp the suitcase so it won’t shift; you’ll be removing the old rivets that hold the wheel assembly in place.
Drill carefully until the rivet head comes off, then push the mandrel through. Clean the holes and test fit the new wheel plate.
- Wear safety glasses
- Work slowly
- Keep parts organized
Secure New Wheel Rivets
With the holes cleaned and the new wheel plate test-fitted, line up the replacement wheel assembly and insert the new rivets through the mounting holes.
Hold the wheel steady, then use a pop rivet tool or hammer-and-anvil rivet setter to flare each rivet tail until it’s tight.
Trim any protrusions, test spin and secure fit, and repeat for remaining wheels.
Align Wheel Brackets for Even Rotation
Line up each wheel bracket so the wheels spin smoothly and the luggage tracks straight; small misalignments make tumbling or dragging worse.
Check alignment visually and spin each wheel, adjust bracket position until rotation is even. Use shims or slight bends if needed, then test rolling.
- Spin test for wobble
- Compare opposite wheels
- Make tiny adjustments and retest
How to Torque Screws and Secure Fasteners Correctly
Once your wheels sit true, tighten each screw to the manufacturer’s torque spec so they hold without crushing the housing or coming loose on the road. Use a calibrated torque driver, apply steady pressure, and follow torque sequence. Check fasteners after short use.
| Tool | Spec | Check |
|---|---|---|
| Torque driver | 1.5–3 Nm | After 10 miles |
| Bit size | PH1/PH2 | Match screw |
| Visual | Flush | No play |
When to Use Washers, Spacers, or Threadlocker
1 simple rule will help you decide: use washers when you need to spread load, spacers when you need alignment or clearance, and threadlocker when you need vibration resistance.
You’ll pick based on fit, movement, and security. Consider these quick scenarios:
- Washer: prevents pull-through on thin materials.
- Spacer: keeps wheel centered, avoids rubbing.
- Threadlocker: stops screws from backing out.
Test Wheel Movement and Load-Bearing After Install
Once the wheels are on, roll the suitcase across carpet to check for smooth, wobble-free movement.
Next, do a weight load trial by filling the bag to its typical packed weight and pushing it again to confirm the wheels bear the load without binding.
If you feel resistance or hear grinding, stop and recheck the axle, spacers, and fasteners.
Roll Test On Carpet
Now that the wheels are installed, roll the suitcase across a carpeted surface to check movement and load-bearing under real conditions.
Observe smoothness, listen for noise, and note resistance. If something feels off, inspect alignment and fasteners.
Try these checks:
- Roll forward and backward slowly for wobble.
- Turn corners to test tracking.
- Press down lightly to simulate settling.
Weight Load Trial
After you’ve checked movement on carpet, it’s time to put real weight on the suitcase to confirm the wheels handle load and stay aligned.
Gradually add luggage or sandbags to reach typical packed weight. Roll the case forward, back, and in circles, listening for wobble or scraping.
If wheels bind or lean, tighten mounts or adjust alignment before final use.
How to Check and Adjust Wheel Alignment
Start by rolling your suitcase on a flat floor and watching the wheels track straight; if the case veers or wobbles, the alignment needs adjusting.
Check and tweak like this:
- Inspect axle attachment and tighten loose screws.
- Rotate wheels by hand to spot binding or lateral play.
- Gently bend misaligned axle or use shims for small corrections, then re-test roll.
Replacing Multiple Wheels and Keeping Balance
Check each wheel for uneven wear so you know which ones need replacement.
When more than one wheel is worn, replace them in pairs to keep rolling balance and even stress on the frame.
After installing new wheels, balance the suitcase and test it on flat and rough surfaces to confirm smooth, stable movement.
Assess Wheel Wear
When you’re deciding whether to replace one or more luggage wheels, inspect each wheel for uneven wear, wobbling, cracks, or missing tread—because swapping a single damaged wheel can throw off the bag’s balance and strain the remaining wheels.
Check these factors to decide:
- Roll each wheel to spot wobble or rough spots.
- Compare tread depth across wheels.
- Look for hairline cracks or loose bearings.
Replace In Pairs
If you’re replacing worn or damaged wheels, swap them in matching pairs so your bag stays balanced and rolls smoothly; changing only one wheel can tilt the luggage, increase wear on the remaining wheels, and make steering awkward. Replace diagonally opposed or both front/back wheels together, match size and mounting type, and keep hardware identical for consistent performance.
| Pair | Reason |
|---|---|
| Fronts | Even wear |
| Backs | Stability |
| Diagonal | Balance |
| All four | Longevity |
| Hardware | Compatibility |
Balance And Test
After you’ve swapped wheels in matching pairs, confirm the suitcase sits level and rolls straight before putting it back into service.
Then check weight distribution and alignment so trips stay smooth. You’ll want to:
- Roll the case on flat ground to spot pulling.
- Load typical weight and repeat the roll test.
- Tighten or adjust any loose mounts until balance feels right.
Repairing or Replacing Damaged Wheel Housings
Inspect the wheel housing closely for cracks, breaks, or stripped mounting points before deciding whether to repair or replace it.
If damage is minor, you can reinforce with epoxy, metal brackets, or rivets to restore strength.
For small damage, reinforce the housing with epoxy, metal brackets, or rivets to restore strength and function.
For warped, extensively cracked, or missing mounts, replace the housing assembly.
Verify new parts match screw patterns and fit snugly to maintain wheel alignment and durability.
Fixing Cracked Shells Around Wheel Mounts
When wheel housings are repaired or replaced, you’ll often find hairline cracks or stress fractures radiating from the shell around the mounts; fixing these promptly prevents further tearing and preserves wheel alignment.
You’ll clean, reinforce, and bond the area, then test rotation.
Use:
- Epoxy or plastic welding to fill cracks
- Fiberglass patch for reinforcement
- Sand, prime, and paint to seal and finish
Temporary Fixes When Replacements Aren’t Available
If you can’t swap in a new wheel right away, you can fashion temporary wheel stabilizers from rubber, foam, or tightly wound tape to keep the suitcase rolling straight.
You can also patch worn treads with durable tape or glue-on rubber strips to reduce slipping and noise for short trips.
These quick fixes won’t last forever, but they’ll get you where you need to go until proper replacements arrive.
Temporary Wheel Stabilizers
Although you can’t always get a replacement wheel on the spot, you can rig temporary stabilizers to keep your luggage usable until proper repairs are possible.
Use simple, quick fixes that don’t damage the suitcase:
- Wrap duct tape and a small rubber pad around the axle for cushioning.
- Slip a zip-tie brace to limit wobble.
- Use a folded cardboard shim under the wheel for alignment.
DIY Tread Repairs
Inspect the tread for cuts or chunks, then clean and dry the area.
Use strong adhesive, duct tape wraps, or rubber patches to fill gaps.
Test for smooth rotation and reapply tape if needed until you can replace the wheel.
How to Maintain Wheels to Extend Lifespan
When you care for your luggage wheels regularly, they’ll roll smoother and last much longer; simple habits like cleaning out debris, lubricating bearings, and checking for loose hardware prevent small issues from becoming failures.
You should:
- Clean wheels and remove grit after trips.
- Apply light lubricant to bearings sparingly.
- Tighten screws and replace worn washers promptly to keep performance at its best.
Early Signs of Wheel Failure to Watch For
If you start noticing wobbling, grinding noises, or resistance when you roll your suitcase, those are early signs a wheel is failing and needs attention. Check for cracks, uneven wear, stuck debris, looseness, or squeaks. Address issues quickly to avoid further damage or travel delays.
| Sign | What to check |
|---|---|
| Wobble | Axle/assembly |
| Grind | Bearings |
| Drag | Debris |
| Crack | Wheel shell |
Can DIY Repairs Void Warranty? (Ricardo Considerations)
Because warranties often hinge on how a product was used and repaired, opening up your suitcase or swapping wheels yourself can sometimes affect coverage.
Check Ricardo’s warranty terms before you start. Keep records and original parts.
- Photograph damage and steps taken
- Save replaced parts and receipts
- Contact Ricardo support if unsure
DIY may be fine, but documentation protects your claim.
When to Choose Professional Repair Over DIY
If the wheel damage affects the frame or feels unsafe, you should let a pro handle it to avoid hidden structural problems.
Weigh the repair cost and complexity—sometimes labor and parts can make professional service cheaper than a long, uncertain DIY attempt.
Also check your warranty or manufacturer coverage, since pros may be required to keep your protection intact.
Safety And Structural Damage
When a crack runs through the frame or the wheel housing bends out of shape, don’t try to jury‑rig a fix—those failures can compromise the suitcase’s integrity and your safety.
You should seek pro help when:
- damage affects structural seams or frame alignment
- repairs require welding, shell replacement, or precise realignment
- you rely on the bag for heavy travel or valuable contents
Cost Versus Complexity
Although DIY wheel swaps save money on simple fixes, weigh the cost against the job’s complexity before you start—ask whether you’ve got the tools, skills, and time to match the repair’s demands.
If parts are pricey, alignment is tricky, or hidden damage appears, hire a pro.
Choose DIY for simple, low-cost swaps; choose repair services when risks or labor multiply expenses.
Warranty And Manufacturer Coverage
Beyond cost and complexity, check your luggage’s warranty and manufacturer policies before starting any repairs.
If it’s covered, you’ll avoid voiding protection by DIY. Choose professional service when warranty applies, damage is extensive, or replacement parts aren’t available.
- If warranty covers wheel failure, contact manufacturer.
- If structural damage exists, seek pro repair.
- If parts are proprietary, use authorized service.
Typical DIY Replacement Costs and Parts Breakdown
A typical DIY luggage-wheel repair will cost you far less than buying a new suitcase, usually ranging from $10 to $40 depending on wheel type and tools needed.
Expect basic wheels or caster sets for $5–$20, bearings or axles $3–$10, and small screws or rivets $1–$5.
If you lack tools, add $10–$25 for a screwdriver set or rivet tool.
How to Find Compatible Aftermarket Wheels by Specs
With parts and costs in hand, you’ll next match replacement wheels to your suitcase by checking a few key specs: wheel diameter, mounting type (plate, axle, or bolt-through), bearing size, and wheel width.
Measure each spec, note material and load rating, then use these to filter options:
- Confirm diameter and width match clearance.
- Match mounting bolt pattern.
- Choose compatible bearing size.
Reading Product Listings for Wheel Compatibility
When you shop for replacement wheels, focus on three listing elements—dimensions, mounting details, and bearing specs—so you can quickly rule out incompatible options.
Check wheel diameter and width against your suitcase measurements. Confirm axle type, screw size, or bracket style matches the original.
Note bearing type and inner diameter to guarantee smooth fit.
Read seller notes and return policy before buying.
How to Test Replacement Wheels Before Travel
After you’ve confirmed the replacement wheels match dimensions, mounting, and bearings, test them thoroughly before your trip to avoid surprises on the road.
Check rolling smoothness, noise, and wobble by pushing the bag over different surfaces. Verify secure mounting and torque. If anything feels off, tighten or replace parts.
- Roll on tile, carpet, and pavement
- Listen for unusual sounds
- Wiggle wheels to test play
Packing and Transporting Luggage After Repairs
Now that your wheels are secure and rolling smoothly, pack and transport the bag as if it were new—distribute weight evenly, protect repaired areas, and keep necessary tools and spare parts handy.
Use compression or packing cubes to prevent shifting, cushion seams and wheel housings with soft items, and avoid overloading.
Lift by handles, roll on smooth surfaces, and check repairs periodically during transit.
Safely Traveling With Newly Installed Wheels
Although the wheels are new, you should treat them cautiously at first: check tightness, test rolls on different surfaces, and avoid full loads until you’re confident they’ll hold up.
Follow these quick tips to travel safely:
- Inspect wheels and fasteners before each trip.
- Use smooth paths and lift over curbs when possible.
- Pack evenly and avoid sudden stresses on corners.
Troubleshooting Common Post-Install Problems
If a wheel starts wobbling, sticking, or making noise after installation, don’t ignore it—check the axle, bearings, and fasteners first to pinpoint the issue.
Tighten loose screws, realign misseated wheels, and replace damaged bearings. Lubricate moving parts sparingly with silicone spray.
Test spin and load before travel. If problems persist, swap the wheel or consult a professional for inspection.
Quick Checklist to Finish a Ricardo Wheel Replacement
1 quick walk-through will help you finish a Ricardo wheel replacement cleanly: double-check axle tightness, confirm bearings spin freely, guarantee fasteners are secure and torqued to spec, verify the wheel sits flush with the housing, spin-test under light load, and apply a small amount of silicone lubricant if needed.
- Reinspect alignment and housing fit.
- Test roll on different surfaces.
- Check for odd noises or wobble.
Documenting the Repair for Warranty or Resale
Now that you’ve verified the wheel’s fit and performance, take a few minutes to document the repair so you protect your warranty and improve resale value.
Photograph the new wheels, serial numbers, and installation steps. Note date, parts sources, and any tools used.
Keep receipts and a brief written summary with your contact info. Store records digitally and with the luggage for easy access.
Recycling Old Wheels and Parts Responsibly
When you’re finished replacing the wheels, don’t just toss the old parts — recycle them responsibly to reduce waste and potential environmental harm.
Check local recycling rules, separate metals and plastics, and wipe greasy parts.
- Contact a municipal e-waste or metal recycler
- Donate usable components to repair groups
- Use a drop-off for contaminated oily pieces (hazardous waste)
Upgrading Wheels for Smoother, Quieter Travel
If you want a noticeably smoother, quieter trip, upgrading your luggage wheels is one of the most effective changes you can make; newer wheel designs, better bearings, and softer tread materials cut vibration and roll resistance so your bag glides rather than clatters.
Pick compatible, high-quality replacement wheels, prioritize sealed bearings and polyurethane treads, and test spin and swivel before reinstalling to guarantee reduced noise and easier handling.
Where to Find Step-by-Step Video Guides for Your Ricardo Model
You’ll find several reliable step-by-step video guides for Ricardo luggage models across official and user-driven platforms; start with Ricardo’s support page and YouTube channel, then check retailer how-to clips and enthusiast forums for model-specific demos and troubleshooting tips.
Find step-by-step Ricardo luggage videos on the brand’s support page, YouTube, retailers, and travel forums.
- Ricardo support and official uploads
- Retailer repair and product videos
- Travel forums and user walkthroughs
Frequently Asked Questions
Are Ricardo Wheel Replacements Covered Under Home Insurance for Accidental Damage?
Generally, no — you’re unlikely to have home insurance cover for accidental damage to Ricardo luggage wheels unless you’ve got specific contents or accidental damage cover that explicitly lists luggage; check your policy and contact your insurer for confirmation.
Can I Legally Modify Luggage Wheels for Air Travel in Other Countries?
Yes — you can usually modify luggage wheels for travel, but you should check airline, airport security, and local regulations; some countries restrict battery-powered or oversized modifications, so confirm rules beforehand to avoid fines or denied boarding.
How Do I Reclaim Vat/Gst on Purchased Replacement Parts Internationally?
You can reclaim VAT/GST by keeping invoices, exporting parts with proof, filing refund claims via the seller or tax authority, meeting residency/export rules, and submitting required forms within deadlines; check each country’s procedures and documentation.
Do High-Speed Wheel Upgrades Affect Airline Weight Restrictions or Fees?
No, high-speed wheel upgrades generally won’t change airline weight limits, but they’ll add a bit of grams. You shouldn’t face extra fees unless the overall bag exceeds the carrier’s weight or size limits, so weigh before travel.
Where Can I Get Professional Certification That Repairs Won’T Affect Resale Value?
You can get certification from manufacturer-authorized service centers, accredited luggage repair schools, or third-party appraisers; check for written warranties and official stamps, and request documentation to prove repairs won’t harm resale value.
Conclusion
You’ve got this — replacing Ricardo luggage wheels is straightforward when you verify your model, pick the right single- or dual-wheel replacements, and follow step-by-step guidance. Keep parts and photos to document the repair for warranty or resale, recycle old wheels responsibly, and consider upgrading for quieter, smoother travel. If you run into trouble, consult model-specific video guides or contact Ricardo support to avoid voiding warranties and guarantee a professional result.