How Do I Unlock My Samsonite Luggage If I Forgot Code
If you forgot your Samsonite code, start by trying common defaults like 000 or 123 and inspect the lock for a tiny reset pinhole or TSA keyway. Gently apply slight outward tension on the shackle while rotating each dial slowly, listening and feeling for clicks. Check inside pockets or paperwork for model/serial details and follow Samsonite’s reset steps or contact support if needed. Keep going to learn step-by-step methods, safe DIY tips, and when to call a pro.
Quick Safe Ways to Open a Samsonite Lock (Start Here)
If you’ve forgotten your Samsonite lock code, don’t panic — you can try a few quick, safe methods before calling for professional help.
First, inspect the lock and luggage for minor signs of wear or a hidden reset pinhole. Gentle probing with a paperclip can reveal mechanisms without damage.
Check the lock and luggage for wear or a tiny reset pinhole; gently probe with a paperclip.
Next, try incrementing each dial slowly while feeling for subtle clicks or resistance that indicate the correct combination.
If the lock is TSA-approved, use a TSA key if you have access.
Throughout, work calmly, avoid forcing components, and stop if you feel significant resistance to prevent breakage.
Check for a Samsonite Factory or Default Code
When you suspect you never changed the code, check for a factory default first—many Samsonite locks ship set to 0-0-0 or 0-0-0-0, depending on model.
Try those combinations calmly, aligning the dials precisely with the indicator line. If the lock clicks, slide the latch gently; don’t force it.
Inspect the lock face for tiny markings that indicate default settings or model numbers, which you can reference online.
If neither default works, note the model and serial, then consult Samsonite support or your manual for model-specific defaults before trying other methods to avoid damaging the lock.
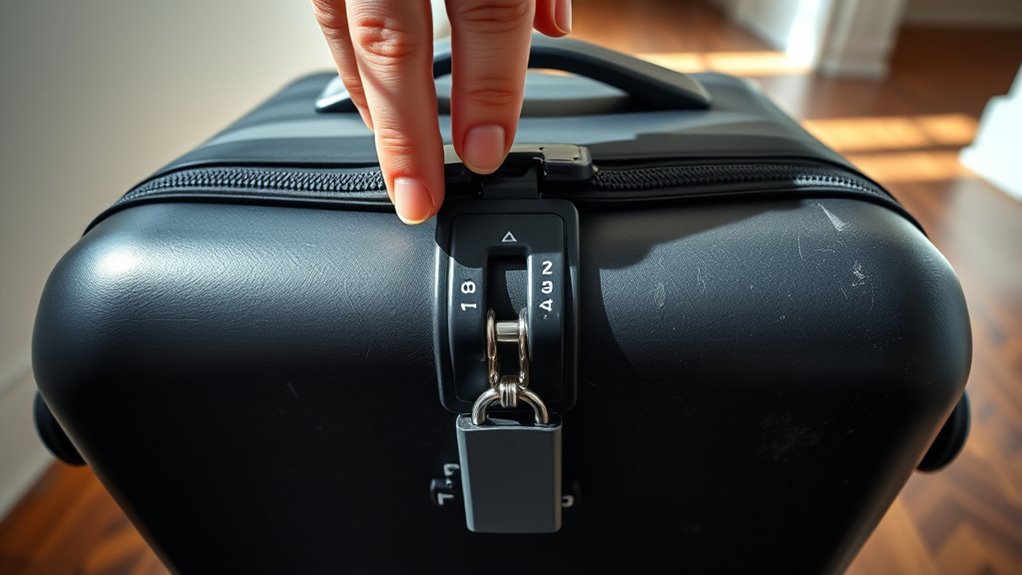
Locate a Hidden Reset Button or Pinhole on Your Lock
After trying the default codes, look closely at the lock for a tiny reset button or pinhole—many Samsonite models hide a recessed button near the shackle or on the lock housing that lets you reset the combination.
Use a paperclip or pin to press gently into that hole while the dials are set to the current code or the factory position.
Hold the button, change the dials to your new desired code, then release.
Test the new code several times before closing the suitcase.
If nothing responds, don’t force the mechanism; consult Samsonite support or a locksmith for guidance.
Try Common Default Combinations Safely
Start by trying common factory codes like 000 or 123, as many locks ship with those settings.
If those don’t work, test other known factory codes listed for your model.
You can then cycle through sequential combinations methodically until the lock opens.
Try 000 Or 123
Many Samsonite locks still open with simple defaults, so try 000 and 123 first since they’re the most common factory settings and the quickest options to test.
Start by aligning the digits to 000, then pull the release; if it doesn’t open, reset to 123 and try again. Do this gently to avoid damaging the mechanism.
If you feel resistance, stop and re-check alignment—sometimes wheels sit slightly off. Keep a record of which codes you test.
Trying these two combos takes moments and often solves the problem without tools, letting you proceed to other safe troubleshooting steps if needed.
Test Other Factory Codes
If the two most common defaults didn’t work, try a few other factory-set combinations before moving on to more invasive methods; manufacturers often use simple sequences like 111, 999, 258, or 369.
You’ll avoid damage by testing known defaults first. Set the dials, apply gentle pressure to the release, and try each code slowly. If one clicks, reset to a memorable code immediately.
If nothing opens, note which patterns failed so you don’t repeat them.
- 111
- 999
- 258
- 369
Cycle Through Sequentially
After you’ve tried the common factory codes, work through the remaining combinations in order so you don’t skip a possible match. Start at 000 and move up sequentially, rotating dials deliberately and listening for clicks or resistance. Take breaks every 100 attempts to refocus and avoid mistakes. Note each tried number to prevent repeats. If you feel a subtle give, linger on nearby numbers — sometimes mechanisms pass through a narrow window. Record progress on paper or phone so you can resume later.
| Attempts | Notes |
|---|---|
| 000–099 | Slow, listen |
| 100–199 | Mark tried |
| 200–299 | Check feel |
| 300–999 | Systematic finish |
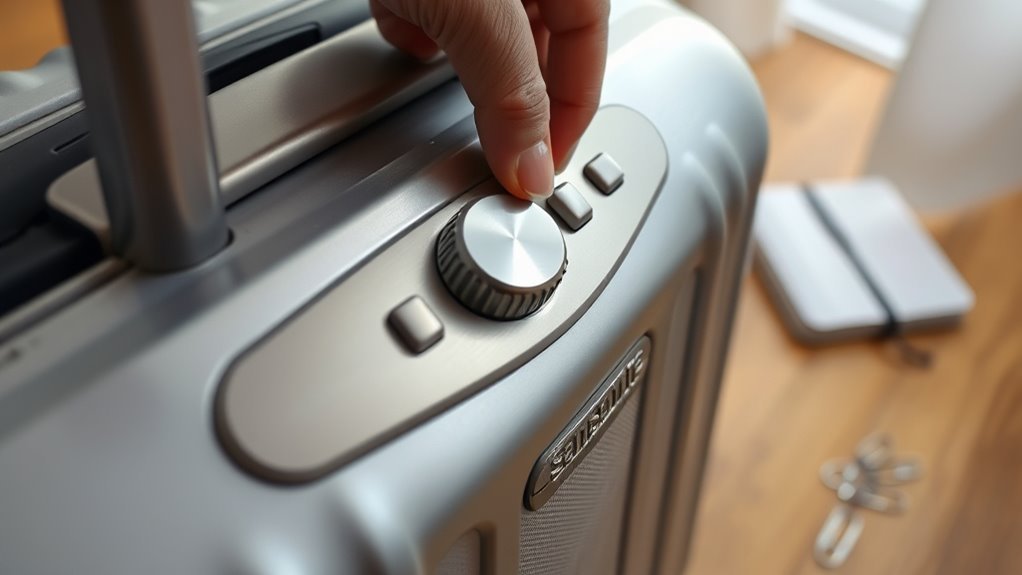
Visual Dialing a Samsonite Combination Lock
Inspect the lock closely for wear, gaps, or a movable shackle that signals the correct wheel.
Then try sequential dialing, turning each wheel slowly while checking for a subtle change in resistance.
Watch for small alignment marks or gaps between digits that line up when the code is set.
Inspect The Lock Mechanism
When you examine the Samsonite combination lock closely, look for subtle indicators like worn numbers, tiny scratches near a specific digit, or a slight misalignment in the dial that can reveal the last-used code positions. You’ll want to inspect the mechanism visibly and gently manipulate it without forcing anything.
- Check each dial for uneven wear or faded paint.
- Shine a light into the gap to spot hairline scratches near a number.
- Rotate dials slowly and note any detents or sticky positions.
- Examine the shackle and casing edges for pressure marks or tool marks.
Collect observations before attempting further methods.
Try Sequential Dialing
If you can’t read wear marks, try sequential dialing: methodically rotate each dial through every number while testing the latch, so you can catch the correct combination by feel or slight movement. Start with the first dial at 0, move it to 1, test the latch, then 2, and so on. Repeat for the second and third dials. Keep tension on the shackle as you turn each dial; slight give or a click often signals the right digit. Be patient and systematic—this brute-force but tactile approach usually works without damaging the lock.
| Step | Action |
|---|---|
| 1 | Tension shackle |
| 2 | Turn dial |
| 3 | Test latch |
Use Visual Alignment Cues
You can combine the tactile method with visual cues to speed things up: look closely at each dial edge for tiny alignment marks, scratches, or a slight gap where the wheel sits against the lock housing. Use a bright light and tilt the lock to catch reflections; subtle notches often line up when the correct number’s set. Stay patient and methodical.
- Inspect each dial edge for marks or differences.
- Rotate slowly while watching for small gaps or seams.
- Use angled light to reveal faint alignment points.
- Note any recurring mark pattern and test that combination.
Tension-and-Roll Method: Step-by-Step
Although it takes some patience, the tension-and-roll method lets you find the combination without forcing the lock.
Hold the shackle or latch gently to apply slight outward tension, not enough to open. With tension maintained, slowly rotate each dial one click at a time, feeling for a subtle change or a softer click that indicates alignment.
When a dial clicks differently, stop and move to the next. Continue cycling through the dials repeatedly, keeping consistent tension and noting positions that felt different.
Once all dials register those subtle cues, release tension and the lock should open.
Systematically Trying Consecutive Combinations Without Damage
Start at 000 and work up through the combinations in order so you don’t skip the correct code.
Move each number one click at a time and test the lock gently to avoid forcing internal parts.
If nothing opens by 999, stop and consider other methods or professional help.
Start At 000 And Proceed
If you don’t know the code, begin at 000 and move through each combination in order, turning the dials carefully and checking the latch after every increment; this systematic approach avoids forcing the lock and keeps you from skipping the correct sequence.
- Set dials to 000, align numbers precisely.
- Rotate to 001, then 002, proceeding one step at a time.
- After each change, pull the release gently to test for opening.
- Keep notes or mark tried ranges to avoid repeats and stay organized.
This method is slow but reliable, preserves the lock, and often finds the code without damage.
Use Gentle, Systematic Steps
When you methodically try each combination, work slowly and use light pressure on the release so you don’t damage the mechanism; keep fingers steady and listen for subtle clicks.
Start at your chosen number, advance one notch at a time, and pause briefly on each setting. Don’t force the zipper or latch—if it resists, move on and return later.
Mark ranges you’ve checked to avoid repeats. Use consistent rhythm and minimal force to protect internal gears.
If you reach the end without success, note patterns that felt different; that info helps a locksmith or manufacturer tech if you need professional help.
Is Your Samsonite Lock TSA‑Approved?
Before trying to force or pick the lock, check whether your Samsonite lock is TSA‑approved, since that determines if Transportation Security Administration agents can open it without damaging your luggage.
If it is, you can expect keyed access by TSA with a universal key; if not, they might cut it. Look for a red diamond logo or “TSA” marking.
If unsure, consult Samsonite documentation or the retailer.
- Find the red diamond or TSA logo on the lock.
- Check your product manual or Samsonite website.
- Inspect receipts or packaging for TSA mention.
- When unsure, assume it’s not TSA‑approved.
How Opening a TSA Lock Differs From a Regular Lock
Although TSA locks look like regular luggage locks, they include a special keyway that lets Transportation Security Administration agents open them with a master key without breaking the lock. So you can expect non-destructive inspection when TSA needs access.
Although they look ordinary, TSA locks have a master-keyed keyway so agents can open bags without damage.
When you use a TSA lock, inspections can be done quickly and without cutting or damaging your zipper or shackle.
Regular locks lack that keyway, so authorities may have to force them open if they need to inspect your bag.
You’ll notice TSA openings are standardized and labeled, and you’ll generally have fewer problems at security checkpoints.
Using TSA Key Access for TSA‑Compliant Samsonite Locks
If your Samsonite luggage has a TSA‑compliant lock, you can rely on TSA agents to open it with a master key for inspection without damaging the lock or your bag. The small, standardized keyway on the lock is what makes that possible.
You can’t access the master key, but you can cooperate to minimize trouble:
- Present luggage and explain you’ve forgotten the code.
- Allow TSA to inspect; they’ll use the keyway if needed.
- Ask if they can relock or leave a notice after inspection.
- Note any damage and file a report immediately if the lock or zipper shows issues.
Identify Your Samsonite Model and Lock Type
Start by checking the exterior labels and tags for model names or stickers so you know what you’re working with.
Inspect the lock mechanism closely—look for a TSA logo, a reset button, or whether it’s a dial or key lock.
If present, note any serial numbers or stamped codes that can help when contacting Samsonite or a locksmith.
Check Exterior Labels
Before you try anything else, inspect the outside of your suitcase for model numbers, serial tags, or printed details that reveal the Samsonite model and lock type. Check seams, wheels, and handle housings where stickers or embossed codes often hide. Note any TSA logo near the lock—its shape hints at a TSA-approved mechanism. Record everything before proceeding.
- Photograph labels and logos for reference.
- Write down model/serial numbers exactly as shown.
- Look for factory stickers inside pockets or beneath lining.
- Compare markings to Samsonite’s online guides or support pages.
These steps speed identification and next steps.
Inspect Lock Mechanism
When you examine the lock closely, you’ll want to determine whether it’s a built-in TSA combination, an external padlock, or a key-operated mechanism so you can choose the right opening method.
Look for model cues: molded locks on hard-shell cases usually hide integrated mechanisms, fabric bags often use stitched padlock loops, and small cylinders or keyholes indicate keyed locks. Note markings like “TSA” or numbered dials.
Check the zipper pulls and frame for where a lock attaches. Identifying type narrows your options—combination reset, shim technique, or locating the small key—so you can proceed appropriately.
Note Serial Numbers
If you can’t remember the code, check the case for a serial or model number—Samsonite usually stamps or prints it on the inside of the suitcase rim, on a sewn tag in fabric luggage, or near the handle.
Jotting that identifier down helps you confirm the exact model and the type of lock fitted so you can look up manuals, replacement keys, or specific reset procedures.
Then use those details to proceed efficiently:
- Note model/serial and lock markings.
- Search Samsonite support or manual PDFs.
- Compare images to identify TSA or proprietary locks.
- Contact Samsonite with the number for guidance or parts.
Find Model and Serial Numbers on Samsonite Luggage
Where can you locate your Samsonite’s model and serial numbers? Check inside the luggage near the zipper track, on a sewn-in fabric tag, or printed on the interior lining.
Inspect the back or bottom exterior for embossed or sticker labels; hard-shell cases often have numbers molded into the shell or on a metal plate.
Check the back or bottom for embossed or sticker labels; hard-shell cases may have numbers molded into the shell or on a metal plate.
Look inside pockets, under flaps, or within the lid compartment.
If your bag has a removable name tag or warranty card, the numbers might be there.
Photograph any found numbers for reference.
If you still can’t find them, note distinguishing features and prepare to contact Samsonite with photos.
Follow Samsonite’s Official Reset Procedures
Once you’ve located the model and serial number on your Samsonite, use those details to follow the manufacturer’s official reset steps on their website or manual.
If the instructions don’t work, try the guided troubleshooting or reset tool Samsonite provides.
When you still can’t open the lock, contact Samsonite support with your model/serial info for further help.
Locate Serial/Model Number
Start by checking the luggage for its serial or model number so you can follow Samsonite’s official reset steps. Look at common locations: near the handle, inside the main compartment, on a sewn tag, or on the warranty card. Write down the code exactly as shown; it’s case- and dash-sensitive. If it’s faded, use a flashlight or magnifier.
- Inspect exterior handles and base plates.
- Open the suitcase and check seams and pockets.
- Locate sewn tags or care labels for model info.
- Refer to any included paperwork for serial details before proceeding.
Follow Manufacturer Steps
If you can find your Samsonite model or serial number, follow the manufacturer’s official reset instructions to open the luggage—these steps are the safest way to avoid damaging the lock or voiding any warranty.
Check Samsonite’s website for model-specific guides or downloadable manuals that show the reset sequence.
Use the recommended tools and align dials exactly as described.
Follow safety notes about pulling the shackle or pressing release buttons.
If instructions require factory code or default digits, enter them carefully.
Record your new code somewhere secure after resetting.
Stick to the official procedure to preserve function and warranty coverage.
Contact Samsonite Support
Because Samsonite keeps detailed records and procedures for each lock type, contacting their support gives you the best chance of a safe, warranty-preserving reset. You’ll need your luggage model, serial number, purchase details, and a photo of the lock.
Reach out via their official website, phone, or authorized retailer to avoid scams. Expect step-by-step guidance or an appointment for service. Follow their instructions precisely to keep warranty coverage.
- Locate model and serial number.
- Gather proof of purchase and photos.
- Contact Samsonite through official channels.
- Follow their reset or service instructions exactly.
Prove Ownership: What Samsonite or Security May Ask For
When you contact Samsonite or airport security to open your luggage, they’ll ask for proof that the bag’s yours—so be ready with a receipt, your boarding pass, a photo of the bag, or the card that came with the lock.
If Samsonite or airport security needs to open your bag, have proof—receipt, boarding pass, photo, or lock card.
You should also have ID showing the same name as reservation or receipt.
A serial number from the bag (often inside a pocket) helps.
If you registered the product online, bring that confirmation or account details.
Be honest about contents if asked.
Providing clear, matching documentation speeds verification and reduces the chance they’ll refuse access or ask you to return later.
Contacting Samsonite Support for Lock Help
After you’ve proved ownership to security or Samsonite reps, contact Samsonite Support for guided help opening or resetting the lock. You’ll want clear instructions and options based on your model and proof.
When you call or message, be ready with serial/model numbers, purchase info, and photos.
- Explain the issue and provide proof of ownership.
- Share the suitcase model and any visible lock markings.
- Follow their step-by-step reset or override guidance precisely.
- Ask about service centers, warranty coverage, or authorized repair steps.
Keep records of your interaction and any reference numbers for follow-up.
When to Call a Professional Locksmith
If you’ve tried the manufacturer’s troubleshooting steps, confirmed ownership, and still can’t open the lock without risking damage, call a professional locksmith. You’ll want help when the lock’s mechanism is jammed, the zipper pulls are fused, or you need quick access before travel. A locksmith will use non-destructive tools and provide proof-of-ownership procedures.
| Situation | Why Call |
|---|---|
| Jammed dial | Prevents forcing |
| Broken shackle | Needs repair |
| Electronic failure | Requires diagnostics |
| Urgent travel | Fast service |
| You’re unsure | Avoid voiding warranty |
Choosing a Locksmith Versus More DIY Attempts
Weigh the cost versus the time you’ll spend trying to open the lock yourself, since a locksmith can be faster but will charge for their expertise.
Consider whether you have the right skills and tools to avoid damaging the zipper, lock, or frame.
Remember that DIY attempts can void warranties or reduce security, so factor that risk into your decision.
Cost Versus Time
When you’re staring at a locked Samsonite and your trip’s clock is ticking, decide whether another round of DIY attempts is worth the few dollars saved or if hiring a locksmith will buy you guaranteed speed and peace of mind.
You’ll weigh cost against minutes lost, potential damage, and stress. Short trips favor swift professional help; if you’ve time, DIY can be cheaper. Consider probable outcomes and your tolerance for risk.
- Locksmith: higher fee, fast, low damage risk.
- DIY retry: low cost, slower, possible harm.
- Time value: missed travel costs.
- Confidence: peace of mind.
Skills And Tools Needed
Cost versus time helps you decide whether to call a pro or try more DIY, but next you should look at the specific skills and tools each option requires.
If you hire a locksmith, you just need scheduling and trust; they bring pin vises, tension tools, pick sets, and experience opening combination locks without damage.
If you DIY, you’ll need fine screwdrivers, needle-nose pliers, a small flashlight, and patience to manipulate dials or remove the lock housing.
DIY also demands steady hands, basic mechanical sense, and willingness to stop if you risk breaking the zipper or lock mechanism.
Security And Warranty Impact
If you call a locksmith, you’ll get a professional who can open most Samsonite locks with minimal damage and preserve your luggage’s security features.
However, doing it yourself can risk triggering voided warranties or leaving scratch marks and weakened components that make future theft easier.
You should weigh repair confidence against cost and warranty status.
Consider these points before choosing:
- Locksmith: preserves integrity, may document repair for warranty claims.
- DIY: cheaper, but can void warranty and impair lock function.
- Manufacturer repair: safest for warranty, often pricier and slower.
- Evidence: keep receipts and photos for disputes.
Safely Remove a Zipper or Pull to Access Contents
Although you’ll want to try non-destructive methods first, sometimes you’ll need to remove a zipper pull or the slider to get into the bag safely. Work on a flat surface, empty pockets, and use pliers or small screwdrivers. Grip the pull, twist gently, and slide the slider off teeth; don’t yank. If teeth are intact, you can reattach or use a temporary clip. Keep parts in a small bag. Test movement before closing. If fabric or track’s damaged, stop and seek professional help to avoid further harm.
| Tool | Purpose |
|---|---|
| Pliers | Remove pull |
| Screwdriver | Pry slider |
Re‑Seal Fabric Luggage After Emergency Opening
When you’ve opened fabric luggage in an emergency, take a moment to assess tears, zipper damage, and loose seams before attempting any repairs so you won’t make things worse.
Then follow these focused steps to re-seal the bag neatly and securely:
Then follow these focused steps to re-seal the bag neatly and securely, restoring function and appearance quickly.
- Clean edges and remove frayed threads so adhesives or stitches bond well.
- Apply fabric glue or lightweight seam tape to small tears; clamp until set.
- For larger rips, use a needle and strong polyester thread with tight, even stitches.
- Test the zipper alignment and reinforce nearby seams; trim excess thread and let adhesives cure fully before use.
Using Household Tools on a Non‑TSA Samsonite Lock (Safe Steps)
Before you try household tools on a non‑TSA Samsonite lock, stop and assess the lock, the luggage material, and the tools you have so you don’t cause unnecessary damage. Check whether the lock is plastic or metal, and note seams or weak points on the case.
Use small, precise tools: flathead screwdriver, needle‑nose pliers, or a rigid butter knife. Work gently, prying near the shackle or latch rather than forcing the body. Protect the shell with cloth to avoid scratches.
If the mechanism resists, pause—forcing it can break the lock or case; seek professional help instead.
Legal Shim and Pick Techniques for Samsonite Luggage
If you decide to use legal shim and pick techniques on your Samsonite, make sure you stick to methods that won’t damage the lock or case and that you’re only working on luggage you own or have explicit permission to open.
You can try careful, noninvasive approaches that minimize force. Consider these steps:
- Inspect the lock type and alignment for visible gaps.
- Use a thin shim to depress the latch edge gently.
- Try a tensioned pick or a simple paperclip for single-dial mechanisms.
- Rotate dials slowly while applying slight tension until the lock yields.
Stop if you feel resistance or risk of damage.
Avoid DIY Methods That Damage Samsonite Luggage
Don’t try to force the lock or pry the case open, since that can break the zipper, welds, or shell and void any warranty.
Don’t use high heat like a torch or hairdryer to soften parts, because heat can warp plastics and ruin the locking mechanism.
If you’re unsure, contact Samsonite or a locksmith to avoid costly damage.
Avoid Forced Entry
When you’ve forgotten your Samsonite combination, resist the urge to pry, drill, or cut the lock—you’ll likely cause permanent damage to the zipper, shell, or internal frame. Forced entry can void warranties and create costly repairs.
Instead, take controlled, non-destructive steps: contact Samsonite, use proof of purchase, or seek professional locksmith help.
- Call Samsonite support for reset options and verified repair centers.
- Show ownership documents before service to avoid delays.
- Visit a certified luggage repair shop rather than attempting cuts or heat.
- Ask a locksmith about non-destructive entry methods to preserve integrity.
Prevent Heat Damage
Alongside avoiding forced entry, you should steer clear of heat-based DIY tricks that seem quick but can warp shells, melt linings, or ruin zippers.
Don’t use hairdryers, heat guns, boiling water, or ovens to soften locks or seams. Heat distorts polycarbonate and ABS, weakens adhesives, and can fuse plastic components so they won’t move.
If a lock’s stiff, try gentle lubricant like silicone spray applied sparingly, or use graphite for keyed locks.
When in doubt, contact Samsonite support or a professional locksmith.
Choosing safe options preserves your luggage and avoids costly, irreversible damage.
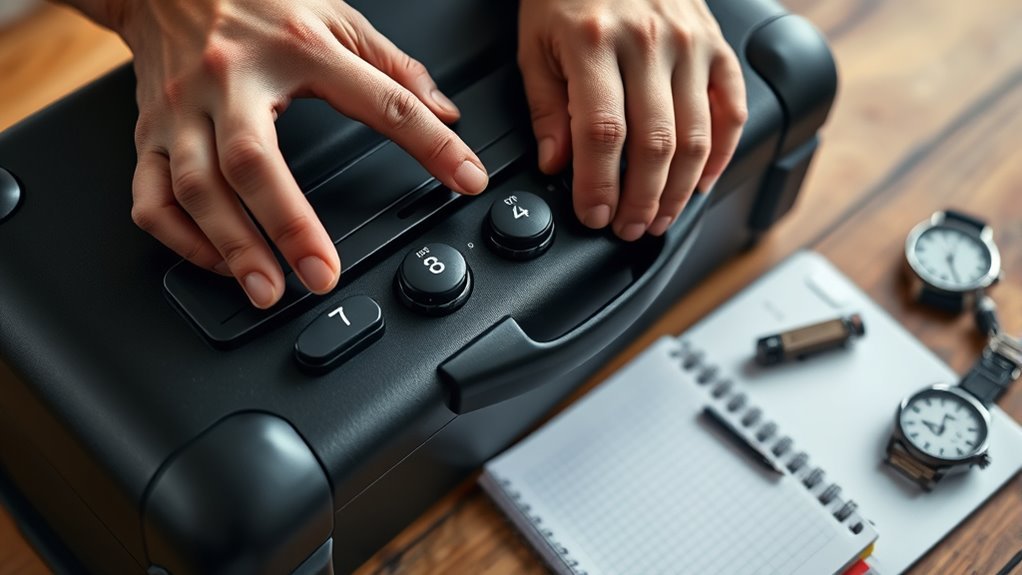
Disable an Electronic Samsonite Lock When Batteries Die
If your Samsonite’s electronic lock goes dead and you can’t enter the code, you can still disable it by accessing the battery compartment or using the mechanical override—both methods let you open the luggage without damaging the case.
First, find the small battery panel near the lock; removing it often exposes a manual release or allows a temporary power source. If that’s sealed, use the built-in key override (usually concealed) to manually unlock.
Follow these steps:
- Locate battery panel or key slot.
- Remove panel with a small screwdriver.
- Insert override key or temporary battery.
- Open lock and access contents.
Replace Batteries and Reset Electronic Samsonite Locks
If your Samsonite lock is acting up, start by locating the battery compartment—it’s usually on the lock housing or under a small panel.
Make sure you use the correct replacement batteries listed in your manual or on the lock itself to avoid damage.
After swapping batteries, follow the manufacturer’s steps to perform an electronic reset so you can reprogram or regain access.
Locate The Battery Compartment
Before you try any reset, find the lock’s battery compartment so you can check or replace the cells—electronic Samsonite locks usually hide it behind a small panel on the lock body or inside the zipper head.
Inspect the lock for a tiny screw, snap cover, or sliding door. You’ll want basic tools like a small screwdriver or fingernail to open it safely.
If you see corrosion or loose contacts, note that before proceeding.
Follow these steps:
- Turn the lock to reveal the back or underside.
- Look for seam lines or a recessed tab.
- Remove the cover gently.
- Inspect contacts and battery orientation.
Use Correct Replacement Batteries
Once you’ve opened the compartment, use the exact replacement batteries the lock specifies—typically CR2032 or AA cells—so the electronics function correctly and you don’t risk damage. Remove old cells, check polarity, and insert fresh ones firmly. Tighten the cover without overtightening. If contacts look corroded, clean them gently with isopropyl alcohol and a cotton swab before installing new batteries. Test the lock operation once powered. Keep spare batteries in your travel kit and note the battery type for future replacements.
| Battery Type | Voltage | Notes |
|---|---|---|
| CR2032 | 3V | Common button cell |
| AA | 1.5V | Standard cylindrical |
Perform Electronic Lock Reset
When your Samsonite’s electronic lock isn’t responding, start by replacing the batteries and performing a reset to restore power and clear temporary faults; this often brings the keypad and internal mechanisms back to life without further tools. You’ll need fresh batteries, a small screwdriver, and patience.
Follow these steps:
- Remove the battery cover and swap in new batteries, observing polarity.
- Press and hold the reset button (or power/reset pinhole) for 10–15 seconds.
- Wait 30 seconds, then enter your known code or try factory default (000 or 123).
- If it still fails, repeat once or contact Samsonite support for service.
Recover a Lost Combination Using Receipts or Registration
If you registered your Samsonite or kept the purchase receipt, you’ve already got a clear path to recovering the combination. Check the receipt for model, serial number, and purchase date—retailers sometimes print original codes or reference numbers that help support verify ownership.
Log into your Samsonite account or recheck registration emails; manufacturers may store default or user-set codes tied to registration.
When contacting Samsonite support, provide receipt details, serial/model, and photo ID to expedite verification. Keep communication concise, ask if they can reset the lock remotely or provide recovery steps, and follow their instructions to regain access securely.
Use Forums and Guides Safely: What to Trust
Although online forums and how-to guides can offer quick tips, treat them as starting points rather than definitive solutions; verify advice with reputable sources before you act. You’ll find varied methods; filter them carefully. Look for posts with photos, timestamps, and follow-up comments confirming success. Prefer manufacturer or certified repair guidance when available.
- Check official Samsonite support first.
- Favor guides with clear evidence and multiple confirmations.
- Avoid techniques that risk damaging locks or voiding warranties.
- When in doubt, contact a pro locksmith or Samsonite customer service for safe resolution.
Record and Store Your New Samsonite Combination Securely
Because you’ll want quick access and long-term security, record and store your new Samsonite combination immediately and deliberately: write it down on durable paper or a waterproof card, save it in an encrypted note on your phone or password manager, and keep a physical copy in a separate, secure place (like a home safe or locked drawer) rather than inside the luggage.
Also photograph the written copy and back up that image to an encrypted cloud folder.
Label records discreetly so they’re not obvious if discovered. Rotate storage locations occasionally, review access permissions, and delete outdated copies to minimize unauthorized exposure.
Choose a Memorable but Secure Lock Combination
When setting a new combination, pick a number sequence you’ll recall without writing it down but that’s not obvious to others—use a pattern tied to a personal routine, mnemonic, or non-public date, and avoid simple repeats or sequential runs like 000 or 123. You want something memorable yet hard to guess.
- Use digits from a non-public anniversary or event only you remember.
- Combine two unrelated meaningful numbers (house number + month).
- Convert a short phrase to numbers using phone keypad mnemonics.
- Rotate a favorite number by a fixed offset each digit.
Keep it simple to recall but not predictable.
Test Your Reset Before Traveling Again
After you reset the code, make sure you verify the new combination actually opens the suitcase.
Test the lock several times to confirm it engages and releases reliably.
Try opening it from different angles to catch any stiffness or misalignment before you travel.
Verify New Code Works
Now that you’ve set a new code, test it immediately to avoid surprises at the airport. Try the combination, open the zipper or latch, then close and scramble the dials. Confirm it opens smoothly without forcing. If it sticks, repeat reset steps or clean the mechanism.
- Enter your new code slowly and deliberately.
- Open, close, then scramble to assure the lock resets.
- Check both zipper pulls or latch alignment when locked.
- Note the code somewhere secure and accessible.
Verifying now saves time and stress later—don’t skip this quick check before travel.
Test Lock Multiple Times
Because a single successful opening doesn’t guarantee the lock will hold up, test your reset multiple times before you travel.
After setting a new code, close and relock the zipper or latch, then reopen it using the code. Repeat this cycle at least five times, checking that the mechanism aligns smoothly and that the digits don’t slip under pressure.
Shake the bag gently and press on the case to simulate movement, then lock and release again. If any hesitation or misalignment appears, reset the code or inspect for debris.
Only travel once the lock operates consistently and confidently.
Try Different Opening Angles
You’ve already checked the reset by opening and closing the lock repeatedly; next, try different opening angles to make certain the mechanism works under real-world stress. You’ll simulate typical handling and spot tight spots or misalignment before travel. Follow these steps:
- Open the case slightly and wiggle the zipper or latch to check smooth engagement.
- Open wider, testing full extension to ensure the lock disengages at larger angles.
- Tilt the case up and down while opening to reveal angle-sensitive sticking.
- Apply gentle pressure on the shell near the lock while opening to mimic packed contents.
If you notice binding, adjust or service the lock before your trip.
Inspect Your Samsonite Lock After Opening for Damage
After you get the lock open, take a close look for any bent teeth, cracked plastic, or loose parts that could cause it to fail later. Check the shackle, dials, and casing for hairline fractures or deformation.
Wiggle moving parts to feel for grit, looseness, or sticking that might indicate internal damage. Smell for burning or melted plastic from forced attempts.
Inspect mounting points where the lock attaches to the luggage—loose rivets or stretched slots can let the lock shift under stress. Photograph any issues for records.
Keep the mechanism clean and dry to prevent corrosion while you decide next steps.
Repair or Replace a Broken Samsonite Lock
If the lock shows damage or won’t operate reliably, decide whether to repair or replace it based on cost, availability, and your comfort with small repairs. You can often fix bent parts or sticky mechanisms with basic tools, but weigh effort versus replacing the unit.
Follow these steps to proceed quickly:
Follow these steps to proceed quickly: assess, fix minor issues, secure temporarily, and replace if needed.
- Assess visible damage and test all functions gently.
- Tighten loose screws, realign components, and lubricate moving parts sparingly.
- Try a temporary workaround (zip tie or cable) to secure contents while you act.
- If repair seems complex or unreliable, substitute the lock to ensure security and peace of mind.
Select Compatible Replacement Locks and Parts
When repair isn’t practical, pick a replacement lock or parts that match your Samsonite’s model, mounting style, and security features so installation is straightforward and the luggage remains secure.
Check your suitcase’s product code or model sticker, note whether it uses built-in TSA-approved locks, external hasps, or zipper sliders.
Measure mounting hole spacing and thickness for compatibility.
Source OEM Samsonite parts first; if unavailable, choose high-quality aftermarket locks labeled as compatible with your model and TSA-approved if needed.
Keep original screws and brackets when possible, or buy matching hardware.
Test the new lock before travel to confirm proper fit and function.
Prevent Future Lockouts: Best Practices
Because lockouts are usually avoidable with a few simple habits, you can dramatically reduce the chance of getting stranded at the airport by adopting consistent routines. Record and store your code securely—use a password manager or a dedicated travel note. Reset combinations to a memorable but non-obvious number after purchase. Test locks at home before you travel. Keep a small backup key or TSA-approved padlock if compatible.
Adopt simple habits—record combinations securely, test locks before travel, and carry a backup to avoid airport lockouts.
- Note codes in one secure place.
- Verify lock operation pre-trip.
- Use travel-specific backups.
- Change defaults to personal combos.
Stick to these steps and you’ll avoid most lockout situations.
Handling Lost Codes While Traveling Internationally
Those preventative habits will help most of the time, but international travel adds extra complications you’ll want to plan for. Before departure, photograph your lock and code, store details in cloud notes, and register luggage if available.
If you lose the code abroad, stay calm: check photos, search baggage receipts for model info, and visit airport lost-and-found or an airline desk — they often assist or recommend local locksmiths. Contact Samsonite’s regional support for instructions or authorized repair centers.
Keep receipts for emergency services. When possible, avoid forceful entry to prevent customs or damage issues that can complicate claims.
Frequently Asked Questions
Can Airlines Open My Samsonite Luggage if I Forget the Code?
Yes, airlines can open your Samsonite if security needs access; they’d usually use tools or send it to TSA, and they’ll try to document or notify you, but you should keep proof of ownership and contact your airline.
Will Unlocking Void My Samsonite Warranty?
No, opening your Samsonite using recommended methods (owner code reset, TSA key, or authorized service) generally won’t void the warranty, but forcing or damaging the lock could, so you should avoid destructive attempts and use official support.
How Long Does Samsonite Customer Support Usually Take to Respond?
Samsonite customer support usually responds within 24–72 hours, though peak seasons can cause longer delays. You can expect faster replies via phone; email or web form responses might take a couple of days, occasionally up to a week.
Are There Privacy Risks When Sharing Lock Photos Online for Help?
Yes — you risk exposing serial numbers, unique scratches, or code patterns that could let thieves replicate or target your luggage. Don’t post identifiable details; blur numbers, remove tags, and share only necessary close-up areas for help.
Can I Use a Universal TSA Key on Non‑Tsa Samsonite Locks?
No, you can’t reliably use a universal TSA key on non‑TSA Samsonite locks; they’re designed differently. Trying one risks damage, voids warranty, and may not open the lock — contact Samsonite or a locksmith instead.
Conclusion
If you’ve forgotten your Samsonite code, don’t panic—you’ve got options. Try the factory/default code, look for a hidden reset pinhole, or carefully scan dials while applying light tension to feel the clicks. If the lock’s broken, replace it with a compatible TSA-approved lock or repair the mechanism. Note down new codes, store them securely, and photograph them when traveling so you avoid future lockouts and keep your luggage moving smoothly.