How to Maximize Carry On Luggage Space
Start by auditing what you really need and prioritize versatile clothing you can mix and match. Pick a carry‑on that fits the strictest airline limits and favors soft sides for squeeze room or a hard shell for fragile items. Roll or bundle garments, use packing cubes or compression bags, tuck socks into shoes, and keep essentials accessible. Balance weight, choose a lightweight backup personal item, and pack strategically so you can expand unpacking tips and advanced tricks.
How to Pack a Carry‑On to the Max: Overview

When you want to get the most out of your carry-on, think strategically before you throw things in: assess what you really need, choose versatile items, and plan how you’ll arrange them to save space and reduce wrinkles.
You’ll prioritize essentials, eliminate duplicates, and pick clothing that mixes and matches. Roll or bundle garments to fit contours, tuck socks and small items into shoes, and use compression or packing cubes to compress layers without crushing delicate fabrics.
Keep weight balanced and frequently used items accessible. With a clear plan you’ll avoid overpacking, move faster through travel, and still have everything you need.
Check Airline Size Limits and Pick Your Carry‑On
Before you pack a single item, check the carry-on size and weight limits for every airline you’ll fly—different carriers, fare types, and even international routes can have very different rules. Measure your bag (including wheels and handles) and weigh it loaded if possible. Choose a bag that fits the smallest limit you’ll face.
Before packing, check every airline’s carry-on size and weight limits—measure your bag and choose one that fits the smallest rule.
Remember weight limits for checked vs. carry-on can change packing decisions.
- Confirm dimensions and max weight on airline sites
- Note overhead bin vs. personal item allowances
- Pick a bag that compresses slightly without bulging
- Keep a lightweight, foldable backup personal item
Decide: Soft vs Hard Carry‑Ons – Pros, Cons, When to Choose
You’ll weigh weight and flexibility—soft bags usually compress for extra inches while hard shells keep you honest about packing.
Think about durability and protection: hard cases shield fragile items, soft ones resist scuffs and squeeze into tight overheads.
Use packing-efficiency tricks like rolling clothes in soft carry‑ons or using custom cubes in a hard case to get the most space.
Weight And Flexibility
Although both soft and hard carry‑ons can meet size limits, your choice really comes down to weight, flexibility, and what you pack. You’ll prefer a soft bag when you need extra give: it compresses into tight overhead bins, squeezes into crowded spaces, and usually weighs less.
Choose a hard shell if you’re packing oddly shaped items that won’t compress, but remember it limits how much you can squeeze in. Consider airline weight rules: a lighter case lets you carry more gear.
Pack strategically to exploit flexibility without exceeding weight limits.
- Soft bags compress for extra volume
- Hard shells hold shape, limit stuffing
- Lighter cases free up weight allowance
- Match bag to packing style
Durability And Protection
How durable is your carry‑on, and what does that mean for protecting your gear? Choose hard shells when impact resistance matters: they shield electronics, toiletries, and fragile items from drops and rough handling. They’re rigid, water‑resistant, and easier to clean, but they won’t compress into tight overhead bins.
Pick soft-sided bags when you need flexibility and exterior pockets; they hug odd shapes, can squeeze into cramped spaces, and often weigh less. They’ll scuff more and offer less blunt impact protection.
Match choice to your trip: fragile tech and checked‑like handling favor hard; light, irregular packing and quick access favor soft.
Packing Efficiency Tricks
Now that you’ve weighed durability and protection, think about how the shell type affects packing efficiency. You’ll choose soft for flexibility or hard for structured protection.
Soft bags compress into irregular spaces, let you overstuff, and often have exterior pockets for quick access.
Hard shells keep items organized, protect fragile gear, and stack predictably in overhead bins.
Pick soft when you need squeeze-and-expand capacity; pick hard when you carry electronics or fragile items and want rigidity.
Consider a hybrid: soft-sided with reinforced panels.
Match shell choice to items, trip length, and how often you’ll jam and reorganize.
- Soft: flexible, expandable
- Hard: structured, protective
- Hybrid: balance of both
Choose by contents and trip type
Choose a Bag With Smart Internal Organization
If you want to squeeze more into your carry-on, pick a bag with smart internal organization that helps you pack efficiently and find things fast. Choose compartments sized for shoes, electronics, toiletries, and documents so items don’t shift and you won’t waste space rummaging.
Use removable pouches and mesh pockets for visibility and compression; they let you layer clothing and stash cords neatly. A dedicated laptop sleeve and zippered valuables pocket keep essentials accessible without unpacking.
Look for split compartments that force flat packing and external quick-access pockets for boarding passes or snacks. Smart organization saves space and time.
Pick a Lightweight, Durable Carry‑On to Save Capacity
All that internal organization helps you pack smarter, but the bag itself plays a big role in how much you can carry. Choose a lightweight shell to lower empty weight, and pick durable materials that resist dents so you can compress contents more confidently.
A lightweight, dent‑resistant shell lets you compress smarter and carry more without added bulk
Opt for a slim profile that fits overhead bins without wasted space. Test zippers, handles, and wheels—reliable hardware avoids emergency rerouting of items into your personal bag.
- Hard vs. soft shell: balance protection and compressibility
- Weight: aim under airline carry‑on allowances
- Durability: reinforced corners, quality zippers
- Shape: rectangular maximizes usable volume
Prioritize What to Pack: Make a Realistic Essentials List
Because overhead space is limited, decide what you actually need and ditch the rest. List essentials: travel documents, medications, a versatile jacket, chargers, toiletries in travel sizes, and one change of clothes.
Match items to trip length and activities; don’t pack “just in case” extras. Prioritize multiuse gear—a scarf that’s a blanket, shoes that work for day and night.
Put frequently used items near the top for quick access. Review the list the night before and remove anything unused recently.
Stick to this pared-down essentials list to avoid overpacking and keep carry-on weight and clutter under control.
Plan Outfits, Not Individual Garments
Think in outfits, not single pieces: plan complete looks for each day and occasion so every item you pack has a purpose. You’ll reduce excess by assigning garments to specific outfits, avoiding one-off pieces that just take space. Lay outfits out before packing, include shoes and accessories, and note when you can rewear layers. This method trims decision-making and helps you spot duplicates.
Plan outfits, not lone pieces: lay complete looks with shoes and accessories to save space and decisions.
- Daytime sightseeing: top, bottoms, light jacket, sneakers
- Evening dinner: dress/shirt, slacks, compact shoe, simple jewelry
- Travel day: comfortable base layer, scarf, slip-on shoes, compression socks
- Active outing: shorts, moisture-wicking top, hat, sport sandals
Favor Versatile Clothing That Mixes and Matches
Once you’ve mapped outfits, pick pieces that play well together so you can mix-and-match instead of packing single-use items. Choose neutral bases—black, navy, beige—that pair with two or three accent colors to create multiple looks.
Opt for layered pieces: a lightweight cardigan, a versatile blazer, and a simple dress that doubles as a top with trousers.
Limit shoes to two complementary pairs: one casual, one dressier. Roll or fold strategically to keep shapes.
Stick to fabrics that *shift* day-to-night and activities. Review choices before you zip up: remove any item that only serves one outfit.
Select Wrinkle‑Resistant Fabrics for Compact Packing
Pick lightweight, wrinkle‑resistant fabrics like polyester blends or travel-specific knits so your clothes stay smooth without taking up extra room.
Roll garments tightly and compress them in packing cubes or a compression sack to shrink bulk and minimize creasing. That combo keeps your outfits ready to wear and maximizes every inch of carry‑on space.
Choose Lightweight Wrinkle-Resistant Fabrics
Because every cubic inch counts, choose lightweight, wrinkle‑resistant fabrics so you can pack more without sacrificing a polished look. You’ll save volume and time—no ironing at destination—and keep outfits crisp.
Favor blends and finishes that resist creasing while staying breathable and quick‑drying. Pick versatile pieces that layer, minimizing duplicates.
Treat delicate items gently and fold along seams to preserve shape.
- Polyester blends: light, durable, wrinkle‑resistant
- Wool blends: natural drape, fewer creases
- Microfiber: packs small, dries fast
- Knits with stretch: comfortable, bounce back after folding
Roll And Compress Strategically
When you roll and compress strategically, you squeeze more into carry‑on space while keeping wrinkle‑resistant fabrics looking sharp. Roll garments tightly from hems to collars to minimize creases and fit more layers. Use compression cubes to flatten bulk and separate outfits so you can pull what you need without disrupting the rest.
Pack heavier items at the bottom and soft pieces around them to maintain shape. Add a thin tissue or plastic layer between delicate fabrics to prevent abrasion.
Unroll promptly on arrival and hang items in the bathroom while you shower to relax any minor wrinkles.
Roll Clothes to Reduce Volume and Prevent Wrinkles
If you want to save space and keep garments smoother, roll your clothes instead of folding them. You’ll maximize volume, fit more items, and limit creases by rolling tightly and evenly.
Use lighter pieces as padding, tuck straps and collars inside rolls, and place rolls vertically for easy access. Keep delicate fabrics loose and secure with tissue or a thin cotton layer.
- Roll T-shirts and casual shirts tightly
- Loosen-roll sweaters to avoid stretching
- Tuck socks into shoes or into roll centers
- Place heavier rolls at the bag base for balance
Use Bundle Wrapping for Dressier Outfits
When you need dressier outfits, start by choosing a sturdy central core like a packing cube or folded sweater to anchor the bundle.
Wrap layers evenly around that core to minimize creases and keep shapes smooth.
Tuck delicate fabrics inside and between layers or use tissue paper to protect them from pressure.
Choose Central Core
Want your dressier clothes to stay crisp without eating half your carry-on? Center your bundle-wrapped core so suits and dresses sit protected amid softer items. You’ll make efficient use of space and prevent shifting that causes wrinkles.
Pack heavier, less wrinkle-prone pieces around the outside to stabilize the core. Tuck delicate layers next to the center to cushion them. Use small items to fill gaps and keep the bundle snug.
- Place the wrapped core centrally
- Surround with rolled casual wear
- Fill voids with socks/underwear
- Stabilize edges with shoes
This keeps form and maximizes usable space.
Wrap Layers Evenly
Because layers compress more neatly when you wrap them around a central core, bundle wrapping keeps dressier outfits smooth and compact. You’ll lay a foundation piece flat, place the core—like a folded sweater—in the center, then layer shirts, skirts, or trousers around it, smoothing wrinkles as you go.
Keep layers even in weight and thickness so the bundle stays balanced and won’t tip in your bag. Tuck sleeves and hems inward to maintain shape, then fold the whole bundle once or twice to fit your carry-on.
You’ll save space and arrive ready to dress without frantic ironing.
Protect Delicate Fabrics
If you’re packing dressier pieces, bundle wrapping lets you protect delicate fabrics while keeping them neat. You’ll center a core item—like a folded blazer—then layer shirts, skirts, and trousers around it, smoothing wrinkles as you go. Use tissue paper between pieces to prevent friction and reduce creasing.
Roll soft items like silk scarves separately and tuck them into gaps. Secure the bundle with a fabric strap or a low-tack elastic to maintain shape without marking fabric.
Place the bundle atop other items in your carry-on to avoid compression and ensure quick access on arrival.
- Center a core blazer
- Layer with tissue paper
- Roll silk accessories
- Secure with soft strap
Pack Compression Cubes to Compress and Separate Items
When you use compression cubes, you’ll shrink bulky clothing and keep outfits organized so you can fit more into your carry-on. Choose cubes in varying sizes so you can separate tops, bottoms, underwear, and accessories.
Roll or fold garments tightly before inserting to maximize compression and reduce wrinkles. Seal each cube firmly and place heavier, denser cubes at the bottom of your bag to create a stable base.
Use a clear or labeled cube for quick outfit retrieval. Leave a small cube for laundry or shoes.
Compression cubes streamline packing, protect fabrics, and make security checks faster and neater.
Use Vacuum Bags Strategically for Longer Trips
Although they take a little more prep, vacuum bags can dramatically increase carry-on space for longer trips by compressing bulky items like sweaters and jackets into thin, manageable packs. You’ll want to choose durable, resealable bags and pack only what you’ll actually wear.
Vacuum bags take a bit more prep but can dramatically free up carry-on space for bulkier layers.
Roll garments before sealing to reduce wrinkles; avoid overfilling to guarantee reliable suction. Use clear bags so you can spot what’s inside without unpacking. When arriving, let items air out before wearing to refresh fabrics.
- Pick high-quality, reusable vacuum bags
- Pre-plan outfits to limit items
- Keep delicate fabrics separate
- Reserve one bag for dirty laundry
Fill Shoes to Save Space and Protect Structure
Stuff your shoes with socks to save space and keep the interiors clean.
Tuck small toiletries like travel-size toothpaste or a razor inside to make the most of every inch.
This also helps protect each shoe’s shape so they don’t get crushed in your bag.
Use Socks For Padding
If you want to save space and keep your shoes in shape, tuck rolled socks into the toe and heel before packing. This fills empty volume, prevents crushing, and keeps pairs together.
Use socks as soft buffers between shoes and delicate items, or to cushion straps and buckles. Choose thinner socks to maximize capacity or thicker ones for extra protection; either way, you’ll reduce movement and scuffs.
Stash an extra pair inside each shoe so you’ll always have backups.
- Roll socks tightly to maximize fill
- Use mismatched socks for internal padding
- Reserve thicker socks for fragile shoes
- Pack shoes near corners to stabilize weight
Pack Small Toiletries
Keep using shoe interiors for soft items beyond socks: small toiletries fit perfectly into the toe or heel to save space and help shoes keep their shape.
Pack travel-size bottles, solid bars, and wrapped cotton pads in resealable bags to prevent leaks.
Tuck toothbrushes, toothpaste, and compact deodorant into one shoe and hair ties or a mini brush into the other.
Place fragile items toward the sole where padding protects them.
Seal liquids in plastic and place shoes mouth-up inside the bagged compartment to catch spills.
This method uses dead space efficiently and keeps your main bag organized without extra bulk.
Protect Shoe Shape
1 simple trick to keep your shoes looking sharp and save carry-on space is to fill them before packing. You’ll protect structure, prevent crushing, and use interior volume efficiently. Stuff shoes with soft items you’d otherwise pack loose so everything fits tighter and stays organized.
- Roll socks into each shoe to maintain shape and absorb moisture
- Tuck small toiletries or chargers where they won’t leak
- Use packing cubes around filled shoes to prevent movement
- Place shoes sole-to-sole to minimize wasted space and balance weight
Do this and you’ll keep shoes pristine while maximizing carry-on capacity.
Wear Your Bulkiest Items on the Plane
When you wear your bulkiest pieces—think puffy jackets, heavy boots, or thick sweaters—you free up significant carry-on space for essentials and souvenirs.
Layer strategically: put on a light base, add the bulky item, and tuck thin pieces beneath or around it to stay warm without wasting room.
Use pockets for small, flat items like passports, chargers, and a slim paperback.
Choose versatile bulky items that match multiple outfits so you don’t pack duplicates.
If the jacket gets too warm, drape it over your arm or stow it in the overhead bin to reclaim a little space.
Limit Shoes: Why Two Pairs Usually Suffice
After you’ve worn your bulkiest pieces to save room, rethink footwear: two pairs usually cover every need without wasting carry-on space. Choose versatile options—a comfortable pair for travel and a dressier or activity-specific pair.
Wear your bulkiest items and pack two versatile shoe pairs—a comfy travel pair and a dressier/activity option.
Pack shoes inside shower caps or shoe bags to protect clothes and compress them against the bag’s structure. Stuff socks or small items inside shoes to save space and maintain shape.
Wear the heavier pair on the plane to reduce weight in your bag. Prioritize neutral colors and multi-use styles to avoid bringing extras you won’t wear.
- Comfortable travel shoes
- Dress/performance pair
- Protective shoe bags
- Stuffing for shape
Minimize Toiletries With Travel‑Sized Essentials
Because liquids and bulky bottles eat space fast, stick to travel-sized toiletries and you’ll free up room for essentials. Choose multi-use items—tinted moisturizer with SPF, shampoo-conditioner combos, and balm that doubles as lip and cuticle care—to cut duplicates.
Transfer liquids into clear, reusable containers that fit regulations and weigh less than retail packaging. Pack solid alternatives like bar soap, solid shampoo, and deodorant to avoid spills and save volume.
Keep a compact zip pouch for organization and stow it where you can access security items quickly. Replace heavy bottles as you use them instead of returning them to your bag.
Build a Solid Carry‑On Toiletry Kit Under 100 mL
If you want a compact, TSA‑friendly toiletry kit that still covers your basics, focus on multi‑use products and smart packaging to stay under 100 mL per item. Pack travel‑size cleanser, moisturizer, and sunscreen in durable leakproof bottles.
Choose concentrates or gels that perform double duty—shampoo that’s also a body wash, or moisturizer with SPF. Use clear quart‑size bags for easy screening and clip small carabiners to hang the bag in bathrooms.
Opt for dual‑purpose concentrates—shampoo/body wash and SPF moisturizers—and store them in clear, hangable bags for easy screening.
Replace bulky items with lightweight tools and decant favorites into labeled containers to avoid waste.
- Multi‑use liquids
- Leakproof 100 mL bottles
- Clear screening bag
- Labeled decants
Use Solid Toiletries to Avoid Liquid Limits
Swap liquids for solids and you’ll skip the 100 mL rules while saving space and weight.
Pick compact bars, powders, and balm formats that do the same job as gels and sprays.
Pack them in small tins or compostable wraps and cushion fragile pieces to prevent crumbling.
Solid Toiletry Benefits
When you choose solid toiletries, you’ll bypass TSA liquid limits and free up valuable space in your carry-on while still bringing everything you need. You’ll enjoy reduced spill risk, lighter weight, and multiuse bars that replace bottles.
Solids are durable, don’t need compliant bags, and often last longer per ounce. Pack them in a small tin or cloth pouch to keep things tidy, and stash empties in checked bags if needed.
You’ll streamline security checks and save space for souvenirs or essentials. Consider swapping one item at a time to test what works best for your routine.
- No spills
- Lighter load
- Multiuse options
- Easier security
Choosing Compact Formats
Want to ditch the liquid limits and reclaim space in your carry-on? Switch to solid toiletries: shampoo bars, balm cleansers, solid sunscreen, and toothpaste tabs cut bulky bottles and the 100ml rule.
You’ll free up zipper pouches and shave weight while keeping essentials accessible. Pick compact, multiuse solids—conditioning bar that doubles as soap, tinted solid moisturizer—to minimize items.
Store each in a small tin or breathable pouch to prevent residue and speed security checks. Replace miniatures with concentrated options that last longer.
This simple swap trims clutter, simplifies packing, and makes overhead bin and under-seat space work harder for you.
Packing And Protection
You’ve cut liquid bulk by choosing solid toiletries; now focus on packing and protecting them so they actually save space and survive the trip. Pack bars and balms in slim, airtight tins or zip pouches to prevent residue and keep shapes compact. Nest brittle items between soft clothing to prevent chipping. Label containers for quick security checks and nightly routines. Choose multiuse solids to reduce item count.
- Use flat tins or stackable cases
- Wrap fragile solids in socks or scarves
- Seal in a small plastic bag for leaks or crumbs
- Place heavier solids at the base of the bag
Decant and Consolidate Products to Cut Bulk
If you’re tight on space, decanting bulky containers into smaller, leakproof bottles or reusable travel pouches instantly frees room and trims weight. Sort items by use, combine similar liquids, and label clearly. Use solid versions—bar soap, shampoo bars, concentrated cleaners—to cut bulk. Pack only what you’ll need, and stash extras in checked luggage or buy locally. Seal caps with tape or use silicone liners to prevent leaks. Compress soft items around bottles to stabilize them.
| Item | Benefit | Tip |
|---|---|---|
| Shampoo | Saves volume | Use solid bar |
| Lotion | Lighter | Transfer to 50ml |
| Detergent | Multi-use | Concentrated drops |
| Sunscreen | Bulk cutter | Small pump |
Organize Carry‑On Electronics With Cable Organizers
When gadgets, chargers, and earbuds are tossed loose into your bag they tangle, take up space, and make airport security a hassle, so use dedicated cable organizers to keep everything compact and accessible. You’ll separate cords, protect plugs, and find items fast.
Pick slim pouches, roll cables and secure them with Velcro straps, and use labeled compartments so you won’t dig. Soft cases cushion adapters; hard-shell organizers prevent crushed power banks.
Keep essentials accessible in a top-pocket organizer for inflight use. Regularly purge unused cords before trips to avoid carrying dead weight.
- Slim pouch for daily chargers
- Velcro straps for neat rolls
- Labeled compartments for quick find
- Hard-shell case for power banks
Pack Multi‑Function Gadgets to Reduce Items
Because every extra gadget adds weight and clutter, choose multi‑function devices that replace several single‑use items. Pick a travel adapter with USB ports and surge protection, a smartwatch that tracks fitness and notifications, and a tablet that doubles as an e-reader and media player.
Swap bulky single‑purpose tools for compact combos—like a grooming kit with foldable trimmers and interchangeable heads. Prioritize battery life and universal compatibility so one charger serves multiple devices.
Test gear before packing to avoid backups. Streamline by asking: does this item fulfill two or more roles? If not, leave it home.
Place Fragile Items in Clothing‑Protected Pockets
Tuck glasses, chargers, or toiletries into shirt and sock-lined pockets so clothing cushions them on all sides.
You’ll save space by using built-in pockets instead of extra pouches.
Pack heavier items closest to the bag’s back to keep fragile things from shifting.
Use Clothing As Cushion
If you pack strategically, your clothes can double as soft, shock‑absorbing armor for fragile items. Use rolled sweaters, socks, and t‑shirts to surround breakables, then position them centrally to avoid edges. Wrap delicate electronics in a soft layer, and tuck fragile souvenirs into gaps between garments. Don’t overcompress padded items; maintain some cushioning.
- Roll bulky sweaters around glassware
- Stuff socks into camera lenses or small bowls
- Layer a t‑shirt between shoes and gadgets
- Use a scarf as extra padding for jewelry
This saves space while protecting valuables without needing bulky cases or extra packing material.
Pack Items In Pockets
You can take the clothing-as-cushion idea a step further by using garment pockets to hold fragile items, keeping them nestled and protected without extra bulk. Slip sunglasses, chargers, small electronics, or toiletries into deep jacket or pant pockets, then surround them with soft shirts or scarves.
Use buttoned or zippered pockets to prevent shifting, and place heavier pockets near the bag’s spine for balance. For extra security, wrap delicate pieces in a thin sock before pocketing.
Check pockets again before zipping: empty coin pockets can become safe spots, while fragile items stay cushioned and accessible.
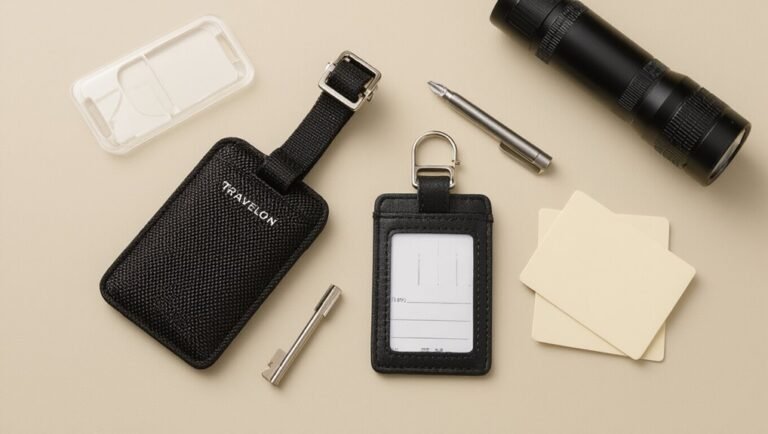
Use Travel Organizers for Documents and Passports
When you organize passports, boarding passes, and important documents into slim travel wallets or zippered pouches, they stay accessible and free up pocket and compartment space for bulkier items. You’ll streamline security checks, avoid frantic searches, and keep fragile papers flat.
Choose RFID-blocking sleeves for added protection, and label pouches so you grab the right file fast. Slip a small pen and photocopy of ID inside one wallet for backups.
Choose RFID sleeves, label pouches for quick grabs, and tuck a pen plus a photocopy of your ID for backups.
- Slim travel wallet for passport and boarding pass
- Zippered pouch for receipts and tickets
- RFID sleeve for credit cards
- Labeled pouch for emergency copies
Prioritize Items in Carry‑On Zones for Easy Access
Set up clear zones in your carry‑on so essential items stay within reach—think documents, meds, and a phone charger in the top pocket. You’ll use a front zone for things you need during the flight and a deeper zone for items you only grab at your destination.
This zone‑based packing keeps you organized and speeds up security and boarding.
Essential Items Within Reach
Because flights and security lines are unpredictable, arrange your carry-on so essentials are in designated, easy-to-reach zones—outer pockets for your boarding pass and ID, a top compartment for headphones and snacks, and a front pocket for phone, charger, and sanitizing wipes.
Pack a lightweight travel wallet, small toiletry kit, medication, and spare mask where you can grab them without opening the main compartment.
Keep bulky items like a sweater slightly tucked but accessible. Use clear pouches to speed retrieval and minimize digging.
Review your layout before each trip to guarantee items haven’t migrated.
- Travel wallet
- Medications
- Toiletry kit
- Phone and charger
Zone-Based Packing Strategy
Although you’ll want to adjust for trip length and personal needs, divide your carry‑on into clear zones so you can grab what you need fast. Assign one pocket or corner for travel documents, phone, wallet, boarding pass, and pen.
Reserve an easy‑reach area for in‑flight essentials: headphones, eye mask, and medications.
Use a central compartment for bulk items like a change of clothes and toiletries in a clear bag.
Keep fragile or valuable items padded near the spine.
Label or mentally map zones and return items after use. This system saves time, reduces stress, and keeps space efficient.
Use Packing Order: Heavy Items at the Bottom
When you pack heavy items at the bottom of your carry-on, you create a stable base that prevents crushing and makes the bag easier to lift and wheel. Place shoes, electronics in protective sleeves, and dense toiletries low and center to keep weight balanced and reduce tipping.
Pack heavy items low and centered to create a stable base, prevent crushing, and keep your carry-on balanced.
Pack fragile or frequently accessed items above these heavier pieces so they stay protected and reachable. Secure loose objects in compartments to stop shifting during transit.
Check weight distribution before zipping; adjust if the bag leans or feels top-heavy.
- Shoes and packed toiletry kits
- Laptop or tablet sleeves
- Small dumbbells or folded jacket
- Packed chargers and cords
Layer Soft Items to Cushion and Compress
After you’ve laid the heavier items low, layer soft pieces like clothing, scarves, and pouches above and around them to cushion fragile gear and fill gaps.
Roll tees and underwear tight to act as buffer zones; tuck socks into shoes to save space and stabilize shapes.
Use thin sweaters or a jacket to cover electronics and toiletries, compressing layers as you zip.
Place delicate items in the center where padding surrounds them.
Smooth layers to eliminate air pockets, then press down and fasten straps or compression panels.
You’ll protect valuables and increase usable volume without adding weight.
Use Modular Packing So You Can Swap Bags Fast
If you want to switch bags on the fly, pack in modular pouches and cubes that group items by function—tech, toiletries, underwear, and documents—so you can pull one unit and drop it into another bag instantly. You’ll label or color-code each module so you find things fast, keep essentials accessible, and avoid unpacking every item when changing bags.
Choose flat, flexible pouches that conform to space, and a slim electronics cube for chargers and adapters. Balance weight across modules to keep any bag comfortable. Practice swapping once at home to refine placement and reduce transit stress.
- Tech cube (chargers, cables)
- Toiletry pouch
- Clothing cube (underwear, socks)
- Document wallet
Use Empty Space Creatively: Hats, Belts, and Socks
Don’t waste odd pockets—pack hats inside shoes to keep their shape and save room.
Roll belts around toiletry bottles to prevent kinks and use the tube as a space-saver.
Stuff socks into any gaps to cushion items and squeeze extra capacity out of your bag.
Pack Hats Inside Shoes
While you’re trying to save space, tuck your hats into shoes to protect their shape and use wasted cavities—place a fedora or sunhat crown-first into a sneaker, then stuff socks or a rolled belt into the hat’s center to maintain structure. You’ll shield brims, cut bulk, and keep hats travel-ready.
Choose sturdier shoes for heavier hats, pad fragile brims with soft items, and position shoes at bag edges to balance weight. When unpacking, remove internal stuffing first so hats regain form.
This method pairs with other packing hacks and helps you maximize every inch without creasing or wasting soft items.
- Use sneakers for casual hats
- Pad brims with socks
- Reserve dress shoes for stiff hats
- Store pairs heel-to-toe
Roll Belts Around Bottles
You’ve already used shoes and hats to save space; now make belts pull double duty by rolling them around travel-size bottles to fill hollow areas and protect both items.
Wrap a slim or braided belt snugly around shampoo, sunscreen, or lotion bottles to stabilize them and prevent rattling.
Tuck these bundled bottles into corners, between folded clothes, or inside rigid toiletry cases to use otherwise wasted voids.
For leather belts, fasten loosely to avoid creasing; for fabric ones, roll tight for compactness.
This simple trick keeps liquids cushioned, saves space, and reduces the chance of spills during transit.
Stuff Socks In Gaps
When you’re packing, stuff socks into every leftover crevice—inside shoes, the gaps between rolled shirts, and the corners of hard-sided cases—to save space and keep items from shifting. You’ll squeeze more in and protect fragile items by filling voids with soft, flexible socks.
Use thicker socks to cushion, thin ones to wrap small toiletries, and mismatched pairs to patch awkward angles. Treat socks as modular packing blocks: compress, tuck, and layer them where fabric won’t wrinkle. This simple habit trims bulk and stabilizes your load, so you’ll avoid wasted space and fewer midflight rummages.
- Cushion fragile items
- Fill shoe interiors
- Wrap small bottles
- Patch odd corners
Choose Compressible Accessories and Jewelry Storage
Looking to save a surprising amount of space? Use soft, compressible accessories—cashmere, nylon pouches, foldable belts—that squish into corners. Roll scarves and stash them around shoes; pack bras in a compression pouch to retain shape while shrinking volume. For jewelry, choose padded travel cases or wrap pieces in microfiber to prevent tangles and scratches.
| Small comfort | Big relief |
|---|---|
| Cashmere pouch | Feels like home |
| Jewelry roll | Peace of mind |
You’ll travel lighter, protect valuables, and enjoy more room for souvenirs without sacrificing style or safety.
Limit Bulky Tech: Pick One Camera or Tablet
If you want to save carry-on space and simplify your gear, pick either a camera or a tablet—don’t bring both unless you truly need them. Decide based on purpose: shoot photos or consume media and work. A single device reduces chargers, protective cases, and bulk.
Choose lightweight models and use cloud or compact storage for backups. Stash accessories that fit together — small straps, microSD, a minimal case — rather than full kits. Consider whether your phone can substitute, too.
- Prioritize primary function: photography or productivity
- Compare weight and case volume
- Consolidate accessories
- Rely on phone when feasible
Optimize Charging With a Single Multi‑Port Adapter
Because you’ll want to power multiple devices without hauling several chargers, pick a single multi-port adapter that covers USB‑C PD and USB‑A outputs so you can charge a laptop, tablet, phone, and accessories from one compact brick.
Choose one with at least 65W USB‑C PD and 18W USB‑A ports, plus pass‑through charging if you’ll plug into a wall outlet.
Carry a short USB‑C cable and a compact USB‑A lead to save space.
Stow the adapter in an easy‑access pocket for security checks.
Label or color‑code cables so you grab the right one fast during layovers.
Streamline Entertainment With E‑Books and Apps
Swap bulky paperbacks for lightweight reading apps so you can carry more essentials. Pick apps that use minimal space and preload books, magazines, and podcasts for offline access.
That way you won’t need extra devices or internet to stay entertained on the go.
Choose Lightweight Reading Apps
When you cut paper books from your carry-on, you free up serious space and weight by switching to lightweight reading apps and e-books; they let you carry dozens of titles without the bulk.
Choose apps that run smoothly, use little storage, and offer adjustable fonts so you won’t need multiple editions.
Prioritize readers with library integration and cross-device sync so your progress follows you.
Keep one compact app for all formats to avoid redundant downloads.
- Pick low-storage, fast-launch apps
- Prefer formats with small file sizes (e.g., ePub)
- Use consolidated libraries and virtual shelves
- Disable heavy visuals and extras
Preload Content Offline
Want uninterrupted entertainment without eating data or hunting for Wi‑Fi? Preload books, podcasts, playlists, and videos to your devices before you leave. Download entire e‑book collections and convert long PDFs to compressed formats so they take less space.
Use apps that let you mark offline folders and verify downloads while on Wi‑Fi. Delete samples, duplicates, and watched episodes to free storage.
Sync progress across devices so you can switch seamlessly. Bring a slim power bank and an OTG flash drive or microSD adapter for extra capacity.
Preloading saves time, avoids streaming hiccups, and keeps carry‑on weight minimal.
Use Airline Seat Storage to Offload Small Items
Curious how to free up valuable carry-on inches? Use airline seat storage smartly: stash items beneath the seat in front or in the seatback pocket to keep your main bag light. You’ll want easy access to essentials and heavier things out of the overhead bin.
- Slip a slim tote or pouch under the seat for snacks, meds, and a book.
- Use the seatback pocket for a folded jacket, earphones, and a slim charger.
- Keep fragile or odd-shaped items beneath the seat to avoid crushing.
- Rotate items between pockets to balance weight and accessibility.
Pre‑Pack for Security: Organize Liquids and Electronics
Now that you’ve mastered seat storage, make security screening faster by pre‑packing liquids and electronics for quick access. Use a clear, quart‑size bag for liquids and place it near the top of your carry‑on or in an external pocket.
Store laptops and tablets in a dedicated, easily reachable sleeve so you can slide them out without digging. Keep chargers, power banks, and cords in a small pouch labeled for electronics to avoid spills and tangles.
Practice loading and unloading once so you know the sequence. Streamlined organization saves time, reduces stress, and keeps more space free for other essentials.
Avoid Overpacking by Setting Strict Item Limits
Decide on a firm item limit—like three tops, two bottoms, and one pair of shoes—and stick to it so you don’t pack by instinct.
Prioritize essentials only: choose versatile pieces that can be mixed and layered rather than single-use items.
Create a wear list you’ll follow while packing, and plan to wear the bulkiest items on travel days.
Set Item Quantity Limits
Because space is limited, set strict item limits before you start packing so you won’t grab extras on impulse. Decide quantities for categories—clothes, shoes, toiletries, gadgets—and stick to them. Use checklists to hold yourself accountable and count items as you pack. If an extra feels necessary, swap something else out. Limits force smart choices and prevent last-minute stuffing that bulks up your bag.
- 5 tops, 2 bottoms
- 1 pair of shoes, 1 sandals
- 1 toiletry bag (travel-size only)
- 2 tech items (phone + one charger)
Count items; don’t exceed your list.
Prioritize Essentials Only
While you might be tempted to pack “just in case” items, stick to absolute essentials and you’ll travel lighter and stress-free. Choose multifunctional pieces, prioritize toiletries you can’t replace, and limit shoes to two pairs. Assign strict counts: tops, bottoms, undergarments, and chargers. Lay items out and remove anything that’s redundant or purely optional. Trust local shops for rare needs. Before zipping, revisit your list and eliminate one item you can live without.
| Item type | Limit |
|---|---|
| Tops | 3 |
| Bottoms | 2 |
| Shoes | 2 |
| Toiletries | Travel-size |
Use A Wear List
If you set a strict wear list before you pack, you’ll stop overpacking and only bring what you’ll actually wear—assign exact counts for each category (tops, bottoms, layers, shoes) and stick to them, treating the list like a travel outfit roster rather than a wish list.
Decide outfits per day, mix-and-match pieces, and pick fabrics that dry quickly and resist wrinkles.
Limit extras: one smart outfit, one casual set, and a lightweight layer.
Pack footwear that serves multiple purposes.
Review the list before closing your bag and remove anything that doesn’t complete an outfit.
- 3 tops
- 2 bottoms
- 1 layer
- 2 shoes
Do a Trial Pack: Test Fit and Weight
Now’s the time to pack everything you plan to bring and zip it shut—then lift and weigh your bag to see how it really fits and whether it meets airline limits.
Try different arrangements: redistribute heavy items toward the wheels, flatten bulks, tuck soft items into gaps. Zip, lift, and weigh again; note any pressure points or bulging seams.
If you’re over limit, remove nonessentials or swap heavier pieces for lighter versions. Practice fitting into overhead dimensions if possible.
Repeat until weight and shape are stable. This trial pack avoids surprises at the gate and keeps you within rules.
Repack at Checkpoints: Quick Fixes for Tight Zippers
When a zipper starts to strain at the security line, act fast and stay calm—you can fix most bulging bags with a few targeted moves.
Open external pockets, redistribute dense items toward the center, and swap bulky shoes or coats to your person if allowed.
Compress soft items into gaps and remove nonessentials for a slimmer profile.
If you still need space, consolidate toiletries into a single pouch and tuck it between layers.
- Open outer pockets and spread contents inward
- Move heavy items to the bag’s center
- Wear or carry bulky garments
- Combine small items into one pouch
Fixes for Zipper Strain, Overweight Bags, and Lost Items
If your zipper’s straining, reinforce the seams and use a travel-safe clip to reduce pressure.
Weigh your bag before you leave and shift or remove items to avoid overweight fees.
Attach a tracker or label your bag so you can quickly locate misplaced items.
Reinforce Zipper Stress
Because zippers often bear the brunt of overpacked carry-ons, you’ll want to proactively reinforce them to avoid splits, stubborn catches, and lost items. Inspect seams and sliders before packing, smoothing fabric and aligning teeth. Use zipper lubricant or a graphite pencil to ease sticky pulls. Clip a small padlock or cable tie through pulls to share strain and deter accidental openings. If a zipper is weak, stitch a reinforcement patch or sew a fabric loop to redirect pressure away from the teeth.
- Apply lubricant sparingly for smoother action
- Add external straps to reduce zipper load
- Use locks or ties on pulls
- Reinforce weak seams with stitches
Prevent Overweight Fees
Although airlines charge hefty fees for overweight carry-ons, you can sidestep them with a few smart habits. Weigh your packed bag at home on a kitchen scale or luggage scale; adjust contents until you meet limits.
Prioritize dense items in checked luggage when possible and wear bulky layers on the plane. Use compression cubes selectively—don’t overpack them.
Shift heavy items to personal items if airline rules allow, and distribute weight evenly to avoid zipper strain. Keep essentials accessible to prevent rummaging and accidental loss.
Finally, understand airline policies beforehand to avoid surprises at the gate.
Track Misplaced Items
Where did that small charger or passport slip off to—and how do you find it fast? You’ll want simple systems: label pockets, stash essentials in clear pouches, and check zipper seams before closing.
Use trackers for high-value items and scan through compartments methodically when you repack. If a bag’s bulky, redistribute weight to avoid zipper strain that hides pockets.
Before boarding, photograph packed contents so you can recall where things went.
- Attach a Bluetooth tracker to valuables
- Keep passports and cards in a single, visible pocket
- Use clear packing cubes for electronics
- Inspect zippers and seams after each use
Buy Travel Clothing That Packs Small
If you want to maximize carry-on space, choose garments designed to pack small and stay versatile. Pick lightweight, wrinkle-resistant fabrics like merino, nylon blends, and thin polyester that compress easily.
Favor neutral colors and pieces that layer: a compact puffer, a thin cardigan, and convertible trousers that work day-to-night.
Choose neutral hues and layer smart: compact puffer, slim cardigan, and convertible trousers for effortless day-to-night style
Replace bulky shoes with one pair that’s comfortable for walking and smart enough for evening.
Use packing cubes and roll items tightly to minimize air gaps.
Prioritize multiuse items—a scarf that doubles as a blanket, a dress that pairs with sneakers or flats—to cut quantity without limiting outfits.
Laundry Tips for Carry‑On Travelers
When you’re traveling light with only a carry-on, planning for laundry makes a huge difference in what you need to pack. You’ll wash basics in sinks, choose quick-dry fabrics, and schedule short laundromat stops to refresh items.
Pack a lightweight laundry kit: soap, sink stopper, travel clothesline, and a zip bag for damp garments. Rotate outfits so you wear versatile pieces more than once between washes.
Treat stains promptly with a travel stain pen. Air-dry overnight when you can, and compress dry clothes to save space while keeping them ready to wear.
- Quick-dry fabrics
- Sink washing kit
- Laundromat timing
- Stain treatment
Convert a Daypack Into an In‑Destination Carry Bag
When you arrive, convert your daypack into a lightweight in‑destination carry bag by packing only what you need for short outings. Select essentials—phone, wallet, water, a compact rain layer, and any meds—and leave bulkier items in your main bag.
This keeps you nimble and prevents lugging extra weight around the city.
Pack Smart For Day Trips
Because you’ll want your hands free and your essentials close, turn your daypack into a compact in‑destination carry bag before you leave your accommodation. Pack items you’ll need for a day out, keep weight centered, and use pockets for quick access. Fold lightweight layers, stash a small first‑aid kit, and secure valuables in a hidden pocket. Limit bulky items so your bag stays comfortable.
- Lightweight rain shell or compact umbrella
- Reusable water bottle and a snack
- Phone, charger, wallet, and travel documents in a zippered pocket
- Sunglasses, sunscreen, and a compact map or app guide
Lighten Weight With Essentials
You’ve already pared down your daypack for outings; now focus on shaving ounces from what you actually carry all day. Swap bulky items for compact alternatives: a lightweight rain shell, travel-sized sunscreen, and a thin microfiber towel. Keep essentials accessible and multiuse to avoid extra gear.
| Keep | Replace |
|---|---|
| Thin shell | Heavy jacket |
| Mini first-aid | Full kit |
| E-reader | Multiple paperbacks |
| Refillable bottle | Disposable bottles |
| Compact charger | Laptop brick |
Strip duplicates, wear heavier items, and limit “just-in-case” gear. You’ll move lighter and enjoy more flexibility without sacrificing safety.
Packing by Trip Length: 1–3 / 4–7 / 8+ Days
If your trip is only a few days, pack tightly and prioritize versatile pieces. For longer stays, plan outfits that mix-and-match and rely on laundering or layering to stretch space.
You’ll choose basics for 1–3 days: one outfit per day, one lightweight jacket, compact toiletries, and a single pair of shoes.
For 4–7 days, add neutral separates and plan one laundry stop.
For 8+ days, focus on rotate-able clothing, travel-sized detergent, and heavier layering pieces worn on the plane.
Keep accessories minimal and footwear multi-use to avoid extra bulk.
- 1–3 days: capsule outfits
- 4–7 days: mix-and-match
- 8+ days: rotate and launder
- Shoes: limit to one pair
Special‑Case Packing: Business Trips and Formalwear
Shorter trips let you rely on basics and laundry, but business travel and events demand a different approach. Pack wrinkle‑resistant garments and a lightweight suit or dress in a compression bag; roll casual items around shoes to save space.
For short trips, basics and laundry suffice; for business, pack wrinkle‑resistant pieces and a lightweight suit in a compression bag.
Use a garment folder or layer suit components flat atop clothes to protect shapes. Limit shoes to two pairs: versatile dress shoes and comfortable flats or loafers.
Bring removable collar stays and a travel steamer or wrinkle-release spray. Store toiletries in spillproof pouches and consolidate accessories in a small pouch.
Plan outfit combos to minimize pieces while covering formal and casual needs.
Family Travel Tips: Packing for Kids in One Carry‑On
When traveling with kids, you can fit everyone’s essentials into a single carry‑on by prioritizing versatile clothing, compact gear, and smart organization. Pack mix‑and‑match outfits, roll clothes to save space, and use packing cubes for each child.
Limit shoes to one pair per child plus lightweight sandals. Choose multiuse items—a jacket that doubles as a blanket, a swim suit that works as activity wear. Compress bulky items and stash small toys in exterior pockets. Keep a lightweight wet bag for spills and a compact first‑aid kit.
- Labelled packing cubes per child
- Roll clothing tightly
- One multipurpose jacket per kid
- Slim toiletry kit
Security and Safety: Keep Valuables Accessible but Safe
Although you’re focused on squeezing every inch of gear into your carry‑on, keep a small, secure section reserved for valuables you need on hand—passport, wallet, phone, keys, and any medication. Use a slim organizer or hidden pocket, lockable zippers, and keep essentials separate so you can access them quickly without unpacking. Scan copies of documents and store encrypted backups. Stay aware in crowds, and use crossbody bags or money belts on long walks. Review airport security rules so nothing gets confiscated.
| Item | Storage | Tip |
|---|---|---|
| Passport | Inner pocket | Waterproof sleeve |
| Phone | Top compartment | Quick access |
| Cash | Money belt | Split locations |
| Meds | Clear pouch | Carry prescription |
Maximize Carry‑On Space Without Sacrificing Comfort
Because you’ll be spending hours wearing or carrying your bag, you want a setup that saves space without making you miserable, so prioritize comfort alongside clever packing. Choose a lightweight, supportive bag with padded straps and a sternum or waist strap to distribute weight.
Pack heavier items close to your back and use compression cubes to reduce bulk while keeping access easy.
Rotate shoes and toiletries into checked luggage when feasible.
Balance space-saving with ergonomics so you won’t strain yourself just to fit more.
- Padded straps and waist/sternum support
- Heaviest items nearest your back
- Compression cubes for organization
- Move nonessentials to checked bags
Quick Checklist to Pack Efficiently at the Last Minute
If time’s tight, focus on a short, prioritized checklist that gets you out the door fast. Grab essentials first: ID, wallet, boarding pass, phone, charger, keys.
Toss versatile clothing—neutral layers you can mix—and limit shoes to one pair plus flats. Use compression cubes for bulky items and a toiletry bag with travel‑size liquids sealed in a clear pouch.
Pack valuables and medications in an easy‑access pocket. Fill gaps with socks or underwear.
Weigh the bag quickly; move items to personal item if needed. Lock or zip securely, then double‑check travel documents and home turn‑off tasks before leaving.
Frequently Asked Questions
Can I Bring Medications and Medical Devices Over 100 mL in Carry‑On Luggage?
Yes — you can bring medications and medical devices over 100 ml in your carry‑on. Tell security, keep prescriptions or doctor’s notes, separate liquids for inspection, and pack devices with spare batteries and necessary documentation.
How Do Airline Gate-Checked Bags Affect My Carry‑On Packing Strategy?
Gate‑checked bags mean you should pack essentials, valuables, meds, and fragile items in your carry‑on; you’ll risk delays or loss, so keep important documents, chargers, and a change of clothes with you.
Are There International Differences in Carry‑On Allowance I Should Know?
Yes—airline carry‑on rules vary internationally: you’ll find different size, weight limits and fee policies by carrier and region, so check your airline’s specific rules before flying and pack accordingly to avoid surprises.
Can I Bring Duty-Free Liquids Onboard in Addition to My Toiletries?
Yes—you can usually bring duty‑free liquids in addition to toiletries if they’re sealed in a tamper‑evident bag with receipt, but rules vary by airline and country, so check transfers and security policies before you travel.
What’s the Best Way to Pack Fragile Souvenirs Purchased During the Trip?
Wrap fragile souvenirs in clothing or bubble wrap, nest them in the center of your carry-on, secure gaps with socks, keep heavier items below, and carry extremely delicate pieces in a padded personal item you won’t check.
Conclusion
You’ve got the tools to turn a single carry‑on into a travel powerhouse. Check airline limits, pick the right bag, and use smart organization—packing cubes, compression, and dual‑purpose items—to squeeze more in without chaos. Keep valuables accessible yet secure, pack kids’ essentials cleverly, and favor lightweight, durable gear that preserves space. With these strategies, you’ll travel lighter, faster, and more comfortably, even when you’re packing to the max.