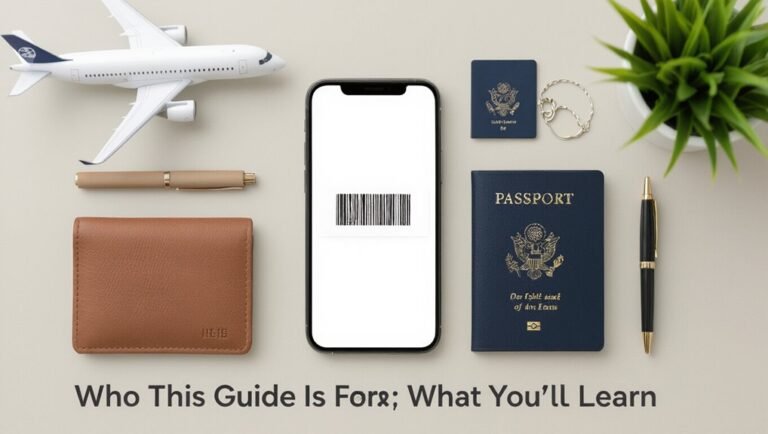
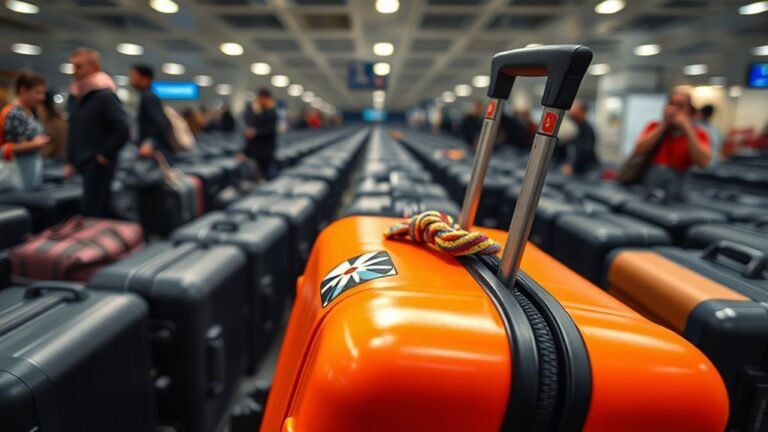
What Is a Tsa Lock on Luggage
A TSA lock on luggage is a special lock that lets Transportation Security Administration agents open and relock your checked or carry‑on bag without breaking zippers or locks. You attach it like any padlock or built‑in mechanism, set a combination or use a key, and look for the Travel Sentry or Safe Skies logo to confirm approval. It deters casual tampering but isn’t foolproof, and if you keep going you’ll find details on types, use, and limitations.
TSA Locks Explained : Quick Answer
When you see a TSA-approved lock, know it lets Transportation Security Administration agents open and relock your luggage without damaging the lock during inspections. You’ll find these locks on zippers, padlocks, and built-in suitcase mechanisms.
They use standardized keyways accessible only to TSA screeners, so your bag can be checked without force. You’ll still set a combination or key for everyday security, but TSA access is an override for inspections.
Using one reduces the risk of broken locks or ripped zippers after screening. Choose recognized brands and register combinations where offered to streamline travel and recovery.
What Is a TSA Lock on Luggage?
A TSA lock lets you secure your luggage while still allowing Transportation Security Administration agents to open it with a master key when needed.
It uses a special keyhole or combination mechanism recognized by TSA so agents can inspect bags without breaking the lock.
You’ll get the protection of a lock plus the assurance that inspections won’t ruin your luggage.
What It Does
Although travelers often want their bags fully private, a TSA lock lets you secure luggage while still allowing Transportation Security Administration agents to open it for inspection without breaking the lock.
You’ll keep belongings safer from casual theft and accidental openings during transit, since the lock prevents easy access by non-authorized people. At the same time, TSA agents can inspect checked or carry-on bags when required, reducing chances they’ll cut straps or pry zippers.
Using a TSA-approved lock also helps you comply with airline and security protocols, potentially speeding security checks and avoiding damage-related hassles after inspections.
How It Works
Curious how TSA locks let you keep things closed yet accessible to inspectors? You attach a TSA-approved lock to zippers or latches; it looks like a regular padlock but includes a keyhole for Transportation Security Administration agents.
When inspectors need to check your bag, they use a universal master key that opens the lock without damaging it. You set a combination or use the lock’s default, and most models reset if needed.
The system balances traveler security with inspection access, reducing forced openings and broken luggage. Still, no lock prevents all tampering, so consider packing valuables in carry-on items.
Why Travelers Use TSA Locks
You use a TSA lock to keep your belongings secure while agents inspect your bag, so you don’t have to leave it exposed.
It also lets TSA open and reseal your luggage without cutting or breaking your lock.
That prevents damage and keeps your suitcase intact for the rest of your trip.
Security During Screening
How do you keep your belongings secure when airport security needs to inspect your bag? You choose a TSA lock so agents can open and relock your luggage without breaking it.
During screening, officers may need to verify contents; with a TSA-approved lock, they use a master key and leave your closure intact after inspection. That means your items stay contained and organized, and you avoid the hassle of damaged zippers or replaced seals.
You also maintain privacy since only authorized personnel can access the locked compartment. Overall, TSA locks balance necessary inspection with the security of your possessions.
Prevents Lock Damage
Why risk a broken zipper or mangled clasp when a TSA-approved lock lets agents open and relock your bag without forcing the closure? You’re protecting both your lock and luggage hardware: TSA agents use master keys instead of cutting or prying, so zippers, combination dials, and integrated latches stay intact.
That means fewer surprises at baggage claim and less chance of belongings spilling out. If screening requires inspection, your lock won’t become collateral damage.
Choosing a TSA lock reduces repair costs and travel hassle, giving you smoother trips and confidence that inspections won’t leave your bag compromised.
How TSA Master Keys Work
Although the locks look unique, TSA master keys let Transportation Security Administration agents access many different luggage locks without breaking them. You insert a master key that engages a hidden mechanism inside approved locks, aligning pins or tumblers to open without your combination.
Agents use these keys during inspections when they need to view contents and then relock your case. The system relies on standardized lock cores and authorized key distribution to maintain control.
You won’t see the keys publicly; they’re restricted to trained personnel. That centralized access lets security work efficiently while minimizing damage to travelers’ luggage.
Which TSA‑Approved Lock Types Exist?
Now that you know how master keys let agents open approved locks, it helps to recognize the lock types that carry the TSA authorization. You’ll find three common categories: cable locks, latch or padlock-style key locks, and integrated suitcase locks.
Cable locks are flexible and good for zippers; they often use a TSA keyway.
Padlock-style key locks look like miniature locks you’d clip onto a zipper pull and accept TSA master keys.
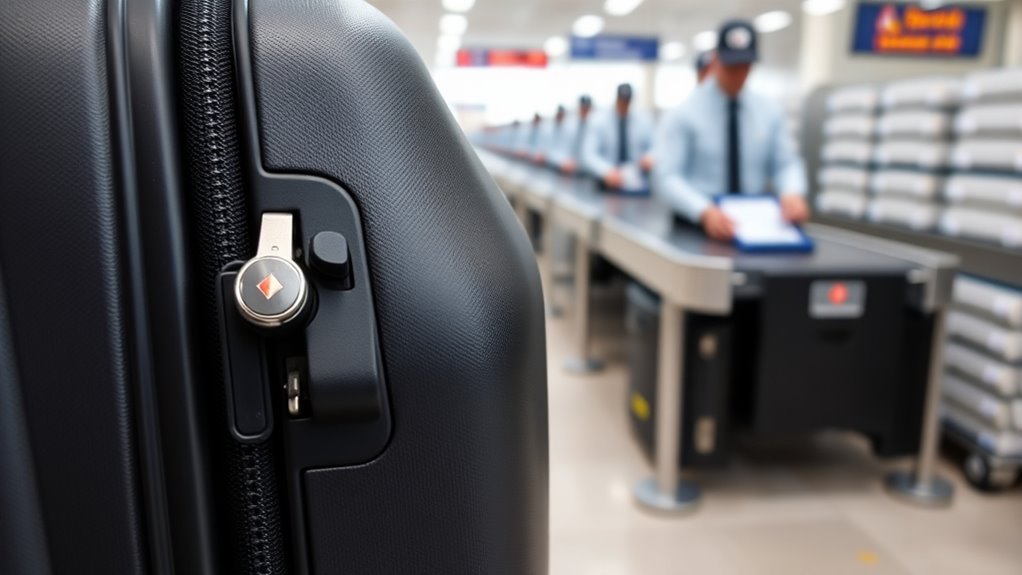
Integrated locks are built into the luggage frame or zipper assembly and usually display the red diamond Travel Sentry logo indicating they’re serviceable by TSA.
TSA Combination Locks vs. TSA Key Locks: What’s the Difference?
When you pick between TSA combination locks and TSA key locks, you’re choosing how you balance convenience and control.
Combination locks let you reset codes and avoid carrying a key, while keyed locks give inspectors one universal key but can be more vulnerable if the key’s duplicated.
Think about whether quick access or not managing a key matters more for your travel style.
Combination vs Keyed
If you’re weighing TSA combination locks against keyed TSA locks, think about convenience, security, and how often you travel.
Combination locks let you skip carrying keys—you set a code, reset when needed, and multiple people can access luggage without a key exchange.
Keyed locks are simple and quick to open if you keep the key safe, and they avoid forgotten codes.
Consider backup: combos need memorizing or written notes; keys need safekeeping and duplicates.
Choose combos for shared access and keyless ease; choose keyed locks if you prefer tactile simplicity and don’t mind managing physical keys.
Security And Accessibility
How secure is your luggage when airport agents need access? You’ll weigh convenience against exposure: combination locks let you control codes, but agents can use a master key or break them; keyed TSA locks let agents open without altering your settings, yet duplicate keys increase risk. Choose based on how you travel and what you pack.
- Combination: you set/reset codes, no key to lose, may be more obvious if tampered.
- Keyed: quick access for agents, simpler for frequent flyers, key duplication is a vulnerability.
- Durability: metal keys resist wear; plastics crack.
- Privacy: consider contents and inspection likelihood.
What “TSA Accepted” vs. “TSA Recognized” Means
Wondering what the labels actually mean? You’ll see “TSA Accepted” and “TSA Recognized” on locks or packaging, and they aren’t interchangeable.
“TSA Accepted” typically means a lock uses a travel-friendly design that TSA agents commonly accept for inspection, but it hasn’t gone through a formal program.
“TSA Recognized” indicates the lock meets specifications from the Transportation Security Administration’s testing partners and is part of their recognized lock program.
You should favor “TSA Recognized” when you want higher assurance that agents can open and relock your bag without damage, though either label often means easier inspections.
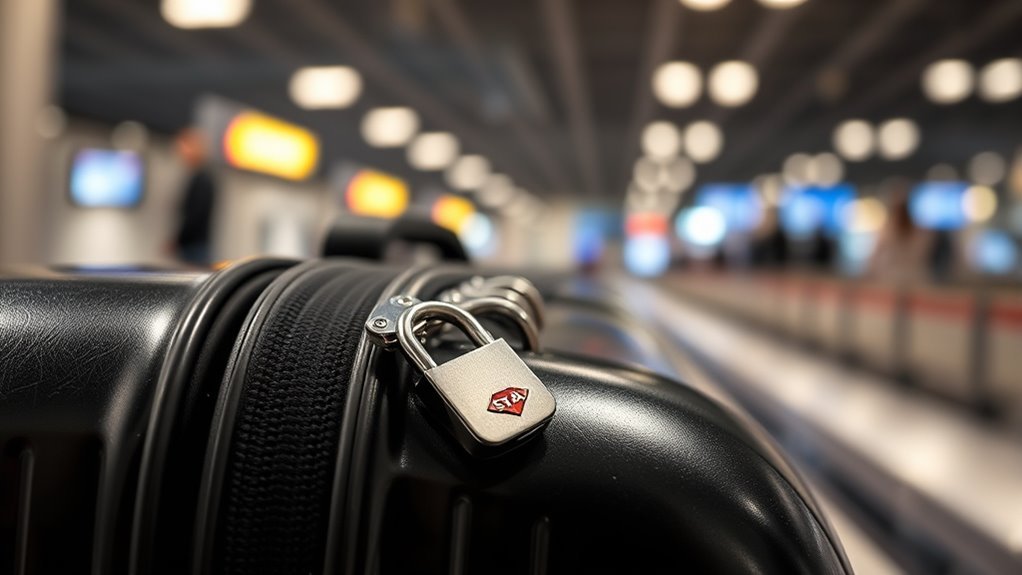
How to Tell If Your Lock Is TSA‑Approved
To tell whether your lock is TSA‑approved, look for the Travel Sentry or Safe Skies logo, a label that explicitly says “TSA Recognized” or “TSA Accepted,” or documentation on the packaging or product page; these markers show the lock is designed to be opened and relocked by TSA agents.
Look for the Travel Sentry or Safe Skies logo, or “TSA Recognized/Accepted” on the lock or packaging.
Check the product description and manual, confirm the model number on the certifier’s online list, and inspect the lock body for markings.
If buying online, read seller photos and reviews for verification.
If unsure, contact the manufacturer.
- Verify logos or labels
- Read product documentation
- Cross‑check certifier lists
- Ask the maker
Where TSA Lock Labels and Logos Appear
You’ll usually find TSA lock labels and logos on the exterior near the zipper or latch so agents can spot them quickly.
You’ll also see small tags or markings inside the luggage, often near the lining or on an internal pocket.
Check both spots before you travel to confirm your lock is properly marked.
Exterior Placement Marks
When inspecting luggage for TSA-compatible locks, look for the official travel-ready mark—usually a small red diamond or a discreet label—near zippers, lock housings, or on the tag flap so agents can quickly identify approved access points.
You’ll spot marks on hard-shell corners, fabric zipper seams, or integrated lock panels. Manufacturers place them where agents can access locks without opening bags.
Check for clear, durable printing and contrast so the symbol’s visible in dim light. If you can’t find a mark, the lock mightn’t be TSA-recognized; verify product specs before travel.
- Corner placement
- Zipper seams
- Lock housings
- Tag flaps
Interior Tag Locations
Alongside exterior markers, many manufacturers place TSA-recognized tags and logos inside luggage so agents can confirm approved access without rummaging through pockets. You’ll often find a small woven label sewn into a lining seam, a printed logo on an interior zipper flap, or a stamped emblem on the inner frame near the lock mechanism.
Check main compartments, divider panels, and pocket linings; some brands tuck tags behind mesh or in hidden pouches. These interior marks help you verify genuine TSA-compatible locks and assist inspectors in identifying approved access points, reducing unnecessary damage and giving you peace of mind during travel.
How TSA Agents Access Locked Luggage
Curious how TSA agents get into locked luggage without breaking your case? You’ll rely on TSA-approved locks that accept master keys. If an agent needs to inspect your bag, they’ll use a universal key to open the lock, inspect contents, then relock it.
Sometimes they’ll request you to open it; if you’re unavailable, they’ll use inspection channels. Agents follow procedures to minimize damage and document any opened baggage.
If forced entry’s needed, they’ll note it and may attach a notification. You won’t see the master key; it’s controlled by the agency for security and accountability.
- TSA-approved locks accept master keys
- Agents use master keys for inspections
- You may be asked to open the bag
- Forced entry is documented and notified
Will TSA Locks Prevent All Tampering?
Knowing that TSA agents can open approved locks with master keys helps explain their purpose, but it doesn’t mean your luggage is immune to all tampering.
TSA-approved locks deter casual theft and prevent breakage from forced entry, yet they’re not foolproof against determined thieves, baggage handlers, or opportunistic damage. Someone could bypass a zipper, cut fabric, or damage a hard-shell case without engaging the lock mechanism.
You should combine locks with sensible packing: keep valuables in carry-on, use tamper-evident seals, label items discreetly, and document contents. Those steps reduce risk and make unauthorized access more noticeable, though not impossible.
Are TSA Locks Required by Airlines or the TSA?
You might think TSA locks are mandatory, but the TSA doesn’t require travelers to use them—its guidelines only explain how agents handle locked bags.
Airlines can set their own policies, though most don’t force locks and focus on baggage size, weight, and security screening.
Check your carrier’s rules before you travel so you know whether a lock could cause issues during handling or inspection.
TSA Rules vs Airlines
While the TSA sets which locks its agents can open, the agency doesn’t require travelers to use TSA-approved locks — airlines set their own baggage rules, and those can vary; you should check your carrier’s policy because some airlines may discourage or restrict locked checked bags for security or handling reasons.
You should confirm airline rules before travel. If an airline requires unlocked checked bags, staff may open them.
Some carriers accept TSA locks but recommend labeling. Others charge for handling disputes or force entry if access is needed.
Carry-on rules differ, too.
- Check your airline’s baggage policy.
- Expect variability between carriers.
- Label bags and locks clearly.
- Prepare for possible inspection.
Lock Requirement Reality
Although the TSA authorizes specific “TSA-approved” locks that its agents can open with a master key, neither the TSA nor federal law requires travelers to use those locks—airlines set their own baggage rules and may allow, discourage, or forbid locked checked bags, so you should confirm your carrier’s policy before packing.
You’ll find some airlines encourage TSA locks to speed inspections; others ban any locked checked luggage, forcing you to remove locks or risk forced entry and damage.
For carry-on, locks are usually your choice, but security screening may require opening. Always check airline policies and inspect baggage tags for special instructions.
Pros of Using a TSA Lock for Checked Bags
Because locks let TSA agents inspect baggage without damaging them, using a TSA-approved lock gives you practical protection and peace of mind when you check bags.
Using a TSA-approved lock lets agents inspect baggage without damage, giving you practical protection and peace of mind.
You’ll deter casual theft, keep contents organized, and avoid surprise damage from forced openings.
TSA-approved locks signal compliance, reducing inspection delays and handling issues.
They’re easy to set and reset, fitting most luggage types.
- Deters opportunistic tampering and theft
- Preserves luggage integrity during mandated inspections
- Speeds up processing by signaling compliance
- Simple setup and compatibility with standard suitcases
Cons and Limitations of TSA Locks
TSA locks give you some convenience, but they don’t stop determined thieves and can provide only limited security protection.
You should also be aware that locks can be tampered with or damaged during inspections, leaving your bag vulnerable or unusable.
Finally, not every lock fits every suitcase and TSA access can complicate your control over who can open your luggage.
Limited Security Protection
While TSA locks give you a convenient way to show you’ve secured your bag, they don’t provide strong theft protection. Master keys and bolt cutters used by baggage handlers and thieves can defeat many models, and a forced entry often leaves no evidence of tampering.
You should treat TSA locks as a signaling tool, not as a barrier against determined theft. Choose sturdy luggage, keep valuables on you, and consider supplemental measures.
Here are practical limitations to note:
- Easy bypass with tools.
- Low-quality locks break under force.
- No guaranteed theft deterrent.
- Locks don’t protect against internal access.
Lock Tampering Risks
Those limitations also open the door to tampering risks you should understand. You rely on TSA-approved keys or override mechanisms, and anyone with access to those tools — or to simple lock-picking methods — can open your luggage without leaving obvious damage. You might find zippers cut, contents disturbed, or non-obvious resealing. Regular inspection helps, but it won’t prevent all intrusions.
| Risk Type | What It Means |
|---|---|
| Master Key Access | Authorized personnel can open locks |
| Pick Vulnerability | Simple tools can bypass tumblers |
| Covert Entry | Items removed without visible marks |
| Resealing | Locks reclosed after inspection |
| False Security | Gives you a mistaken sense of safety |
Compatibility And Accessibility
Because manufacturers and airports don’t all play by the same rules, you can run into compatibility and accessibility problems with TSA-approved locks. You might find locks that airports can’t open, or keys and tools that vary by country. That can delay inspections, damage luggage, or leave you responsible for replacements.
Also, some older or budget suitcases lack reinforced lock mounts, so locks won’t fit securely. Consider alternatives and check airline and destination rules before you travel.
- Misaligned master key systems limit access
- Nonstandard lock fittings break under inspection
- International variations complicate openings
- Replacement parts can be scarce
Risk Scenarios When Using Non‑TSA Locks
If you use a non‑TSA lock on checked luggage, you risk having your bag opened, damaged, or delayed when security needs to inspect it—agents may cut locks or force zippers, leaving broken hardware or tampered contents and no guarantee you’ll be compensated.
You could arrive with ripped seams, broken clasps, or missing items because cutters and prying tools focus on quick access. A forced entry can ruin organizers and cosmetics, contaminate clothes with residue, or scatter small valuables.
Even carry‑on checks at checkpoints can cause similar issues. To avoid these outcomes, choose TSA‑accepted locks or pack valuables and irreplaceables in your carry‑on.
How Airport Security Decides to Open Luggage
When your checked bag draws attention, security officers use a mix of automated alerts, intelligence, and human judgment to decide whether it needs to be opened. You’ll be subject to screening triggers like imaging anomalies, prohibited item indicators, or random checks.
Officers weigh threat level, flight risk, and profiling leads before deciding. If they open your bag, they follow protocols to minimize damage and document actions. You can expect notification procedures and a record of inspection when applicable.
- Imaging alerts from X-ray or CT scanners
- Intelligence or watchlist matches
- Random or secondary screening
- Visible damage or leaking contents
What Happens When the TSA Opens Your Lock?
If TSA agents open your lock for an inspection, they’ll check the contents, reseal the bag, and document the search.
They’ll try to use a TSA key or an approved method, but if your lock gets damaged they’ll note it and may leave a written notice inside your luggage.
You can follow the notification instructions to report damage or ask questions afterward.
TSA Inspection Procedure
Wondering what happens when TSA opens your lock? You’ll get a routine inspection: agents use a universal key to open approved locks, check contents for threats, and reseal bags when possible. If they inspect, they’ll leave a Notice of Inspection. You can expect professionalism and adherence to screening protocols.
- Agents unlock with a master key designed for TSA-approved locks.
- They examine items for prohibited or suspicious materials.
- They may reposition or repack contents for further screening.
- They’ll leave a printed notice indicating the bag was inspected.
Keep TSA locks on to allow inspection without cutting your lock.
Lock Damage And Notification
Because TSA agents may need to inspect your bag, they’ll use a master key to open approved locks and will try to relock or leave a notice after screening.
If they open a nonapproved or damaged lock, they may cut it and leave a Notice of Inspection inside. You’ll find whether your items were inspected and any reasons listed.
If your lock or luggage is damaged, file a claim with the airline immediately and keep receipts for repairs or replacement.
Take photos of the damage and the notice, note flight details, and contact the airline’s baggage service office before leaving the airport.
How to Replace a Broken TSA Lock After Inspection
When TSA cuts or damages your lock during an inspection, you’ll want to replace it quickly to secure your bag for the rest of your trip. First, remove any broken pieces and inspect zippers or hasps for damage.
Buy a replacement TSA-approved lock—choose keyed or combination based on your preference. Install per manufacturer instructions, ensuring the Travel Sentry logo fits TSA guidelines.
Finally, test the lock, close and reopen it several times to confirm smooth operation.
- Remove debris and check hardware
- Purchase an approved replacement
- Install correctly and align components
- Test repeatedly before travel
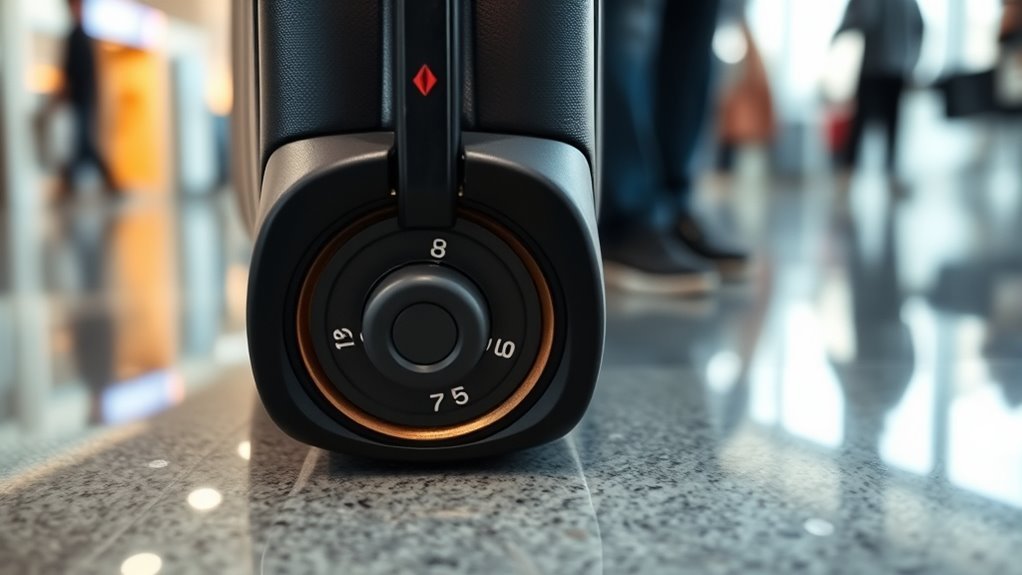
How to Set a TSA Combination Lock Step by Step
Before you set the combination, make certain the lock is in its factory-open position and that you’re sitting somewhere flat and well-lit so you can see the dials or reset pin clearly.
Ensure the lock is in factory-open position and work on a flat, well-lit surface to see the dials clearly.
Locate the reset tab or button—often inside the shackle hole or on the side—and hold it down or flip it to the set position.
Rotate each dial to your chosen numbers, pressing gently to guarantee each clicks into place.
Return the tab or release the shackle; the lock should now be secured.
Test the new combination several times before closing your luggage to confirm it opens reliably.
How to Reset a TSA Combination Lock If You Forget the Code
If you forget your TSA lock code, don’t panic—you can often reset it without cutting the lock. First try the manufacturer’s reset tool or instructions, which usually involve aligning dials and pressing a reset pin or button.
If that fails, contact the maker for specific guidance or a replacement option.
Resetting a Forgotten Code
Losing your TSA lock code can feel frustrating, but you can usually regain access without buying a new lock by following a few straightforward steps.
First, check for a default code or documentation; many locks ship set to 0-0-0 or come with reset instructions. If that fails, try systematically testing nearby combinations while applying gentle tension to the shackle—feel for a subtle click.
If your lock has a reset hole, use a pointed tool per the lock’s alignment.
When you regain access, set a memorable yet nonobvious code and record it securely.
- Check defaults/docs
- Gentle tension scan
- Use reset hole
- Record new code
Using Manufacturer Reset Tools
When you’ve exhausted basic tricks and still can’t open your TSA lock, contact the manufacturer for a reset tool or kit designed for your model. Many brands offer a keyed-reset device or an internal shim that lets you clear the combination without damaging the lock.
You’ll typically need proof of purchase or the lock’s serial number to request the tool. Follow the manufacturer’s instructions precisely: insert the tool, engage the release, set your new code, then remove the device. Don’t force components.
If instructions aren’t available, ask customer support for step-by-step guidance or authorized service to avoid voiding warranties.
How to Use a TSA Key Lock Correctly
Although the idea’s simple, using a TSA key lock correctly takes a couple of careful steps to guarantee your bag stays secure and accessible to screeners.
Using a TSA key lock is simple but requires a few careful steps to keep your bag secure yet accessible to screeners.
You’ll attach the lock to the zipper pulls or a latch, confirm the shackle seats fully, then test closure before travel.
Keep the key somewhere safe but reachable—don’t lock it inside a checked bag.
If screeners need access, they’ll use a master key; you won’t.
After inspection, verify the lock is intact and re-secure zippers.
- Attach lock to zipper pulls or latch
- Make sure shackle seats fully
- Store key securely but accessible
- Check lock after inspection
Best Placement for a TSA Lock on Your Suitcase
When choosing where to put a TSA lock, think about how it interacts with your zipper pulls so they sit snugly and can’t slip out.
You’ll also want to check built-in lock locations to make sure they don’t interfere with the case opening or TSA access.
Finally, confirm the lock and any straps or handles still fit comfortably and don’t create weak points you could catch or damage.
Zipper Pull Placement
Because the zipper pulls are the most accessible part of your suitcase, placing your TSA lock where both pulls meet gives the best balance of security and convenience. You’ll secure the main opening, keep the lock visible for inspectors, and avoid awkward straps or handles.
Position it low enough to clear your bag’s frame but high enough to prevent snagging.
- Align pulls at center-top for easy access.
- Thread lock through both pull tabs to prevent forced separation.
- Guarantee pulls sit flush to reduce leverage points.
- Check zipper movement after locking to confirm smooth operation.
Built-In Lock Location
If you want a built-in TSA lock to work well, place it where inspectors can access it without fumbling and where it won’t compromise the bag’s structure.
Position the lock near the main opening so agents can reach it without detaching straps or moving bulky items.
Mount it flush with the shell or in a reinforced seam to avoid stress points that weaken fabric or crack hardside shells.
Keep it away from wheels, handles, and corner areas that take impacts.
Confirm the lock’s mechanism aligns with zipper pulls or latch points to operate smoothly.
That placement balances security, durability, and inspector convenience.
Strap And Handle Fit
Since straps and handles are the parts you grab most, place a TSA lock so it doesn’t obstruct their movement or pinch fabric when you lift or shoulder the bag. You want access, comfort, and secure closure without snagging.
Position the lock away from where your hand naturally sits, test lift and carry motions, and verify straps still retract or fold.
Consider wear points and avoid stitching or padding seams. A lock mounted to a hard anchor or zipper pull near the corner usually works best.
- Place away from hand grip and shoulder contact
- Test lifting and retraction motions
- Avoid seams and padding edges
- Mount to rigid anchor or corner pull
How to Secure Zipper Pulls With a TSA Lock
When you secure zipper pulls with a TSA lock, you create a simple, visible deterrent that keeps your bag closed during transit while still allowing agents to inspect it without damage.
Thread both zipper sliders together, align their holes, and insert the TSA lock’s shackle or cable through them.
Set your combination or close the keyed lock, then test by tugging gently to confirm it’s holding.
Keep the key or combination accessible but separate from the luggage.
If an agent needs access, they’ll use their master key or code without cutting your zipper.
Inspect the pulls after travel for wear or misalignment.
Using Cable Locks vs. Integrated Suitcase Locks
You’ll notice cable locks give you flexibility to secure multiple zippers or odd-shaped gear quickly.
Integrated suitcase locks, on the other hand, offer a cleaner look and often stronger tamper resistance.
Think about whether you value that adaptable reach or the built-in security when choosing.
Cable Flexibility Benefits
Although integrated suitcase locks keep things tidy, cable-style TSA locks give you real flexibility for odd-shaped luggage and multiple zippers. You can loop a cable through bulky handles, link several bags together, or secure external pockets that built-in locks can’t reach.
Cables bend around straps and irregular closures, so you won’t force zippers or jam compartments. They also let you fasten detachable items or wrap around unconventional luggage frames.
Lightweight and compact, cable locks adapt to travel needs without altering your bag. Choose one with a TSA key or combination to stay compliant and convenient.
- Loop through odd handles
- Secure multiple zippers
- Fasten external pockets
- Link several bags
Integrated Lock Security
Because integrated locks sit flush in the suitcase shell and cable locks loop around external points, choosing between them comes down to how you balance convenience, coverage, and tamper resilience.
You’ll find integrated locks are neater, less likely to snag, and often TSA-approved with keyed or combination mechanisms built in. They protect zippers or clasps directly but can be bypassed if someone breaks the shell.
Cable locks let you secure multiple compartments or external straps and provide flexible attachment, though they protrude and can be cut.
Pick integrated locks for streamlined travel and cable locks when you need versatile, multi-point security.
How to Choose Lock Strength and Material
When picking a TSA-approved lock, balance how tough it needs to be with the material it’s made from. You’ll match strength to trip type: short flights need lighter protection; long or checked travel calls for tougher locks.
Choose materials that resist cutting and corrosion while staying lightweight. Metals offer durability; reinforced plastics reduce weight and still deter casual tampering. Consider the locking mechanism—zippers, hasps, or built-in clasps—and pick a material that complements it.
- Assess travel risk and needed cut resistance
- Prefer hardened steel or zinc for checked bags
- Use ABS or reinforced polymers for carry-ons
- Check weight versus durability trade-offs
How to Evaluate TSA Lock Brand Reliability
After you match lock strength and material to your trips, check the brand behind the lock to make sure it really performs. Look for manufacturers with transparent testing standards, clear warranty terms, and visible TSA approval verification.
Read recent user reviews for real-world durability, focus on recurring reports of failures or easy bypasses, and prioritize brands that publish third-party test results.
Verify available replacement parts and customer support responsiveness—brands that answer queries quickly are likelier to honor warranties.
Finally, cross-check industry recognition like travel gear awards or certifications; reputation built on consistency matters more than marketing claims.
Budget TSA Locks Under $25
You can find reliable TSA-approved options for under $25 that still offer solid durability and easy-to-set combinations.
Check affordable cable locks if you need flexible security for bulky bags, or opt for lightweight padlocks when weight matters.
Compare construction and reset features so you get the best protection without overspending.
Durable Combination Options
Although budget locks can’t match premium models, you can still get a durable combination TSA lock under $25 that reliably secures your luggage and survives rough handling. Look for solid zinc or hardened alloy bodies, metal shackle alternatives, and clear reset mechanisms. You’ll want corrosion resistance and a smooth dial or push-button set. Test the combination before travel and note the default code. Avoid flimsy plastics and cheap paint finishes.
- Solid metal construction for impact resistance
- Easy-to-use reset mechanism
- Corrosion-resistant coating for longevity
- Clear TSA keyway and stamped model number
Affordable Cable Locks
Looking for a flexible, budget-friendly way to secure your luggage? Affordable cable locks under $25 give you versatile protection without breaking the bank.
You’ll find braided steel cables with vinyl coating, simple combination dials, and compact TSA-approved mechanisms that let agents inspect baggage without cutting them.
They loop through zippers, handles, or multiple bags, so you can customize security based on your route.
Expect basic weather resistance and light tamper evidence—perfect for short trips or checked bags when paired with sturdier luggage.
Compare reviews for smooth dials and reliable reset functions to get the best value for your needs.
Lightweight Padlock Choices
When you need something lighter than a cable but still TSA-approved, budget padlocks under $25 give you compact, fuss-free security for carry-ons and checked bags. You’ll find keyed and combination styles that meet TSA standards without weighing you down.
Choose solid zinc or aluminum for durability, look for clear reset instructions, and prefer packages that include replacement keys or a master key code. Remember low cost means simpler mechanisms; inspect reviews for jam reports.
These locks deter casual tampering and signal intent to secure belongings while staying affordable and travel-friendly.
- Small combination padlock
- Keyed brass/zinc padlock
- Lightweight aluminum lock
- Resettable TSA combo
Mid‑Range TSA Locks With Extra Features
If you want more than basic security without paying top-dollar, mid-range TSA locks give you solid protection plus useful extras like built-in cable loops, tamper-evident indicators, and smartphone integration for keyless access.
You’ll find combination dials with reinforced housings, metal shackles rated to resist common pry attempts, and weather-resistant casings for varied trips.
Choose locks that let you set personalized codes, link to an app for temporary access, or attach to multiple zippers with a neat cable.
They balance convenience and deterrence—practical for frequent travelers who want extra features without the complexity or cost of premium models.
Premium TSA Locks With Advanced Security
Because you demand the highest protection for valuable gear, premium TSA locks combine hardened materials, certified tamper resistance, and smart authentication to deter sophisticated attacks. You get reinforced shackles, drill‑resistant housings, and precision internal mechanisms that resist prying and picking.
Certified ratings and anti‑shimming designs give measurable assurance. Choose locks with serviceable components so you can replace worn parts rather than discard the lock.
- Hardened stainless steel shackles for cut resistance
- Anti‑drill plates and reinforced housings for impact resistance
- High‑precision locking cams to prevent picking
- Replaceable components and clear certification labels for assurance
Smart TSA Locks and Bluetooth Options
Premium mechanical features set a strong baseline, but smart TSA locks bring connectivity and convenience that many travelers now expect. You can pair a lock to your phone via Bluetooth to check status, release remotely, or receive tamper alerts.
Battery life varies, so you’ll want models with replaceable cells and clear low-battery warnings. Look for simple apps, reliable firmware updates, and physical key or PIN backups in case wireless fails.
Consider travel scenarios: airplane cabins, checked bags, and crowded terminals—choose a lock that balances wireless perks with straightforward manual overrides and durable construction for everyday use.
Are Smart TSA Locks TSA‑Compatible?
You’ll want to understand how smart locks actually work—many use Bluetooth or NFC to let you lock, open, and share access from your phone.
TSA compatibility depends on whether the lock includes a TSA master‑key override or a certified access method for agents.
Let’s look at how those access protocols affect security and convenience.
How Smart Locks Work
When smart locks connect to your phone or a travel app, they let you lock and unfasten luggage without a physical key, but that convenience raises the question of TSA compatibility. You control access via Bluetooth, Wi‑Fi, or NFC, and the lock verifies credentials before releasing.
Battery power, encrypted keys, and firmware updates matter for security and reliability. Manufacturers may include a physical key or TSA‑accepted mechanism as backup.
Consider how the app logs access and how you grant temporary codes to helpers.
- Connection methods
- Power and battery life
- Encryption and firmware
- Backup access options
TSA Access Protocol
Knowing how a smart lock connects and how you can get back in helps set expectations for TSA interaction, because airport security operates under its own rules and tools. You should check whether your smart lock includes a TSA keyhole or an approved override that security can use.
If it doesn’t, TSA may cut it to inspect contents. Register any mobile app or recovery codes and keep backup keys accessible in checked baggage or with a trusted person.
At screening, cooperate if agents request access. Remember, compatibility varies by brand and model, so verify TSA-approved status before traveling to avoid damage.
International Travel Considerations for TSA Locks
If you’re traveling internationally with a TSA lock, remember that not all countries recognize or allow them, and airport security abroad may cut locks that they can’t open. You should weigh risks and plan for inspections: use reliable locks, keep valuables in carry-on, and know local rules when possible.
Also expect varying inspection practices and potential repair needs.
- Check destination regulations and airline rules before packing.
- Carry spare cable ties or portable lock for temporary use.
- Photograph luggage contents and lock model for claims.
- Pack valuables and fragile items in carry-on to avoid loss.
How Other Countries Handle Inspected Luggage
How do other countries handle inspected luggage? You’ll find varied practices: some agencies cut locks, reseal bags with tamper-evident tags, and leave a notice inside. Others simply open and close without marking.
Many nations use their own approved lock systems or rely on airport security to re-secure items. If officials cut your lock, they typically won’t cover replacement costs.
You should pack valuables and fragile items in carry-on or notify authorities if something’s sensitive. Check destination rules before travel so you know whether to use TSA-style locks, leave bags unlocked, or accept possible inspection and resealing.
TSA Locks and Airline Baggage Handling Rules
Because airlines and security agencies each set different rules, you should understand how TSA-approved locks fit into both TSA inspection policies and your carrier’s baggage handling procedures. You’ll find TSA can open and relock approved locks for inspection; airlines may have additional requirements about checked locks, liability, or refusal of locked bags. Always check your carrier’s policy before flying.
Consider how handling systems, transfers, and international partners affect lock use and damage risk. Follow airline guidance to avoid delays or refused carriage.
- Confirm carrier lock policies
- Use only TSA-approved locks
- Anticipate inspections and relocking
- Report damage promptly
Documenting Your Lock and Luggage Before Travel
When you document your lock and luggage before travel, take clear photos of the lock’s brand, model and key or reset code alongside the closed bag from multiple angles so you can show exactly how it looked before handing it over.
Also photograph any identifying luggage tags, serial numbers, dents, scuffs and the interior contents after packing.
Note the date, time and location in a short written log or on the photo metadata.
Email the images to yourself and save them to cloud storage for easy access.
Keep printed copies in your carry-on and include contact info for your carrier.
Evidence to Collect If the TSA Damages Your Luggage
If TSA damages your luggage, gather clear, time-stamped evidence right away so you can support a claim and speed up resolution. You should document everything before leaving the airport: take photos and video showing external damage, opened locks, and the surrounding inspection area. Note the date, time, and checkpoint location. Collect witness names if possible and keep any torn tags or receipts.
- Photos/videos of exterior damage and opened lock
- Photos/videos of interior contents and missing items
- Time-stamped notes with date, time, checkpoint, and agent details
- Physical evidence: torn tags, receipts, and luggage ID
Filing a Complaint or Claim After Inspection Damage
Ready to file a complaint or claim after TSA inspection damage? Start by noting the inspection tag number and filing a report with the airline and TSA before leaving the airport. Photograph damage and keep original tags, boarding pass, receipts, and repair estimates.
Submit a complaint online via the TSA website and the airline’s baggage claim portal, following their timelines and required forms. Describe the damage clearly, attach evidence, and state the compensation you seek.
Keep copies of all correspondence and use certified mail for mailed claims. Follow up persistently and escalate to the Department of Transportation if responses are inadequate.
How to Avoid Common Mistakes When Using TSA Locks
After you’ve documented and reported any inspection damage, take a moment to prevent future headaches by using TSA locks correctly. You’ll avoid common errors by learning simple habits and checking settings before travel.
- Always record your lock combination and store it separately so you won’t be locked out.
- Test locks at home to confirm they open and re-secure smoothly, avoiding jams at the airport.
- Use TSA-approved locks and inspect them for wear; damaged locks can fail or be cut.
- Don’t rely on packing fragile items in checked bags to compensate for lock limitations; pack smart and keep valuables with you.
Tips for Keeping Valuables Safe in Checked Bags
While it’s best to keep high-value items with you, sometimes you have to check a bag, so take steps to reduce risk.
Wrap jewelry and electronics in clothing to cushion them and hide shape. Place small items in a zippered internal pocket or a hard case inside the suitcase.
Use TSA-approved locks so agents can open bags without damaging them.
Record serial numbers and take photos of valuables before travel.
Avoid labeling items as expensive.
Distribute valuable items across multiple bags if possible.
Keep receipts and insurance info accessible, and consider travel insurance that covers checked baggage.
Alternatives to TSA Locks for Fragile or Valuable Items
If you’re worried that a TSA-approved lock still leaves fragile or high-value items vulnerable, there are other practical options to weigh. You can choose alternatives that reduce damage and theft risk without relying solely on locks.
- Pack valuables in your carry-on and keep them on you.
- Use hard-sided, padded cases or specialty hard shells for fragile items.
- Ship items insured via a reputable courier with tracking and signature required.
- Declare and inspect fragile pieces at check-in; request gate-check or special handling.
These choices help you control handling, insurance, and oversight for sensitive belongings.
Combining TSA Locks With Tamper‑Evident Seals
Because TSA locks alone only show that a bag was opened by authorized personnel, combining them with tamper-evident seals gives you both controlled access and clear visual evidence of unauthorized entry.
You can lock zippers or latches with a TSA keyable device and affix a numbered or adhesive seal across an opening. If the seal’s broken or missing, you’ll know someone accessed contents even if the lock remains intact.
Choose seals rated for travel, log seal numbers, and inspect seals after baggage handling. This layered approach deters tampering, helps with claims, and provides quick visual confirmation without hindering authorized inspections.
How to Maintain and Clean TSA Locks
When you keep TSA locks clean and serviced, they’ll work reliably and avoid jams or corrosion during travel. Simple routine care takes only a few minutes but prevents many common problems.
You should inspect, clean, lubricate, and test locks regularly. Use a soft brush to remove dirt, compressed air for debris, and a mild cloth for fingerprints.
Apply a small amount of graphite or silicone lubricant to moving parts, not oil. Cycle the combination or key several times after maintenance.
Store luggage in a dry place to prevent rust and check mechanisms before each trip.
- Inspect
- Clean
- Lubricate
- Test
When to Retire and Replace Your TSA Lock
Regular maintenance keeps TSA locks functioning, but you’ll still need to replace them eventually. Replace if the lock shows corrosion, bent or broken components, or if the shackle or dials stick despite cleaning.
Swap locks after any forced TSA entry, visible tampering, or if the key is damaged or missing.
Upgrade when travel patterns change—more flights or international trips may justify a sturdier, newer model with updated approvals.
If you forget combinations frequently or the reset mechanism feels unreliable, replace it for convenience and security.
Dispose of old locks securely so codes or keys can’t be reused.
Technical FAQs: Combinations, Master Keys, and Reset Procedures
If you need to change a combination, understand how master keys work, or reset a jammed mechanism, this section answers the practical technical questions travelers ask most often.
You can usually set or change combinations by aligning digits to the current code, pulling or pressing a reset tab, then entering a new code and returning the tab.
TSA master keys open locks without revealing your code; keep locks undamaged to allow inspection.
If jammed, try lubricant and gentle manipulation or contact the manufacturer—forcing it risks breaking both lock and luggage.
Record codes securely and test after resetting.
- Locate reset tab or button
- Use current code before changing
- Keep locks visible and undamaged
- Contact manufacturer for jams
Real Traveler Experiences With TSA Inspections
Though inspections vary, you’ll often find TSA agents using master-keyed tools to open your locked luggage, quickly checking contents, and resealing or leaving a notice if they’ve looked inside. You might discover a notice tucked in, or subtle resealing marks on zippers.
Some travelers report polite, efficient inspections with items untouched; others mention scuffed tags or shifted packing. If something’s damaged, you can document it immediately and file a claim.
Many learn to pack valuables in carry-on. Overall, experiences range from routine to inconvenient, but knowing what to expect helps you respond calmly and protect your belongings.
Quick Checklist for Using a TSA Lock on Your Next Trip
After you’ve seen how inspections typically go, use this quick checklist to lock your luggage confidently and reduce hassle at the checkpoint.
- Choose a certified TSA-approved lock and register its code or keep the key in your carry-on.
- Attach the lock so TSA agents can access zippers or compartments without damaging seams.
- Note fragile or special-access items on an external tag or inside accessible pockets for smoother inspections.
- Inspect your lock and luggage before departure; replace worn locks and ensure zippers align so agents can relock after an inspection.
Follow these steps to streamline security and safeguard your belongings.
Common Myths About TSA Locks Debunked
While TSA-approved locks offer real benefits, several persistent myths can make you doubt whether they’re worth using. You might hear they tempt theft — but visible locks actually deter casual tampering and signal legitimate luggage.
Some say TSA masters every lock; only approved models let agents open and relock without breaking them, reducing damage.
Others claim locks hide illegal items from inspection; agents can still inspect contents when necessary.
You may worry about key loss or code hacks; pick reputable brands and reset codes regularly.
Knowing facts helps you choose and use TSA locks confidently on future trips.
Frequently Asked Questions
Can TSA Locks Be Used on Backpacks or Carry-On Bags With Nonstandard Zippers?
Yes — you can use TSA locks on backpacks or carry-ons with nonstandard zippers if they accept a lock or have zipper pulls you can secure; otherwise you’ll need alternative security like cable locks, straps, or lockable luggage inserts.
Do TSA Agents Log Every Time They Open a Locked Bag With a Master Key?
No, they don’t log every opening; TSA agents may record selective inspections, but routine master-key openings typically aren’t individually logged. You should assume your locked bag can be opened without a record during security screening.
Can TSA Lock Use Void My Travel Insurance or Warranty on Luggage?
Generally, no — using a TSA lock won’t void your travel insurance or luggage warranty. You should check specific policy or warranty terms, though, because rare providers might have clauses about lock types or forced-entry damage.
Are TSA Lock Master Keys Vulnerable to Duplication by Unauthorized Parties?
Yes — TSA master keys can be vulnerable; researchers showed physical keys and codes can be copied or replicated from photos or impressions, so you should assume potential duplication and avoid relying on them for high security.
Can I Travel With TSA Locks if My Destination Enforces Stricter Security Rules?
Yes — you can usually use TSA locks, but if your destination imposes stricter rules they might require you to remove or replace them; you’ll need to comply with local regulations and airline or security staff instructions to avoid delays.
Conclusion
Now that you know what a TSA lock does and why it matters, you can choose one that fits your travel style and feel confident using it. TSA‑approved locks let agents inspect checked bags without breaking your lock, saving headaches and expense. Keep your combination recorded, understand reset steps, and expect occasional inspections. With smart use and realistic expectations, a TSA lock gives extra security and smoother airport experiences—without fooling you into thinking it’s foolproof.