Why Did Tsa Put a Lock on My Luggage
You found a TSA lock because agents opened your bag for screening—often after an X‑ray flag, a suspicious item, battery or electronics concern, or a random check—and resealed it with a tamper‑evident lock so they could reaccess it without breaking your lock. They’ll usually leave a notice inside, try to minimize damage, and use master keys on approved locks; document issues and report damage to TSA or your airline. Keep going for steps to follow and why it happens.
Quick Answer: Why TSA Might Put a Lock on Your Luggage
If TSA inspected your bag and put a lock on it, they likely did so after opening it for a security check and resealing it to protect your belongings. You’ll often see a tamper-evident seal, a luggage lock, or a notice when agents needed to inspect contents for prohibited items, suspicious electronics, or random checks.
They’ll use TSA-approved locks so they can reopen baggage without damage. This isn’t punitive; it’s procedural.
If you packed prohibited items, you may face confiscation or further questioning, but a lock usually just signals that security followed protocol while safeguarding your property.
First Steps If You Find a TSA Lock on Your Bag
If you spot a TSA lock on your bag, start by inspecting it closely to see whether it’s an official Travel Sentry or similar marker.
Check for signs of forced entry or damage to the zipper, seams, or lock itself.
If anything looks tampered with or broken, document it with photos before filing a report.
Inspect The Lock
When you spot a TSA lock on your bag, start by checking the lock type and any visible damage so you can determine whether it was opened for inspection or tampered with.
Next, examine the keyway or combination dials: TSA locks often show a red diamond Travel Sentry logo near the mechanism.
Test the combination or key gently—don’t force it.
Look for scratches, bent shackle, or misalignment around the zipper pulls or latch.
Note any loose parts and whether the zipper pulls are resealed through the lock.
Take photos and record the lock model before you move the bag.
Check For Damage
Because a TSA lock can mean your bag was opened for inspection or handled roughly, start by checking for damage right away. You should inspect the exterior, zippers, seams, wheels, and handles, noting anything ripped, dented, or misaligned.
Open the bag and scan contents for broken items, missing goods, or loose packing. Photograph everything and record details before moving items.
- Look for tears, dents, or forced entry marks.
- Test zippers, locks, and closures.
- Check wheels and telescoping handles for function.
- Inventory contents; note missing or damaged items.
If you find damage, report it immediately.
When TSA Inspects Checked and Carry-On Bags
Although TSA agents don’t inspect every bag, they’ll open checked and carry-on luggage when security screening flags an item for further review. You might find a contact slip, broken lock, or zip tie; agents reseal with TSA-approved locks or tamper-evident bags.
If your bag’s locked and you used a TSA key lock, they’ll open it; otherwise, they may cut noncompliant locks. They’ll generally avoid rummaging unnecessarily, focusing on the flagged area and noting items.
If something’s missing or damaged, report it immediately to the airline before leaving the airport; document with photos and ask for a written report.
Why TSA Conducts Physical Searches of Luggage
When your bag triggers an alert or can’t be fully screened by machines, TSA agents will open it to follow security screening protocols and confirm there’s no threat.
They conduct physical searches to find prohibited items that x-rays or swabs might miss.
You should expect respectful, targeted checks aimed at keeping everyone safe.
Security Screening Protocols
If an item in your bag triggers an alarm or looks suspicious on the X-ray, TSA officers will open it to verify its contents and rule out threats to passenger safety. You’ll usually be offered the choice to be present while they inspect, and officers follow steps to protect privacy and prevent damage.
Inspections aim to confirm safety, not to search for prohibited items beyond manifest threats. Typical protocol includes:
- Visual X-ray assessment
- Manual inspection with you present
- Use of gloves and inspection trays
- Repackaging and documentation
Know your rights, cooperate, and reclaim your lock if intact.
Prohibited Item Detection
Why does TSA sometimes open bags for a hands‑on check? You’ll get a physical search when X‑ray images are unclear, show potential threats, or detect prohibited items like sharp objects, liquids over limits, or explosives components.
Agents open your luggage to confirm contents, remove ambiguous items, and prevent dangerous materials from boarding. You can speed the process by packing transparently, separating electronics and liquids, and declaring unusual items.
If an agent finds a prohibited item, they’ll either dispose of it, offer return options, or escalate security procedures. Cooperate calmly—physical searches protect everyone and resolve screening uncertainties efficiently.
Why TSA Locks Bags After Inspection (Chain of Custody)
Because TSA agents must document and secure any checked item they open, they often lock bags after inspection to maintain a clear chain of custody and prevent tampering while the luggage moves through the system.
Because TSA must document opened checked items, agents often lock inspected bags to preserve chain of custody and prevent tampering
You’ll find locks or tags showing inspection details and an agent’s ID, so you know who handled your bag and when. This protects you and the agency by reducing loss, disputes, and liability.
Expect clear labeling and documentation when retrieval is needed. Key points to note:
- Identification of inspecting agent
- Time and location stamped
- Tamper-evident seals applied
- Chain recorded in logs
How TSA Reseals Bags That Won’t Close Properly
When an agent finds your checked bag won’t close after inspection, they’ll try simple fixes first—repacking loose items, refastening zippers, or tucking straps—to get it securely shut.
If that fails, they’ll use approved sealing methods: sturdy tamper-evident tape across the opening, a plastic security zip tie threaded through zipper pulls, or a clear adhesive tamper strip.
They’ll label the bag to note the inspection and sealing, often including an agent ID and date. You’ll receive a notice at baggage claim explaining the action.
These steps keep contents secure while providing visible evidence if the seal’s been disturbed.
Types of TSA Locks, Tags, and Tamper Seals
If you want your luggage inspected without having it damaged, it helps to know the different TSA-approved locks, tags, and tamper seals agents use and what each one signals. You’ll see combination or key locks indicating accepted access; a bright “inspected” tag when agents opened your bag; tamper-evident tape showing an exam occurred; and zip-ties or plastic seals used to temporarily secure contents.
Know these four categories so you can quickly identify why your bag was altered:
- Combination/key locks
- Inspected tags
- Tamper-evident tape
- Zip-ties/plastic seals
Recognizing them prevents surprises and helps you report damage.
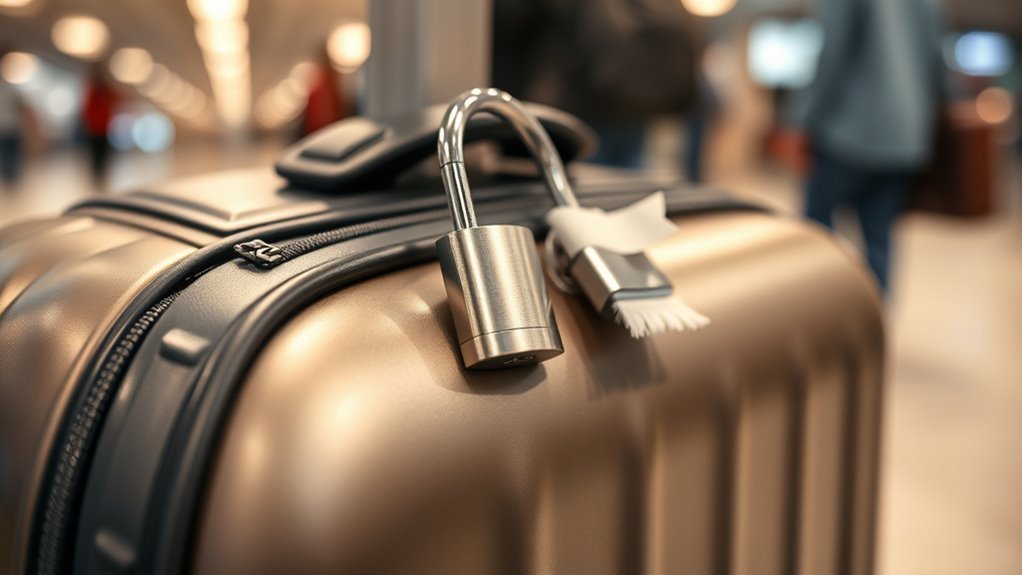
What a TSA‑Approved Lock Looks Like
Although TSA-approved locks come in several styles, you’ll recognize them by a small red diamond logo—Travel Sentry or Safe Skies—indicating agents can open them with a master key.
Look for a small red diamond—Travel Sentry or Safe Skies—signifying agents can open the lock with a master key.
You’ll see combination dials, key locks, or cable loops designed to secure zippers or handles.
Hard-case luggage may have integrated locks with the logo near the latch.
Portable padlocks and zipper pulls display the mark on their face.
Colors and materials vary—metal, plastic, braided cable—but the logo is the reliable identifier.
Check packaging or product descriptions when buying, and inspect the lock on your bag before travel.
How Tamper‑Evident Seals Work

Because airport security needs a clear, quick way to show whether a bag’s been examined, agents use tamper-evident seals that change appearance when someone opens or tampers with your luggage. You’ll see bright adhesive strips, plastic pull-tabs, or paper seals that break, void, or display a message when disturbed. These are single-use and inexpensive, discouraging unnoticed access.
When you travel, inspect seals before and after screening to spot irregularities.
Typical features include:
- color change upon breakage
- irreversible tearing or perforation
- sequential serial numbers for tracking
- adhesive failure visible at the edge
How to Tell If TSA Opened Your Bag
You can often spot signs that TSA inspected your bag by checking for inspection indicators like torn packing, resealed tape, or paper slips left inside.
Look for marks on TSA‑approved locks—stamped logos or scuffs from the inspection process can show they were opened. Keep an eye on both the lock and the contents to confirm whether an inspection occurred.
TSA Inspection Indicators
When TSA inspects your bag, there are a few clear signs you can look for that indicate an agent opened it. You’ll notice straightened contents, resealed packaging, or a notice slip tucked inside. Check zippers, straps, and outer seams for fresh wear or misalignment. Smell for disinfectant or marker ink.
Look for:
- A printed or handwritten inspection notice inside.
- Items reorganized from your original arrangement.
- Taped or resealed compartments.
- Unfamiliar scuffing or tool marks near closures.
If you find signs, document them, keep receipts, and contact the airline or TSA for a report.
TSA-Approved Lock Marks
If you spot inspection signs inside your bag, your next step is to check any TSA-approved locks for telltale marks that show an agent used their master key. Look for tiny scratches, scuffs, or indentations around the keyhole or shackle that weren’t there before.
Compare both sides and photos you took pretravel if possible. A slightly misaligned keyhole or fresh paint scuff can also signal opening.
Remember TSA uses specific master keys; damage is usually minimal. If you suspect forced entry, document it, keep packing lists, and file a claim with the airline or TSA immediately, including photos and timestamps.
Random Screening vs. Targeted Searches: Differences
Curious how TSA decides which bags get opened? You’ll see two approaches: random screening, which is algorithmically or procedurally blind, and targeted searches, which focus on intelligence, alerts, or suspicious findings.
Random checks keep unpredictable coverage; targeted searches zero in on risk indicators.
- Random: you’re selected by rotation or machine flags.
- Targeted: you’re chosen based on behavior, intel, or alerts.
- Random aims for fairness and deterrence.
- Targeted prioritizes threat mitigation and efficiency.
You’ll experience brief delays either way; agents keep procedures standardized to balance traveler flow with security needs.
What TSA Agents Can and Cannot Do During Inspections
When TSA inspects your bags, agents can open containers, screen electronics, and search for prohibited items.
They can’t go through intimate areas of your luggage or perform invasive body searches without probable cause and proper protocol.
If something’s taken out or damaged, you’ll want to note it and ask about the reason and next steps.
What Agents Can Inspect
Although TSA officers have broad authority to screen baggage, they’re limited to specific procedures and legal bounds when inspecting your luggage. You should expect them to open bags, X-ray contents, and swab items for explosives or prohibited residues.
They’ll search accessible compartments and remove items that trigger alarms. You can watch when practical, and they’ll document damaged or altered locks.
- Carry-on and checked bag X-rays
- Manual opening and visual inspection
- Explosive trace swabs
- Removal of prohibited items
Agents follow standardized protocols; cooperation speeds inspection and helps protect your belongings.
What Agents Cannot Do
While TSA officers can do several types of inspections, they can’t rummage through your belongings without following rules. You’ll usually be present when agents inspect checked bags and can request a private screening for sensitive items.
They won’t open locked bags unless they can legally access them; if you use a TSA-approved lock, officers will use a master key instead of breaking it.
Agents can’t confiscate property without cause or detain you beyond inspection procedures. They won’t search protected areas without consent or a warrant.
If you believe rules weren’t followed, report the incident to TSA promptly.
What to Do If You Think Your Bag Was Searched Improperly
If you suspect TSA searched your bag improperly, stay calm and document what you found before leaving the airport. You should notify a supervisor at the checkpoint or the airport’s lost and found office, request a written incident report, and ask about next steps. Don’t argue loudly; stay polite and clear.
- Ask to speak with a TSA supervisor.
- Request a written report or incident number.
- Note names, times, and locations.
- Keep receipts for valuables and travel documents.
Follow up online via the TSA contact form and consider filing a complaint if the response is unsatisfactory.
How to Document Damage or Improper Searches
After you speak with a supervisor and file an incident report, start documenting the damage or improper search right away so you have a clear record. Photograph all exterior and interior damage from multiple angles, include any broken zippers, torn fabric, scuffs, or missing items. Timestamp photos and note location, date, flight number, and names of staff you spoke with.
List missing or damaged contents with estimated values. Keep original baggage tags, boarding passes, and the incident report copy. Save receipts for replacement or repairs.
Store everything in one folder or digital file so you can retrieve evidence quickly.
How to File a Complaint With the TSA
Want to make sure your complaint gets noticed and acted on? File online at tsa.gov/contact or use the TSA Contact Center. Be concise, stick to facts, and attach photos or documents you gathered earlier. Include dates, times, flight numbers, and agent names if possible. You’ll get a tracking number—keep it.
- Describe what happened clearly.
- Attach evidence (photos, receipts).
- Provide contact info and tracking number.
- Ask for specific resolution (refund, explanation).
Follow up if you don’t hear back in 30 days. Keep copies of all correspondence and stay professional in tone.
When to Contact Your Airline Instead of TSA
If your issue is about airline liability, baggage delay claims, or getting compensation and rebooking, you should contact the airline first because they handle lost or delayed luggage and passenger remedies.
The airline can tell you their specific liability limits and start a claims process or arrange rebooking.
TSA handles security actions, but the carrier is responsible for getting your bags and money back.
Airline Liability Rules
When your bag is damaged, lost, or contains missing items after a flight, you’ll usually need to contact the airline rather than TSA because airlines are responsible for baggage handling and compensation under federal and international rules.
You should file a claim quickly, keep receipts, and note damage at the airport. Know limits and timelines: domestic rules cap liability, Montreal Convention applies internationally. Contact customer service and follow their process for inspections and reimbursement.
Key steps to prepare:
- File a report with the airline immediately.
- Keep boarding pass and baggage tags.
- Save receipts for contents and repairs.
- Track claim correspondence.
Baggage Delay Claims
Besides damage or loss, another common post-flight issue is a delayed checked bag, and that’s also something you need to take up with the airline rather than TSA.
If your bag doesn’t arrive, report it immediately at the airline’s baggage service office in the terminal or via their app. You’ll get a Property Irregularity Report (PIR) with a reference number—keep it.
Airlines track and locate bags, arrange delivery, and handle interim needs. TSA doesn’t manage baggage routing.
Follow the airline’s instructions for timelines and required receipts for essential purchases. Persistently follow up until your bag is returned.
Compensation And Rebooking
Although TSA enforces security rules, your airline handles compensation and rebooking for delayed, canceled, or missed flights, so contact them directly to get refunds, vouchers, or a new itinerary.
When TSA inspects or locks luggage, it doesn’t owe you travel credits or change reservations. Reach out to your carrier if you need:
- Refunds for canceled flights
- Rebooking after missed connections
- Vouchers for delays or disruptions
- Reimbursement for expenses airlines cover
Keep receipts, note confirmation numbers, and document timelines. Use the airline’s app, phone line, or airport counter for fastest resolution; escalate to a supervisor if needed.
Compensation and Reimbursement: What to Expect
If TSA inspects your bag and damages or loses something, you can file a claim for reimbursement through the carrier, not TSA.
Start by documenting damage—photos, lists, receipts—and submit within the airline’s timeframe. Airlines usually require proof of ownership and value; keep originals and digital copies.
Reimbursement limits vary by carrier and ticket type, and processing can take weeks. You may get repair, replacement, or cash settlement; negotiated amounts might be less than you expect.
If denied, appeal with additional evidence or escalate to aviation consumer protection.
Travel insurance can cover gaps beyond carrier liability.
Common Items That Trigger a Physical Search
If TSA finds unexpected electronics in your bag, they’ll often open it to check batteries and hidden components.
You should also expect a search if you’re carrying liquids or gels that exceed allowed sizes or aren’t properly packed.
Knowing these triggers helps you pack smarter and avoid delays.
Unexpected Electronics Inside
Ever wondered why TSA sometimes wants to open your bag when you’ve only packed “everyday” tech? You might think chargers and headphones are harmless, but certain electronics raise flags during X-ray screening.
Batteries, dense circuit boards, and molded components can obscure images or mimic prohibited items, prompting a physical check. To reduce delays, pack strategically:
- Remove large electronics like laptops and tablets for separate screening.
- Keep spare lithium batteries in carry-on and visible.
- Place cameras and dense chargers where screens can clearly view them.
- Avoid wrapping devices tightly with clothing that hides contours.
Follow these tips to minimize inspections.
Liquids And Gel Containers
When you pack toiletries, drinks, or gel-based items, TSA often flags them because containers can leak, conceal prohibited substances, or create ambiguous shapes on X-rays that require hands-on checks. You should separate liquids into clear, resealable bags and follow the 3-1-1 rule for carry-ons to reduce attention.
Unlabeled bottles, homemade cosmetics, or partially used containers raise suspicion and prompt inspectors to open bags. If TSA asks, cooperate and declare anything unusual to speed the process.
For checked luggage, secure caps and double-bag items to prevent spills and avoid perfumes or aerosols that might trigger extra scrutiny.
Explosive Trace Detection and Baggage Locks
Because security officers need to check for traces of explosives, TSA may open and relock your suitcase using a screened, approved lock to preserve your property while maintaining safety. You’ll be notified if agents need to swab items or inspect contents for residue.
They try to avoid damaging luggage and will use a TSA-approved lock when relocking. You should:
- Expect brief handling and possible resealing.
- Keep an inventory to spot missing items.
- Use TSA-approved locks to allow reopening without damage.
- Contact the airline or TSA promptly if you find tampering or missing belongings.
Why Electronics or Batteries Often Prompt Checks
You’ll often get extra screening when you pack batteries because they can overheat or short and are subject to specific safety rules.
Electronics also prompt checks because they can conceal prohibited items or components that need inspection.
Be prepared to power on devices or remove batteries so TSA can quickly verify they’re safe.
Batteries Trigger Extra Screening
If a TSA agent flags your bag for extra screening because of electronics or batteries, it’s usually due to safety and security concerns. You’ll face checks because lithium batteries can overheat, look suspicious on X-rays, or be improperly packed.
To speed things up, know what agents look for:
- Loose or spare lithium batteries packed with devices.
- Damaged, swollen, or improperly stored batteries.
- Multiple high-capacity power banks exceeding airline limits.
- Unlabeled or unfamiliar battery packs that obscure device contents.
Keep batteries in carry-on when possible, protect terminals, and pack devices so agents can quickly inspect them.
Electronics Hide Restricted Items
When agents flag electronics or batteries, they’re often worried those items can conceal prohibited goods—wires, narcotics, or even components of incendiary devices can be hidden inside chargers, power banks, phones, and laptops.
You should expect agents to inspect devices more closely because hollowed-out cases, modified batteries, or added circuitry can mask contraband or trigger alarms.
Remove electronics from bags when asked, power them on if requested, and explain unfamiliar modifications.
Documented issues or odd smells warrant extra scrutiny.
Cooperating speeds clearance, reduces delays, and helps officers verify safety.
Knowing this helps you pack and travel with fewer surprises.
Airline vs. TSA Responsibilities for Baggage Security
Although both airlines and the TSA handle baggage, they’ve distinct roles: airlines manage your luggage’s transport and handling, while the TSA enforces security screening and may lock or inspect bags for safety.
You’re responsible for choosing locks approved by the TSA and following airline size and weight limits. If TSA inspects, they’ll reseal with a tamper-evident device; airlines reroute, delay, or report damaged items from handling.
Know who to contact: TSA for security screenings, the airline for lost or damaged luggage. Consider these responsibilities:
- TSA: security screening, inspections, locks
- Airline: transport, loading, baggage handling
- TSA: enforcement, penalties, prohibited items
- Airline: claims, tracking, customer service
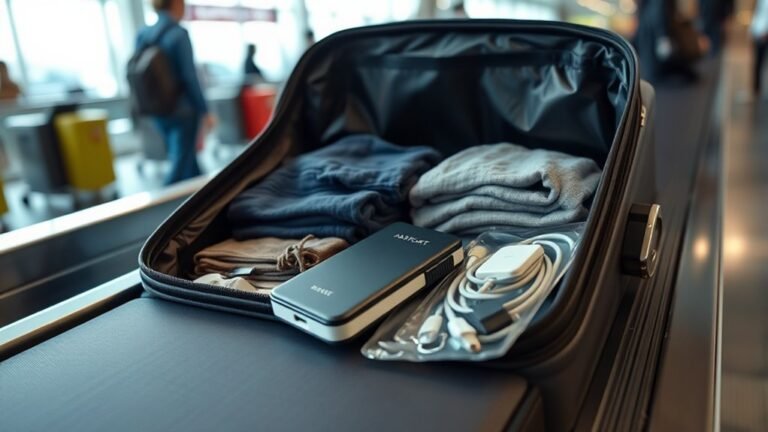
How to Pack So TSA Can Inspect Without Damage
Since TSA may need to open checked bags for screening, pack so inspectors can do their job without damaging your belongings or your lock. Place fragile items in the center, cushioned by clothing or bubble wrap, and avoid packing valuables or irreplaceables in checked luggage.
Use clear, resealable plastic bags for small items and toiletries so agents can view contents without scattering them. Leave accessible space near zippers or TSA-accessible locks so agents can open and reseal without cutting.
Label contents and include contact info inside. Compress and organize with packing cubes to minimize disruption if inspection requires rummaging.
Best Locks to Use for TSA Screening
If you want your bag to stay secure and still allow TSA to inspect it without cutting your lock, pick a TSA-recognized lock or an inline lock designed for airline screening. You’ll want a durable, approved padlock or zipper pull with the red diamond Travel Sentry logo so agents can open and relock without damage.
Consider cable or combination styles for flexibility and avoid cheap, easily broken models. Maintain your combination records and test locks before travel.
Opt for cable or combination locks for flexibility; avoid flimsy models, record combinations, and test locks before travel.
Prioritize locks that resist tampering yet reset easily if inspected. Recommendations focus on reliability, TSA compatibility, and user convenience.
- Durability
- TSA approval
- Ease of use
- Resettable
Using Tamper‑Evident Luggage Wraps and Tags
You can boost security and spot tampering quickly by using tamper‑evident wraps and tags on your luggage. Different options—shrink wrap, adhesive seals, and numbered or RFID tags—offer varying visibility and durability.
Learn the right way to apply and remove them so they protect your bag without damaging it or interfering with TSA checks.
Benefits Of Tamper‑Evident Wraps
When you wrap your suitcase with tamper‑evident film or attach a security tag, you get immediate visual proof if someone’s tried to access your belongings, which deters opportunistic theft and speeds up inspections.
You’ll also enjoy clearer accountability and simpler travel routines. Wraps and tags cut down on unnecessary bag openings, reduce stress at checkpoints, and protect fragile or private items. They give you a quick way to spot damage or interference before you reach your destination.
Consider benefits like these:
- Visible tamper indication
- Faster security checks
- Reduced theft risk
- Easier claim support
Types Of Security Tags
Curious which security tag will suit your travel style best? You’ll find simple adhesive seals that show tampering, cable ties that secure zippers, and numbered tear-off tags for chain-of-custody tracking.
There are RFID or barcode labels that let you scan status, and tamper-evident plastic straps that loop through handles for visible breaks.
For fragile or high-value items, use certified tamper-evident seals with serial numbers; for quick trips, disposable adhesive strips work fine.
Mix types: pair a seal with a cable tie for extra visibility.
Choose based on visibility, reusability, and how easily airport staff can inspect them.
Proper Application And Removal
Though applying tamper‑evident wraps and tags seems simple, doing it correctly makes the difference between clear tamper evidence and a false sense of security. You’ll inspect seals for damage before use, align tags so numbers are visible, and press wraps firmly to remove air pockets.
When sealing, verify tags lock and can’t be slid or twisted off. After travel, check seals immediately; photograph and retain ticket numbers for disputes. Replace single‑use wraps after any inspection.
Remember these steps:
- Inspect packaging
- Align and press firmly
- Record seal IDs
- Replace if compromised
Tips for Traveling With Fragile or High‑Value Items
If you’re packing fragile or high‑value items, plan how you’ll protect them before you zip your bag—use sturdy cases, wrap items individually in padding, and keep valuables in carry‑on whenever possible so you control handling and access. Pack heavier items low and centered, use rigid containers for watches or electronics, and insure or photograph valuables before travel. Label fragile bags and use TSA‑approved locks if checked. Consider portable scales and backup chargers. Stay aware of local rules for valuables and declare items when required.
| Item type | Protection tip |
|---|---|
| Electronics | Hard case |
| Jewelry | Padded pouch |
| Glass | Bubble wrap |
| Cameras | Foam inserts |
| Documents | Carry in hand |
Preventing Surprises: Packing and Documentation Checklist
Now that you’ve packed and protected fragile or high‑value items, make a checklist to prevent surprises at the airport and beyond. Confirm ID, boarding pass, and any permits for restricted items. Label bags with contact info and remove old tags. Photograph contents and note serial numbers for valuables. Keep receipts and warranty papers in a carry‑on.
- ID, tickets, permits
- Photos and serial numbers
- Receipts, warranties
- Clear external labels
Review airline and TSA rules for batteries, liquids, and declared items before you leave. Carry documents and photos on your phone and in print.
International Screening: How Other Countries Differ
How do security checks vary when you fly abroad? You’ll notice different rules, tech, and enforcement. Some countries inspect bags more thoroughly, others focus on passenger screening; signage and languages change, too. Know local regulations, remove electronics when asked, and expect varied lock policies.
| Country type | Typical focus |
|---|---|
| US/Canada | Random physical inspection |
| EU | Document checks, liquids control |
| Middle East | Extensive baggage x-ray |
| Asia | Rapid automated lanes |
| Small nations | Manual searches |
Follow airline guidance, declare items, and accept that procedures reflect local law and security priorities.
Airport Signs and Staff to Ask About Searches
After you notice different screening styles abroad, watch the signs and staff to understand what’s likely to happen to your bag or person. Look for posted procedures, language about random checks, and instructions for locked luggage.
Ask staff politely about search policies if signage isn’t clear; they’ll tell you whether they’ll cut locks, use seals, or request you open bags. Know who to approach: information desks, checkpoint officers, or airline ground staff.
Follow their directions to avoid delays.
- Read signs first
- Ask officers clearly
- Confirm lock/seal practices
- Get contact for complaints
Real Traveler Scenarios: Common Lock and Seal Cases
When TSA or foreign agents lock or seal your bag, you’ll usually learn why from signs, officers, or a quick notice—common reasons include security inspections, customs holds, or unresolved prohibited items—and knowing typical scenarios helps you respond calmly and fix things fast.
You might find a broken zipper and a padlock after a random explosives trace test, a sealed bag due to undeclared alcohol or food at customs, or a tag when an item flagged by X‑ray needs secondary screening.
Follow instructions, show documents, declare items, and ask where to pick up or how to clear holds before departing.
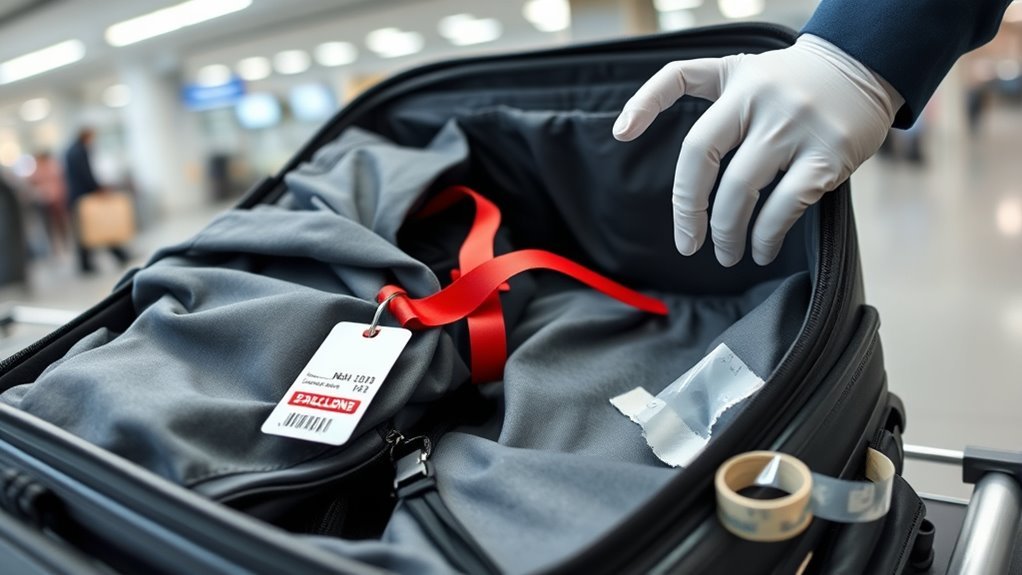
How to Read TSA Inspection Notices and Tags
If you find a TSA notice or tag on your luggage, don’t panic—these labels tell you exactly why agents opened or sealed your bag and what steps you can take next. Read the main box for inspection reason (random, alarm, prohibited item) and check for agent initials and date.
If you find a TSA tag on your luggage, stay calm—check the reason box, agent initials, and date.
If a seal’s applied, note its number before breaking it. Keep the notice for questions or claims.
- Find reason code and description.
- Record seal or tag number.
- Note agent ID/date.
- Keep the notice for follow-up.
Contact the airline or TSA only if items are missing or damaged.
Further Resources: TSA Policies and Passenger Rights
Knowing how to read a TSA notice helps you decide what to do next, and there are several official resources you can use to understand your rights and the agency’s procedures.
Check the TSA website for inspection policies, prohibited items, and guidance on locks and packing.
Review the TSA Traveler Redress Inquiry Program (DHS TRIP) if you think you were wrongly targeted.
Consult the relevant airline’s policies for baggage handling and claim procedures.
For legal questions, contact a consumer rights attorney or your local small claims court.
Keep copies of notices, photos, and receipts to support any complaint or claim.
Frequently Asked Questions
Can TSA Remove Non‑Approved Locks From Checked Luggage?
Yes — TSA can remove non‑approved locks on your checked luggage if they need to inspect it. They’ll generally leave a notice, but your lock may be cut or damaged, so use TSA‑approved locks to avoid problems.
Will TSA Lock My Bag After a Canine or Bomb‑Sniffing Dog Alert?
Yes — if a canine or bomb‑sniffing dog alerts, TSA may open and inspect your bag, then secure it with a TSA‑approved lock or tamper seal. They’ll note the inspection and try to reseal your luggage.
Can I Pack Medication or Medical Devices in Carry‑On to Avoid Inspections?
Yes — you can pack medication and medical devices in carry‑on to reduce inspections. Keep prescriptions, original packaging, and declare liquids over 3.4 ounces at security; notify officers if devices need screening or pat‑down.
Do TSA Locks Work Across Different Countries and Airlines?
TSA locks mostly work with U.S. security; other countries and airlines may not recognize them. You’ll want a lock accepted by local authorities or use removable locks, since rules and inspection tools vary internationally and by carrier.
Can I Request an Explanation or Get the Agent’s Name at Inspection Time?
Yes — you can ask the agent for an explanation and request their name during inspection. They’ll typically provide reasons; if unsatisfied, note details, file a complaint with TSA or the airline later, and keep any documentation for follow-up.
Conclusion
If you find a TSA lock or seal on your luggage, don’t panic — it usually means TSA inspected your bag for safety. You’ll see a notice explaining why, and staff can answer questions before you leave the airport. Keep TSA-approved locks on future trips to protect your belongings after inspection. If something’s missing or damaged, report it right away. Know your rights, read the notice, and follow up with the airline or TSA for resolution.