What Is Hand Luggage
Hand luggage is the small bag you bring into the cabin with you — think carry-on suitcase, backpack, or tote — holding essentials like travel documents, valuables, a change of clothes, electronics, medications, and small toiletries. It must meet your airline’s size and weight rules and follow liquid and battery limits. You’ll keep it under the seat or in the overhead bin for quick access, and if you keep packing smart, there’s more useful guidance ahead.
Quick Answer: What to Bring in Hand Luggage
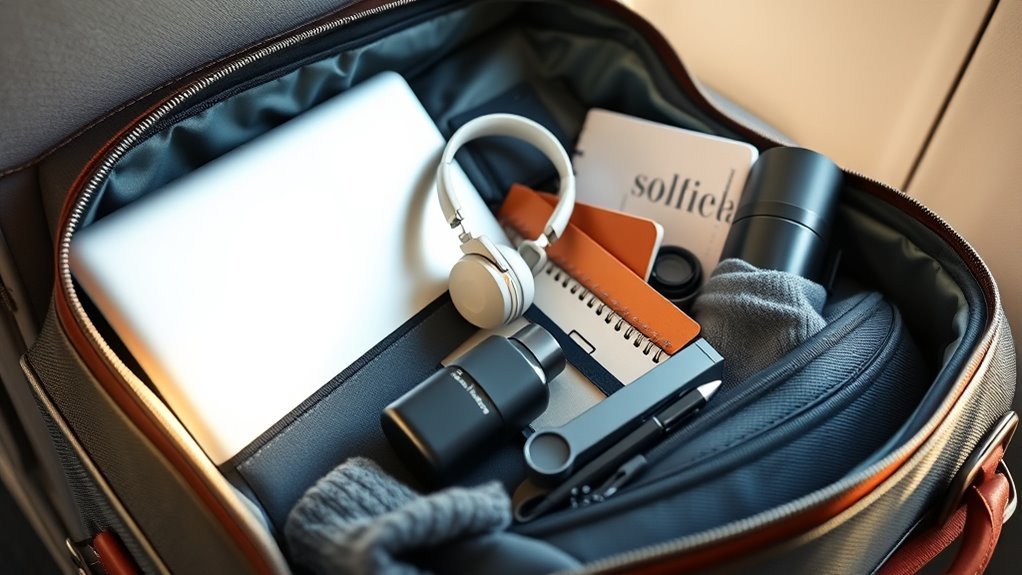
When packing hand luggage, focus on essentials you’ll need during travel and items you can’t risk losing: travel documents, wallet, phone and chargers, a change of clothes, any necessary medications, and basic toiletries in compliant containers.
Pack a compact power bank, noise-cancelling earphones or earplugs, and a lightweight travel blanket or scarf.
Bring a compact power bank, comfy noise-cancelling earphones (or earplugs), and a lightweight travel blanket or scarf for comfort.
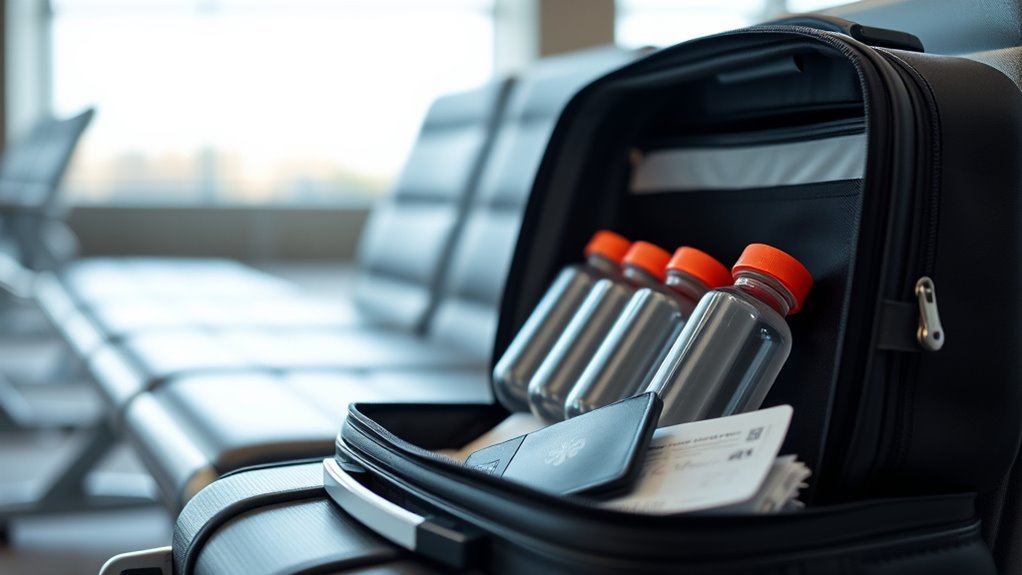
Include snacks, a refillable water bottle (fill after security), and a pen for forms.
Keep valuables and fragile items cushioned and accessible.
Use packing cubes or small organizers to stay tidy.
Check airline rules before flying and adjust contents for trip length and personal needs.
What Counts as Hand Luggage
You’ll want to check airline size limits first, since each carrier sets specific dimensions and weight for what you can bring into the cabin.
Think about allowed carry-on items next — from electronics and medications to liquids in approved containers — and how rules vary by airline and country.
Following those two checks will help you pack only what truly counts as hand luggage.
Airline Size Limits
Although airlines all call it “hand luggage,” what actually counts varies: each carrier sets its own size and weight limits, and those rules determine whether your bag can go in the overhead bin, under the seat, or needs to be checked.
Check dimensions (length, width, height) and weight before you pack; airlines sometimes include wheels and handles.
Low-cost carriers often enforce stricter limits and charge for larger carry-ons.
Measure your bag and compare it to the airline’s published allowance to avoid gate-checking or fees.
When in doubt, choose a compact, lightweight bag that meets the smallest common limits.
Allowed Carry-On Items
Because airlines define hand luggage differently, you should know exactly what items count as a carry-on before you pack. Generally, carry-ons include a small suitcase or backpack and one personal item like a purse, laptop bag, or briefcase.
Acceptable contents cover clothing, toiletries (in approved containers), electronics, medications, travel documents, and snacks.
Prohibited or restricted items include sharp objects, large liquids, and certain batteries or tools—check airline and TSA rules.
If you’ll carry sports gear, musical instruments, or duty-free purchases, confirm size and fee policies ahead of time to avoid surprises at the gate.
Typical Carry-On Size Limits
You’ll usually see a standard carry-on maximum of about 22 x 14 x 9 inches (including wheels and handles) on many U.S. and international airlines.
Remember that some carriers—especially low-cost or regional ones—set smaller limits, and international size rules can vary by country and aircraft.
Check your airline’s published dimensions before you pack to avoid surprises at the gate.
Standard Airline Dimensions
Wondering how big your carry-on can be? Airlines usually set standard dimensions to fit overhead bins: measure length, width, and height including handles and wheels.
You’ll find that most major carriers accept similar sizes, but weight and enforcement vary. Pack smart to meet limits and avoid gate checks.
Check your airline before travel to prevent surprises.
- Typical max: about 22 x 14 x 9 inches (56 x 36 x 23 cm)
- Include wheels and handles in measurements
- Some low-cost carriers enforce stricter rules
- Weight limits often apply separately
- Soft-sided bags can squeeze into tight spaces
International Size Differences
How different are carry-on rules around the world? You’ll find major variation: European carriers often allow 55 x 40 x 20 cm, US airlines typically permit 22 x 14 x 9 inches, and low-cost carriers enforce tighter limits or charge for larger bags.
Asian airlines vary by carrier and class, with some matching European dimensions and others stricter.
Weight limits also differ—some airlines set no limit for size-compliant bags, others cap weight at 7–10 kg.
Before you pack, check your specific airline and connecting carriers; sizes change, and noncompliance can mean gate checked bags or extra fees.
Common Cabin Baggage Weight Allowances
While rules vary by airline and fare class, most carriers let you bring a single piece of cabin baggage plus a small personal item. Typical weight limits range from 7–10 kg (15–22 lb) for economy and up to 14 kg (30 lb) for premium cabins. You should check your ticket and airline website before packing, since allowances differ by route and loyalty status.
Most airlines allow one cabin bag plus a personal item; economy often limits 7–10 kg, premium up to 14 kg.
Weigh your bag at home, use lightweight packing techniques, and be prepared to move items to your personal item if gate staff weigh carry-on.
- Economy: commonly 7–10 kg
- Premium economy/business: up to 14 kg
- Low-cost: often stricter
- International vs domestic variations
- Excess fee considerations
Carry-On vs Personal Item: Labels and Limits
You’ll want to know the exact carry-on size limits so your bag fits the overhead bin without surprises. Learn what counts as a personal item—like a small backpack or purse—and how airlines enforce those definitions.
Then prioritize what goes in each piece so essentials stay accessible and weight is distributed correctly.
Carry-On Size Limits
Wondering what counts as a carry-on versus a personal item? Airlines set carry-on size limits by linear dimensions (height + width + depth) and weight; you’ll need to check your carrier before packing.
Typical maximums are around 22 x 14 x 9 inches, but low-cost or regional airlines often use smaller allowances. Oversized bags may be gate-checked or charged.
Measure your packed bag, including wheels and handles, and weigh it if weight limits apply. Use these quick checks to avoid surprises at boarding:
- Measure length, width, depth including wheels
- Confirm airline-specific dimensions
- Weigh packed bag at home
- Factor in expansion pockets
- Expect enforcement variability
Personal Item Definitions
How big is a “personal item” and how does it differ from your carry-on? You can usually bring one carry-on plus a personal item; the personal item fits under the seat and holds essentials. Airlines define labels and limits by dimensions and purpose: briefcase, small backpack, or tote qualify. Check specific measurements before you pack.
| Item type | Typical size | Example use |
|---|---|---|
| Personal item | 40 x 30 x 15 cm | Laptop, documents |
| Carry-on | 55 x 40 x 20 cm | Clothes, shoes |
| Exceptions | Vary by airline | Musical instrument, duty-free |
Packing Priority Rules
When should you prioritize the contents of your carry-on over your personal item? You should favor the carry-on when items are bulky, fragile, or restricted (like liquids over 100ml), and when weight or security checks make access necessary.
Use the personal item for essentials you’ll need in flight—documents, electronics, medications—so they’re reachable under the seat. Know airline size and weight limits; mislabeling can cost time and fees.
Pack strategically: heavier, less-needed items go in the overhead; daily-use items stay with you.
- Travel documents and wallet
- Medications and small electronics
- Liquids under 100ml in personal bag
- Fragile or heavy items in carry-on
- Items likely to be gate-checked
Items That Always Count as Hand Luggage
Almost every airline explicitly counts a few essentials as hand luggage: your coat or jacket, small personal items like a handbag or laptop bag, and any duty-free purchases you bring on board. You should treat these as part of your carry-on allowance and plan placement carefully to avoid gate checks. Keep valuables and travel documents in these items so you can access them easily. Know that size and count rules vary, so check your carrier.
| Item type | Typical example | Tip |
|---|---|---|
| Clothing | Coat/jacket | Wear or stow |
| Personal item | Handbag/laptop | Keep accessible |
| Purchases | Duty-free | Pack last |
Items Allowed With Restrictions (Overview)
Although many items are permitted in your hand luggage, some come with limits or special handling, so you should know the rules before you pack. You can bring useful items, but airlines and security set quantity, packaging, and declaration rules.
Know liquid limits, battery rules, and how to present items at screening. If an item needs paperwork or special packing, arrange that before travel. Follow airline size and weight limits to avoid gate-checking.
When in doubt, check airline and TSA/CAA guidance to prevent delays or confiscation.
- Liquids and gels (container size limits)
- Spare lithium batteries (carry-on only)
- Medications (original packaging, prescriptions)
- Sharp tools (sheath, size limits)
- Duty-free items (sealed bags, receipts)
Prohibited Items for Hand Luggage
Because airport security prioritizes safety, you can’t bring items that could harm people or aircraft in your hand luggage. You must leave firearms, ammunition, explosives, flammable materials, and most sharp objects like large knives or box cutters in checked baggage or at home.
Airport security bans items that could harm people or aircraft—leave firearms, explosives, flammables, and large knives out of carry-on.
Sporting equipment that can be used as a blunt instrument—bats, golf clubs—are usually prohibited.
Certain tools, chemical agents, and self-defense items such as pepper spray and stun guns are banned from carry-on.
Regulations vary by airline and country, so check specific prohibitions before travel to avoid confiscation, fines, or denied boarding.
Liquids Rule for Carry-On (100 Ml / 3-1-1)
You’ll need to follow the 100 ml limit for liquids in carry-on, meaning containers must be 100 ml (3.4 oz) or smaller.
Pack those containers in a single, clear, resealable quart-sized bag following the 3-1-1 rule—one bag per passenger.
I’ll also cover common exceptions (medications, baby food, duty-free) and practical packing tips to speed you through security.
100 Ml Limit Explained
When you pack liquids in your carry-on, each container must be 100 ml (3.4 oz) or less and fit inside a single, transparent resealable bag no larger than one liter — the common “100 ml / 3-1-1” rule that most airports enforce for security.
You should measure bottles, gels, and aerosols before travel, and transfer larger amounts into compliant travel bottles.
Keep the bag accessible for screening, and remember medications and baby milk may have exceptions; declare them.
Overfilling or hidden containers can cause delays or confiscation, so plan quantities carefully and avoid last-minute transfers.
- Measure each container
- Use clear resealable bag
- Keep bag accessible
- Declare exceptions
- Avoid overfilling
3-1-1 Packing Rule
If you’re packing liquids in your carry-on, follow the 100 ml (3.4 oz) / 1-liter bag rule strictly: each container must be 100 ml or less, all must fit in a single clear resealable bag no larger than one liter, and you should present that bag separately at security.
Pack only essentials—toiletries, medication, baby formula—so you don’t overflow the bag.
Place containers upright if possible to avoid leaks and zip the bag fully.
Keep the bag accessible near the top of your carry-on.
Replace liquids that exceed limits or transfer them to compliant travel-sized containers before you reach screening.
Exceptions And Tips
Although the 100 ml/3-1-1 rule applies broadly, several common exceptions and practical tips can make packing liquids for carry-on easier and less stressful. You’ll still follow limits, but know what’s allowed and how to streamline your bag.
Bring prescription meds and baby formula in original containers; declare them at security.
Use travel-size reusable bottles, and consider freezing gels for long flights to keep them cool.
Pack toiletries in a clear quart bag for quick inspection.
Consider buying duty-free liquids after security.
- Keep prescriptions and medical liquids accessible
- Use labeled, refillable 100 ml bottles
- Freeze gels for insulation
- Buy duty-free post-screening
- Declare exceptions promptly
Duty-Free and Liquids Bought After Security
Because duty-free purchases and liquids bought after security follow different rules, you should know what’s allowed and how to carry them through the airport.
If you buy liquids in the sterile zone, they’re usually sealed in tamper-evident bags with receipts; keep the seal intact and carry the receipt to board.
Duty-free items obtained before transfer may be allowed in carry-on if packed per airline and connecting-country rules.
For connections, check whether you can bring sealed bags through additional screenings.
When in doubt, ask the shop or airline, and pack proof of purchase separately for quick access at security or boarding.
Packing Medications and Baby Food for the Cabin
Along with duty-free and post-security purchases, you’ll want to plan how to carry medications and baby food through checkpoints and onto the plane. Keep prescriptions in original packaging, bring a doctor’s note for liquid meds, and separate items for easy inspection.
Pack enough baby food, formula, and snacks for delays; use insulated pouches for temperature-sensitive items. Declare larger quantities at security and be ready to taste or open containers if asked.
Store items where you can reach them during the flight and on the jet bridge.
- prescriptions in original containers
- doctor’s note for liquid meds
- insulated pouch for formula
- declare larger quantities
- separate items for inspection
Electronics Rules for Cabin Baggage
When packing electronics in your cabin bag, know the size, battery, and screening rules so you don’t get held up at security or at the gate.
Place laptops and large tablets in an easily accessible spot; you’ll usually need to remove them for X-ray screening.
Keep smaller devices like phones and e-readers stowed in clear trays or your bag if rules allow.
Use protective sleeves to prevent damage and bring required chargers to demonstrate functionality if asked.
Label valuable gear and consider travel insurance.
Check airline and airport guidance before travel, since limits and screening procedures vary by carrier and country.
Batteries, Power Banks, and Charger Rules
You’ll need to check battery capacity limits before you pack any spare batteries or power banks, since airlines restrict watt-hours and may limit quantities.
Keep power banks in your carry-on and protect terminals to prevent short circuits.
Also carry chargers with you, but stow loose replacement batteries in their original packaging or in battery cases.
Battery Capacity Limits
Curious what restrictions apply to batteries, power banks, and chargers in your carry-on? You’ll need to know capacity limits: most airlines allow lithium-ion batteries up to 100 Wh without approval, 100–160 Wh with airline approval, and prohibit over 160 Wh.
Carry spare batteries in your cabin, not checked baggage. Keep terminals protected and use original packaging or tape exposed contacts. Declare large batteries when required and follow airline-specific rules.
- Up to 100 Wh: generally allowed
- 100–160 Wh: airline approval needed
- Over 160 Wh: usually prohibited
- Spare batteries: carry-on only
- Protect terminals and declare when required
Power Bank Packing
Having covered capacity limits, let’s focus on how to pack power banks and chargers for carry-on travel.
You should carry power banks in your hand luggage only, not checked baggage, and keep them accessible for inspection.
Protect terminals with tape or original covers and stow chargers in a separate pouch to avoid short circuits and tangled cables.
If your power bank exceeds airline-permitted watt-hours, get airline approval before travel.
Bring cables and adapters, but avoid loose lithium cells.
Declare large-capacity units at security if asked.
Pack devices partially charged—airlines may ask you to power them on.
How to Pack Laptops and Tablets for Security
When going through airport security, pack laptops and tablets so they’re easy to remove. Use a dedicated, padded sleeve or compartment and keep devices near the top of your bag.
Power down or set to airplane mode, and remove bulky cases if required. Have chargers and cables organized separately for quick access. Be ready to place devices in bins as instructed and reclaim them promptly.
Power down or use airplane mode, remove bulky cases, and keep chargers and cables organized for quick bin checks.
- Use a thin, protective sleeve
- Position device in an accessible pocket
- Remove straps or thick cases if asked
- Keep cords in a small pouch
- Power off or set to airplane mode
Smart Toiletries Packing for Carry-On
Know the liquid limits before you pack so you don’t get stopped at security.
Choose travel-sized bottles, solid alternatives, and multi-use products to save space in your carry-on.
Pack everything in a clear, resealable pouch for quick checks and easy access.
Liquid Limits Explained
Curious what counts as a “liquid” in your carry-on and why the airport fusses over tiny bottles? You need to follow the common 100 ml (3.4 oz) rule: containers must fit in a single transparent, resealable quart/liter bag and be presented separately.
Gels, aerosols, pastes, and lotions fall under the same limit. Medicines and baby food are exceptions with proof. Check local variations before travel.
- 100 ml per container maximum
- All containers in one clear bag
- Bag size: about 1 quart/liter
- Gels and aerosols included
- Declare exceptions like meds
Space-Saving Toiletries
Although you’ve already mastered the liquids rule, packing toiletries for a carry-on calls for smart downsizing and clever organization so you don’t waste space or slow security lines. You’ll choose multipurpose items, decant into travel bottles, and use solid alternatives. Roll small towels, tuck items into shoe cavities, and keep a clear pouch ready for inspection. Prioritize essentials and ditch duplicates.
| Item | Compact Tip | Benefit |
|---|---|---|
| Shampoo | Solid bar | No liquid limit |
| Lotion | Sample tube | Saves space |
| Toothpaste | Tiny tube | Meets rules |
| Razor | Travel case | Safe storage |
| Perfume | Atomizer | Minimal weight |
Choosing Between Carry-On and Checked Luggage
Because your trip’s length, itinerary, and comfort preferences shape how you pack, choosing between carry-on and checked luggage comes down to trade-offs in convenience, cost, and security. You’ll favor carry-on for short trips, quick connections, and avoiding fees, while checked bags suit long stays, bulky items, or when you want less to carry.
Consider risk tolerance for delays or lost luggage, mobility through airports, and whether you need immediate access to essentials. Pack smart: prioritize valuables and a change of clothes in your carry-on, and weigh fees versus convenience before deciding.
- Trip duration
- Connection tightness
- Fee comparison
- Access to essentials
- Risk of delay/loss
How Airlines Enforce Carry-On Rules
When you head to the gate, airlines enforce carry-on rules through a mix of size checks, weight limits, and gate agent discretion to keep boarding smooth and safe. You’ll see staff use sizers, ask you to lift bags into scales, or request gate checks when overhead bins fill. Know your airline’s stated dimensions and pack to avoid delays. If a bag’s borderline, agents will decide based on space and boarding order. Be ready to gate-check bulky items to keep boarding efficient.
| Enforcement Method | Typical Action |
|---|---|
| Size check | Bag sizer |
| Weight check | Scale |
| Agent discretion | Gate check |
| Bin capacity | Boarding order |
Budget Carriers: Stricter Hand Luggage Policies
On budget carriers, you’ll face tighter size and weight limits for hand luggage than on full-service airlines.
You’ll often need to measure and weigh bags at the gate, and oversized or overweight items can mean hefty fees or forced check-in.
Plan and pack precisely to avoid surprises and extra costs.
Size And Weight Limits
Although low-cost airlines advertise a generous carry-on allowance, you’ll often find much stricter size and weight limits than on full-service carriers. You need to measure and weigh your bag before you travel, since allowances can be tight and enforced at boarding.
Know dimensions, weight caps, and whether personal items count separately. Pack smartly to avoid fees or forced gate checks.
Check your airline’s exact numbers—limits vary by route and fare class—and consider a lightweight bag or a scale.
- Maximum linear dimensions (length+width+height)
- Weight cap per bag (kg or lbs)
- Personal item vs. carry-on rules
- Enforcement points (gate or check-in)
- Fee thresholds and overlimit charges
Strict Carry-On Rules
Low-cost airlines often take size-and-weight restrictions a step further, so you’ll face stricter hand luggage rules than with full-service carriers. They may limit you to one personal item, ban standard carry-ons unless you pay, or enforce very small dimensions.
You’ll need to weigh and measure your bag at check-in; gate staff can make you check oversized items for a fee. Liquids, batteries, and bulky items often get tighter scrutiny.
To avoid surprises, check the carrier’s exact limits before packing, use compact luggage, and consider paying for a carry-on allowance only when it’s essential.
International vs Domestic Carry-On Differences
Wondering how carry-on rules change when you cross borders? You’ll notice size limits, allowed items, and fees vary by country and airline.
Security screening can be stricter for international flights, and duty rules affect what you can bring home. Pack with the destination’s regulations in mind, and check both airlines on connecting itineraries.
Be ready to move liquids to comply with the strictest checkpoint you’ll pass.
- Different size/weight limits by carrier and country
- Varied prohibited items lists and enforcement
- Liquids and electronics screening differences
- Potential international fees or upgrade requirements
- Customs and duty considerations
How to Measure Your Bag to Avoid Gate Checks
Before you head to the airport, measure your bag’s exterior dimensions—height, width, and depth—to make sure it fits the carrier size.
Check your airline’s specific carry-on limits so you don’t get surprised by stricter rules.
Finally, weigh the packed bag at home so you can adjust contents and avoid a gate check.
Measure Exterior Dimensions
How big is your carry-on, really? Measure the exterior: height, width, depth including wheels, handles, and pockets. Lay the bag flat and use a tape measure from the longest points. Include telescoping handles if they won’t be removed; count side pockets and external straps. Record dimensions in centimeters and inches so you can compare later. Double-check by placing the bag in a doorway or under a table to visualize fit.
- Measure height from base to highest fixed point
- Measure width at widest side
- Measure depth including wheels
- Include all external attachments
- Note measurements in two units
Check Airline Limits
Which rules apply to your trip depends on the airline, fare class, and even the aircraft, so check limits before you pack. Visit the carrier’s website or app for up-to-date carry-on size and cabin bag rules. Note permitted dimensions, rollable vs. rigid measurements, and any personal item allowance.
If you’ll connect or fly codeshare, verify each segment’s policy. Airlines may enforce strict limits at boarding; oversized bags get gate-checked. Measure height, width, and depth including wheels and handles, and compare to the posted maximums.
When in doubt, choose a slightly smaller bag to avoid surprises.
Weigh Before Leaving
If you want to dodge a last-minute gate check, weigh your carry-on at home so you know it meets the airline’s limit — most carriers publish a maximum in kilograms or pounds, and gate agents will enforce it. Use a bathroom or luggage scale, weigh with typical contents, and compare to the limit. If you’re close, shift items to personal item, remove nonessentials, or swap heavier toiletries for travel sizes. Label the bag’s weight if you travel often so you build a feel for it.
- Use a reliable scale
- Weigh packed, zipped, and ready
- Redistribute weight
- Swap heavy items
- Keep toiletries light
Best Carry-On Bag Types by Traveler Need
Because every trip has different priorities, picking the right carry-on comes down to what you need most—organization, durability, space, or ease of transport.
Every trip varies—choose a carry-on that matches your priorities: organization, durability, capacity, or effortless transport.
If you’re meticulous, choose a bag with multiple compartments, clear pockets, and a laptop sleeve to keep items accessible.
For frequent flyers, pick rugged materials and reinforced handles that stand up to constant use.
If you pack bulky items, opt for a high-capacity duffel or expandable roller to maximize space.
For short hops or crowded terminals, go for a lightweight, maneuverable bag with smooth wheels and a comfortable carry strap so you breeze through travel.
Hard Shell vs Soft Carry-On: Pros and Cons
When you’re choosing between hard shell and soft carry-ons, think about durability and protection versus weight and flexibility.
A hard shell gives better impact resistance for fragile items, while a soft bag usually weighs less and can squeeze into tight overhead bins.
Consider what you typically pack and how much maneuverability you need on trips.
Durability And Protection
Although both hard-shell and soft carry-ons aim to protect your belongings, they do so in very different ways: hard shells resist impact and moisture but can crack under extreme force, while soft-sided bags flex to absorb shocks and often include external pockets for quick access. You’ll choose based on what you carry and how rough your travel is.
Hard cases shield fragile gear and electronics better; soft cases reduce puncture risk and let you compress contents. Consider maintenance, repairability, and weather exposure when deciding which protection style fits your routine.
- Hard shells: rigid barrier
- Soft sides: shock absorption
- Water resistance differences
- Repair and longevity
- Zipper vs latch security
Weight And Flexibility
If you value easy lifting and flexible packing, weight and flexibility are the two biggest factors that’ll shape which carry-on fits your travel style.
You’ll find hard shells are often heavier but offer rigid support, keeping fragile items secure and sliding easily into overhead bins.
Soft carry-ons weigh less, compress into tight spaces, and let you squeeze in souvenirs or a jacket.
Choose soft if you prioritize lightness and adaptable capacity; pick hard if you want structured protection and don’t mind a bit more heft.
Consider materials, handle quality, and how airlines enforce size and weight limits.
Best Personal Items to Save Space
Want to save space without sacrificing essentials? Choose compact, multiuse personal items that fit under the seat and keep you organized. You’ll want gear that reduces bulk, replaces single-use items, and stays accessible during travel.
- Slim toiletry kit with refillable bottles
- Lightweight scarf that doubles as a blanket
- Foldable water bottle
- Compact electronics organizer for cables and chargers
- Slim, soft-sided document wallet for passport and papers
Pack items you’ll use often and that compress easily. Prioritize versatility and accessibility so your hand luggage stays streamlined and functional without excess weight.
Packing Efficiently for Short Trips
When you’re heading out for a short trip, prioritize versatile pieces and smart organization so you can travel light without missing essentials.
Choose mix-and-match clothing: neutral layers you can rewear, one pair of shoes that suit activities, and compact toiletries in reusable travel sizes.
Roll clothes to save space and reduce wrinkles, and use packing cubes to separate outfits and dirty laundry.
Limit gadgets to essentials with multi-use chargers and adapters.
Keep documents and a small first-aid kit accessible.
Check weather and plan outfits per day to avoid extras.
Stick to carry-on limits to skip baggage claim.
Packing Strategy for Long-Haul Flights
Short trips let you get away with a pared-down bag, but long-haul flights demand a different approach: prioritize comfort, redundancy, and in-flight needs while still packing smart. You’ll pack layers, entertainment, and essentials that keep you functional if luggage is delayed.
Choose versatile clothing, a compact travel pillow, and spare chargers. Keep medications, toiletries, and a change of clothes in your carry-on. Balance weight and accessibility so you can reach items without unpacking everything.
- Layered clothing and a warm layer
- Noise-cancelling headphones or earbuds
- Portable charger and spare cables
- Essential meds and toiletry kit
- Lightweight entertainment (tablet, book)
Rolling, Folding, and Compression Techniques
Although space is limited, smart rolling, folding, and compression will maximize capacity and keep your carry-on organized.
Roll softer items like t-shirts and leggings to save space and reduce wrinkles. Fold structured pieces along natural seams and stack them to maintain shape.
Use compression bags for bulky layers, but avoid over-compressing delicate fabrics.
Place heavier, flatter items at the base to create a stable layer, then tuck rolled items into gaps. Reassess as you pack to eliminate air pockets.
With deliberate technique, you’ll fit more, protect garments, and access essentials without digging through a mess.
Packing Cubes and Organizers That Help
Packing cubes and organizers take the techniques you just used and keep them tidy, letting you find items quickly without unpacking everything. You’ll group clothes by outfit, separate dirty from clean, and protect delicate items in padded pouches.
Use clear or mesh cubes so you see contents at a glance. Choose sizes that match your bag’s compartments and compress soft items when needed. Don’t overfill or you’ll lose the benefit of organization.
- Color-code cubes for outfits
- Mesh panels for visibility
- Zip pouches for cords and toiletries
- Shoe bags to protect garments
- Small valuables pouch for documents
Maximizing Overhead Bin Space
When you’re boarding, think like a cube: orient bags to fit the bin’s shape, slide soft items into gaps, and place heavier carry-ons against the wall so lighter items nest around them.
Measure dimensions before you leave, and board with a compact bag that reliably fits. Use soft-sided bags that compress, and stash jackets or scarves to fill voids.
Put flat items like laptops on top or along the bin side.
Lift with your legs and slide items in rather than jam them; that preserves space for others and avoids damage.
Offer help to consolidate when bins are chaotic.
Security Screening Tips to Speed Checks
Once your carry-on is stowed, shift focus to moving through security quickly so you don’t lose that hard-won time. You’ll breeze the checkpoint if you prepare proactively: have documents ready, remove liquids and electronics, wear easy-to-remove shoes, and follow staff instructions.
Stay alert to signage and lane rules, and consolidate small items into a pouch to prevent repeated searches.
- Keep passport and boarding pass accessible
- Pack liquids in a clear 1-quart bag
- Place laptop/tablet in an outer compartment
- Wear slip-on shoes for quick removal
- Use a small pouch for belts and chargers
What to Do If Your Bag Is Gate-Checked
If the gate agent asks you to gate-check your carry-on, stay calm and act quickly so you don’t lose time or essential items. Remove anything you’ll need during boarding or upon arrival—medication, phone, charger, travel documents—and keep them on your person.
Empty loose liquids into a clear bag if required. Label the bag with your name and phone number, or attach the airline’s gate-check tag securely. Note the tag number and where staff place the bag.
Ask where to retrieve it at your destination and whether it’ll be on the jet bridge or baggage claim. Keep boarding pass handy.
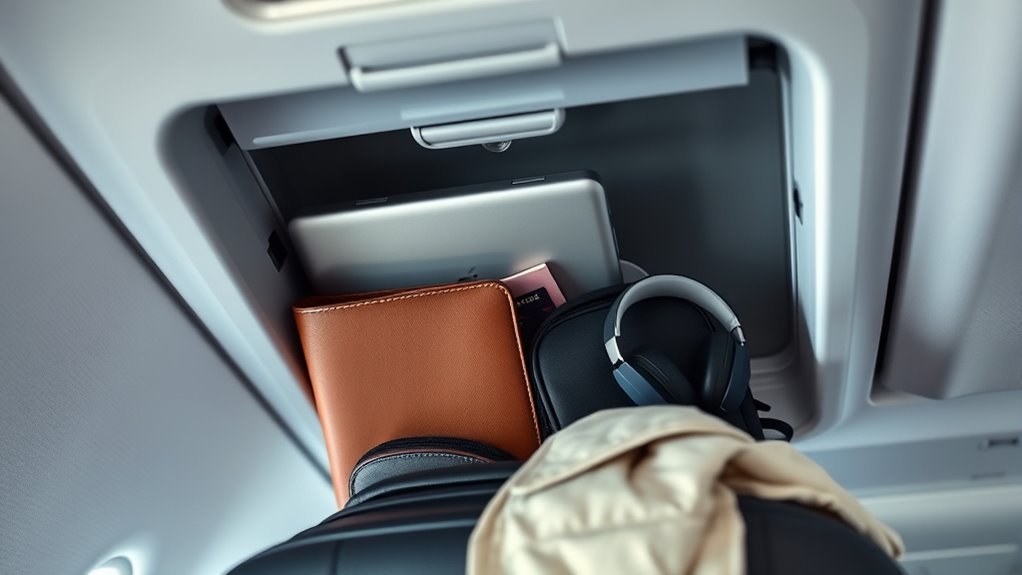
Protecting Valuables and Travel Documents Onboard
Because flights are busy and space is limited, keep your valuables and travel documents on you or within sight at all times. Stow passports, boarding passes, electronics, and jewelry in a secure, accessible place—preferably a zipped neck pouch, inner jacket pocket, or small crossbody bag.
Use simple protections like password locks, RFID sleeves, and padded cases. Stay mindful during boarding, lavatory trips, and sleep. If you must sleep, loop a strap through your bag or tuck it between your feet.
- Keep passports in an inner, zipped pocket
- Use RFID-blocking sleeves
- Secure laptops and phones in padded cases
- Carry minimal jewelry
- Keep receipts and tickets together
Hand Luggage Etiquette in Overhead Bins
While overhead bins keep your carry-on close at hand, treating them with consideration makes boarding smoother for everyone. Store smaller bags under the seat and larger ones overhead, placing handles toward the aisle for easy retrieval. Slide bags in flat to maximize space; avoid stuffing stuff in that blocks neighbors’ items.
If you see space, consolidate politely to help latecomers. Don’t hog multiple bins—use the space above your row first. When deplaning, be ready to grab your bag quickly so others can disembark.
Respectful, efficient habits reduce delays and keep cabin traffic flowing.
Traveling With Fragile Items in Carry-On
How do you protect delicate items when they travel in the cabin with you? Pack them in a hard-sided case or a well-padded bag, wrap fragile pieces individually in soft clothing or bubble wrap, and place them toward the center of your carry-on away from seams.
Keep smaller items in zip pouches to prevent scratching, and always carry very fragile items as a personal item you can stow under the seat.
Communicate with flight crew if you need extra space or help lifting into an overhead bin.
- Hard-sided case or padded bag
- Individual wrapping (cloth/bubble)
- Center placement
- Zip pouches for small items
- Carry as personal item
Carrying Food and Duty-Free Items On Board
Wondering what food and duty‑free items you can bring into the cabin? You can pack solid snacks, prepackaged meals, and sealed duty‑free goods in your carry‑on. Liquids over 100ml purchased airside are usually allowed if packaged by the retailer; otherwise follow liquid rules. Declare items subject to customs or agricultural checks. Keep receipts and original packaging for duty‑free purchases. Eat quietly and avoid strong odors. Store food in sealed containers to prevent spills. Below is a quick reference:
| Item | Note |
|---|---|
| Solid snacks | Allowed |
| Sandwiches | Allowed, avoid messy fillings |
| Liquids >100ml (airside) | Often allowed with receipt |
| Duty‑free alcohol | Follow airline limits |
Small Pet Carriers as Cabin Baggage (Rules & Tips)
If you’re traveling with a small pet, check each airline’s pet carrier policies before booking so you know what’s allowed. Pay close attention to size and weight limits to guarantee the carrier fits under the seat and meets rules for in-cabin pets.
For your pet’s comfort, choose a well-ventilated, familiar carrier and bring a soft pad and familiar toy to reduce stress.
Airline Pet Carrier Policies
Because airlines set strict size, material, and labeling requirements for small pet carriers, you’ll want to verify rules before you book to avoid surprises at the gate. Know carrier types allowed, documentation required, and whether your pet must stay in the carrier under the seat.
Confirm advance reservations and fee policies, and understand health certificate or vaccination demands. Prepare a comfortable, leak-proof carrier with proper ventilation and an absorbent pad.
At check-in, present ID and pet paperwork, arrive early, and follow gate agent instructions to ensure smooth boarding.
- accepted carrier materials
- required documentation
- reservation and fees
- in-cabin behavior rules
- check-in procedures
Size And Weight Limits
Most airlines limit in-cabin pet carriers by specific dimensions and a combined carrier-plus-pet weight, so check your carrier against the carrier size chart and weight cap before you book.
You’ll also verify whether the carrier must fit under the seat forward of you. Measure external length, width, and height, including wheels and handles.
Weigh the carrier with your pet to confirm it stays within the limit; airlines often enforce at check-in.
Some carriers compress slightly to meet size rules, but confirm material flexibility is acceptable.
If your carrier or pet exceeds limits, you’ll need alternative arrangements or a checked/manifested option.
In-Cabin Comfort Tips
When traveling with a small pet in the cabin, focus on making the carrier a calm, secure space that keeps your animal comfortable and minimizes stress for both of you. You’ll want a carrier that fits airline rules, has ventilation, and a soft base.
Line it with an absorbent pad and a familiar blanket or toy. Offer water before boarding and use calming pheromone sprays if your vet approves. Keep the carrier under the seat where air is steady and you can touch your pet briefly.
- Choose airline-approved size and soft-sided carriers
- Use absorbent bedding and familiar scents
- Offer hydration pre-boarding
- Limit loud noises and sudden moves
- Check airline pet policies ahead of time
Medical Devices and Mobility Aids in Cabin Bags
Have you got medical devices or mobility aids you need to bring into the cabin? You should pack essential items like inhalers, CPAP machines, insulin pumps, prosthetics, and folding canes in your carry-on so they’re accessible.
Notify airline staff during booking and at check-in about any equipment needing special stowage or power. Carry documentation and prescriptions to speed security checks.
Pack chargers, spare batteries, and protective cases; remove batteries if required by airline rules.
If a mobility aid is gate-checked, confirm retrieval procedures on arrival.
Prioritize items you’ll need during boarding, flight, and immediate disembarkation.
Handling Liquids Bought After Security (Process)
If you buy drinks, toiletries, or other liquids after security—like from an airport shop or lounge, you’ll need to follow specific steps to bring them through to your gate and onto the aircraft.
You should keep receipts, verify purchases are sealed in tamper-evident bags, and be ready to show items during boarding or transfer checks.
If you have a connecting flight, confirm transfer rules and declare items if required.
Pack small items within easy reach and avoid opening sealed bags until on board.
- Keep receipts visible
- Use tamper-evident bags
- Know transfer regulations
- Be prepared for inspection
- Don’t open until seated
Common Hand Luggage Mistakes to Avoid
Because you’ll want smooth security checks and a stress-free flight, avoid common hand luggage mistakes like overpacking, hiding prohibited items, or stashing essentials in hard-to-reach places; these slip-ups slow you down, risk confiscation, or leave you scrambling mid-journey.
Pack light, prioritize items you need onboard, and keep documents and electronics accessible. Don’t forget chargers, medications, and a change of clothes.
Use clear pouches for liquids and sealables for fragile items. Check weight by lifting your bag to feel comfortable carrying it.
Label your luggage and lock it appropriately, but don’t rely solely on checked baggage solutions.
How to Check Airline Policy Before You Fly
Wondering what rules apply to your carry-on? Check the airline’s official website first — weight, size, and permitted items vary. Verify rules for connecting carriers and code-shares. Note cabin class and frequent-flyer allowances that might change limits. Save screenshots or print the policy page for reference, and confirm any recent updates close to departure.
- Look up size and weight limits on the airline site
- Review liquid, battery, and restricted-item rules
- Check baggage fees and cabin class allowances
- Confirm rules for connections and partner airlines
- Save screenshots or confirmation emails for your booking
Quick Packing Checklist for Perfect Hand Luggage
Now that you’ve checked size, weight, and restricted-item rules, use this quick packing checklist to get your hand luggage ready without last-minute stress.
Start with essentials: passport, boarding pass, wallet, phone, chargers, and any medication in original packaging.
Pack a lightweight change of clothes and underwear, plus a compact toiletry kit within liquid limits.
Include noise-cancelling earplugs or earbuds, a travel pillow, and an eye mask for comfort.
Add a pen, small snack, and refillable water bottle (empty through security).
Keep valuables and fragile items cushioned and accessible.
Review and remove prohibited items before leaving.
Frequently Asked Questions
Can I Bring Duty-Free Alcohol on a Connecting International Flight?
Yes — you can usually bring duty-free alcohol on an international connecting flight, but you’ll need to keep it sealed in its tamper-evident bag with the receipt, and comply with transfer airport security and destination alcohol allowance rules.
How Do I Carry Essential Pet Medication in Hand Luggage?
Carry essential pet medication in your hand luggage with prescriptions and vet letters, pack doses in original labeled containers, keep some extras, store cooling packs if needed, and notify airline/security about injectable or controlled meds in advance.
Are Oversized Duty-Free Liquids Allowed if Sealed by the Shop?
Generally, you’re allowed oversized duty-free liquids if the shop seals them in a tamper-evident bag with receipt, but you’ll need to keep them sealed and follow airline and transit security rules, especially for connecting flights.
Can I Gate-Check Carry-On to Free up Overhead Space Voluntarily?
Yes — you can usually gate-check your carry-on voluntarily to free overhead space; just check with the gate agent, tag your bag, remove valuables, and be prepared for potential delays or retrieving it at the plane or baggage claim.
What Documentation Proves a Medical Device Belongs to Me?
You’ll show ownership with a prescription, letter from your doctor, device serial-number documentation, purchase receipts, insurance paperwork, or manufacturer registration; bring original IDs and medical records, and you’ll keep copies to present to airline or security staff.
Conclusion
You’ve got the essentials: pack important documents, devices, a change of clothes, meds, and travel comforts, sticking to size, weight, and liquid rules. Remember the difference between carry-on and personal items, and keep receipts for duty-free purchases. Avoid overpacking, check your airline’s policy, and use a short checklist before leaving home. Do that, and your hand luggage will be stress-free, compliant, and ready for whatever your trip throws at you.