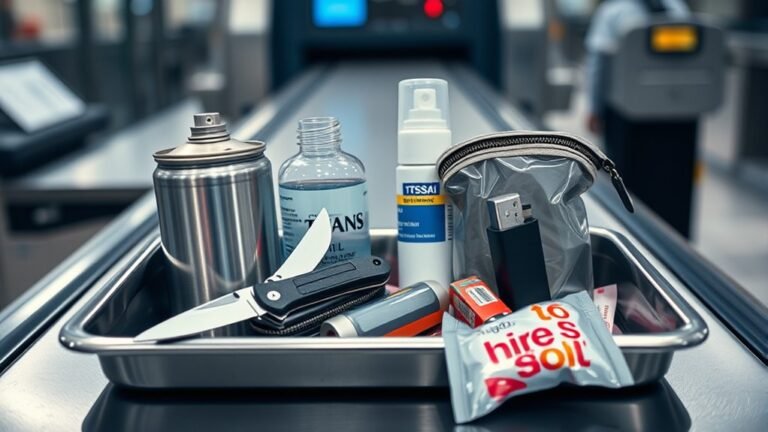
What Do You Need for Tsa Pre Check
You’ll need a valid government ID (a passport or Real ID‑compliant driver’s license), proof of citizenship or lawful residency (passport, green card, visa/I‑94), payment for the application fee, and an online application plus an in‑person appointment for ID verification, fingerprinting, and a quick interview. Bring originals only, verify names and dates match, and keep your Known Traveler Number handy for bookings. Continue for tips on eligibility, documents, and avoiding common mistakes.
Quick Answer: Is TSA PreCheck Worth It?

Wondering if TSA PreCheck is worth it? You’ll save time and hassle at many U.S. airports: shorter lines, no shoe removal, and keeping laptops and liquids in your bag.
Enrollment costs a fee and needs a one-time in-person appointment, so it’s worth it if you travel several times a year or value predictability.
It doesn’t guarantee expedited screening every trip, and not all airlines or international departures offer it.
If you prefer smoother security and can justify the expense and occasional limits, it’s a practical investment.
If you rarely fly or mainly take international flights, you might skip it.
Who Benefits From TSA PreCheck
If you decided TSA PreCheck sounds worthwhile, the next question is whether it fits your travel pattern and needs. You benefit most if you fly frequently, value time, or dislike long lines. Families get smoother screenings with kids. Business travelers keep schedules tight. Occasional flyers gain convenience at busy hubs.
| You | Why it helps | Feeling |
|---|---|---|
| Frequent flyers | Skip shoes/belts often | Relief |
| Parents | Faster family lanes | Calm |
| Business travelers | Save meeting time | Confident |
| Occasional travelers | Less airport stress | Pleasant |
Weigh cost versus flights per year to decide.
TSA PreCheck: A Brief Process Overview
Because TSA PreCheck streamlines several steps, you move through security faster and with less hassle. You apply online, pay the fee, and schedule a short in-person appointment for ID verification and fingerprinting.
After approval, you get a Known Traveler Number to add when booking flights. At the airport, look for PreCheck lanes: you’ll keep shoes, belts, and light jackets on and leave laptops and compliant liquids in your bag.
Agents screen you faster thanks to dedicated machines and cleared passenger lists. Renewals are simpler, often done online, keeping your travel routine efficient and predictable.
Eligibility Basics: Age, Citizenship, Residency
Before you apply, know who qualifies: TSA PreCheck is open to U.S. citizens, U.S. nationals, and lawful permanent residents who meet age and background criteria.
You’ll need to be at least 13 to enroll; children 12 and under can use a parent’s Known Traveler Number.
You must provide proof of identity and residency during enrollment and at your appointment.
If you live abroad, permanent residency in the U.S. is required for eligibility.
Keep documentation current — expired IDs can delay approval.
Check specific state ID or passport requirements before your appointment so you’re prepared.
- Age requirement
- Citizenship status
- Residency proof
- Documentation currency
Disqualifying Criminal and Immigration Factors
You should know that certain criminal convictions can bar you from TSA PreCheck, especially offenses involving serious violence, terrorism, or recent felony convictions.
Immigration violations and findings of inadmissibility can also prevent enrollment, even if you otherwise meet the basic requirements.
We’ll explain which offenses and immigration issues are most likely to disqualify you and how they’re evaluated.
Criminal Convictions Affecting Eligibility
If you’ve been convicted of certain crimes or have unresolved immigration violations, those records can disqualify you from TSA PreCheck. You’ll be screened for disqualifying criminal convictions like terrorism, espionage, or violent felonies tied to security risks.
Lesser offenses may be evaluated case-by-case; recent convictions or pending charges raise concerns. You should disclose accurate information during application and bring documentation to appeals.
Legal rehabilitation or record expungement can improve prospects, but outcomes vary. Consult an attorney if unsure.
- Terrorism-related convictions
- Espionage or treason
- Violent felonies impacting security
- Recent convictions or pending charges
Immigration Violations And Inadmissibility
Because immigration violations can make you inadmissible to the United States, they’re treated seriously during TSA PreCheck screening and can disqualify applicants, especially when tied to security concerns or unresolved removal orders.
You’ll be screened for offenses like illegal entry, visa fraud, overstays with adverse findings, or deportation records. If you’ve unresolved immigration proceedings, outstanding warrants, or misrepresented information, your application can be denied.
You should disclose issues honestly and consult immigration counsel to resolve admissibility before applying. Clearing records, obtaining waivers, or finalizing removal cases improves your chance, but unresolved violations often block PreCheck approval.
How to Verify Your Eligibility Before Applying
Wondering whether you qualify for TSA PreCheck? You can confirm eligibility before applying by checking your citizenship or immigration status, criminal history, and past travel-related violations.
Review program disqualifiers like unresolved warrants or certain convictions. Use the TSA PreCheck eligibility tool online and consult DHS guidance if you’ve had prior immigration issues.
If you’re unsure, contact the enrollment center or call DHS for clarification.
- Check nationality or immigration category against TSA lists.
- Review criminal records and resolve inaccuracies.
- Use the TSA online eligibility checker.
- Contact enrollment staff for personalized confirmation.
Required ID for Your In-Person Appointment
When you arrive for your in-person appointment, bring one primary, government-issued photo ID that matches the name on your application—typically a valid U.S. passport, passport card, or state driver’s license/ID.
Noncitizens should bring their current immigration documents (e.g., permanent resident card or Form I-94) and any additional IDs listed on their appointment confirmation.
Bring any secondary ID the confirmation requests, such as a student or military ID, only if specified.
IDs must be original, unexpired, and legible.
If your name changed, bring documentation showing the legal change.
Keep IDs accessible to speed check-in and avoid delays.
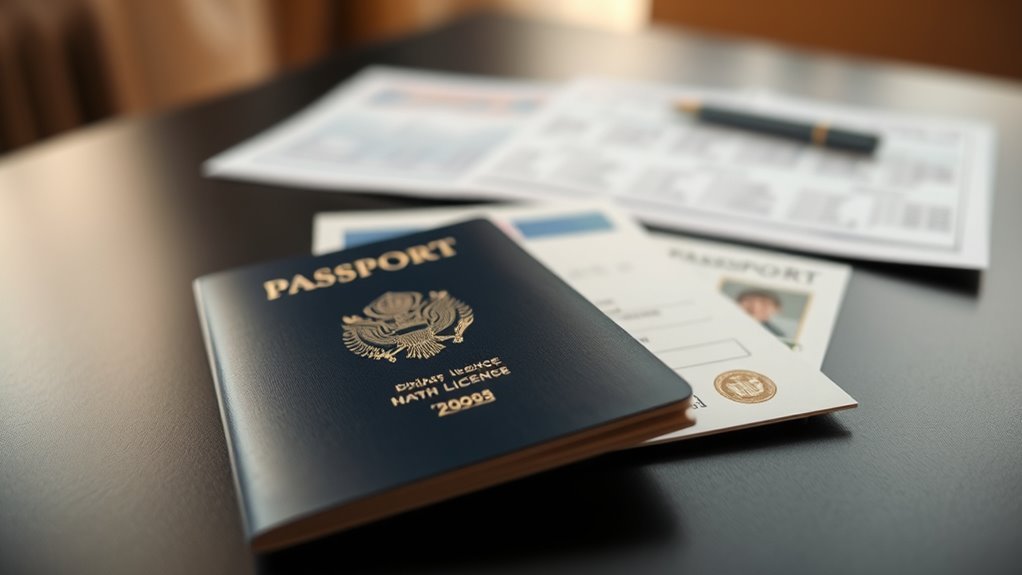
Proof of U.S. Citizenship or Immigration Status
You’ll need to show documents that prove your U.S. citizenship or lawful immigration status when you apply.
Acceptable citizenship documents include a valid U.S. passport, a certified birth certificate paired with photo ID, or a naturalization certificate.
If you’re not a citizen, bring proof of your immigration status such as a green card, permanent resident card, or valid visa with supporting paperwork.
Acceptable Citizenship Documents
Which documents prove your U.S. citizenship or immigration status for TSA PreCheck? You’ll need original or certified documents showing identity and status. Bring acceptable proof to your enrollment appointment so the agent can verify eligibility quickly.
- U.S. passport (book or card) — primary proof of citizenship.
- U.S. birth certificate (original or certified copy) paired with a government photo ID.
- Certificate of Naturalization or Certificate of Citizenship (original).
- Permanent Resident Card (green card) or Employment Authorization Document (original).
Don’t bring photocopies; agents must inspect originals to complete your application.
Proof Of Immigration Status
Need proof of your citizenship or immigration status? You’ll need original, valid documents when applying for TSA PreCheck. Bring one primary document that verifies your identity and status.
| Document Type | Examples | Notes |
|---|---|---|
| U.S. Passport | Passport book/card | Preferred proof |
| Naturalization Certificate | Form N-550/N-570 | Original required |
| Permanent Resident Card | Green Card (I-551) | Unexpired preferred |
If you’re a noncitizen, bring your current immigration document (work/study visas, I-94, or I-797). Originals only — no photocopies. Agents verify authenticity during enrollment.
Passport vs. Passport Card: Which Is Accepted?
Curious whether your passport card will get you through TSA PreCheck security? You can use either a passport book or passport card as proof of identity and citizenship for TSA PreCheck enrollment and at the checkpoint, but airline and international travel rules differ. Know that:
- Passport book works universally for domestic and international flights and TSA PreCheck verification.
- Passport card is valid for land and sea travel to neighboring countries and for PreCheck ID purposes.
- Bring the physical document; digital copies aren’t accepted.
- Check your airline policy and expiration dates before travel to avoid surprises.
REAL ID and Driver’s License Rules
Before you enroll in TSA PreCheck, check whether your state-issued driver’s license meets Real ID standards so it’s accepted at airport security.
If your license isn’t Real ID-compliant, you’ll need an alternative ID like a passport to board domestic flights.
Also confirm your eligibility to get or upgrade a driver’s license in your state to avoid surprises during enrollment.
Real ID Requirements
When you fly domestically or enter certain federal facilities, you’ll need a REAL ID-compliant form of identification—usually a driver’s license or state ID that meets federal standards. You’ll present it at TSA checkpoints when a REAL ID is required; otherwise, passports still work.
States issue REAL ID upgrades after verifying identity documents, proof of Social Security, and residency. Check your state’s DMV website to confirm compliance and how the star marking appears on the card. If you don’t have one, plan ahead to avoid denied boarding or entry.
- Verify your current ID status.
- Gather required supporting documents.
- Visit the DMV or reserve an appointment.
- Keep your passport as a backup.
Driver’s License Eligibility
Although REAL ID rules affect how you’ll use your driver’s license for federal purposes, the basics of eligibility for getting or upgrading a license remain grounded in proving identity, lawful status, Social Security, and residency.
You’ll need original documents or certified copies: a birth certificate or passport for identity, immigration papers if you’re not a citizen, your Social Security card or a W‑2, and two proofs of local residency like utility bills or lease agreements.
States may require a vision test, fingerprints, or fees. Check your state’s DMV website for specific REAL ID upgrade steps, required forms, and appointment procedures before you go.
Acceptable Secondary ID Documents
If your primary ID isn’t available or doesn’t meet TSA PreCheck standards, you’ll need an acceptable secondary ID to confirm your identity. Acceptable options typically include a passport card, DHS trusted traveler card (Global Entry, NEXUS, SENTRI), or a state-issued enhanced driver’s license, and each must be unexpired and government-issued.
You should carry one that matches your reservation name and has a clear photo. Present it during enrollment or at the checkpoint when requested.
TSA won’t accept expired or unofficial documents. Keep originals, not photocopies, and replace lost IDs promptly to avoid travel delays.
- Passport card
- DHS trusted traveler card
- Enhanced driver’s license
- Other government-issued photo ID
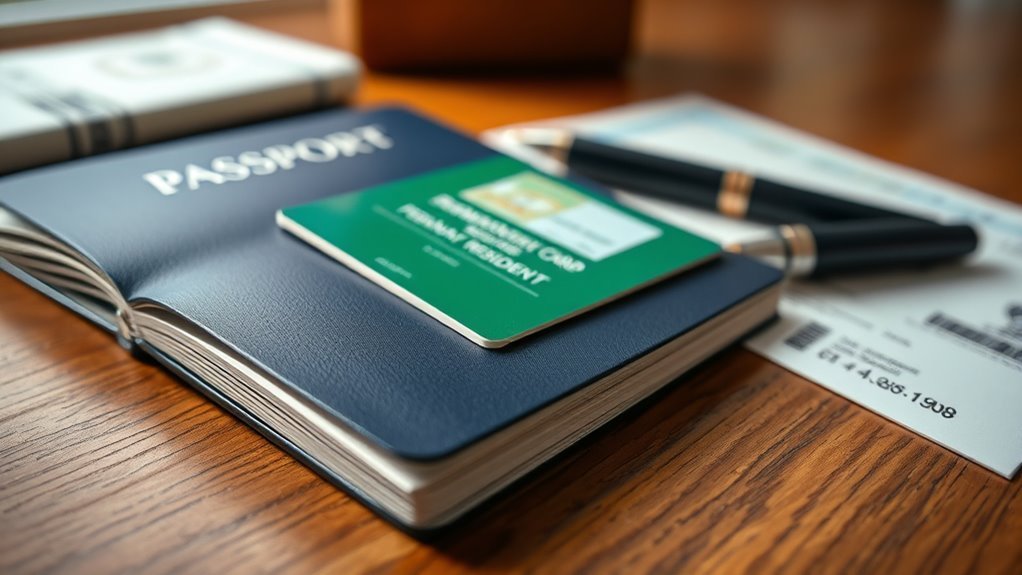
Documents for Lawful Permanent Residents
If you’re a lawful permanent resident, bring your unexpired green card (Form I-551) as your primary ID for TSA PreCheck enrollment and at checkpoints; TSA accepts the physical card with a clear photo and name that matches your reservation. You’ll also provide proof of identity and complete the application; your green card satisfies citizenship status for enrollment. Keep the card current and travel name consistent to avoid delays. Below is a simple reference table for clarity.
| Document Type | Accepted? | Notes |
|---|---|---|
| Green Card (I-551) | Yes | Primary ID |
| Passport | Optional | Backup |
| Driver’s License | Optional | Secondary |
| Enrollment Form | Required | Application info |
Documents for Other Non‑U.S. Citizens
When you’re not a U.S. citizen or lawful permanent resident, bring your unexpired passport plus the specific immigration document that proves your legal status and travel eligibility (for example, a valid visa, Form I-94, or Employment Authorization Document). TSA needs the passport photo and name to match your reservation. You’ll present both at enrollment and when asked at checkpoints. Originals only—no photocopies.
Keep documents current, and carry any travel endorsements. If you travel on a different name, be prepared to show supporting name-change records (see next section). Follow airline rules too, since boarding IDs must match TSA records.
Keep documents current and carry travel endorsements; if your name differs, have name-change records ready and follow airline rules.
- Passport
- Valid visa
- Form I-94
- Employment Authorization Document
Proving Name Changes or Identity Discrepancies
Because your TSA records must exactly match the name on your travel ID, bring original legal documents that show any name changes or other identity discrepancies—such as a marriage certificate, court order, divorce decree, or amended passport—so agents can verify your identity quickly and avoid delays.
You’ll also present current government photo ID that reflects your legal name. If your travel documents show different names, carry supporting paperwork proving the link between names.
Originals are preferred; certified copies may be accepted. Keep documents organized and accessible during enrollment and at the checkpoint to prevent misunderstandings and speed processing.
What to Bring When Applying for Minors
While minors can’t enroll themselves, you’ll need to bring documentation that proves both the child’s identity and your authority to act for them. Bring originals and copies; the agent will verify birth certificates or passports and your ID.
If you’re not a parent, bring legal guardianship papers or a notarized consent. Expect to present proof of relationship, especially for infants with different surnames.
- Child’s birth certificate or passport
- Parent/guardian government-issued photo ID
- Court-ordered guardianship or custody documents (if applicable)
- Notarized written consent for non-parent applicants
Filling Out the Online Application
Before you start the TSA PreCheck online application, make sure you meet the eligibility criteria and have your required documents ready.
Double-check names, dates of birth, and passport or ID numbers as you enter them to prevent delays.
Use the site’s prompts and review pages carefully so your information is accurate before submission.
Eligibility And Documents
Wondering what you need to apply for TSA PreCheck? You must meet basic eligibility and provide documents when filling out the online application and during your enrollment appointment. You’ll confirm citizenship or lawful status, age, and identity, and supply supporting evidence.
- Valid passport or U.S. birth certificate plus government photo ID.
- Permanent resident card or valid visa if non-citizen.
- Proof of name changes (marriage certificate, court order) if applicable.
- Current contact information and address verification (utility bill, lease).
Have originals or certified copies for your appointment; digital copies help prepare but aren’t accepted alone.
Application Accuracy Tips
When you fill out the TSA PreCheck online application, be precise and consistent with every entry to avoid delays or a denied enrollment—use the exact names, dates, and document numbers shown on your supporting ID. Double-check spelling, and make sure your current address and contact info match the documents you’ll bring to your appointment.
Enter your legal name exactly, include all middle names or initials as on your ID, and use the correct date format. Review passport or driver’s license numbers carefully.
Save drafts, verify email and phone accuracy, and correct mistakes immediately to prevent mismatches at enrollment.
Creating Your Account and Username Tips
As you set up your TSA PreCheck account, have your email, phone number, and a secure password ready so the process goes smoothly. Use a reliable email you check often, link a phone for verification, and create a password with mixed characters.
Pick a username that’s memorable but not personally revealing; avoid full names or birthdates. Save credentials in a password manager.
- Use a professional-looking email (no nicknames).
- Choose a unique username used only for travel accounts.
- Enable two-factor authentication when offered.
- Record recovery options and update them if they change.
Choosing a Convenient Enrollment Center
Pick an enrollment center that’s close to home so you won’t waste time traveling.
Check appointment availability at nearby centers and choose one with convenient times for your schedule.
If nearby slots are full, consider slightly farther locations with earlier openings.
Proximity To Home
Because you’ll likely visit the enrollment center more than once, choose one that’s close to home or along routes you already use, saving time and reducing hassle for appointments and renewals. Pick a location that fits your routine so you’ll actually go: near work, grocery runs, or transit stops.
Consider parking, public transit access, and neighborhood safety. If you travel regionally, a center near an airport or major highway can help.
Keep directions and hours handy so you don’t get delayed.
- Parking convenience
- Transit connections
- Safe, well-lit area
- Proximity to regular routes
Appointment Availability
When you’re choosing an enrollment center, check appointment availability early so you can book a time that fits your schedule without repeated trips.
Look for centers offering weekday evenings or weekend slots if you work standard hours.
Use the online scheduler to compare openings across nearby locations; some show cancellations you can grab.
If you need same-day service, call the center—staff sometimes release last-minute appointments.
Factor in travel time and parking when picking a slot, and choose one that gives you buffer for delays.
Once booked, add reminders and bring required documents to avoid rescheduling.
Scheduling Your In-Person Appointment
Before your appointment, pick a convenient enrollment center and book a slot online or by phone so you won’t face long waits; you’ll get a confirmation with date, time, and location.
Bring required ID and your confirmation; arrive early to avoid rescheduling.
If plans change, cancel or reschedule online to free the slot.
Check center hours—some close weekends or have limited evening times.
- Review acceptable IDs on the TSA site.
- Keep your confirmation email or number handy.
- Factor travel time and parking into your schedule.
- Reschedule promptly if you can’t make it.
What Happens at the In-Person Interview?
When you arrive for your in-person appointment, bring a government-issued photo ID and any documents that prove your citizenship or immigration status.
You’ll complete a brief interview where an agent verifies your information, takes your fingerprints, and answers any questions.
The whole process is usually quick, so you can ask about next steps before you leave.
What To Bring
Although the in-person interview only takes a few minutes, you’ll need to bring specific documents and be prepared for ID verification and fingerprinting. Bring originals, not copies, and keep items organized for quick presentation. Have your appointment confirmation ready on your phone or printed.
If you have recent name changes, bring legal proof. Expect to sign forms and provide contact details.
- Valid passport or driver’s license (unexpired)
- Proof of citizenship or immigration status (birth certificate, naturalization certificate, or passport)
- Proof of address if required (utility bill, lease)
- Appointment confirmation and any name-change documents
Interview Process Steps
With your documents ready and organized, you’ll step into a short, structured interview where an agent will confirm your identity, review your paperwork, and collect fingerprints and a photo.
You’ll answer brief questions about your background, travel history, and citizenship status—stick to clear, honest responses.
The agent checks for discrepancies and may clarify details from your application. The interaction usually lasts under ten minutes.
After biometrics and verification, you’ll be told the next steps, processing timelines, and how to check your application status.
If approved, you’ll receive a Known Traveler Number; if not, you’ll get instructions for appeals or reapplication.
How Long the Appointment Usually Takes
If you’re booking a TSA PreCheck enrollment appointment, expect the in-person visit to take about 10–15 minutes for most applicants; that covers identity verification, fingerprinting, and a quick interview. You’ll check in, present documents, answer brief questions, and complete biometric capture.
Busy centers or incomplete paperwork can add time, so arrive early and bring originals. Most people leave within a quarter hour; rare delays might push it to 30 minutes.
Busy centers or missing paperwork can lengthen your visit—arrive early with originals; most finish in about 15 minutes.
Use the appointment confirmation to find peak times and plan accordingly.
- Bring required IDs
- Arrive 10 minutes early
- Complete forms beforehand
- Expect minor waiting
Fingerprinting: Process and Tips
When you go through fingerprinting, you’ll have your inkless prints scanned in a few clear steps so the agent can verify your identity.
Come prepared for your enrollment appointment by bringing required ID, arriving on time, and keeping your hands clean to speed things up.
If a scan gets rejected, it’s usually due to dirty or damaged fingers, smudged prints, or equipment issues.
You can just re-scan after cleaning or adjusting your position.
Fingerprint Collection Steps
Although fingerprinting may seem technical, the collection process is straightforward and designed to get clear, usable prints quickly; you’ll follow a simple sequence so results are accurate. You’ll sanitize or moisturize hands if needed, remove jewelry, and position fingers as instructed. The technician will roll or scan each finger once, capturing all ridges. Stay relaxed, apply even pressure, and lift when told.
- Clean hands and remove rings.
- Position fingers on scanner or ink pad.
- Roll or press each finger per directions.
- Review prints for clarity; repeat if necessary.
Enrollment Appointment Tips
Now that you know the fingerprinting steps, plan your enrollment appointment to keep the process smooth and quick. Bring a government ID and your conditional approval letter or confirmation number. Arrive early to avoid rushed fingerprints and wear short sleeves or sleeves you can roll up.
Clean hands and dry fingers help scanners read ridges; avoid lotion just before scanning. Follow staff instructions and place fingers steadily—no jerking. If you have recent cuts, mention them so they can adjust technique.
Ask for clarification about next steps, processing timeline, and how you’ll receive your Known Traveler Number.
Common Rejection Reasons
Several factors can cause fingerprint scans to be rejected, and knowing them helps you avoid delays. You’ll want clean, dry hands and to avoid lotions or recent work that smears ridges.
If sensors report low-quality prints, the technician may repeat scans; persistent failures can require ink-and-paper backups or rescheduling. Some skin conditions, scars, or worn fingerprints from manual labor reduce clarity.
Follow instructions, position fingers squarely, and apply steady pressure without sliding.
- Dirty, wet, or greasy fingertips
- Cuts, scars, or eczema on pads
- Excessive pressure or finger movement
- Sensor malfunction or poor technique
Common Document Mistakes to Avoid
When you apply for TSA PreCheck, small errors on your documents can cost you time or even a denied enrollment, so double-check details like name spellings, birthdates, and document expiration dates before you submit.
Make sure your government ID matches your application exactly — no nicknames, mismatched initials, or outdated addresses.
Submit clear, legible copies; blurry or cropped images get rejected. Use unexpired passports or driver’s licenses and verify serial numbers or issuance details.
If you changed your name, include legal proof like a marriage certificate.
Avoid altered documents or unofficial IDs to prevent delays or denial.
Cost and How to Pay for TSA PreCheck
TSA PreCheck costs $78 for a five-year membership, and you can pay online with a credit or debit card, or in person at many enrollment centers that also accept cards. Some centers may take cash, but check ahead.
You’ll schedule an appointment, complete a short application, and pay the fee — it’s nonrefundable. If you qualify, your Known Traveler Number is issued and you’ll enjoy expedited screening.
- Fee covers five years.
- Pay during online application or at enrollment.
- Keep your receipt for records and reimbursement options.
- Renewal requires another fee and updated appointment.
Paying by Card, Debit, or Money Order
When you pay for TSA PreCheck, you’ll find which cards and payment methods are accepted and any differences between debit and credit.
You’ll want to know if your bank’s debit card is treated like a credit transaction and whether fees or holds apply.
If you don’t use cards, learn how to prepare a proper money order for the application.
Accepted Payment Methods
Wondering which payment methods you can use for your PreCheck application? You can pay online at the TSA website or enrollment portal using common electronic methods. Pick what’s convenient, but be prepared to provide accurate billing details and a valid cardholder name.
If you apply in person, some enrollment centers accept cashless payments only, so check ahead.
- Credit card (online processors)
- Debit card (use PIN or signature as allowed)
- Money order (payable to the program where accepted)
- Electronic payment services (when listed on the official site)
Confirm accepted options at your chosen enrollment center before you go.
Debit Vs Credit
Choosing between debit, credit, or a money order comes down to convenience, fees, and the protections you want.
You’ll find credit cards often give better fraud protection and dispute rights, plus rewards if you use them.
Debit cards pull directly from your bank, so unauthorized charges can temporarily tie up funds and dispute resolution may take longer.
Some enrollment sites may accept only cards, so check before you start.
If you prefer to avoid linking accounts, credit is safer.
Compare any processing fees and your card’s chargeback policy to pick the best payment method for TSA PreCheck.
Using Money Orders
If you prefer not to use a card or want a paper trail, money orders offer a simple alternative for paying TSA PreCheck fees. You’ll buy one at a post office or retailer, fill in the payee and your name, and include it with any required application materials if the program accepts mailed payments.
Keep receipts and tracking numbers; they prove payment if processing stalls. Verify current acceptance rules before purchasing so you don’t waste time or money.
- Confirm acceptance with TSA or enrollment provider.
- Use exact payee name and amount.
- Retain receipt and tracking.
- Mail via tracked service.
Fee Waivers, Employer Programs, Reimbursements
Many travelers qualify for fee waivers or employer‑sponsored reimbursement that cut or eliminate the $78 TSA PreCheck application cost, so it’s worth checking your eligibility before you apply. You can get reimbursed by employers, receive fee waivers through military or certain credit unions, or use travel benefit platforms. Check policies, required documentation, and timing—some employers need preapproval. Keep receipts and your Known Traveler Number for reimbursement forms. If you switch jobs, confirm transferability. Below are examples to visualize common options.
| Source | Typical benefit |
|---|---|
| Employer | Full/partial reimbursement |
| Military | Fee waiver |
| Credit union | Discount or waiver |
| Travel card | Statement credit |
How Long Approvals Take and Checking Status
Wondering how long TSA PreCheck approvals take? You’ll usually hear back within 3–5 days, though some applications need up to 60 days for review. You can check status online or by phone, and you’ll get email updates when your Known Traveler Number (KTN) is assigned.
- Apply online, schedule your appointment, complete your interview.
- Check status at the official TSA PreCheck portal using your application ID.
- Call the enrollment center if online status hasn’t updated after two weeks.
- Bring ID and documents to your interview to avoid delays or requests for more info.
Using Your Known Traveler Number (KTN)
Once your Known Traveler Number (KTN) appears in your account, start adding it to every airline profile and booking so you consistently get the PreCheck lane. Enter the KTN in your airline loyalty profile, reservation name record (PNR), and on partner booking sites. Double-check spelling and traveler name matches your ID to avoid mismatches. If you book through an agency or family member, confirm they include your KTN. At check-in, verify the KTN is on the reservation to improve your chances of PreCheck eligibility.
| Where to add | Example place | Tip |
|---|---|---|
| Profile | Airline account | Save once |
| Reservation | PNR/confirmation | Confirm before check-in |
| Third-party | Agency/OTA | Provide ASAP |
How TSA PreCheck Shows on Boarding Passes
When your reservation is eligible, TSA PreCheck appears right on your boarding pass as a clear indicator—look for the words “TSA PRECHK,” the abbreviation “TSA PRE,” or a PreCheck logo near your name or flight details. You’ll see it on paper or mobile passes, and it signals access to expedited screening lanes.
If you don’t see the indicator, check that your Known Traveler Number was added to the reservation and that the airline supports PreCheck for that flight.
- Verify KTN in your booking.
- Inspect mobile and printed passes.
- Contact the airline before travel.
- Expect occasional eligibility exceptions.
Renewing TSA PreCheck: Timing and Documents
If your TSA PreCheck membership is about to expire, start the renewal process up to six months before the expiration date to avoid gaps in coverage; some airlines will verify an active Known Traveler Number at check-in.
You can renew online through the Trusted Traveler Programs website or the app, completing the application and paying the fee.
Be ready to update your passport and ID information, and note any name changes require supporting documents.
Occasionally you’ll need an in-person appointment for fingerprinting or identity verification; if so, schedule promptly.
Keep proof of renewal confirmation until your new membership appears in airline systems.
What to Do If Your Application Is Denied
Although a denial is frustrating, you’ve got clear steps to challenge it and possibly get approval. First, read the denial notice carefully to understand the reason. Then collect documents or evidence that directly address the issue cited.
Although denials are frustrating, follow the notice, gather evidence, and address the reason directly to challenge it.
Next, submit an appeal or request a review following the instructions and deadlines on the notice.
Finally, be persistent: follow up if you don’t hear back.
- Review the denial letter for specific causes.
- Gather supporting documents that refute or clarify concerns.
- File the appeal or review request promptly.
- Monitor status and follow up until resolved.
Correcting Errors and Updating Your Info
If you notice mistakes in your profile, correct enrollment information right away to prevent screening issues.
You can update personal details like name changes, address, or passport data through your TSA account or by contacting the enrollment center.
Keeping your info current helps make certain PreCheck eligibility and smoother travel.
Update Personal Details
When you spot an error in your TSA PreCheck profile or your contact details change, correct them promptly so your travel stays smooth and your eligibility isn’t affected. You can update phone numbers, addresses, and email through your trusted traveler account or by contacting enrollment support. Keep IDs current so boarding passes match your TSA record.
If you legally change your name, follow the required documentation steps. Regularly review your profile before trips to avoid delays.
- Update mailing and residential addresses.
- Correct phone and email entries.
- Upload new ID documentation if needed.
- Report legal name changes promptly.
Correct Enrollment Information
After you’ve reviewed and updated basic contact and ID details, make certain your enrollment information itself is accurate—errors in your name, date of birth, passport number, or gender can block TSA PreCheck benefits at the checkpoint.
If you spot a mistake, contact the enrollment provider or log into your Known Traveler Number account to request corrections. Bring original documents to an enrollment center if required.
Update any name changes due to marriage or legal action promptly. Keep copies of confirmations and correspondence.
Verifying and correcting enrollment data ensures your TSA PreCheck status matches travel documents and prevents delays at security.
Using TSA PreCheck When Traveling Internationally
Curious how TSA PreCheck applies to international travel? You can use PreCheck on flights departing U.S. airports even if your destination is abroad, as long as your airline participates and your boarding pass shows the TSA PreCheck indicator.
When returning to the U.S., PreCheck doesn’t affect customs processing.
- Confirm your Known Traveler Number is in your airline reservation.
- Check that your carrier supports PreCheck on international routes.
- Verify your boarding pass displays the PreCheck logo before you head to security.
- Remember PreCheck speeds security screening, but global entry benefits are separate.
TSA PreCheck vs. Global Entry: How They Work Together
If you value faster security lines for outbound international flights, it’s good to know how TSA PreCheck and Global Entry work together: PreCheck speeds you through airport security, while Global Entry includes PreCheck plus expedited U.S. customs processing for returning travelers.
You can apply just for PreCheck or for Global Entry, which grants both benefits. Global Entry costs more but covers international re-entry and often includes Global Entry kiosks and faster passport control.
Keep your Known Traveler Number active in airline reservations to use PreCheck.
Choose Global Entry if you travel abroad frequently; pick PreCheck if you mainly fly domestically.
Real Benefits You’ll Notice at Security
When you use TSA PreCheck, you’ll get through much faster thanks to dedicated lanes that move steadily. You won’t have to take off your shoes in most airports, which saves time and hassle.
These simple changes add up to a smoother, less stressful start to your trip.
Faster Security Lines
Because TSA PreCheck puts you in a dedicated lane, you’ll move through security far quicker—often in minutes instead of the longer standard lines. You’ll wait less, feel less rushed, and get to your gate with time to spare. The streamlined process reduces stress and makes connections easier when you’re tight on time.
Expect predictable screening so you can plan arrival times confidently. Benefits are consistent across many airports, though busiest hubs vary. Here are specific advantages you’ll notice:
- Shorter queue times.
- Faster ID checks.
- Less time removing outerwear.
- Smoother carry-on screening.
Less Shoe Screening
Notice how much time you save when you don’t have to remove your shoes? With TSA PreCheck, you breeze through security without stopping to take them off, chase bins, or re-lace sneakers. That saves minutes per traveler, reduces line congestion, and lowers stress before your flight.
You’ll move smoothly through the checkpoint, keeping footwear on and avoiding awkward juggling of carry-ons. Less shoe screening also helps if you have mobility issues, kids, or tight connections. It’s a small convenience that adds up: fewer delays, cleaner stations, and a calmer start to travel, letting you focus on your trip.
When TSA PreCheck Won’t Help (Exceptions)
Although TSA PreCheck speeds up screening for millions of travelers, it won’t apply in every situation and you should know the common exceptions so you won’t be caught off guard.
Although TSA PreCheck speeds screening, it doesn’t apply everywhere—know common exceptions to avoid surprises.
You might still face standard screening when:
- You’re on an airline or route that doesn’t participate in PreCheck.
- Your boarding pass lacks the TSA PreCheck indicator due to reservation or booking class issues.
- You travel with guests who don’t have PreCheck and the gate agent assigns mixed screening.
- Random or secondary screening is selected for security reasons, documentation checks, or unusual carry-on items.
Check your boarding pass and airline policies before you go.
What to Bring and How to Prep the Day of Appointment
Knowing when PreCheck won’t apply helps you plan, but for your enrollment appointment you’ll want to focus on what to bring and how to prepare the day of. Bring your valid ID, proof of citizenship or lawful status, and your appointment confirmation. Arrive early, have forms ready, and charge your phone for notifications. Expect fingerprinting and a short interview; answer clearly and confidently.
| Item | Where | Why |
|---|---|---|
| ID | Wallet | Verifies identity |
| Documents | Folder | Supports eligibility |
| Phone | Confirms appointment |
Keep copies organized and avoid last-minute scrambling.
What to Wear to a TSA PreCheck Appointment
Since you’ll be fingerprinted and briefly interviewed, wear neat, comfortable clothing that clearly shows your face and wrists—think short sleeves or sleeves you can roll up and avoid hats or heavy scarves. You’ll want simple attire so the agent can verify identity quickly and you move through the process without fumbling.
Choose layers you can remove easily, avoid excessive jewelry that complicates scans, and pick shoes you can slip off if asked. Present a tidy appearance to speed verification and reduce questions.
- Short sleeves or rollable sleeves
- Minimal jewelry
- Easily removable outerwear
- Closed-toe, easy-off shoes
Handling Lost or Expired Documents Before Applying
Lost or expired ID documents? You should act quickly. Check which ID the TSA accepts—typically a valid passport or state-issued driver’s license or ID card—and confirm expiration rules.
If your ID’s expired, start the renewal online or at your local DMV; request temporary or interim documents if available.
For lost IDs, file a police report if required, then apply for replacements and get a certified copy of your birth certificate or passport if needed.
Only apply for TSA PreCheck once you have acceptable, current identification to avoid delays or denial.
Keep digital copies and note processing times before scheduling.
Employer and Military Enrollment Options
If your employer or military status could cover TSA PreCheck enrollment, take advantage of streamlined options that save time and money. You can often enroll through employer-sponsored programs or military personnel initiatives that waive fees or provide group sign-ups.
Check eligibility, required documentation, and who handles appointment scheduling. Follow your organization’s instructions to submit proof of employment or service and complete the in-person interview.
- Verify employer or military eligibility criteria and deadlines.
- Gather ID and employment/service verification documents.
- Use provided scheduling links or contact HR/ID card office.
- Confirm fee waiver or reimbursement procedures before applying.
Privacy and Data Security Concerns
When you enroll in TSA PreCheck, you’ll share sensitive personal data—like your name, date of birth, address, and fingerprints—so it’s important to understand how that information’s collected, stored, and used. You should know TSA and DHS contractors handle enrollment data under federal privacy rules.
Biometrics are used to verify identity and reduce fraud. Ask about retention periods, access controls, and whether data’s shared with other agencies. Check privacy notices and your right to correct records.
If you’re concerned, limit what’s on file where possible and contact the agency’s Privacy Act officer for specific questions or complaints.
Cost‑Benefit Checklist: Is It Worth It for You?
Because you’re weighing time savings against cost and hassle, run through a quick checklist to see if TSA PreCheck pays for you. Consider your travel frequency, typical airport wait times, and whether you value streamlined security. Factor in the $78 fee, five‑year validity, and any employer or credit‑card reimbursement.
Think about family travel — if you often go with kids, the convenience multiplies. Compare the application time and occasional interview against cumulative minutes saved per trip to estimate break‑even.
- How many round trips per year do you take?
- Typical security wait times at your home airport?
- Any reimbursement options available?
- Do you travel with family?
Alternatives for Less Frequent Travelers
If you don’t fly often, you might consider TSA PreCheck alternatives like CLEAR or paying per-use expedited security at some airports.
You can also weigh Global Entry, which adds faster customs processing on international trips and includes PreCheck for five years.
Think about your travel patterns and decide which option saves you time and money.
TSA PreCheck Alternatives
Although TSA PreCheck speeds you through security, it’s not the only option for occasional flyers—there are simpler, low-cost ways to skip lines and stress. You can pick alternatives that fit short trips, business travel or one-off vacations without committing to membership fees or interviews.
- Buy expedited airport security passes when available at some airports for single trips.
- Fly during off-peak hours to face shorter lines and quicker processing.
- Join airline-specific priority programs or buy priority boarding to access dedicated lanes.
- Use mobile check-in, digital boarding passes, and pack carry-on efficiently to move faster through checkpoints.
Global Entry Benefits
Global Entry gives you faster re-entry into the U.S. by letting preapproved travelers skip long customs lines and use automated kiosks at major airports—perfect for occasional international flyers who want a low-hassle alternative to paying per-trip services.
You’ll complete an online application, pay a nonrefundable fee, and schedule an in-person interview.
Once approved, you get expedited customs processing and five years of membership, which can include TSA PreCheck benefits on eligible flights.
Global Entry saves time, reduces airport stress, and often pays for itself after a few international trips.
It’s ideal if you travel abroad sporadically but value speed.
Quick Checklist: Everything to Bring and Do
Before you leave for the airport, gather the essentials you’ll need to breeze through TSA PreCheck: your valid government ID, your boarding pass (mobile or paper), your Known Traveler Number on the reservation, and any travel documents required by your destination.
Then follow this quick checklist so you don’t hit delays. Keep items accessible, remove bulky shoes if needed, and pack liquids per rules even though screening is eased.
Confirm children’s documents and check airline apps for updates. Stay calm and cooperative with officers for a fast lane experience.
- Wallet/ID and boarding pass
- Known Traveler Number on reservation
- Liquids in approved containers
- Child documentation and confirmations
Frequently Asked Questions
Can I Enroll in TSA Precheck While Incarcerated or on Parole?
No, you generally can’t enroll in TSA PreCheck while incarcerated, and being on parole usually disqualifies you until your criminal record meets eligibility criteria; you’ll need arrest disposition and clearance before applying during supervised release.
Do TSA Precheck Benefits Transfer to TSA Precheck Kiosks at Airports?
Yes — your TSA PreCheck benefits work at TSA PreCheck kiosks when your Known Traveler Number is linked to your airline reservation; you’ll just follow kiosk prompts, show ID, and enjoy expedited screening without extra steps or separate enrollment.
Are Pets or Service Animals Covered Under TSA Precheck Screening?
Yes — TSA PreCheck covers you, not animals; service animals and pets aren’t granted expedited screening themselves. You’ll still follow standard procedures: present documentation, escort your animal through screening, and comply with officer instructions.
Can Someone Else Attend My In-Person Appointment on My Behalf?
No, you can’t send someone else; you must attend your in-person appointment, provide your ID and documents, submit fingerprints, and sign consent. If you miss it, reschedule—appointments are personal and require your physical presence.
Will TSA Precheck Speed up Customs and Immigration Upon Return?
No, TSA PreCheck won’t speed up customs and immigration; it’s for expedited domestic/security screening. You’ll still go through regular customs and passport control on return, though some airports offer Global Entry for faster processing.
Conclusion
TSA PreCheck can save you time and stress if you fly often, value convenience, or want a smoother security experience. You’ll need proof of identity and citizenship/residency, a clean criminal/immigration record, and to pass a background check and brief enrollment appointment. Consider cost vs. flying frequency, and weigh privacy concerns. If you rarely fly, look at alternatives. If you decide to apply, bring required documents and be prepared for fingerprints.