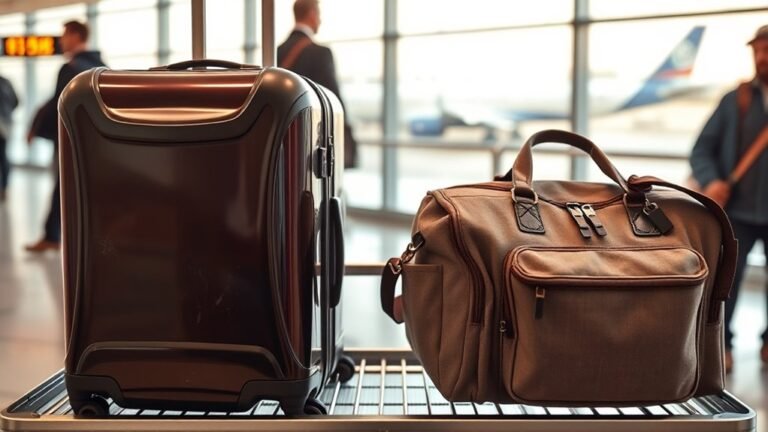
Is a Carry On Enough for 2 Weeks? Packing Tips
Yes — you can fit two weeks into a carry-on if you plan smartly. Stick to mix-and-match neutrals, pack compressible travel fabrics, limit shoes to two pairs, and use packing cubes and rolling to save space. Rely on quick-dry items or laundry access to repeat outfits, keep toiletries under TSA limits, and weigh your bag against the strictest airline rules. Follow a simple checklist and you’ll see exactly how to make a carry-on work for 14 days.
Is a Carry‑On Enough for 14 Days?
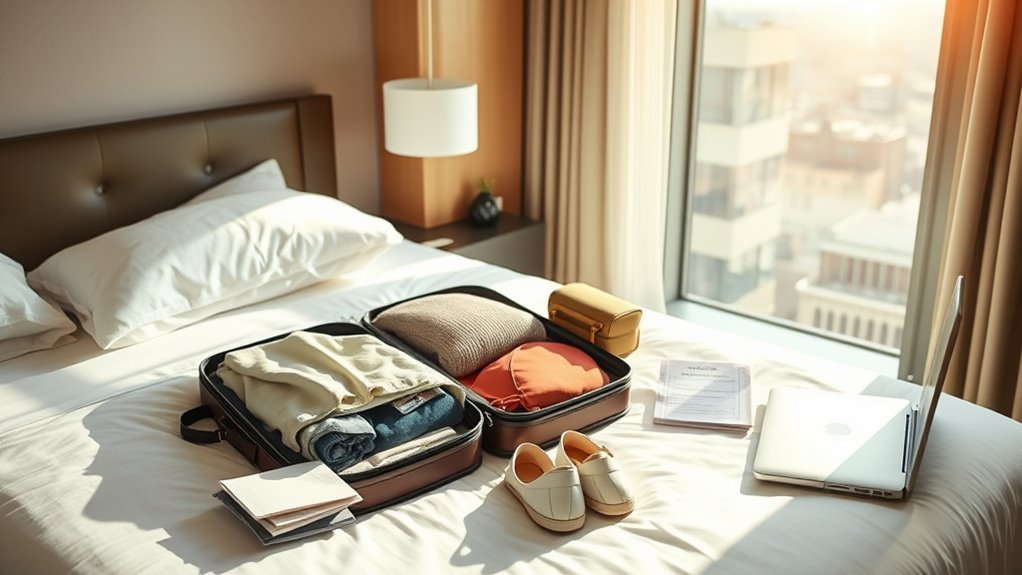
If you pack smart and plan outfits around versatile pieces, a carry‑on can absolutely handle 14 days—especially if you’ll have access to laundry. You’ll prioritize mix‑and‑match clothing, neutral colors, and layers so each item serves multiple looks.
Choose travel‑weight fabrics that dry fast and pack compressible items to save space. Limit shoes to two pairs: one casual, one dressier. Use packing cubes and roll garments to maximize room and prevent wrinkles.
Plan toiletries as travel‑size or buy basics there. With disciplined outfit planning and laundry stops, you’ll avoid checked baggage without sacrificing style or essentials.
Quick Checklist: When to Pack Carry‑On Only
Now that you know how to make 14 days fit into a carry‑on, here’s a quick checklist to help you decide when to actually leave the checked bag at home.
Travel solo or with light packing habits. No bulky gear, formalwear, or gifts. Trip has reliable laundry options or lasts under two weeks with planned outfit repeats.
Travel light: solo trips with no bulky gear or formalwear, laundry available or outfits planned to repeat.
You’ll use public transport or short drives without bulky souvenirs. You can manage liquids within TSA limits and have necessary toiletries in travel sizes.
Minimal cold‑weather items that compress. Flights are nonstop or have generous connection times. You’re willing to rewear and pack smart.
Airline Size and Weight Rules That Matter
Because airlines set both size and weight limits, you’ll want to check both before you pack, not just the stated “carry‑on” dimensions. Look up your carrier’s cabin bag measurements and the allowed weight — regional or low-cost carriers often have stricter rules.
Note whether personal items are separate and the location of measurement (including wheels/handles). Remember weight limits apply at boarding, not just gate checks; overweight bags may incur fees or forced checking.
If you’ll connect flights, verify rules for each airline. Keep receipts or screenshots of policies in case staff dispute your bag’s compliance.
Choose the Right Carry‑On Size and Weight
Pick a carry‑on that matches the strictest size and weight limits you’ll face so you don’t get slapped with fees or forced to gate‑check. Measure exterior dimensions and include wheels and handles. Check both linear dimensions and airline weight caps for hand luggage and cabin baggage — domestic, international, and budget carriers differ.
Aim to stay a little under limits to account for scales and staff variability. Use a lightweight, durable case so you maximize packing capacity without excess pounds. Weigh your packed bag at home on a luggage scale and adjust contents until you consistently hit, but don’t exceed, the allowable weight.
Best Carry‑On Styles for a 2‑Week Trip
Once you’ve settled on size and weight, decide which carry‑on style fits how you travel and what you’ll pack.
Hard‑shell suitcases protect fragile items and resist rain, ideal if you bring electronics or souvenirs.
Soft bags compress into tight overhead bins and often have exterior pockets for quick access to documents or a sweater.
Expandable models give wiggle room for returns but can exceed limits if overfilled.
Spinner wheels let you glide through terminals; two‑wheelers handle curbs and uneven sidewalks better.
Backpacks keep hands free and suit active itineraries.
Choose the style that matches your route, activities, and packing discipline.
Pick a Carry‑On With Smart Organization
If you want stress-free access to everything during a two-week trip, choose a carry-on with clear organization: dedicated laptop and toiletry compartments, removable packing cubes, and external pockets for travel docs. You’ll move faster at security, stay tidy in transit, and avoid rummaging for chargers or paperwork.
Pick a bag with sturdy zippers, a trolley sleeve, and internal dividers that match how you pack. Consider water-resistant fabric and a lockable main compartment. Test-fit your essentials before you travel to confirm capacity and layout.
- Prioritize compartments that match your routine
- Use removable cubes for laundry separation
- Label pockets for quick finds
- Keep valuables in a zippered external pocket
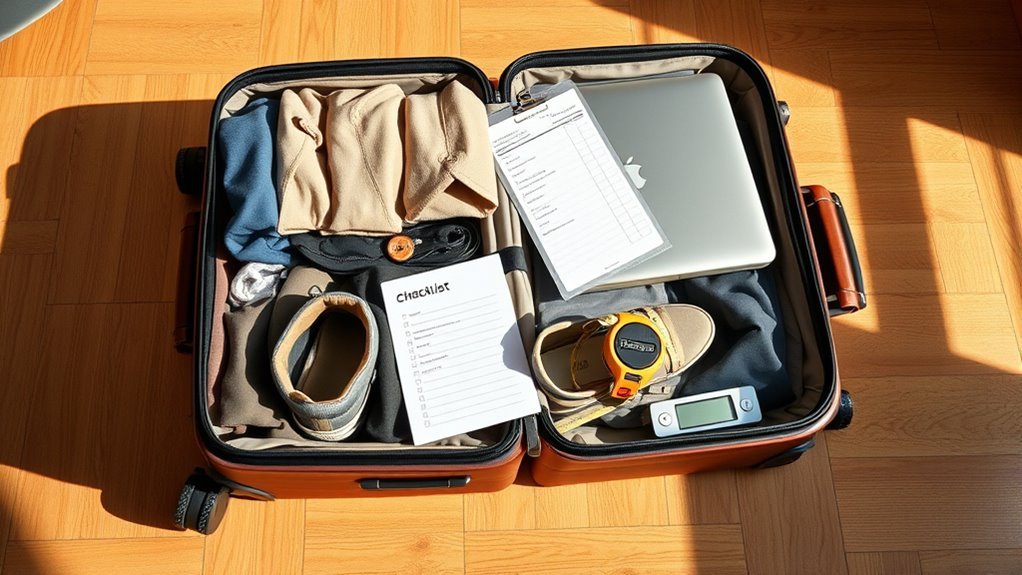
Minimalist Packing Checklist for 14 Days
Now that your bag’s organized, focus on what actually goes into it: a minimalist 14-day checklist keeps weight down and options flexible by limiting duplicates and favoring mix-and-match pieces. Pack 7 tops, 3 bottoms, 1 dress/extra, 2 layers, 7 underwear, 4 socks, 1 pair shoes, lightweight toiletry kit, compact first-aid, chargers, and travel docs. Do laundry mid-trip or reuse items. Prioritize versatile fabrics and neutral colors. Check weather and activities to tweak counts. Use packing cubes to compress and separate clean from worn items for easy access and freshness.
| Essential | Count |
|---|---|
| Tops | 7 |
| Bottoms | 3 |
| Layers/Extras | 3 |
Build a 14‑Day Capsule Wardrobe in 6 Steps
Because a well-planned capsule wardrobe lets you wear everything you packed, you’ll travel lighter and look put-together without fuss. Start by choosing a neutral palette, pick versatile layers, and limit patterns. Prioritize fabrics that resist wrinkles and wash quickly.
Plan outfits for activities and two dressier looks; rotate accessories to change vibe. Aim for mix-and-match pieces that serve multiple roles so you won’t overpack.
- Choose a core color and two accents for cohesion
- Select multi-use outerwear and shoes for comfort and style
- Bring interchangeable accessories to refresh outfits
- Pack quick-dry, low-crease fabrics for easy care
How Many Tops and Bottoms to Pack?
When you plan tops and bottoms, count outfits instead of individual pieces so every item pulls double duty.
Choose three neutral bottoms—jeans, tailored pants, and a casual skirt or shorts—then add four to six tops: two basic tees, a button shirt, a blouse, and one or two statement tops.
That gives about ten to twelve outfit combinations.
Pick fabrics that resist wrinkles and match your shoes.
If laundry’s available, drop one bottom or top; if not, keep one extra top.
Stick to a cohesive color palette so everything mixes easily and space stays minimal.
Layering Tricks to Multiply Outfits
Start with versatile base layers—thin tees and a neutral camisole—that you can wear alone or under other pieces.
Mix-and-match tops like a button-up, a lightweight sweater, and a tee to create different looks with the same bottoms.
Then use scarves, belts, and jewelry as accessory power plays to change the vibe without adding bulk.
Base Layers First
If you pack your base layers first, you’ll set a flexible foundation that makes mixing and matching a breeze. Start with neutral, breathable pieces you can wear alone or under extras.
Choose fabrics that dry fast and resist odor so you can re-wear confidently. Limit colors to two neutrals and one accent to keep combos simple.
Roll or fold to save space and keep items accessible at the top of your carry-on.
- Lightweight merino or synthetic tees
- Slim long-sleeve for cooler evenings
- Neutral camisoles or tank tops
- Compact thermal or undershirt for layering
Mix-And-Match Tops
Because tops set the tone for every outfit, choose a few versatile pieces you can layer to create many looks. Pick two neutral tees, one crisp button-down, a thin knit sweater, and a lightweight jacket.
Stick to a simple color palette so items swap easily. Use one statement top—a patterned blouse or bright tee—to refresh repeats.
Roll or fold tops to save space and keep wrinkle-prone pieces near the top of your bag.
Plan outfits around the button-down and jacket: wear them alone, open over tees, layered under the sweater, or tied at the waist for casual variety.
Accessory Power Plays
You’ve already set a strong base with mix-and-match tops; now use accessories to multiply those looks without adding bulk. You’ll transform basics into distinct outfits by focusing on small, versatile pieces that layer and swap easily.
Choose items that add color, texture, or silhouette changes so each day feels fresh without extra clothing.
- Lightweight scarves for neck, head, or belt uses
- Statement jewelry to shift casual to dressy instantly
- A packable belt and a thin cardigan for waist definition
- Compact hat and crossbody bag to change proportions and function
Use intent: one accessory, many outcomes.
Fabrics That Cut Bulk and Odor
When you want to travel light without smelling like you’ve been on the road for days, choosing the right fabrics makes all the difference. Pick merino wool for tees and socks; it’s lightweight, resists odor, and needs fewer washes.
Add synthetic blends—polyester-spandex—for quick-dry, wrinkle-resistant layers that compress easily. Pack a couple of silk or modal pieces for breathable baselayers that take up minimal space.
Avoid heavy cottons and bulky knits; they retain moisture and weight. Use fabrics with antimicrobial finishes sparingly.
Roll or compress garments to save room, and plan outfits that mix and match for maximum wear.
How Many Shoes Can You Realistically Bring?
You can usually get away with three pairs: a comfortable walking shoe, a dressier option, and a casual sandal or sneaker.
Pick versatile styles that work for multiple outfits and weather scenarios to maximize space.
Tuck a small shoe-care kit (insoles, polish wipe, odor tabs) in your carry-on to keep them fresh.
Limit To Three Pairs
Because shoes eat space and add weight fast, limit yourself to three pairs for a two-week carry-on trip. Pick a pair you’ll wear on the plane, a comfortable everyday shoe, and one dressier or activity-specific option. Rotate smartly: wear the bulkiest, pack the others. Use shoe bags or stuffing to save space and protect clothes. Plan outfits around each pair so nothing becomes redundant.
- Wear-on-flight pair reduces bulk and saves carry space.
- Two packed pairs cover comfort and special events.
- Shoe bags keep dirt contained and compress better.
- Rotate usage to extend comfort and reduce need for extras.
Choose Versatile Styles
If you want to keep footwear practical without overpacking, focus on versatile styles that cover most activities—think a sturdy sneaker, a neutral flat or loafer, and a compact dress shoe or sandal.
Choose shoes that adapt: sneakers for walking and casual dinners, loafers or flats for sightseeing and work-friendly outfits, and a slim dress option for evenings.
Pick neutral colors to match multiple outfits and prioritize lightweight, packable pairs. Wear your bulkiest pair on travel days.
Limit extras to one specialty pair only (hiking or beach). This keeps your carry-on light and your wardrobe flexible.
Pack Shoe Care Essentials
Having picked versatile styles, think about how many pairs you can realistically bring and how to keep them looking good on the road. You’ll usually manage with three: walking shoes, dressier pair, and sandals or trainers.
Limit bulk by wearing the heaviest pair on travel days.
Protect soles and shape with simple hacks: stuff socks into toe boxes and use a shoe bag.
Carry a tiny care kit to refresh footwear between uses.
- Mini brush or toothbrush for scuffs
- Small tube of leather conditioner or polish
- Spare laces and heel cushions
- Disposable wipes for quick cleanups
Underwear and Socks: What to Pack and Why
When you plan for two weeks in a carry-on, underwear and socks are small items that can make or break your comfort and laundry strategy. Pack enough for travel days plus a reliable rotation so you’re not forced into daily washing.
Choose quick-dry underwear and merino or synthetic socks to control odor and speed drying. Bring one extra pair beyond your rotation for delays or workouts.
Pick quick-dry underwear and merino or synthetic socks; add one extra pair for delays or workouts.
Compress with packing cubes to save space and keep pairs together. If you’ll access laundry once, halve what you pack.
Prioritize versatile neutral colors and lightweight fabrics that layer and launder easily.
Pack a Business Wardrobe in a Carry‑On
Even with limited space, you can fit a sharp, versatile business wardrobe into a carry‑on by focusing on interchangeable pieces and smart fabrics. Choose neutral colors, two tailored tops, one blazer, and a pair of trousers that can be dressed up or down.
Roll casual shirts, fold blazers inside packing cubes, and use shoe space for belts and toiletries. Plan outfits by day to minimize extras, and pick wrinkle‑resistant fabrics.
Keep one wrinkle‑release spray and quick‑polish wipes handy.
- Neutral palette for mixing
- Multi‑use blazer and trousers
- Wrinkle‑resistant fabrics
- Shoes that suit meetings and evenings
Create Dressier Looks Without Extra Bags
Start with a mixed neutrals base—think black, navy, beige, and white—so pieces pair effortlessly.
Add one or two versatile statement items, like a silk scarf or a tailored blazer, to elevate multiple outfits.
Finish with a smart shoe choice that’s both comfortable and dressy to avoid hauling extra bags.
Mixed Neutrals Base
Though it might seem subtle, building a base of mixed neutrals—think warm tans, cool greys, and classic navy—lets you dress outfits up without adding extra pieces. You’ll pack fewer items when each piece coordinates across occasions.
Choose fabrics with contrast: a soft camel sweater, a charcoal blazer, navy trousers, and ivory tees create layers that shift from casual to polished. Focus on fit, texture, and small finishes so accessories do the elevating.
Rotate shoes and jewelry to change tone without bulk.
- Pick neutrals with different temperatures
- Prioritize tailored silhouettes
- Mix textures for depth
- Limit prints to one accent
Versatile Statement Pieces
How can one or two standout pieces make your carry-on feel like it holds a whole wardrobe? Pick a tailored blazer and a dressy top with personality—think rich color, subtle embellishment, or an interesting cut. These pieces elevate basic tees and trousers instantly, letting you switch from daytime casual to evening-ready without extra luggage.
Choose fabrics that resist wrinkles and colors that play well with your neutral base. Pack them carefully—fold with tissue or use a garment sleeve—to keep shape.
With versatile statement pieces, you’ll create multiple polished outfits while keeping your carry-on light and efficient.
Smart Shoe Selection
Because shoes can make or break an outfit, pick a small, versatile selection that covers walking comfort and dressier moments without adding bulk. You’ll want practical pairs that mix and match with everything. Choose neutral colors, lightweight construction, and styles that shift from day to night.
Wear the bulkiest pair on travel days to save space. Use packing cubes or shoe bags to protect clothes and compress volume. Rotate socks to keep feet fresh, and limit yourself to three pairs in the bag plus the ones you wear.
- Comfortable walking sneakers
- Compact ballet flats or loafers
- Dressy low-heel sandals
- Slip-on mules or sandals
Pack Swimwear and Beach Gear Efficiently
If you’re heading to sun and sand for two weeks, pack swimwear and beach gear with purpose: choose quick-dry suits, a versatile cover-up, and one compact pair of water shoes that cover most activities.
Pack two to three swimsuits to rotate, reducing dampness and detergent needs. Roll suits to save space and slip them into a waterproof pouch.
Bring a lightweight microfiber towel that folds small and dries fast. Include a wide-brim hat that crushes into your bag and polarized sunglasses in a slim case.
Add a reusable zip bag for wet items and a compact, sand-resistant tote.
Toiletries: What to Bring and What to Decant
When you pack toiletries for two weeks in a carry-on, prioritize essentials, consolidate where possible, and decant bulky bottles into travel-size containers to save space and meet airline rules.
Bring only what you use daily: toothbrush, multitask cleanser, lightweight moisturizer, deodorant, and any prescription meds. Use small, labeled bottles and a clear pouch to stay organized.
Skip full-size items you can buy or that hotels provide. Choose solid versions when practical—soap, shampoo bars, and solid lotion bars cut leaks and weight.
- Carry prescriptions separately and in original bottles
- Decant duplicates into one container
- Pack a tiny first-aid kit
- Opt for multipurpose products
Follow TSA Liquids and Save Space
Remember the TSA 3-1-1 rule so you don’t pack liquids that’ll get confiscated at security. Choose clear, travel-sized bottles and leakproof pumps to fit essentials without wasting space.
Organize them in a single quart-sized bag to maximize toiletry room in your carry-on.
TSA Liquid Limits
Because TSA rules cap carry-on liquids to containers of 3.4 ounces (100 ml) placed in a single clear quart-sized bag, you’ll need to plan which toiletries to bring and which to buy at your destination.
Prioritize essentials: medications, contact solution, and items you can’t replace. Pack multipurpose products and decant just enough for the trip. Keep your quart bag accessible for security screening to avoid delays.
- Choose essentials that save time and money
- Replace bulky items at your destination when cheaper or available
- Use solid alternatives when possible to bypass limits
- Keep emergency meds separate and documented
Smart Bottle Choices
If you want to follow TSA liquid rules and save space, pick bottles that are durable, leak-proof, and sized right for your quart bag. Choose clear, squeezable travel bottles with secure caps so you’ll spot contents and dispense without spills.
Opt for silicone or BPA-free plastic; they compress slightly when not full, letting you fit extras. Use matching sizes to stack efficiently and comply with 3.4-ounce limits.
Label bottles with waterproof tags or write on caps to avoid digging. For conditioners or lotions, flip-top or pump tops work best.
Keep heavier liquids low in your bag to prevent crushing.
Maximize Toiletry Space
While you’ll still follow the TSA 3.4-ounce rule, you can shave a lot of bulk by consolidating, choosing concentrated products, and arranging items to use every inch of your quart bag. Pack multi-use essentials—cleanser that doubles as shave foam, SPF-tinted moisturizer—and transfer liquids into labeled travel bottles.
Freeze solid bars and solid deodorants to save space and avoid the liquid limit. Lay items flat, nest smaller caps in larger ones, and keep fragile containers cushioned by socks.
Weigh necessity: replace bulky bottles with tablets or powders when possible.
- Consolidate products for multiple uses
- Opt for solids and concentrates
- Use uniform, flat bottles
- Nest and cushion items
Minimal Makeup and Grooming Essentials
When you strip your routine down to the essentials, packing makeup and grooming items becomes a matter of multiuse products and smart choices. Choose tinted moisturizer with SPF instead of foundation and separate sunscreen, a concealer stick for spot coverage and under-eye brightening, and a cream blush that doubles as lip tint.
Pack a slim brush or sponge, mascara, a brow pencil, and a small neutral eyeshadow stick for quick definition. For grooming, bring a compact toothbrush, travel toothpaste, compact hairbrush, travel razor, and multipurpose balm for lips, cuticles, and dry spots.
Keep items TSA-compliant and organized.
Medications and Health Items to Keep Onboard
You’ve pared down beauty and grooming—now apply that same efficiency to health items so you’re covered without overpacking.
Bring prescription meds in original bottles, enough for the trip plus a few days, and keep them in your carry-on.
Add a small clear pouch with basics: pain reliever, antihistamine, anti-nausea, and any daily supplements you can’t skip.
Include bandaids, antiseptic wipes, and blister pads for unexpected injuries.
Pack a compact thermometer and your vaccination card or relevant medical info.
Keep copies of prescriptions and emergency contact details accessible in case you need assistance.
- Prescription meds in original bottles
- Basic OTCs in a clear pouch
- First-aid essentials
- Medical documents and contacts
Prioritize Tech: What to Bring and Skip
If you want to travel light and stay connected, choose devices that serve multiple purposes and skip duplicates: bring a smartphone with offline maps and entertainment, a compact charger or power bank, and noise-cancelling earbuds that double as a headset. Pack a slim e-reader instead of bulky books, skip a laptop if a tablet handles email and documents, and leave single-use gadgets at home. Prioritize backups: extra SD card, charging cable, and essential adapters (not all adapters). Use this quick decision guide:
| Keep | Skip | Why |
|---|---|---|
| Smartphone | Extra camera | Consolidation |
| Power bank | Multiple chargers | Space |
| Earbuds | Headphones | Weight |
| E-reader | Books | Convenience |
Charging Plan and Compact Travel Adapters
Why bring a charging plan? You’ll avoid dead batteries, frantic searches for outlets, and overpriced airport chargers. Plan which devices you’ll use daily, pack a compact multi-port charger, and bring a universal travel adapter suited to your destinations. Keep cables organized and prioritize power-hungry items like phones and cameras.
Consider a small power bank for long transit days and enable battery-saving modes.
- Pick a charger with USB-C PD for fast charging multiple devices
- Choose a lightweight, foldable adapter covering local plug types
- Limit gadgets to essentials to reduce charging needs
- Store cables in a labeled pouch
Packing Cubes vs Compression Bags: When to Use
When you want organized packing without wasting space, packing cubes and compression bags each offer clear advantages: cubes keep outfits and accessories sorted for easy access, while compression bags shrink bulky items to free up room.
Use packing cubes when you want fast retrieval, outfit grouping, and protection against spills—great for frequent stops or if you unpack in hotels.
Choose compression bags for bulky sweaters, jackets, or soft gear when space is tight and you won’t need quick access. Don’t over-compress delicate fabrics or items needing shape.
Combine both: cubes for everyday wear, compression for occasional heavy pieces to maximize carry-on capacity.
Rolling, Folding, and Bundle Methods Compared
Though each technique saves space differently, you’ll want to pick the one that matches your clothing types and travel habits.
Rolling works great for casual, wrinkle-resistant pieces and lets you squeeze more into tight corners.
Folding keeps structured garments like blazers and dress shirts neater.
Bundle wrapping reduces creases for multiple layers but needs a flat base and careful layering.
Combine methods: roll T-shirts, fold formalwear, bundle sweaters.
- Rolling maximizes volume for soft items.
- Folding protects shapes and reduces visible wrinkles.
- Bundling minimizes creases across outfits.
- Mix methods based on outfit formality and luggage layout.
Compress Bulky Items Safely
Pick compression-friendly fabrics like nylon or merino so items squash without losing shape. Wrap or pad bulky fragile things—shoes, sweaters with embellishments, or knitwear—to keep them from getting crushed.
Don’t overstuff; leave a little room so zippers close smoothly without straining.
Choose Compression-Compatible Fabrics
If you plan to compress bulky items, choose fabrics that tolerate pressure and moisture without losing shape—think synthetic blends, lightweight wool, and tightly woven cottons rather than delicate knits or heavily structured pieces.
You’ll pack more reliably when garments rebound after compression and resist creasing or matting. Opt for pieces with minimal embellishment and secure seams.
Use compressions bags for bulky but compatible items, and avoid overstuffing. Check care labels for moisture sensitivity.
Consider layering lightweight fabrics instead of packing one heavy coat.
- Synthetic blends: stretch, recover, quick-dry
- Lightweight wool: warmth, resilience
- Tightly woven cotton: durability
Avoid delicate knits.
Protect Fragile Bulky Items
Now that you’ve selected fabrics that tolerate compression, protect the bulky fragile items you still want to bring—think down jackets, puffer vests, or structured shoes. Wrap each item in a soft layer: a tee, packing cube divider, or shower cap for shoes.
Use inflatable pouches or lightly compressible cubes to control pressure—don’t vacuum-seal delicate fill. Place rigid items between softer garments to absorb shocks and keep them upright where possible.
Fill gaps with socks or scarves to prevent shifting. Mark the cube or compartment so you unpack fragile pieces first and check them immediately upon arrival.
Avoid Overstuffing Zippers
Because zippers are the weak link when you cram a bag, compress bulky items thoughtfully to protect seams and hardware. You’ll keep the carry-on manageable and avoid zipper strain by choosing the right method.
Use rolling bags, compression cubes, or vacuum bags selectively, and never force a zipper closed. Distribute weight evenly, leave a bit of give near corners, and test closure before travel.
If a bag feels tight, remove or rearrange items rather than yank the zipper.
- Use compression cubes for sweaters, not coats
- Put heavier items near the frame
- Leave 1–2 inches of edge slack
- Check zippers before departure
Pack Toiletries in Carry‑On Pockets Smartly
When you pack toiletries in carry‑on pockets smartly, you’ll keep essentials accessible while staying within security rules. Use clear quart‑size bags for liquids and place them in an outer pocket for quick removal.
Stow a small toiletry kit with travel‑size shampoo, toothpaste, and deodorant; double‑seal anything prone to leaks with tape or tiny zip bags.
Keep a compact brush, medications, and contact supplies in an internal pocket to avoid rummaging.
Reserve one pocket for wet wipes and a sunscreen stick.
Arrange items flat and upright so security checks and inflight needs go smoothly.
Organize Passports, Docs, and Valuables
If you want quick access and peace of mind, group passports, boarding passes, and important documents in a single, secure pocket or travel wallet that you always keep within reach.
Keep copies of passports and reservations in your luggage and digitally; scan and email them to yourself.
Use a slim RFID-blocking sleeve if you’re concerned about skimming, but don’t overpack papers.
Store small valuables like jewelry and spare cash in an interior zip pocket, not outer compartments.
Check expiration dates before travel and tuck emergency contact info where you can find it fast.
- Passport copy (digital + paper)
- Boarding pass accessible
- Emergency contacts visible
- Small valuables inside zip pocket
Keep Your Carry‑On Safe: Locks and Anti‑Theft Tips
You’ll want TSA‑approved locks on zippers so security can inspect without destroying your bag.
Stash cash and passports in hidden compartments or inside clothing to keep them out of sight.
Consider an anti‑theft bag with slash‑proof straps and RFID blocking for extra peace of mind.
Use TSA-Approved Locks
Because airport security may need to inspect checked bags, use TSA‑approved locks on your carry‑on so agents can open and re‑lock them without damaging the zipper or lock mechanism. You’ll protect your stuff while complying with regulations.
Choose sturdy combination or keyed locks stamped with the TSA logo, register combos, and keep keys separate. Inspect locks before travel and replace worn ones.
- Pick a recognized brand with clear TSA markings.
- Set unique, memorable combinations and note them securely.
- Check lock condition after each trip for wear.
- Prefer lightweight locks that don’t add bulk to your bag.
Conceal Valuables Smartly
When you’re carrying everything important on board, concealment matters as much as locks — thieves target easy visibility and quick access, not heavy safes. Tuck passports, cash, and electronics into layered pockets: a slim RFID-blocking sleeve inside a zipped compartment, then a soft pouch buried beneath clothing.
Use inconspicuous containers—sunglasses case or toiletry bag—rather than obvious travel wallets. Keep one small, reachable stash for essentials and another hidden backup.
Avoid leaving valuables in outer pockets or transparent cases. Stay mindful when you unpack in public spaces; repack promptly and don’t display expensive gear while moving through terminals.
Choose Anti-Theft Bags
Looking for a straightforward way to deter pickpockets and tamperers? Choose an anti-theft bag with slash‑proof fabric, locking zippers, and RFID blocking to keep essentials secure. You’ll want something comfortable for long walks and compact enough to fit in your carry-on.
Test pockets and closures before travel, and use hidden compartments for passports and cash. Combine a lightweight lock with the bag’s features for extra peace of mind, and keep valuables on your person during transit.
- Slash‑proof body prevents opportunistic cuts
- Locking zippers slow down tampering
- RFID lining blocks digital skimming
- Hidden pockets conceal important documents
Plan Laundry to Cut What You Pack in Half
If you plan to do laundry mid-trip, you can cut your clothing volume roughly in half without feeling like you’re wearing repeats. Pack versatile pieces that mix and match, prioritize quick-dry fabrics, and limit specialty items.
Bring enough underwear and socks for several days, two bottoms, three to four tops, and one lightweight sweater or layer. Schedule a laundry day after sightseeing or travel to avoid interruptions.
Use packing cubes to separate clean and worn items, and roll clothes to save space. Planning laundry lets you travel lighter, move faster, and avoid checked-bag fees.
Find Laundry on the Road and Quick Detergents
Split your laundry day into where and how you’ll wash: scout nearby laundromats, hotel or hostel services, and app-based pickup/drop-off options so you won’t be stuck with dirty clothes. You’ll save space by planning quick washes and choosing detergents that travel well.
Pack a small bottle of concentrated liquid, detergent strips, or travel soap for handwashing. Know local laundromat hours, costs, and whether machines accept cards.
Rinse and wring garments, then roll in a towel to speed drying.
- Bring travel-sized, concentrated detergent
- Use detergent strips to avoid spills
- Carry a sink stopper and a travel clothesline
- Check reviews for laundromats ahead
Quick Repair Kit: Sewing, Tape, and Spares
Pack a tiny kit with a few needles, matching thread, safety pins, and a couple buttons so you can handle basic sewing emergencies.
Throw in a small roll of duct or fabric tape and a travel-sized seam grip for quick fixes that don’t need a needle.
Also tuck in a spare pair of socks and an extra underwear or two to cover common clothing mishaps.
Basic Sewing Essentials
When a seam pops or a button goes missing on the road, you want a tiny kit that fixes things fast without taking space in your carry-on. Pack a small plastic case with a needle threader, a few needles, and matching threads wound on cards so you can mend hems or reattach buttons quickly.
Include safety pins for temporary holds and a pair of compact scissors or snips. Keep spare buttons from key garments and a tiny seam ripper for emergency alterations. These basics save outfits and confidence, letting you handle most fabric mishaps without hunting a tailor.
- Needle, thread, threader
- Small scissors/snips
- Safety pins
- Spare buttons
Quick Fix Tapes
Even if you’ve got a tiny sewing kit, a few rolls of repair tape make emergency fixes faster and more secure—think hemming a skirt with fabric tape, sealing a ripped backpack seam with tenacious nylon tape, or patching a blistered shoe sole with waterproof tape.
Pack fabric tape, duct or nylon tape, and a skinny roll of medical or moleskin tape for blisters. Keep tapes in a zip bag so sticky faces don’t snag clothes. Use scissors or a small multi-tool to cut neatly.
Tapes save time, avoid outfit changes, and prevent small issues from ruining a day of travel.
Common Clothing Spares
Although a tiny sewing kit and some tape handle most emergencies, you’ll want a few spare clothing items and fasteners to keep you moving without laundry stops or sudden outfit gaps. Pack a spare pair of underwear and socks for two or three days, an extra T‑shirt that layers, a lightweight belt or elastic band, and a compact set of removable buttons and safety pins.
These choices save time, space, and stress if something rips, stains, or stretches. You’ll avoid unnecessary washing, adapt outfits for weather changes, and stay presentable for meetings or evenings out.
- Spare underwear and socks
- Extra T-shirt
- Lightweight belt or elastic
- Removable buttons and safety pins
What to Wear on Travel Days to Save Space
If you dress strategically for travel days, you can save a surprising amount of suitcase space and avoid stuffing bulky items. Choose your bulkiest layer — a lightweight coat or packable down — and wear it.
Put on your heaviest shoes (comfortable sneakers or boots) to free space and avoid carrying them.
Opt for a simple outfit: breathable base layer, versatile top, and slim pants with stretch.
Use pockets for travel essentials and a scarf that doubles as a blanket.
Keep accessories minimal and compressible.
Dressing this way moves bulk onto you, leaving more room in your carry-on for essentials.
Rewear Strategy: Get More From Fewer Items
Choose pieces that mix and match so you can create new outfits without extra bulk. Plan a capsule of neutral basics plus a couple of accent items, and rotate them through different combinations.
Between wears, freshen garments with quick air-outs, spot-cleaning, or a travel-sized spray to keep them feeling and smelling clean.
Plan Mix-and-Match
When you plan outfits around a few versatile pieces, you can wear fresh-looking combinations all trip long without overpacking. Focus on a neutral palette, one statement piece, and fabrics that layer well.
Pick bottoms that match multiple tops, and choose shoes that suit day and night. Roll items to save space and visualize outfits before you pack.
Stick to a simple formula: 2-3 bottoms, 4-5 tops, 1 light jacket, 1 dress or smart option.
- Neutrals as a base
- One pattern or color pop
- Layerable textures
- Shoes: flexible, minimal
Refresh Between Wears
Because you won’t have space for a full wardrobe, plan simple ways to refresh items between wears so each piece feels new longer. Rotate scarves, belts, and jewelry to shift outfits without extra clothes.
Toss lightweight tops into a quick cold-water soak with a bit of detergent, then hang to dry overnight to remove odors.
Use a fabric spray or steam to revive sweaters and dresses, and spot-clean stains right away.
Alternate shoes with insoles or foot powder to cut odor.
Give underwear and socks priority in laundry rotation.
Small rituals like these let you rewear confidently and pack less.
Pack for Mixed Climates in One Bag
If you’ll face hot days and chilly nights, plan outfits that layer easily so you can adapt without overpacking. Choose lightweight base pieces, a mid-layer for warmth, and a compact outer shell that stashes small. Neutral colors mix-and-match; fabrics that dry fast and resist wrinkles keep options fresh. Roll items to save space and use packing cubes to separate warm and cool-weather pieces. Limit shoes to two versatile pairs.
- Pack breathable tops that work solo or under sweaters
- Bring a thin, packable jacket with a hood
- Include one warm accessory (hat or scarf)
- Prioritize quick-dry fabrics
Pack for Activities: Hiking, Beach, City, Dining
As you plan outfits for hiking, beach days, city strolls, and dinners out, think in layers and function so one carry-on covers every activity. Pick lightweight base layers that wick for hikes and double as city tees.
Pack a compact softshell or rain jacket that tucks away for beach wind and evening dining.
Choose convertible pants/shorts and a quick-dry swimsuit that can be a top layer or swimwear.
Limit shoes: trail shoes, versatile sandals, and one dressier pair that compress.
Bring minimal accessories: a packable hat, microfiber towel, multipurpose belt, and a small laundry kit to refresh garments.
Multi‑Destination Packing Strategies That Work
When you’re moving between climates and activities, plan your carry-on around layers, outfit modules, and a strict footwear rule so everything stays useful across stops. You’ll choose neutral bases, one statement piece per destination, and mix-and-match accessories to stretch outfits.
Roll thermal and lightweight layers, pack compressible outerwear, and isolate dirty laundry in a lightweight bag. Limit shoes to two pairs plus sandals for versatility; wear the bulkiest pair. Prioritize fabrics that dry fast and resist wrinkles.
Use packing cubes to keep modules separate and grab-ready for changing weather or unexpected plans.
- Neutral color palette
- Modular tops and bottoms
- Two-shoe rule
- Quick-dry fabrics
Make Room for Souvenirs and Shopping
Leave a bit of wiggle room in your bag by choosing expandable luggage so you can compress down for travel and expand for your finds.
Plan ahead and reserve one packing cube or half your suitcase for shopping so you won’t have to sacrifice essentials. That way you’ll come home with souvenirs without shipping or scrambling at the airport.
Pack Expandable Luggage
If you’re planning to bring home souvenirs or pick up extra items while traveling, invest in expandable luggage so you won’t have to squeeze things in or pay baggage fees at the end of your trip. Choose a durable, lightweight model with a reliable zipper expansion and test it before you leave.
Expand only when needed to keep weight balanced. Use compression packing cubes so you can expand strategically. Protect fragile purchases with bubble wrap or clothing inside the expanded section.
- Gives flexibility without overpacking
- Saves money on unexpected fees
- Preserves organization mid-trip
- Adapts to last-minute finds
Allocate Shopping Space
Expandable luggage helps, but you still need a plan for bringing things home without chaos. Decide a shopping budget and reserve space: compressible layers, a fold-flat tote, or a lightweight duffel that fits inside your carry-on.
Pack one or two outfit combos lighter to create room, and use packing cubes to visually track available volume. Keep fragile purchases in the center of soft clothing and carry liquids in a sealed pouch.
Before checkout, consider shipping big or heavy finds home. On return day, rearrange and redistribute weight to meet airline limits and avoid last-minute stress.
Handle Bulky Outerwear Without Checking Bags
When you want to skip checked bags, treat bulky outerwear as part of your carry-on strategy: wear your heaviest coat on the plane, compress lighter jackets into a packable layer, and reserve your bag’s space for essentials. Layer smartly so you can adapt to weather and cabin temperature.
Pick a coat with deep pockets for documents, and choose compressible fabrics. Use a compression sack for a puffy jacket and a thin travel blanket that doubles as extra insulation on board.
- Wear the bulkiest item to save space
- Pack a compressible midlayer for warmth
- Prioritize multifunctional outerwear
- Use pockets for valuables
Travel Laundry Hacks: Sink Wash and Hotel Options
Although you’ll want fresh clothes every few days, you don’t need a laundromat to keep your wardrobe workable—sink washing and hotel services can stretch a carry-on for two weeks. You’ll pack travel detergent, a sink stopper, and a microfiber towel. Hand-wash quick items at night, rinse, wring gently, and hang to dry. Ask hotels about same-day pressing or pay-per-item laundry when you need crisp shirts. Balance doing a few washes with occasional hotel service to save time. This keeps your load light and your confidence high.
| Soft | Quick | Relief |
|---|---|---|
| Hope | Ease | Calm |
| Trust | Fresh | Bright |
Plan Daily Outfits Fast With a Template
Use a simple outfit planning template to map out each day so you’re not deciding in the morning.
Start with mix-and-match basics—two neutral bottoms, three tops, a layering piece, and one pair of shoes—to maximize combos.
You’ll pack less and still have fresh looks every day.
Outfit Planning Template
If you want to save time and space, a simple outfit-planning template helps you map every day at a glance. Use a one-page grid: date, activity, top, bottom, layer, shoes, and accessories. Fill it before packing so you only bring what’s listed. Prioritize items that serve multiple days and note laundry opportunities. Check weather and event notes while you assign looks.
- Goals: comfort, function, and one visual theme
- Slots: morning, afternoon, evening for variable days
- Swap notes: backup top or bottom for spills
- Laundry plan: which pieces you’ll re-wear
Mix-And-Match Basics
Now that you’ve mapped each day’s looks on a simple grid, focus on building a compact wardrobe of mix-and-match basics that makes filling those slots fast.
Pick a neutral palette—black, navy, beige, white—and add one accent color.
Choose three tops, two bottoms, a lightweight layer, and one dress or jumpsuit if you want variety.
Stick to fabrics that dry and resist wrinkles.
Shoes: one casual, one dressy.
Accessories like a scarf and belt change the vibe without extra bulk.
Lay items over your template before packing to confirm every piece works with at least three others.
Electronics Checklist: Cords and Backups
When you pack for two weeks with only a carry-on, your electronics bag should be compact, organized, and ready for quick access. Prioritize multi-device chargers, one reliable power bank, and short cords to reduce tangles.
Bring adapter(s) for your destinations and a USB hub if you’ll charge multiple items in one outlet. Backup storage helps: a small SSD or encrypted cloud plan prevents data loss.
Label cables or use color-coded ties so you grab the right one quickly. Stash a compact surge protector if you expect unreliable power.
- Multi-port charger
- Short, labeled cords
- Power bank (high capacity)
- Backup SSD/cloud
Cut Toiletries Without Sacrificing Hygiene
Electronics fit neatly into a small pouch, and you can apply the same compact mindset to toiletries without cutting corners on cleanliness. Opt for travel-size bottles or decant essentials into 100ml containers, and choose multipurpose products—shampoo-conditioner, moisturizer with SPF, and a combined cleanser-toner.
Pack solid bars for soap and shampoo to avoid liquid limits and leaks. Use a clear, leakproof toiletry bag for easy security checks and spare a small zip pouch for meds and feminine products.
Replace bulky spray bottles with roll-ons or wipes. With smart swaps and careful packing, you’ll stay fresh without overstuffing.
What to Do if Your Bag Is Gate‑Checked
If the gate agent asks you to gate-check your bag, expect standard protocols like tagging and separate loading.
Keep essentials—meds, documents, a change of clothes—in a small personal item so you’re covered even if your suitcase is delayed.
After landing, track the tag number and head to baggage claim promptly to retrieve your bag.
Expect Gate‑Check Protocols
Because overhead space can fill fast, airlines often ask you to gate‑check a carry‑on — and you should be ready. When that happens, stay calm: gate‑checked bags go to the aircraft hold and usually return at baggage claim, but policies vary.
Have identification on the bag, keep essential documents and meds with you, and note any fragile items. Expect a tag and a claim stub; photograph the bag before handing it over. If gate agents request inspection, comply politely.
Follow airline instructions for oversized or weighted items to avoid surprises at boarding or arrival.
- Attach clear ID and a contact label
- Keep meds and documents on you
- Photograph the packed bag and tag
- Ask agents about retrieval procedures
Protect Essentials In Carry‑On
What should stay with you no matter what? Keep passports, wallet, phone, chargers, prescriptions, a credit card, and a change of clothes in a small personal item you can stash under the seat.
Use clear plastic pouches for toiletries and meds to speed security checks.
Zip fragile items in padded sleeves and attach a luggage tag with your name and contact.
If gate staff asks to gate‑check your carry‑on, move essentials into your personal item immediately.
Photograph packed contents and the bag’s exterior for claims.
Carry a slim lock and important documents in a secure, easy‑access compartment.
Track And Retrieve Quickly
When gate agents ask you to check your carry‑on at the last minute, act fast: move essentials into your personal item, note the gate‑check tag number, and snap a clear photo of the tag and the bag’s exterior. Keep receipts and tag photos handy, text yourself the image, and register any unique identifier with the airline app.
At arrival, head to baggage claim or the airline counter immediately; use your photo to speed retrieval and prove ownership.
- Record the tag number and photo in your phone
- Add a distinctive tie or sticker to the bag
- Use the airline app’s tracking feature
- Ask for a written claim receipt
Avoid Overweight and Oversized Fees
Worried about surprise fees at check-in? Weigh your bag at home and compare it to airline limits—carry-ons often max at 7–10 kg or 22 lbs, depending on the carrier. Use a compact luggage scale and redistribute items into personal items to stay within allowances.
Choose lightweight luggage and compress clothes with packing cubes to save space without adding weight. Wear your bulkiest shoes and jacket on the plane.
Know size rules too: measure dimensions before leaving so handles and wheels don’t push you over the limit. If you’re close, remove nonessentials rather than paying steep gate fees.
Pack When Traveling With a Partner or Family
When you travel with a partner or family, split shared items like toiletries and chargers so you’re not carrying doubles.
Coordinate outfits ahead of time to avoid unnecessary extras and make laundry easier.
Use packing cubes to keep everyone’s clothes separated and snug in one carry-on.
Divide Shared Items Strategically
If you’re traveling with a partner or family, split communal items to cut weight and avoid duplicates: designate one toothbrush, one small first-aid kit, and shared toiletries (shampoo, sunscreen, laundry soap) to one bag, while the other carries chargers, a compact medical kit with any prescription meds, and a spare power bank.
Agree on essentials beforehand, list who packs what, and keep items accessible for security checks. Use clear pouches and duplicate small items only when necessary. This reduces bulk, speeds packing, and prevents last-minute runs.
- Trust but verify assignments
- Balance weight between bags
- Keep critical meds with you
- Label shared pouches
Coordinate Outfit Planning
Because you’ll be sharing limited luggage space, coordinate outfits ahead of time so everyone packs versatile pieces that mix and match, avoid duplicates, and cover planned activities.
Decide colors and a few neutral bases so tops, bottoms, and layers pair easily.
Assign specific items—one swimsuit, one light jacket—to different people to prevent repeats.
Discuss footwear needs and limit to two pairs each: walking shoes and a dressier option.
Plan laundry opportunities and pack quick-dry fabrics to reduce quantities.
Lay out outfits for each day or event to spot gaps, then trim extras for a streamlined shared carry-on.
Use Packing Cubes
After you’ve coordinated outfits, packing cubes make it easy to keep each person’s items separate and accessible inside a shared carry-on. You’ll assign a cube per person or category, label them, and slide them into the bag so you don’t unzip everything to find socks.
Use different colors or compressible cubes to maximize space. At your destination, you can pull one cube out as a mini-wardrobe, keeping rooms tidier and laundry sorted. They cut down on decision time and prevent mix-ups when everyone’s tired.
- One cube per person
- Color-code by family member
- Compress bulky items
- Keep dirty laundry separate
Budget vs Premium Packing Tools Worth Buying
Deciding between budget and premium packing tools comes down to how often you travel and what you value most—durability, weight savings, or cost.
If you travel rarely, choose affordable cubes, a basic toiletry kit, and a cheap luggage scale; they save money and work fine.
If you travel frequently, invest in high-quality packing cubes, a lightweight hardshell carry-on, and a reliable scale—you’ll avoid replacements and limit airline fees.
Consider midrange options for a balance: tougher materials without premium price.
Always check warranties, weight penalties, and return policies so your choice matches how you actually travel.
Real‑World 14‑Day Carry‑On Packing Examples
When you actually pack for two weeks in a carry-on, you’ll see that smart choices and a tight kit beat sheer volume—these examples show realistic, runnable outfits and gear lists that fit most airlines’ size and weight limits.
You’ll mix neutral tops, one dressier outfit, layered outerwear, compact toiletries, and a laundry plan. Pick fabrics that dry fast and resist wrinkles. Roll or bundle strategically, keep shoes to two pairs, and use compression sparsely so weight stays manageable.
Plan outfits by function, not occasions, and aim to rewear key pieces confidently.
- Travel capsule: 7 tops, 3 bottoms, 2 shoes, 1 jacket
- Warm-climate: 8 linens, sandals, sun hat, small detergent
- Cold-climate: thermal base, insulated jacket, boots, compact gloves
- Business-lite: blazer, dress, trousers, travel steamer
Common Packing Mistakes to Avoid
If you cram too many “just-in-case” items, you’ll end up with a heavy, disorganized carry-on that defeats the purpose of traveling light. Avoid overpacking duplicates, bulky shoes, and full-size toiletries.
Pick versatile clothing that mixes and matches, and limit specialty items you won’t wear often. Don’t forget to check airline liquid rules and measure electronics to prevent gate-side surprises.
Pack documents and essentials in an easily reachable pocket so you’re not rifling through layers. Finally, skip single-use gadgets and excessive “what if” items — they add weight and stress without real benefit.
When Checked Luggage Is Actually Better
Because you want a smoother trip rather than a constant juggling act, checked luggage can be the smarter choice for certain two-week plans. You’ll appreciate the space when you need bulkier items, souvenirs, or multi-climate layers. You won’t fight gate luggage limits or cram liquids into tiny bags, and you can move through airports hands-free.
Consider checking a bag when you want convenience over strict carry-on discipline.
- You’re bringing bulky gear (boots, toiletries, gifts)
- You’ll visit multiple climates needing varied outfits
- You value hands-free transit and simpler security
- You plan to shop or return with extras
Final Decision Guide: Carry‑On Only or Check a Bag?
Although you can travel light, deciding whether to go carry‑on only or check a bag comes down to a few clear tradeoffs: convenience and speed versus space and flexibility.
You’ll choose carry‑on if you value quick airport transit, lower loss risk, and have a strict wardrobe or reliable laundry access.
Pick a checked bag when you need bulkier items, souvenirs, or equipment, or when multiple climate layers make packing tight.
Factor airline fees, connection times, and activity plans.
If unsure, hybridize: a well-packed carry‑on plus a small checked bag gives you adaptability without overcommitting.
Frequently Asked Questions
Can I Pack Liquids Over 100ML if Medically Necessary?
Yes — you can bring liquids over 100ml if they’re medically necessary. You’ll need documentation (prescription or doctor’s note), declare them at security, and they may be inspected; contact your airline or airport for specific procedures.
How Do I Handle Customs for Duty-Free Purchases in a Carry‑On?
You declare high‑value duty‑free items when required, keep receipts and tamper‑evident bags, check allowance limits for your destination, carry proof of purchase, and be ready to pay duty or show exemption documentation at customs.
What if My Carry‑On Is Lost or Delayed by the Airline?
If your carry‑on’s lost or delayed, you’ll report it to the airline immediately, get a written reference, claim essentials and reimbursement, keep receipts, track updates, and follow up persistently until your bag’s returned or compensation’s resolved.
Can I Bring Gifts or Fragile Items Safely in a Carry‑On?
Yes — you can bring gifts or fragile items safely in a carry‑on. Wrap them in clothing, use bubble wrap, place them in the center of your bag, and carry them onboard to control handling and avoid checked‑baggage risks.
How Do I Fit Musical Instruments or Sports Gear in a Carry‑On?
You usually can’t fit full instruments or bulky sports gear in a carry‑on, but you can bring small instruments, collapsible gear, or compact accessories; you should check airline policies, use hard cases, and gate‑check oversized items.
Conclusion
You can do two weeks in a carry‑on if you plan and pack smart. Prioritize versatile clothing, travel‑size toiletries, and a neutral palette you can layer and rewear. Match your bag to airline limits, use compression and packing cubes, and streamline shoes and extras. Opt to check a bag only if you need bulky gear, gifts, or strict dress codes. Test your outfit combos beforehand — you’ll travel lighter and move faster with just a carry‑on.