How to Wrap Luggage for Travel Protection
You’ll protect your luggage by cleaning and organizing the contents, padding fragile items, and locking with TSA‑approved locks and clear tags. Choose a wrap based on trip length and bag type: cling film or heavy stretch wrap for tamper evidence and abrasion resistance, reusable covers for scuffs and rain, or airport shrink‑wrap for speed. Secure seams with tape, add straps or corner guards, and photograph valuables. Keep going to see step‑by‑step techniques and material choices.
Quick 3‑Step Luggage Wrap Before Checking
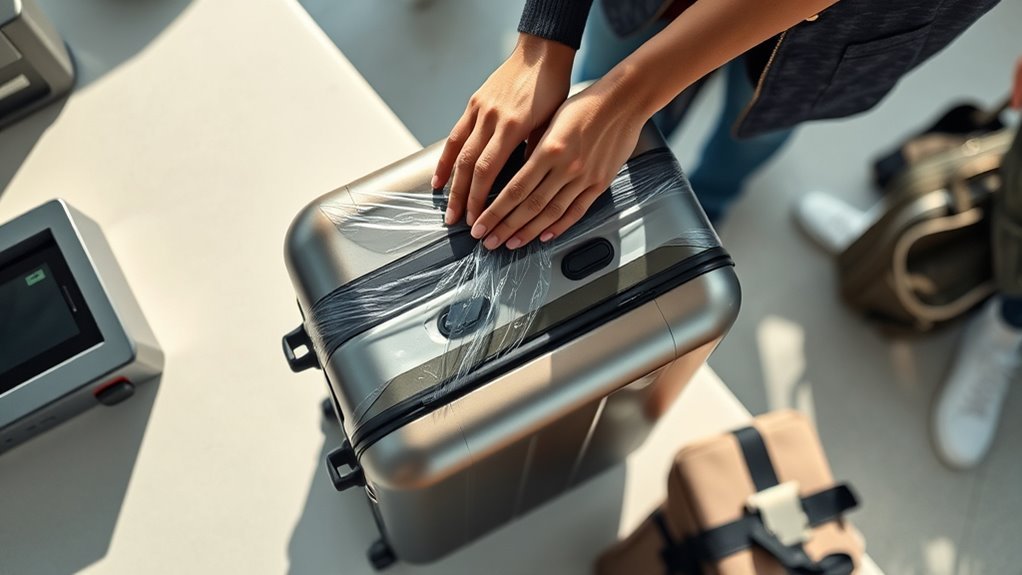
Before you check your bag, do a fast protective wrap that only takes a few minutes and keeps your luggage secure. First, zip and lock all compartments, then smooth fabric to remove bulges so the wrap sits flat.
Second, use a cling film or lightweight strap: wrap around the suitcase horizontally, overlap once, and tighten to prevent shifting.
Third, reinforce corners with tape or a corner protector, then add a bright tag for quick ID.
Inspect seams and handles, adjusting tension so nothing digs in. You’ll check faster, deter casual tampering, and arrive with gear better protected.
Choose a Wrapping Method by Trip Type and Luggage
When you pick a wrapping method, match it to your trip length, destination, and the type of bag you’re using. For short trips, lightweight options like fabric straps or a simple outer sleeve work—easy to remove and won’t trap moisture.
For longer travel, choose sturdier protection that resists abrasion and weather. Hard-shell suitcases need edge guards and secure straps more than full coverings; soft-sided bags benefit from wrap or liner to prevent snags.
If you’ll check luggage frequently or travel through rough hubs, prioritize tamper-evident solutions. Balance protection with accessibility so you can open or inspect without undoing everything.
Cling Film vs. Luggage Cover: Which to Pick
You want something that keeps your bag safe without slowing you down, so compare cling film and a fitted luggage cover on protection level first.
Cling film shields against scratches and spills and’s cheap and disposable, while covers offer reusable impact and theft deterrence but cost more up front.
Think about how much protection you need, how often you travel, and whether convenience or long-term value matters more to you.
Protection Level Comparison
Although both cling film and fitted luggage covers can shield your bag, they do so in different ways that matter depending on how you travel.
You’ll get near-seamless splash and scratch protection with cling film; it hugs contours, deters tampering, and keeps dirt off hard shells but offers minimal shock absorption.
A fitted cover resists abrasions, hides scuffs, and adds modest padding, protecting fabric cases and corners better during rough handling.
Choose cling film for short trips and security-focused wrapping; pick a cover when you want reusable abrasion resistance and slight cushioning on longer, bumpier journeys.
Cost And Convenience
If cost and ease matter most, weigh cling film’s low price and one-time use against a cover’s higher upfront cost but repeated value. You’ll pay little for cling film, cover odd shapes quickly, and discard it after a trip. That’s handy for short stays or if you’re tight on time.
A fitted luggage cover costs more initially, but you’ll reuse it, protect against abrasion, and avoid messy wrapping each journey. Consider storage space, airport security—covers remove easily while film can raise questions—and environmental impact: film creates waste, covers reduce it.
Choose based on trip frequency and priorities.
When to Use Airport Shrink‑Wrap vs. DIY
If you want fast, uniform protection and a tamper-evident seal, airport shrink-wrap is worth the cost.
If you’re on a budget or travelling with oddly shaped gear, a DIY wrap using cling film or straps can do the job just fine.
We’ll compare the pros and cons so you can pick the right option for your trip.
Airport Shrink‑Wrap Benefits
Wondering whether to get your suitcase shrink-wrapped at the airport or wrap it yourself? Airport shrink‑wrap gives quick, uniform protection against scratches, moisture, and tampering, and staff handle bulky bags you can’t manage easily. It’s ideal when you’re short on time, unfamiliar with wrapping techniques, or need a visible tamper‑evident seal for checked luggage.
Many services include liability labeling and disposal, saving you effort. Expect to pay a fee, and check airline restrictions. Use it when convenience, consistent coverage, and added theft deterrence matter more than cost or reuse—especially for fragile or high‑value items.
DIY Wrap When Appropriate
Airport shrink‑wrap makes sense in many scenarios, but you’ll want to wrap your own luggage when cost, reuse, or control matter more. DIY wrapping saves money, lets you choose materials, and avoids airport lines.
You’ll tailor protection to fragile items, adjust padding, and inspect wraps anytime. Use durable tape, a stretch wrap or cover, and secure straps.
- Cost: DIY is cheaper for frequent travelers.
- Reuse: Washable covers and straps cut waste.
- Control: You decide padding, seams, and access.
- Convenience: Wrap at home on your schedule.
Types of Luggage Covers and How to Fit Them
When you’re choosing a luggage cover, pick the type that matches your needs—stretch-fit neoprene or spandex covers slip snugly over suitcases for scuff and dirt protection. Hard-shell jackets add abrasion resistance for checked bags. Zip-on or wrap-around covers offer quick access and added security features like lockable zips or ID windows.
Measure your suitcase height, width, and depth before buying; manufacturers list compatible dimensions.
To fit stretch covers, slide the cover from one end, align corners, then tug edges into place. For zip or wrap styles, fasten zippers or Velcro, check handles and wheels for clearance, and secure any locks.
Best Budget Wraps: Bubble, Foam, and Alternatives
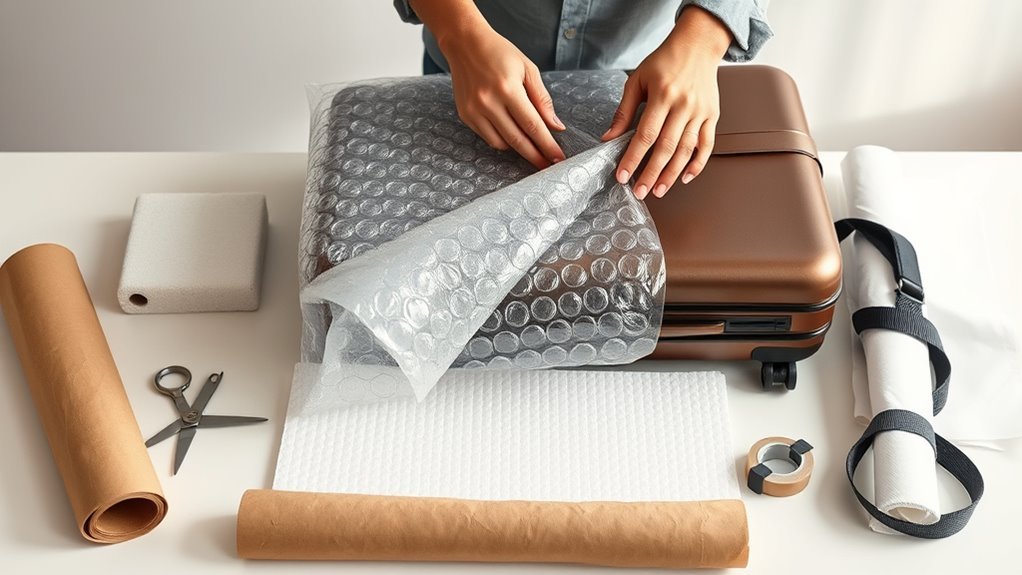
You’ll find that bubble wrap gives excellent shock protection but can be bulky and creates waste.
Foam sheets or inflatable foam alternatives save space and often re-use better, though they may cost a bit more up front.
Let’s compare the pros and cons so you can pick the most practical, budget-friendly option for your trip.
Bubble Wrap Pros/Cons
Although simple at first glance, choosing bubble wrap—or foam or other budget options—means weighing protection, cost, and convenience so your luggage survives rough handling. You’ll like bubble wrap for light, flexible cushioning that molds around odd shapes and resists punctures; it’s cheap and widely available.
Downsides include bulk, single-use waste, and limited crush resistance for very heavy items. Use it for fragile layers, not sole protection.
- Protection: good for shocks, not heavy compression.
- Cost: low per roll, reusable when careful.
- Convenience: easy to apply, tape-friendly.
- Sustainability: consider recycling or reuse.
Foam Alternatives Guide
Looking for budget-friendly padding that does more than bubble wrap? You can pick foam sheets, neoprene, or eggcrate padding to protect fragile items without overspending.
Foam sheets cut to size wrap odd shapes; they compress but rebound to cushion impacts.
Neoprene sleeves resist abrasion and water, so electronics stay safer.
Eggcrate foam distributes pressure and’s light for bulky gear.
For DIY, use yoga mats or layered felt for shock absorption and surface protection.
Secure with tape or reusable straps to prevent shifting.
Choose based on weight, compression resistance, and moisture needs to balance cost and protection.
Eco‑Friendly Wrapping Options That Work
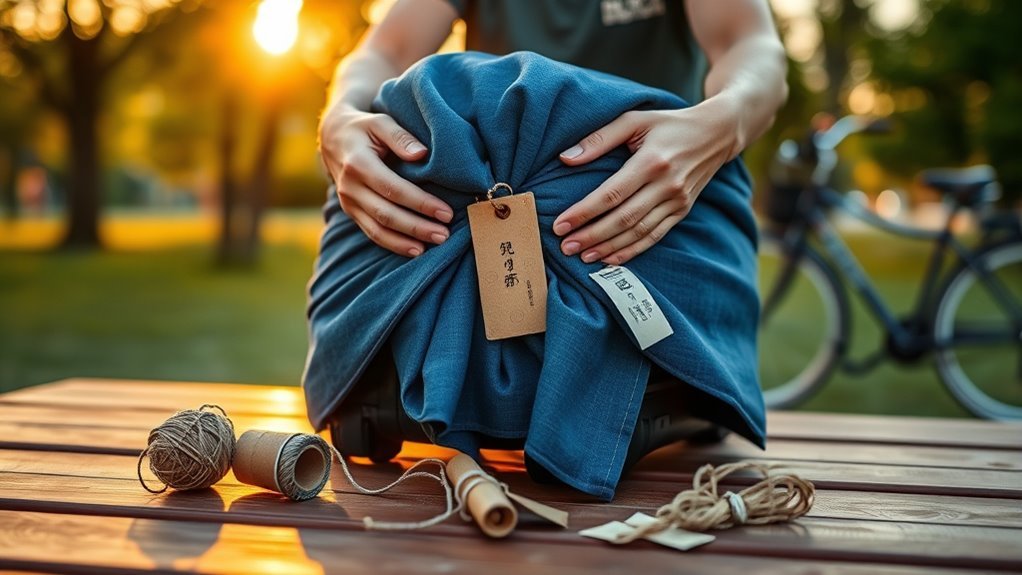
When you want to protect your luggage without adding plastic waste, several sustainable wrapping options work well—reusable straps, fabric wraps, and recycled-material covers give strong protection while cutting disposables. You’ll choose options that are durable, lightweight, and washable so your bag stays safe and the planet benefits.
Consider how easy each is to secure and remove at checkpoints.
- Reusable luggage straps — adjustable, quick-release, and visible for ID.
- Fabric wraps (old saris, canvas) — cushioned, machine-washable, stylish.
- Recycled nylon covers — water-resistant, tear-resistant, packable.
- Biodegradable films — short-term use, compostable options.
How to Prep Your Suitcase for Wrapping (Step by Step)
Before you wrap, empty your suitcase and give the interior a quick wipe so nothing spills or smells.
Pack and cushion fragile items firmly with clothing or bubble wrap to prevent shifting.
Finally, lock your case and attach a clear label with your contact info before wrapping.
Empty And Clean Contents
Because a clean, decluttered suitcase makes wrapping simpler and more effective, start by removing everything and laying items out so you can sort quickly. Check pockets, laundry, and loose cords; toss trash and damp items. Wipe interiors with a damp cloth and let them air dry. Organize what stays by category to avoid overfilling and shifting during transit.
- Clothes: fold or roll to save space and keep shape.
- Shoes: empty, clean, and store in bags.
- Toiletries: cap bottles, place in a sealed pouch.
- Electronics & cords: bundle and protect in soft cases.
Secure Fragile Items
How should you handle fragile items so they survive the trip? Wrap each fragile in soft clothing or bubble wrap, securing edges with tape.
Place heavier items at the bottom and cushion with folded garments or foam inserts.
Use small boxes for odd shapes, filling gaps with packing paper to prevent shifting.
Keep fragile items centered, away from suitcase walls and zipper areas.
Consider a fragile-only compartment or pouch inside the suitcase for extra protection.
Finally, photograph valuables and note serial numbers before packing so you’ll have documentation if damage occurs.
These steps minimize movement and absorb shocks during transit.
Lock And Label Exterior
Once you’ve secured fragile items inside, lock and label the exterior to deter tampering and make identification quick at baggage claim. Use a TSA-approved lock so security can inspect without breaking it.
Attach a clear, durable luggage tag with your name, phone, and destination; tuck a duplicate inside.
Consider a bright strap or ribbon to spot your bag fast.
Finally, photograph the bag’s labels and lock before check-in for records.
- Choose a TSA lock.
- Add an outer tag and internal copy.
- Use a distinctive strap or ribbon.
- Photograph bag and details for proof.
Pack Fragile Items to Reduce External Wrapping
If you pack fragile items thoughtfully, you’ll cut down on the need for bulky external wrapping and make your bag lighter and easier to handle. Place breakables centrally, surrounded by firm dividers or dedicated compartments to limit movement.
Use rigid cases or padded pouches for electronics, and keep glass upright and separated with sturdy separators. Fill gaps with compact cushioning—foam inserts or bubble sleeves—so items don’t shift.
Balance weight so fragile pieces don’t sit beneath heavy items. Label internal pockets clearly and stash fragile-only layers near the center, where shocks and compressions are minimized during transit and handling.
Use Clothing as Internal Padding Effectively
After packing fragile items toward the center, use your clothes to create tailored cushioning that fills voids and stabilizes gear. Roll socks around small breakables, pad shoes with underwear or scarves, and layer sweaters for shock absorption.
Pack fragile items centrally and use clothes—rolled socks, padded shoes, layered sweaters—to cushion and stabilize your gear.
Distribute heavier garments near the bag base to lower the center of gravity and prevent shifting. Compress outer clothing to lock items in place, but avoid overstuffing zippers.
- Roll socks into gaps for localized protection.
- Wrap electronics in thin shirts before surrounding with sweaters.
- Place shoes heel-to-heel with socks inside to save space.
- Use belts to secure bundles and prevent movement.
How to Wrap Soft Bags and Duffels for Transit
Because soft bags and duffels lack rigid structure, you’ll want to distribute weight carefully and add external protection so they hold shape and survive handling.
Start by placing heavy items centrally and low, surrounded by rolled clothing to prevent shifting. Use small internal compartments or packing cubes to separate fragile items.
Compress soft contents but avoid overstuffing; leave slight give for impact absorption. Wrap the bag in a durable, weatherproof cover or luggage wrap, securing straps to prevent slippage.
Add a bright tag and remove loose straps. For checked transit, consider a theft‑resistant cable or lock approved by authorities.
Wrapping Hard‑Shell Suitcases Without Trapping Moisture
When wrapping a hard-shell suitcase, pick breathable covers like mesh or perforated fabric so humidity can escape.
Elevate the case on a small rack or foam blocks to allow airflow underneath.
Tuck a few silica gel packs inside to absorb lingering moisture.
These steps keep your shell protected without trapping dampness.
Choose Breathable Materials
How do you protect a hard‑shell suitcase without sealing in moisture? You pick breathable wraps and liners that block scratches but let air move. Avoid plastic clings; choose perforated covers, cotton bags, or mesh sleeves so condensation won’t build.
Pack silica packets or moisture-absorbing pouches inside, but keep them accessible for replacement.
- Perforated suitcase covers for exterior protection and airflow.
- Cotton or linen garment bags for clothes and liners.
- Mesh compression sacks to organize without trapping dampness.
- Replaceable desiccant packs placed in pockets, not sealed compartments.
Elevate For Airflow
Want better airflow under a hard-shell case? Elevate the suitcase slightly so air circulates beneath and moisture doesn’t pool. Use small, stable risers like rubber feet, folded cardboard strips, or a shallow tray with vents; position them at corners to keep weight balanced.
Avoid sealing the base against a flat surface or plastic wrap that traps humidity. When wrapping, leave a narrow gap between wrap and bottom, or use breathable mesh pads under the risers to prevent scratching.
Check elevation points after packing and during storage; maintaining airflow reduces damp spots and helps preserve finishes and any soft pockets inside.
Use Silica Gel Packs
You can pair elevation with moisture control by tucking silica gel packs into your hard-shell case before sealing it. You’ll prevent damp smells and protect fabrics and electronics without trapping condensation.
Choose small, fresh packs and spread them where pockets and seams collect air. Replace or recharge them after long trips.
- Place packs under lining and in zippered compartments.
- Use multiple small packs rather than one large packet.
- Check pack color indicators or test dryness periodically.
- Store extra packs in your travel kit for reuse.
This keeps airflow effective while reducing humidity risks inside your suitcase.
Protect Zippers and Wheels When Wrapping Luggage
Because zippers and wheels take the brunt of handling, wrap them thoughtfully to prevent snags, breaks, and dirt buildup during transit.
Cover zipper pulls with a small fabric sleeve or tape to stop snagging; avoid adhesive directly on teeth.
Use soft foam or cloth around wheel housings to cushion impacts and keep grime out.
Secure protective pieces with gentle elastic bands or low-residue tape so they won’t shift.
If wheels are removable, detach and pack them inside.
Inspect coverings after wrapping to confirm mobility and access for inspection without unwrapping the entire bag.
Securing Straps and Locks Before Wrapping
Before you wrap, fasten and tidy every strap and lock so nothing snags, flaps loose, or becomes a safety risk during handling. Check straps for wear, trim dangling ends, and tuck them under buckles or into strap keepers. Secure external locks, note combination settings, and avoid covering TSA indicators. Use zip ties or small cable ties for temporary fixes, and pad any metal parts that might abrade the wrap.
- Inspect straps for frays and weak stitching.
- Fold and tuck excess strap length neatly.
- Lock zippers, label combinations, keep a spare key.
- Protect buckles with soft tape or cloth.
How to Apply Shrink Wrap at the Airport Like a Pro
When you get to the airport wrapping station, watch the attendant position and feed the roll so the film covers every seam evenly.
After they finish, inspect all sides for gaps, loose edges, or stretched plastic and ask for a rewrap if anything looks weak.
Keep your receipt and note any special markings so you can report damage quickly if needed.
Airport Wrapping Process
If you want your suitcase to survive rough handling, airport shrink-wrapping is a quick, affordable way to add a tough, tamper-evident layer—here’s how to do it like a pro.
- Present your bag to the counter; they’ll remove straps and loose tags so wrap sits flat.
- Position the suitcase on the turntable; center it and close zippers and pockets.
- Operators will encase the bag in film, then run the heat tunnel; watch to confirm full coverage.
- Pay, collect the receipt, and note the wrap time—keep documentation for claims if needed.
Post-Wrap Inspection
Though the wrap looks finished, you should inspect it right away to confirm full coverage and tamper-evidence. Run your hands over seams and corners to guarantee film’s snug, without gaps or loose edges.
Check zippers, handles, and wheels—these are common weak spots—and verify the wrap overlaps adequately.
Look for cuts, punctures, or suspicious resealing that could signal tampering. Confirm the airport’s tamper-evident seal or sticker is intact and matches your receipt.
If anything’s off, ask attendants to rewrap or adjust immediately.
Finally, document the condition with a quick photo before you leave the counter.
Household Materials for Fast At‑Home Wrapping
Because you might need a quick solution before heading out, this paragraph lists common household items that let you wrap luggage fast and securely. You’ll use what’s on hand to protect corners, keep zippers closed, and deter scratches without special gear. Stick to strong, clean materials and test adhesion on a small patch.
For quick protection before travel, use sturdy household items to secure straps, shield corners, and keep zippers closed.
- Duct tape — reinforces seams, secures loose straps.
- Stretch wrap or cling film — covers shell, resists dirt and moisture.
- Bubble wrap or folded towels — cushions fragile areas.
- Old belts or bungee cords — compress and hold everything tight.
Tools That Speed Up Wrapping and Save Time
To speed things up, use quick-apply stretch wrap to secure zippers and handles in seconds.
A portable heat sealer will give you tight, tamper-resistant seals on plastic covers.
Slip protective foam sheets between fragile items and the shell to cut packing time and reduce rewraps.
Quick-Apply Stretch Wrap
When you need to secure luggage fast, quick-apply stretch wrap tools cut wrapping time dramatically while giving a tight, protective seal. You’ll mount a roll on a handheld dispenser, pull the film snug around handles and corners, and lock it quickly without tape. They reduce fiddling, resist tearing, and protect surfaces from scratches and spills. Use them for checked bags, duffels, or oddly shaped items.
- Buy a dispenser with a comfort grip.
- Choose 15–30 micron film for durability.
- Overlap wraps by 50% for security.
- Trim and tuck ends to avoid snags.
Portable Heat Sealer
If you want a faster, neater way to finish wrap jobs, a portable heat sealer gives you a clean, permanent seal in seconds. You’ll press the sealer along film edges to bond layers, eliminating loose ends that catch or unwind.
Choose a lightweight, battery or USB model with adjustable temperature so you can work with different wrap types without melting delicate surfaces. Use short, steady passes and test on scrap film first to set the right heat.
Keep the tip clean and store it cool. A sealer speeds packing and leaves a professional, damage-resistant finish on wrapped luggage.
Protective Foam Sheets
Looking for a quick way to add cushioned protection without bulky padding? You can use protective foam sheets to speed wrapping and keep items safe. They cut easily, conform to odd shapes, and reduce impact during transit. Use them as single-layer wraps, liners, or corner guards to prevent abrasions and dents.
Lightweight foam won’t add much weight, and reusable sheets save time on repeat trips.
- Cut sheets to size for delicate items.
- Layer for extra shock absorption.
- Secure edges with tape or elastic bands.
- Store flat to avoid creases and reuse.
Waterproofing Luggage for Rainy or Snowy Trips
Because rain and snow can ruin clothes and electronics in minutes, you’ll want to waterproof your luggage before you leave so surprises don’t wreck your trip.
Rain and snow can ruin clothes and electronics—waterproof your luggage before you go to avoid travel disasters.
Start with a durable, water-resistant cover or rainproof suitcase; test zippers and seams with a spray.
Use heavy-duty plastic bags or dry sacks for clothing and toiletries, and seal them tightly.
Wrap suitcase seams with waterproof tape for added protection.
If you expect deep snow or extended exposure, add a fitted rain cover over wheels and handles.
Label bags clearly and keep important papers in an inner waterproof pouch for quick access.
Pack and Wrap Electronics Safely for Travel
When you pack electronics, protect them from shocks, moisture, and prying eyes by using dedicated cases, padding, and smart organization. Pack devices in hard or padded cases, wrap fragile items in microfiber cloths, and keep chargers and cables in labeled pouches. Place laptops and tablets in dedicated compartments; keep cameras and lenses cushioned and upright. Remove batteries from spare cells and store power banks in carry-on.
- Use foam, bubble wrap, or padded sleeves for each device.
- Seal small accessories in zip bags to avoid tangles.
- Layer devices to prevent contact.
- Keep valuables in carry-on for security.
Wrap Cosmetics and Liquids to Prevent Spills
After you’ve packed electronics securely, turn your attention to cosmetics and liquids since a single leak can ruin clothes and gear. Put liquids in sealed plastic bags, squeeze out air, and double-bag especially for shampoos, serums, and sunscreen. Cap bottles tightly, tape lids with medical or packing tape, and use travel-size containers with locking tops when possible.
Place heavier, non-breakable containers at the bottom and fragile glass in the center, cushioned by soft items. Keep open-use toiletries in an external toiletry pouch for quick access.
Label bags for customs and avoid overfilling to reduce pressure-related spills.
Protect Delicate Fabrics and Garments While Wrapping
Although delicate fabrics can look resilient, they bruise and snag easily, so wrap them with extra care to keep garments looking fresh. Treat each piece individually: fold silk and lace with tissue paper, use garment bags for dresses, and don’t overpack so fibers breathe. Cushion seams and embellishments to prevent flattening.
Delicate fabrics bruise and snag—wrap each piece with tissue, garment bags, and cushioning so fibers breathe.
- Layer tissue between folds to avoid creases.
- Roll knits gently to reduce stretching.
- Place fragile items near the center, surrounded by soft clothing.
- Secure straps and jewelry separately to stop snags.
You’ll arrive with garments intact when you wrap thoughtfully.
Wrapping Sports Equipment and Oversized Items
When you pack sports gear and oversized items, start by protecting any protruding parts like rackets, handlebars, or club heads with padding or rigid guards.
Secure irregular shapes with straps, foam, or custom-fit wrap so they don’t shift or stress the case.
Choose durable materials—heavy-duty bubble wrap, reinforced tape, and hard shells—so the whole package survives rough handling.
Protecting Protruding Parts
Because irregular shapes and protruding parts are the most vulnerable during transit, you’ll want to reinforce and cushion those areas first. Use targeted padding, snug wraps, and protective shells so handles, wheels, fins, and rack ends don’t catch or crush. Focus on contact points and edges.
- Wrap protrusions with foam pipe insulation or bubble wrap, secured with tape.
- Add corner guards or folded cardboard around edges and tips.
- Use zip ties or Velcro straps to immobilize movable parts before wrapping.
- Place fragile protrusions toward the center of the case and mark the exterior as “fragile.”
Securing Irregular Shapes
If you’re packing sports gear or oversized items, plan a tailored approach that cushions odd contours and keeps pieces from shifting. Start by disassembling what you can: remove detachable parts, wrap them separately, and label each bundle.
Use foam rolls or clothing to fill gaps and protect rounded edges like helmets or bats. Secure loose straps with tape or zip ties so they don’t snag.
For long items, bundle midpoints to prevent bending and pack them along the suitcase’s length.
Finally, test stability by gently shaking the bag; add more padding until items don’t move.
Choosing Durable Materials
Although sports gear comes in odd sizes, choosing durable wrapping materials makes the difference between scuffed equipment and gear that arrives ready to use. You’ll want materials that resist tears, cushion impacts, and stay secure during handling.
For oversized items, prioritize protective layers and reliable fasteners so nothing shifts.
- Heavy-duty stretch wrap for contouring and abrasion resistance.
- Bubble wrap with thick bubbles to absorb shocks around fragile parts.
- Padded travel bags or moving blankets for seams and corners.
- High-quality packing tape and ratchet straps to keep wraps tight and stable.
Tamper‑Evident Seals: What to Buy and How to Use
When you’re protecting checked or stored bags, tamper‑evident seals give you a clear, low‑cost way to spot interference and deter casual snooping; choosing the right type and applying it correctly makes the difference between a useful indicator and a false alarm. Pick single‑use cable, plastic pull‑tight, or security tape based on zipper style and fragility. Apply where opening would be obvious, photograph placement, and log seal numbers. Replace damaged seals immediately. Check seals promptly on arrival.
| Type | Best use |
|---|---|
| Cable seal | Hard shells, reinforced openings |
| Pull‑tight | Soft luggage, quick visual check |
Low‑Cost DIY Tamper‑Evident Options
You can add inexpensive tamper-evidence with visible tamper tape that leaves a clear “opened” pattern if someone tries to peel it off.
Use simple zip ties threaded through your zipper pulls or handles as single‑use seals—snip them to open and you’ll see if they’ve been tampered with.
Both options are cheap, lightweight, and easy to check at a glance.
Visible Tamper Tape
Looking for a simple way to spot if someone’s tampered with your bag? Visible tamper tape is cheap, adhesive, and changes appearance when peeled. You stick strips over zippers, seams, or luggage locks; if someone lifts them, residue, a “void” message, or color change reveals interference. Use bright colors so damage stands out, and press firmly to avoid false positives. Replace tape after inspection or rough handling.
- Choose high-contrast tape for easy detection.
- Apply across two surfaces for clear breakage.
- Write initials or date on tape for ownership.
- Keep spare rolls in your carry-on.
DIY Zip Tie Seals
If you want a cheap, effective way to spot tampering, zip ties make a great DIY seal. Use plastic ties to secure zippers, handles, or compartments; pick brightly colored or numbered ties so missing or replaced ones stand out.
Thread a tie through zipper pulls, tighten until snug but not stressed, then trim excess tail. For extra evidence, mark the tie with a permanent pen or record its number and color.
Zip ties won’t stop determined thieves, but they’ll show interference and slow casual access. Carry spare ties and replace them after inspections or rough transfers.
Label Wrapped Luggage So Handlers Can Identify It
When handlers can see your name and contact info without unwrapping the suitcase, they’ll identify and return it faster, so attach a clear, weatherproof tag to the exterior of the wrap and add a duplicate inside. Use bold, legible type and include your phone, email, and an alternate contact. Don’t list valuables.
- Place the external tag near the handle so it’s visible during loading.
- Seal the tag pocket to prevent moisture and tearing.
- Put an internal tag in a zipped pocket or between garments.
- Consider a bright ribbon or sticker to make your bag stand out.
What Airport Security Looks for in Wrapped Bags
After you’ve labeled both the outside and inside of your wrapped bag, remember that security will still inspect any luggage that raises concern. You’ll want easy access to contents, a visible lock, and no hidden compartments. Be cooperative if agents ask to unwrap a section for screening.
| What they check | Why it matters | How you help |
|---|---|---|
| Contents match manifest | Safety & legality | Pack transparently |
| Prohibited items | Prevent risk | Don’t conceal items |
| Integrity of wrap | Tamper evidence | Use clear, inspectable wrap |
| Locks & seals | Chain of custody | Use TSA-approved locks |
Follow instructions, stay calm, and keep documentation handy.
Avoid Airline Baggage Policy Issues When Wrapping
Before you wrap, check your airline’s baggage rules so you don’t violate size, weight, or material limits.
Use removable wrapping or shrink film that staff can cut away for inspections without damaging your bag.
If you’re carrying fragile or valuable items, declare them at check-in so they’re handled appropriately.
Check Airline Policies
1 simple step can save you time, money, and hassle: check your airline’s baggage and wrapping rules before you seal anything. You’ll avoid surprises like prohibited materials, extra fees, or forced unwrapping at the airport. Read the carrier’s website or call customer service to confirm size, weight, and wrapping allowances. Note differences for international flights and codeshares. Keep proof of compliance with your documents.
- Verify permitted wrapping materials and security procedures.
- Confirm checked-bag weight and size limits to avoid fees.
- Ask about inspection policies that may require unwrapping.
- Save contact info and policy screenshots for quick reference.
Use Removable Wrapping
When you choose removable wrapping, you make inspections and transfers far simpler while staying compliant with airline rules. Opt for straps, reusable covers, or bubble-wrap sheets secured with non-permanent tape so agents can open bags without tearing material.
Label fasteners and keep tools handy to remove and reapply protection quickly. Use transparent film or clear covers so contents and tags remain visible during checks.
Avoid permanent adhesive or locked cases that impede inspection. Removable solutions speed up baggage handling, reduce damage risk, and help you follow carrier guidelines while keeping packing flexible for connections or customs.
Declare Fragile Items
Want to avoid delays or denied claims? You should declare fragile items when checking wrapped luggage so carriers know to handle them carefully. Label the bag, list fragile contents on forms, and tell the agent at drop-off. Some airlines require special tags or fees; check policy ahead to avoid surprises.
If you’re shipping valuables, get written confirmation of declared value for liability coverage.
- Tell the agent and show documentation.
- Add a visible “FRAGILE” tag after wrapping.
- Fill out any airline or shipping fragile declaration.
- Note declared value for proper insurance and claims.
How Wrapping Affects Baggage Weight and Fees
Although wrapping adds only a few pounds in most cases, you should factor that extra weight into your checked baggage allowance because airlines charge fees based on total weight and dimensions. Measure and weigh your bag after wrapping to avoid surprises at the counter.
Use minimal layers that still protect—bubble wrap, a shrink-wrap service, or a lightweight cover—to limit added pounds. Remember some carriers count oversized dimensions even if weight is OK; wrapping can subtly increase girth.
If you’re close to a limit, redistribute items, carry more on board, or pay for a higher allowance in advance to save time and money.
Shipping Luggage Ahead: Packaging, Wrap & Insurance
If wrapping at the airport raises concerns about weight, size, or damage, you might prefer shipping luggage ahead to avoid fees and gate-check hassles. Shipments let you pack sturdily: use a hard-sided box or corrugated crate, pad interiors with bubble wrap or clothing, and reinforce seams with heavy tape. Insure declared value through the carrier and document contents with photos and receipts.
- Choose a carrier with luggage-friendly tracking and delivery windows.
- Measure and weigh to select correct service and avoid surcharges.
- Label clearly with contact info and fragile tags.
- Keep insurance and tracking confirmations handy.
Custom Wrap Solutions for High‑Value Items
When you’re packing high‑value items, standard airport or courier wrapping often isn’t enough, so you should plan a custom solution that matches the item’s size, fragility, and value. Assess risks, choose rigid cases, use foam inserts or molded supports, and add tamper‑evident seals. Label discreetly and document condition with photos. Consider dual layers: inner shock absorption and outer protective wrap.
| Item type | Recommended wrap |
|---|---|
| Jewelry | Padded pouch + hard case |
| Electronics | Foam cradle + anti‑static bag |
| Artwork | Corner protectors + crate |
| Instruments | Molded foam + suspension case |
When to Pay for Professional Airport Wrapping
Because airport wrapping adds both protection and a service cost, you should pay for it only when the risk or value justifies the expense. Consider frequency, destination, contents, and condition to decide.
If you travel often with fragile or high‑value items, it’s worth the fee. For short, low‑risk trips or durable gear, skip it.
- Frequent flyers carrying electronics or collectibles: pay for peace of mind.
- Long journeys with multiple connections: wrapping reduces handling damage.
- Fragile, irreplaceable, or high‑value contents: prioritize professional wrap.
- Worn or compromised luggage: wrap to prevent further damage and loss.
Rewrap a Damaged Bag Mid‑Journey: Quick Fixes
Although a full service wrap might not be available mid‑trip, you can still secure a damaged bag quickly with common items and simple techniques. Inspect tears, split seams, or broken handles. Use duct tape for seams, zip ties through handle mounts, and plastic wrap or trash bags to shield contents. Reinforce corners with folded cardboard. Keep tools handy: pocket knife, scissors, and spare straps.
| Problem | Quick fix | Materials |
|---|---|---|
| Torn seam | Tape over inside/outside | Duct tape, scissors |
| Broken handle | Zip tie loop | Zip ties |
| Hole | Patch and wrap | Cardboard, wrap |
| Wet bag | Dry and cover | Trash bag |
| Loose wheels | Strap tight | Luggage strap |
Common Wrapping Mistakes and How to Avoid Them
If you skip basic prep or rush the job, you’ll usually end up with weak seals, trapped moisture, or stuff that shifts in transit. You can prevent damage by spotting common mistakes and fixing them before you seal the bag. Keep edges clean, dry, and smooth; choose the right wrap tension; and secure loose straps or handles.
Skip shortcuts: prep thoroughly so seals hold, moisture doesn’t trap, and items stay secure during transit.
- Overstretching film: it tears or pops seams.
- Underwrapping: items move and corners get dented.
- Sealing wet fabric: causes mildew and odor.
- Ignoring protrusions: zippers or wheels puncture the wrap.
Inspect and correct these before you leave.
How to Test Your Wrap Before Travel
Before you head to the airport, test your wrap with a quick, practical check to make certain it’ll survive handling and weather.
Press along seams and corners to confirm adhesive or tape holds; tug gently on any straps or zip ties.
Simulate drops by setting your bag down firmly on different sides to see if the wrap shifts or tears.
Sprinkle a little water or run a damp cloth over exposed areas to check moisture resistance.
Open and close locks and zippers to make certain access isn’t hindered.
Mend weak spots now so your luggage stays protected throughout transit.
Store Wrapped Luggage Between Trips Safely
Once you’ve confirmed the wrap holds up, store your wrapped luggage where it’ll stay clean, dry, and protected from pests. Choose a cool, ventilated spot away from direct sunlight to prevent plastic degradation and fading. Keep it off concrete floors to avoid moisture transfer, and don’t stack heavy items on top. Label the exterior with contents and date so you can find what you need quickly.
- Use shelving or pallets to keep bags elevated.
- Add silica gel packets inside for humidity control.
- Cover with a breathable cloth to block dust.
- Inspect quarterly for pest signs or wrap damage.
Insurance, Photos, and Paperwork for Wrapped Bags
When you wrap luggage for storage or travel, document its condition and value so you can file claims or prove ownership quickly if something goes wrong. Take clear photos of exterior, interior, labels, and any existing damage before and after wrapping.
Before wrapping luggage, photograph and record its condition and value—interior, exterior, labels, and any damage—for fast claims or proof.
Note serial numbers, brand, model, purchase receipts, and estimated value in a dated inventory you keep digitally and on paper.
Check your homeowner, renter, or travel insurance for luggage coverage and policy limits; consider adding riders for high-value items.
Keep claim contact info, policy numbers, and shipping receipts accessible.
Update records after repairs, purchases, or long-term storage.
Real Traveler Examples: Wins and Failures
If you want a clear sense of what works and what doesn’t, look at real traveler stories that show both smart choices and costly mistakes. You’ll learn fast from others’ wins and failures so you can wrap smarter, not harder.
Consider these concise examples:
- You wrapped a fragile box inside a hard-shell suitcase and taped corners — it survived a rough transfer.
- You used cheap plastic wrap but skipped securing straps — contents shifted and damaged clothing.
- You labeled an external bag and added tamper-evident seals — loss was prevented.
- You overpacked and burst a seam midflight — weight matters.
Final 10‑Step Wrap Checklist Before You Leave
Before you head out, run through this concise 10-step checklist to make sure your luggage’s protection is complete and travel-ready — you’ll avoid last-minute fixes and common oversights by checking each item. Check shell integrity, wheels, and handles. Secure zippers with locks or ties. Apply wrap or cover snugly. Reinforce corners and seams with tape. Pad fragile items inside. Distribute weight evenly. Label with contact info and hidden ID. Photograph contents and exterior. Keep valuables and essentials in carry-on.
| Task | Status |
|---|---|
| Shell & wheels | |
| Locks & wrap | |
| Padding & weight | |
| Labels & photos |
Frequently Asked Questions
Can Wrapping Trigger Extra Airport Inspections or Delays?
Yes — wrapping can prompt extra inspections or delays. If agents need to inspect your bag, they’ll cut or unwrap it, which can slow you down. You’ll want to allow extra time and keep items accessible.
How Do I Unwrap Luggage Quickly After Arrival?
You’ll cut the wrap at seams with scissors or a box cutter, peel away plastic, then reattach or tuck straps. Check zippers, repack essentials first, and keep tools handy so you can finish unwrapping quickly.
Will Wrapping Damage Leather or Delicate Bag Finishes?
Wrapping can damage leather or delicate finishes if you use adhesive films or wrap too tightly; you’ll want breathable covers, soft cloth layers, and avoid sticky tape directly on surfaces to protect materials and seams during transit.
Can I Wrap Luggage Containing Batteries or Medical Devices?
Yes — you can wrap luggage containing batteries or medical devices, but you’ll need to follow airline and transport rules, secure devices to prevent damage, declare batteries if required, and guarantee medical devices remain accessible for inspections and emergencies.
How to Document Wrapped Luggage for an Insurance Claim?
Document wrapped luggage by photographing seals, serial numbers, and damage before and after wrapping, keeping receipts and wrapping service records, noting date/time and witness names, and emailing yourself the evidence so it’s time-stamped and easy to retrieve.
Conclusion
Wrapping your luggage protects it and your peace of mind, so pick the method that fits your trip, bag, and budget. Before checking, do a quick 3‑step secure wrap, photograph contents and labels, and stash paperwork and insurance details separately. Store covers or wrapped bags safely between trips, and learn from others’ wins and failures. Use this checklist to double‑check zippers, locks, straps and ID, then travel confident knowing you’ve minimized damage and loss.
