How to Weigh Luggage at Home Without a Scale
You can get a reliable luggage weight at home without a scale using a few simple tricks. Lift the bag and compare it to a known weight or lift yourself on a bathroom scale holding the bag and subtract your weight. Build a makeshift balance with a broom and fulcrum or counterbalance with filled water bottles (1 L ≈ 1 kg). Weigh sections separately and sum them. Keep going and you’ll find practical steps, calibration tips, and packing fixes to avoid fees.
Quick Answer: How to Weigh Luggage at Home
If you don’t have a scale, you can still estimate your luggage weight quickly by comparing it to objects with known weights (a large bag of rice, a suitcase you’ve weighed before) or by using the lift-and-feel method—lift the packed bag with both hands and compare it to something you’ve lifted recently, or lift one side and subtract with a bathroom scale under the opposite side.
Another fast option is a simple DIY hanging scale with a bathroom scale and a strong strap or a suitcase on a countertop where you weigh yourself, then weigh yourself holding the bag and subtract the difference.
You’ll gauge roughly: light (under 15 kg), medium (15–23 kg), heavy (over 23 kg). Check straps, redistribute items, and repack to meet airline limits.
What You Can Realistically Do Without a Luggage Scale
Those quick tricks will get you a decent sense of your bag’s weight, but you can also take practical steps that don’t require buying a luggage scale.
Those quick tricks give a good feel for your bag’s weight—plus practical, scale-free steps to lighten and balance it.
You can strip unnecessary items, use packing cubes to limit overpacking, and prioritize multi-use clothing to cut bulk. Weigh dense items mentally—shoes, books, electronics—and move lighter things into carry-on or leave them at home.
Count outfits and aim for mix-and-match pieces to reduce quantity. Use a shower hook or banister to test balance and comfort when lifted.
These steps won’t give exact kilos but will keep you under typical airline limits.
When to Use an Official Airport Scale Instead
When you’re unsure after home checks or you’re facing tight airline limits, use an official airport scale to avoid surprises at the counter. You’ll get the definitive weight, account for handled baggage rules, and resolve disputes fast. Rely on it when stakes are high or your homemade method feels iffy.
- If your bag’s near the airline limit
- When you’ve added last-minute items
- If multiple airlines or segments have different allowances
- Before paying hefty overweight fees
Arrive early to weigh, repack if needed, and avoid stress. The airport scale is the final authority—use it when accuracy matters.
Weigh Luggage With the Bathroom-Scale Lift
Have one person stand on the bathroom scale and note their weight.
Then hand the suitcase to them so you can both step on together.
Balance the bag on their body or hold it so the scale reads the combined weight.
Subtract the original person-only weight from the combined reading to get the luggage weight.
Use Two-Person Lift
If you don’t have a luggage scale but can recruit a helper, the two-person bathroom-scale lift gives a quick, reliable way to estimate your bag’s weight.
Stand on a bathroom scale, note the reading, then hold the suitcase while your helper steps on a second scale. Subtract your weight from the combined reading to get the bag’s weight.
Make sure you:
- Use two identical or similarly accurate scales
- Stand still and center weight on each scale
- Have your helper hold the bag steadily, not swing it
- Repeat once or twice for consistency
This method’s simple math gives a dependable estimate.
Balance On Scale
Because you can’t always get a helper, the bathroom-scale lift lets you weigh your luggage solo by balancing the bag on the scale against your body weight.
Place the scale on a firm, level floor. Step onto the scale and note the reading.
With steady posture, lift the luggage onto your clasped hands or a strap so the bag sits between your feet, keeping your balance. Hold still until the number stabilizes.
Don’t strain—bend your knees and keep the load close. Record the reading shown while you and the bag are balanced.
Repeat once for consistency.
Subtract Your Weight
Once you’ve recorded both numbers, subtract your initial weight from the combined reading to get the bag’s weight; write the math down so you don’t forget it.
Lift the bag again while standing on the scale, note the combined value, then subtract your solo weight. That difference is the luggage weight.
Double-check math, repeat if readings seemed unstable, and round sensibly. Use a pen or phone note to avoid mistakes.
Remember to account for straps or extra items you held.
- Confirm scale reads zero before starting
- Keep posture consistent during both readings
- Repeat twice for accuracy
- Round to nearest convenient unit
Bucket-and-Fulcrum Method Using a Broom Handle
You’ll start by picking a sturdy fulcrum—like a thick brick or short metal pipe—that won’t slip under pressure.
Then you’ll balance a broom handle across it, hang a bucket with your luggage on one end and a counterweight or known mass on the other, and adjust until it levels.
Finally, you’ll calculate the bag’s weight by comparing the bucket side to the known weight and using simple ratios if needed.
Choosing A Sturdy Fulcrum
When you set up a bucket-and-fulcrum scale with a broom handle, pick a fulcrum that’s rigid, round, and smooth so it won’t wobble or damage the handle under load. You’ll want something stable and consistent so measurements stay repeatable.
Choose a fulcrum that supports the handle’s midpoint height without crushing it, and position it on a flat surface to prevent slipping. Consider these attributes when selecting or improvising a fulcrum:
- Hard material (wood, metal, dense plastic)
- Rounded edge to allow pivoting
- Firm base that won’t shift
- No sharp burrs or cracks
Test briefly before weighing.
Balancing The Broom Handle
Before you add buckets, center the broom handle on the fulcrum so it sits level and doesn’t roll; small adjustments at this stage make the later measurements far easier. You’ll check balance by eye, nudging the handle until it remains horizontal with equal overhang each side. Use tape or a marker to note the center point so you can repeat setup. When balanced, you’ll hang buckets at measured distances to compare moments. Keep the fulcrum steady and the handle straight; any wobble ruins comparisons. Record positions and observations for consistent, repeatable results.
| Item | Purpose |
|---|---|
| Center mark | Repeatable setup |
| Eye check | Initial balance |
| Nudge adjustments | Fine-tuning |
| Stable fulcrum | Prevent wobble |
| Record notes | Consistency |
Calculating Luggage Weight
Now that the broom handle is balanced and marked, you can start using it as a lever to measure your luggage. Place the fulcrum under the mark, hang the bag at one end, and slide a known weight on the opposite side until it balances.
Read the distance from fulcrum to bag and fulcrum to counterweight, then apply the lever rule: weight_bag = weight_counter × (distance_counter / distance_bag).
Be steady and repeat for accuracy. Remember safety and stable supports.
Key reminders:
- Use a rigid broom handle
- Choose known, heavy counterweights
- Measure distances precisely
- Repeat and average results
Hang a Bag From a Doorframe Hook and Rope
If you’ve got a sturdy doorframe and a strong hook or over-the-door hanger, you can turn them into a simple makeshift scale: loop a rope around your bag’s handle, secure the rope to the hook, then lift the bag by standing on a household scale and noting the change in weight or measuring the rope tension with a hanging scale substitute.
Position the hook high enough so the bag hangs freely. Step on the scale, note your weight, then lift the bag via the rope until it clears the floor and record the new reading.
Subtract to find the bag’s weight. Check knots and balance for safety.
Use Household Items as Counterweights
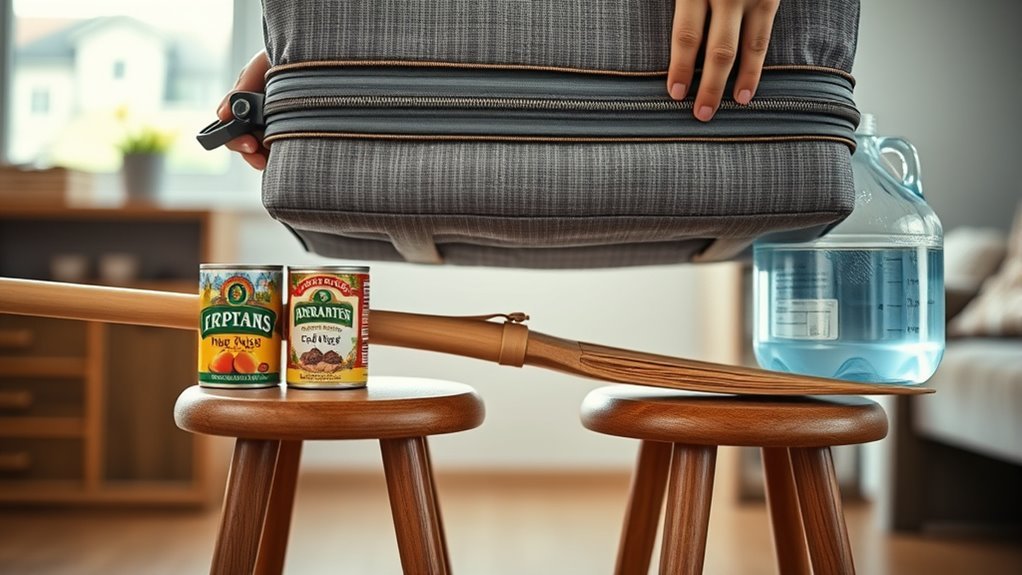
Once you’ve practiced lifting your bag from a doorframe, you can balance it against common household items to estimate weight without reading numbers.
Once you can lift your bag from a doorframe, balance it against household items to estimate weight.
You’ll use steady hands and simple swaps: place the bag on one end of a sturdy broom or plank pivoted on a fulcrum, then add or remove items on the other end until it balances horizontally.
Choose items whose weights you roughly know and note combinations. Keep everything stable and repeat to confirm.
- Books
- Water bottles
- Canned food
- Shoe pairs
This gives a practical, repeatable estimate without scales.
Compare Bags Against Known-Weight Objects
When you don’t have a scale, compare your packed bag to objects whose weights you already know—like a filled gallon jug (about 8–9 lb), a 5 kg dumbbell, or a suitcase you’ve weighed before—so you can judge whether your luggage falls under your airline’s limit.
Lift the bag, then lift the known object; note how they feel relative to each other.
Use a seesaw technique: place each on opposite ends of a sturdy board and balance on a fulcrum to gauge differences. Repeat with different combinations to narrow the estimate.
Record results and adjust packing if your bag feels heavier than allowed.
Estimate Weight Using Bottled Water
You can also use bottled water as a simple, reliable weight reference because its volume-to-weight relationship is consistent: one liter of water weighs about 2.2 pounds (1 kg). Fill bottles, note their total liters, and add them to your bag until it feels like the packed weight. Balance comfort and allowance limits as you go. Use this method for accurate estimates when you lack a scale.
- Choose sealed bottles for predictable volumes.
- Keep bottles upright to avoid spills.
- Count liters, then multiply by 2.2 for pounds.
- Remove or add bottles to match airline limits.
Use Milk, Flour, and Rice as Reliable Measures
You can use common pantry items as stand-ins for weight: a 1-liter carton of milk is about 1 kilogram by volume, so it’s a handy reference.
For dry goods, a cup of all-purpose flour weighs roughly 120 grams and a cup of uncooked rice about 185 grams, letting you total up equivalents quickly.
Keep a note of these conversions and use them to estimate how much your packed items add to the milk reference.
Milk As Volume Reference
Wondering how household staples can replace a scale? You can use milk as a predictable volume-to-weight reference because its density is close to 1 g/mL.
Fill a sealed container with milk, note the volume, and use that known weight to counterbalance or compare luggage by displacement or simple balance methods. Milk’s uniform density and common packaging make it handy when you need a quick standard.
- Use sealed 1L milk cartons for consistent 1,000 g references.
- Mark container volume clearly.
- Compare luggage by balancing on a seesaw surface.
- Account for container weight when calculating net mass.
Flour And Rice Equivalents
1 simple trick is to use common dry goods like flour and rice as reliable weight proxies when milk or a scale aren’t available.
You can estimate luggage weight by filling resealable bags with known volumes: 1 cup of all-purpose flour is about 120 grams, and 1 cup of uncooked rice is about 200 grams.
Weigh a bag by eye—compare volume to these cups—or measure cups at your sink, then transfer to your bag to mimic weight.
Combine increments to reach target limits.
Note variations: sifted flour weighs less, different rice types vary.
Adjust for packing density and round conservatively.
Quick Math: Convert Volume to Weight
If you’ve packed liquids or bulky items and only know their volume, you can still estimate their weight by using density as the bridge between the two. You’ll convert volume (liters or cubic centimeters) to mass by multiplying by density (kg/L or g/cc). Use consistent units, then sum items for total luggage weight. Keep conversions simple and round sensibly.
- Find each item’s volume.
- Look up or recall its density (water ≈1 kg/L).
- Multiply volume × density for mass.
- Convert masses to same unit and add.
This gives a practical, quick estimate before travel.
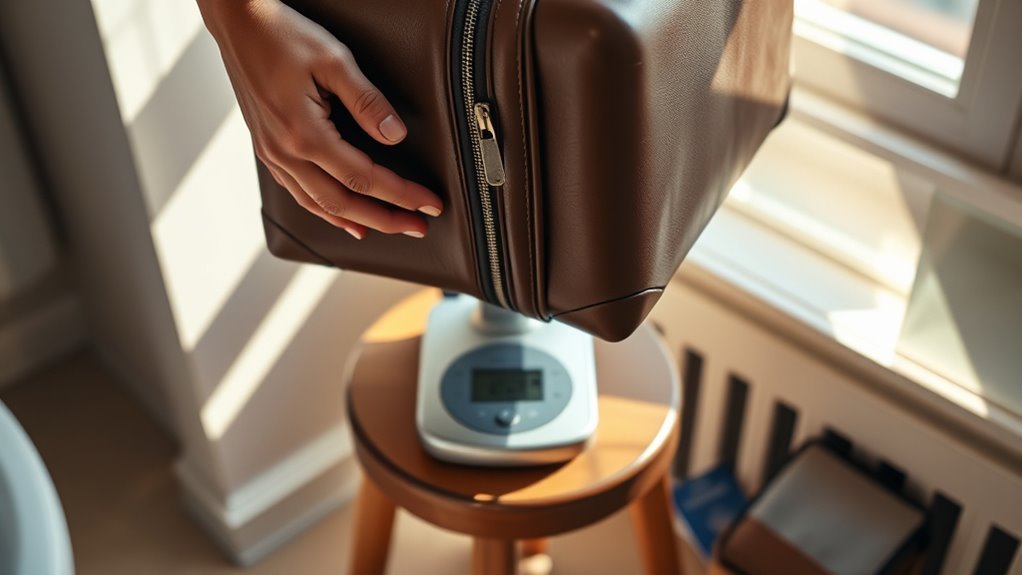
Partial Weighing on a Bathroom Scale
You can weigh a heavy bag by using the counterbalance method: step on the bathroom scale holding a small, known-weight item, then step off and note the change when you hold the luggage.
If you don’t have a known weight, tare with common household items (a bag of rice or bottled water) whose weight you can look up.
This lets you measure heavy luggage in parts and add the numbers for the total.
Use the Counterbalance Method
Although bathroom scales can’t weigh awkward items directly, you can use a counterbalance method to get an accurate reading. Place a sturdy box or tote on the scale, note its weight, then add part of your luggage until the scale reaches a comfortable maximum without tipping. Subtract the box weight to find the luggage portion. Repeat if needed for different sections and add results.
- Use a rigid container that fits the scale
- Transfer luggage evenly to avoid shifts
- Keep measurements consistent (same scale position)
- Record each partial weight before summing
This method avoids lifting the whole bag at once.
Tare With Household Items
Once you’ve used the counterbalance approach for heavy sections, tare with common household items to handle smaller or oddly shaped pieces.
Place a stable container—like a mixing bowl or laundry basket—on your bathroom scale and note its weight. Reset or mentally subtract that tare value.
Add the odd-shaped item to the container and record the combined weight, then subtract the container’s weight to get the item’s mass.
For multiple items, add them together before weighing or weigh individually and sum results.
Use consistent placement and repeat measurements for accuracy.
Round to the nearest convenient unit for travel planning.
Weighing Carry-On vs Checked Bags at Home
Because carry-on and checked bags have different size and weight rules, weighing them at home calls for slightly different approaches. You’ll want to prioritize accuracy for checked luggage and portability for carry-ons. Use household methods that match each bag’s purpose and airline limits.
- For checked bags, pack fully and compare against a known heavy item.
- For carry-ons, simulate flight-ready contents and feel for heft.
- Use luggage straps or taped handles to lift with a bathroom scale substitute.
- Note airline rules: dimensions, weight limits, and fee thresholds.
Adjust contents until you’re confident the bag meets the specific rules.
Balance Two Bags on a Broomstick Fulcrum
Pick a sturdy fulcrum like a thick broomstick on a solid edge or a heavy book to prevent slipping.
Place one bag on each side, adjust their positions until the stick balances, and note which side tilts.
Shift one bag along the stick to compare how much movement it takes to level them and infer relative weights.
Choose A Sturdy Fulcrum
If you’re going to balance two bags on a broomstick, start by finding a sturdy fulcrum that won’t roll or crush under weight—think a solid block, a heavy rolling pin, or a thick hardcover book laid on its spine.
Place the fulcrum on a flat, non-slip surface and test stability before adding luggage. You’ll want something dense and narrow enough to let the broomstick pivot, yet broad enough to avoid tipping.
- Prefer heavy, compact items
- Avoid rounded or soft supports
- Check for surface grip
- Verify no wobble or tilt
Adjust fulcrum position until the broomstick pivots cleanly.
Balance And Compare Weights
With your sturdy fulcrum and broomstick in place, set one bag near one end and the other bag near the opposite end so the stick can pivot freely.
Watch which side tips. If one side drops, slide that bag slowly toward the fulcrum or slide the lighter bag away until the stick balances horizontally.
Mark positions on the stick or note distances from the fulcrum.
To estimate weight, swap a known-weight item into one bag and repeat adjustments, or use proportional distances: weight1 × distance1 = weight2 × distance2.
Record results, repeat for accuracy, and avoid sudden movements that disrupt balance.
Measuring Soft Duffels and Odd Shapes Accurately
Because soft duffels and oddly shaped bags won’t stand upright or hold a rigid profile, you’ll need to measure them differently than hard suitcases.
Flatten gently, smooth contents, then measure maximum length, width, and depth by probing with a soft ruler or tape.
Note bulges separately and add estimated volume.
- Capture the largest dimensions, not average shape
- Use a flexible tape and a partner for accuracy
- Measure after zippers and straps are positioned as for travel
- Record measurements on paper or phone
Convert combined dimensions to an estimated volume, compare to a similar rigid bag you’ve already weighed for a close weight estimate.
Estimate Weight by Lifting Technique and Feel
When you lift your packed bag, pay attention to how your body responds—note the initial heft, whether it pulls you back, and how easily you can shift it between hands. Use consistent lifts: raise it from floor to waist, then shoulder, timing each motion.
Compare sensations to known weights you’ve handled recently—a 5 kg grocery bag, a 10 kg laundry load. Notice balance: a well-distributed pack feels steadier than one weighted on one side.
Watch your posture and breathing; heavier loads make you brace and inhale sharply. Repeat checks after rearranging items until the lift-feel matches your target weight range.
Best Household Items to Use as Makeshift Scales
If you don’t have a scale, everyday household items can give you reliable estimates—think sturdy chairs and buckets, a bathroom chair and a backpack, or a broom handle and two equal bags—so you can measure by comparison or simple leverage.
Use items that are stable, known-weight, and easy to compare. Try these practical options:
- Filled water jugs (1 liter ≈ 1 kg) for direct weight comparison
- A sturdy chair to test how a suitcase feels when lifted
- A backpack you know the weight of to compare heft
- Two identical bags hung from a broom for balance checks
Check stability and safety before testing.
Build a Simple Bucket-and-Pulley Hanger
You can build a reliable bucket-and-pulley hanger using sturdy materials like a metal bucket, strong rope, and a solid hook or beam.
Make sure each component is rated for the weight you expect so nothing bends or breaks.
Calibrate the setup by hanging known weights and marking the rope or bucket position so you get accurate readings for your luggage.
Choose Sturdy Materials
Start by picking materials that won’t bend, twist, or fray under the weight of your luggage—strongness matters more than looks. You’ll want components that stay rigid, resist abrasion, and secure attachment points so the hanger stays safe and repeatable. Choose rope, pulley, bucket, and fasteners rated above expected loads. Inspect for defects and avoid flimsy or stretched items.
- Use braided nylon or climbing rope, not thin twine
- Pick a metal pulley with sealed bearings
- Select a sturdy plastic or metal bucket with reinforced rim
- Use stainless steel carabiners and bolts for anchors
Calibrate With Known Weights
When you build a simple bucket-and-pulley hanger, calibrating it with known weights guarantees your homemade scale gives reliable readings. Use identical small weights or household items (cans, water bottles) with labeled masses. Hang each known weight, note bucket height or marker, and record readings. Repeat for several points to check linearity. Adjust marker positions or bucket length until readings match expected masses. Check connections and friction if discrepancies persist. Maintain a simple calibration chart for future use.
| Known Weight | Marker Position |
|---|---|
| 500 g | 4 cm |
| 1,000 g | 8 cm |
Safe Tricks for Weighing Very Heavy Suitcases
If a suitcase is too heavy to lift safely, enlist help and use simple leverage and support methods so you can estimate its weight without risking injury or damage.
Ask a friend to steady the case while you create a makeshift fulcrum: slide a sturdy broom handle under the suitcase and balance it on a low block, then lift one end and compare against a known weight or your own bodyweight shift.
Have someone steady the case while you lever one end on a sturdy broom handle and low block to gauge weight.
You can also use doors, counters, or towels to slide and gauge resistance.
Follow these tips:
- Use a firm fulcrum point
- Compare against known weights
- Lift short, controlled increments
- Keep posture neutral
Prevent Drops and Injuries During DIY Weighing
After you’ve set up a fulcrum or enlisted help to estimate weight, focus on preventing drops and injuries by controlling movement and protecting your body.
Keep your feet shoulder-width apart and bend at the knees, not the waist.
Use both hands and maintain a firm grip; wrap straps or rope to avoid slipping.
Lift slowly and pause if the load shifts.
Clear your path and remove tripping hazards before you move the bag.
If something feels unstable, set it down and readjust straps or get help.
Wear closed-toe shoes and gloves to protect feet and hands from impact or abrasion.
Improve Accuracy: Subtract Container and Hook Weight
Because any bucket, hook, or strap adds its own weight, you’ll need to measure and subtract that so your luggage reading is accurate.
Weigh the empty container setup, record it, then weigh the luggage plus setup and subtract to get true baggage weight.
Use consistent placement and repeat measurements to reduce error.
- Zero the scale with the container if possible
- Weigh the container alone on the same spot
- Note hook, strap, or handle weight separately
- Repeat and average readings for reliability
Subtract the container/attachment weight from the combined measurement to report the luggage’s net weight.
Account for Clothing Choices and Packing Variance
When you pack, remember that what you wear and how you fold items can change your bag’s weight by a surprising amount; plan for a margin rather than a single fixed number.
Choose heavier shoes or a jacket for travel day to reduce packed weight, and count those worn items when estimating.
Roll versus fold affects bulk and how tightly things compress, changing real weight distribution when you stuff corners.
Account for laundry or damp clothes adding ounces.
Make a short list of likely outfit combinations, estimate each total, then use the heaviest plausible figure plus a small buffer to avoid surprises.
Tolerances: How Close Is “Good Enough” for Airlines?
Check your airline’s weight allowance before you pack so you know the exact limit you’re aiming for. Expect some carriers to tolerate a pound or two over, while others enforce limits strictly and charge hefty fees.
When in doubt, aim under the limit or redistribute items to avoid surprises at the gate.
Airline Weight Allowance
Airlines usually give a little wiggle room on checked-bag weight, so you don’t need to hit the allowance exactly to avoid fees. Check your carrier’s published limit, because economy, premium, and loyalty tiers differ. You’ll want to aim below the limit to stay safe.
- Know the official per-bag weight limit for your ticket class.
- Verify carry-on versus checked allowances; rules differ.
- Remember international flights may enforce stricter limits.
- Check baggage fee policies for incremental overages.
When you pack, distribute heavy items between bags and use household weighing tricks to keep each piece comfortably under the posted allowance.
Acceptable Overweight Margins
Because baggage scales and gate checks aren’t perfect, you don’t need to hit the published limit exactly to avoid fees — most carriers tolerate a small overage. You can usually expect a 1–2 kg (2–5 lb) cushion on checked bags and about 0.5–1 kg (1–2 lb) for carry-ons, but policies vary. Check your airline’s fine print before packing.
If you’re close to the limit, redistribute items or wear heavier clothes. When in doubt, aim under the allowance.
Don’t rely on luck at the gate; use these tolerances as a practical buffer, not a guarantee.
Common Airline Weight Limits and Typical Fees
While limits vary by carrier and route, most major airlines stick to a few common weight bands you should know before packing. You’ll usually see: carry-ons capped around 7–10 kg (15–22 lb), checked bags at 20–23 kg (44–50 lb), higher allowances of 32 kg (70 lb) for premium or international fares, and strict excess charges beyond those limits.
Typical fees rise steeply once you’re over the limit, often a flat overweight charge or per-kilogram rate. Check your airline’s policy in advance, weigh proactively at home, and redistribute items to avoid costly surcharges.
- Carry-on: 7–10 kg
- Standard checked: 20–23 kg
- Heavy checked: 32 kg
- Fees: flat or per-kg
How to Test Your DIY Method Against an Official Scale
You’ve checked airline limits and adjusted packing, so now confirm your home method by comparing it to an official scale.
Take a suitcase you’ve weighed at home and bring it to a reliable scale — airport kiosks, shipping stores, or a calibrated postal scale work.
Note the official reading and record your DIY estimate.
Repeat with one or two different loads (light, near-limit) to check consistency.
Calculate the difference and average error.
If it’s within an acceptable margin (e.g., 0.5–1 kg / 1–2 lb), you’re good.
Keep a small correction rule for future DIY measurements.
Troubleshoot Inconsistent DIY Readings
If your DIY luggage weights jump around from one attempt to the next, start by isolating variables: weigh on a flat, stable surface, use the same method each time, and make sure nothing shifts inside the bag.
Check these common causes and fix them quickly:
Check common causes quickly and apply simple fixes to stabilize your luggage weight readings.
- Uneven floor or tilting board
- Moving handles or straps changing leverage
- Contents settling between trials
- Inconsistent measuring points on the bag
Re-weigh after addressing each item. Use repeats to confirm consistency, record results, and discard outliers.
If readings still vary, inspect for hidden compartments or loose items and repeat the isolation process until measurements converge.
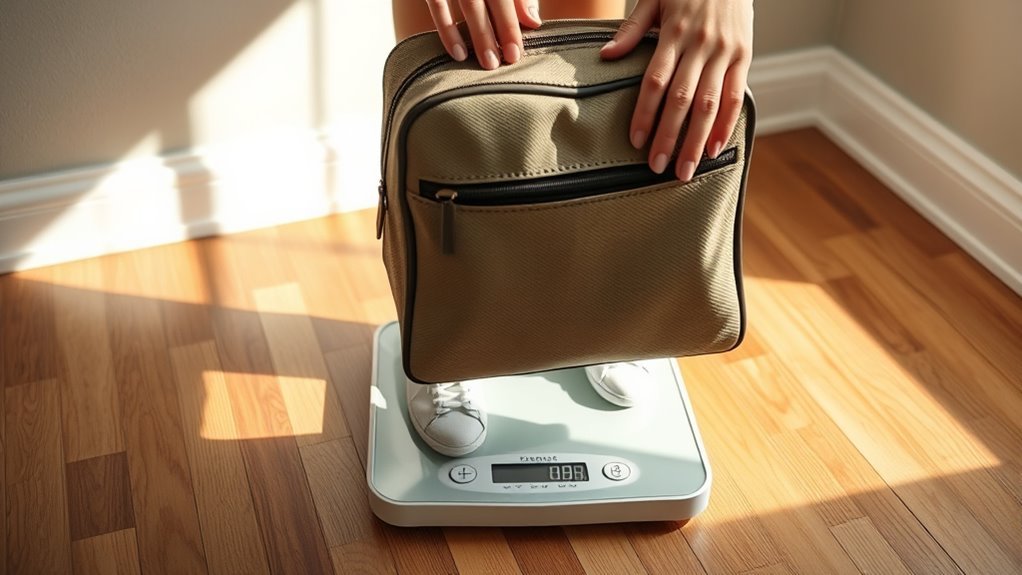
Calibrate Your Bathroom Scale at Home
Once your DIY readings stop bouncing around, it’s time to make sure your bathroom scale gives accurate numbers you can trust for comparisons. Put the scale on a flat, hard surface, then zero or reset it per the manufacturer’s instructions.
Use a known weight—dumbbell, filled backpack, or two 5 kg bags—and place it centered. Record the reading, then add or remove weight to check linearity across the range you’ll use for luggage.
If readings drift, swap batteries, clean contacts, and repeat. Note any consistent offset and apply that adjustment when estimating suitcase weight.
Quick Packing Swaps to Cut Weight Fast
When trimming suitcase pounds fast, focus on swapping heavy items for lighter equivalents. You can cut weight without losing essentials by choosing smarter versions and packing fewer backups. Replace bulky shoes with a lightweight pair, trade hardcover books for an e-reader, swap full-size toiletries for travel-sized containers, and wear heavier layers during transit. These small swaps add up quickly.
Trim pounds fast: swap bulky items for lighter versions, pack fewer backups, and wear heavy layers while traveling.
- Choose dual-purpose clothing
- Opt for compressible fabrics
- Consolidate electronics and chargers
- Use travel-size or solid toiletries
Execute these changes, weigh mentally against needs, and you’ll hit baggage limits more easily while keeping what truly matters.
Redistribute Items to Avoid an Overweight Fee
Because airlines charge per bag and per kilo, you can often dodge overweight fees by shifting items between suitcases, carry-ons, and your personal item. First, move dense items like shoes and toiletries into your carry-on if it’s under the limit, balancing weight across bags.
Place fragile or valuable items in your personal item for safety. Use clothing to pad and redistribute small heavy things evenly. If one checked bag’s close to the limit, transfer a few items to another checked bag rather than paying fees.
Reweigh using home methods, adjust until both bags comfortably meet airline allowances.
Smart Packing Hacks That Reduce Surprises at Check-In
Use everyday items like filled water bottles or books to test how a bag feels when it’s packed, so you can spot heavy spots before you leave.
If you’re worried about airline limits, wear your bulkiest shoes and layers to shave pounds off your checked bag.
These simple moves help you avoid surprises and last-minute repacking at the counter.
Use Everyday Items
If you don’t have a scale, everyday household items can double as reliable makeshift weights so you can estimate your bag’s mass before you leave. Use consistent objects with known weights to compare: fill a tote with canned goods, then swap into your suitcase until it feels similar.
Balance methods work too—hang the bag on a sturdy broom and compare against a loaded backpack. Note measurements and repeat if you rearrange items.
Helpful go-to weights:
- 1 standard soup can (~400 g)
- 1 liter water bottle (1 kg)
- Pair of shoes (~800–1,200 g)
- Laptop (~1–2 kg)
Wear Heavy Layers
Once you’ve used household items to estimate suitcase weight, you can shave pounds off your checked luggage by wearing heavier pieces instead. Put on your bulkiest jacket, boots, and layered tops when you leave for the airport so they aren’t counted in your bag.
Choose dense fabrics and wear one of your shoes; stash lighter footwear inside the suitcase. If the flight’s chilly, keep the coat on board; if it’s warm, you’ll still save on checked fees.
Balance comfort and airport security—opt for easy-to-remove layers for screening. This simple swap prevents surprise overweight charges.
When to Move Items From Checked Bag to Carry-On
When you’re deciding whether to shift items from your checked bag into your carry-on, prioritize anything you can’t afford to lose, items you’ll need during travel, and valuables that could be damaged or stolen in transit. Move essentials that keep your trip running smoothly and protect fragile or high-value things.
Consider access, security, and replacement difficulty.
- Passport, IDs, boarding pass
- Medications and prescriptions
- Electronics, chargers, backups
- Irreplaceable jewelry and documents
If weight limits force choices, keep what affects your itinerary and comfort in carry-on. You can risk bulkier, replaceable items in checked luggage.
Plan for Return-Trip Weight Increases
Because you’ll likely bring home souvenirs, gifts, or extra laundry, plan your outbound packing with extra weight and space in mind. Pack versatile clothing you can repeat to reduce new purchases, and leave a dedicated empty cube or pouch for bulky finds.
Use compressible bags to squish soft items and distribute heavier keepsakes near wheels to meet airline balance expectations. Estimate added weight per item type—shoes, ceramics, bottles—and mentally add that to your pre-trip gauging.
Consider mailing heavy items home from your destination if overweight, and mark fragile purchases to prevent damage during rearranging at the airport.
Pre-Departure Checklist for Final Weighing
Before you head out, run through a short checklist to confirm your bag’s final weight and avoid surprises at the airport. Check pockets and remove receipts, chargers, or wrappers; empty any toiletries or liquids you won’t use. Zip and fasten compartments; tuck loose items to keep weight centralized.
Compare packed items to your planned list and swap heavier things for lighter alternatives if needed.
- Remove nonessentials
- Consolidate small items into one pouch
- Repack to balance weight evenly
- Perform a quick lift test for comfort
Do a final visual and lift check before leaving.
Tools Worth Buying If You Weigh Luggage Often
If you weigh luggage often, investing in a few purpose-built tools will save time and prevent overweight fees. Buy a digital luggage scale: compact, accurate, and quick for checking bags before you leave.
A portable hanging scale with a strap works for odd-shaped items. Get a tape measure to verify airline linear dimensions.
Consider a luggage trolley with built-in scale if you move heavy gear frequently. Packing cubes and compression bags won’t weigh but help distribute weight evenly so you avoid surprises.
Choose durable, lightweight tools with clear displays and reliable batteries to keep checks hassle-free.
Keep a Travel-Weight Log for Repeat Trips
When you reuse routes or packing lists, keep a travel-weight log that records trip-specific item totals so you know what each bag actually weighed.
Over time you’ll spot historical weight trends—like which items consistently push you over limits—so you can make targeted cuts.
Update the log after every trip and use it to pack smarter next time.
Trip-Specific Item Totals
Wondering which items consistently push your bag over the limit? Track each trip’s item totals so you know. For a given destination, note weights (or counts) for clothing, electronics, toiletries, and extras. Keep entries short: item, quantity, estimated weight.
Before packing, consult the trip-specific list to drop or swap high-impact items.
- Clothing layers (per piece)
- Electronics (chargers, devices)
- Toiletries (full vs. travel sizes)
- Extras (books, souvenirs)
You’ll repeat trips with clear priorities, cut nonessentials faster, and pack confidently without a scale by relying on those concise, destination-focused totals.
Historical Weight Trends
Although you’re focused on individual trips, tracking weights over time shows patterns you’ll actually act on—record each trip’s total and category breakdown in a simple log so you can spot recurring overages and shrinking opportunities.
You’ll note which trips push limits: clothing, shoes, souvenirs, or gear. Compare similar itineraries and seasons to see consistent culprits.
Use dates, destination, trip length, and transport limits to contextualize entries.
Review before packing to shave items that habitually add pounds. Over months, you’ll refine a baseline packing list, predict allowances, and make intentional swaps so repeat trips get lighter without sacrificing essentials.
Environment and Safety Tips for DIY Weighing
Because you’re handling heavy bags and makeshift rigs, make sure your workspace is clear, well-lit, and dry before you start. Wear closed-toe shoes and gloves if needed, and keep kids and pets away.
Lift with your legs, not your back, and avoid twisting while holding items. Check any straps, cords, or hooks for wear before use.
- Test balance with a light object first
- Use a sturdy table or platform rated for weight
- Keep a phone nearby for emergencies
- Don’t improvise with damaged tools
Stop immediately if something feels unstable or strains occur.
Fast Recap: Quickest Ways to Weigh Luggage at Home
Now that you’ve covered safety and setup, let’s quickly run through the fastest ways to weigh luggage at home so you can pick the method that fits your tools and time.
Use a bathroom scale: weigh yourself, then weigh holding the bag; subtract.
Try a luggage hook scale for direct digital readouts—fast and accurate.
Use a kitchen scale for small bags or divided packing: weigh compartments and add.
For improvised estimates, compare to known-weight items (gym weights, water jugs) and adjust.
Record results and pack to airline limits.
Choose the quickest method based on accuracy you need and gear available.
Frequently Asked Questions
Can I Estimate Luggage Weight Using My Body Weight Alone?
Yes — you can estimate it by weighing yourself, then weighing yourself while holding the luggage, and subtracting the two numbers; it won’t be exact, but it’ll give you a useful approximate luggage weight for travel planning.
How Accurate Are Smartphone Apps That Claim to Weigh Bags?
They’re somewhat accurate for rough estimates but won’t match a real scale’s precision; you’ll get errors from sensor limits, phone model, and setup, so don’t rely on apps for strict airline weight limits.
Will Airline Staff Accept a Homemade Weight Estimate at Check-In?
No, airline staff won’t accept a homemade weight estimate; they’ll use the airport scale and enforce limits. You should check weights beforehand to avoid surprises, because overage fees or repacking decisions happen at the counter.
How Do I Account for Liquids in My Carry-On Weight Estimate?
You’ll count liquids’ container volumes and weights, use full-container weights from labels or estimate 1g per ml, total them, and add to your carry-on estimate; you’ll pack spare smaller bottles to stay under limits.
Can I Weigh Souvenirs Bought During Travel Before Returning?
Yes — you can weigh souvenirs before returning. Use a portable luggage scale, hang bags from a bathroom hook, or balance items against known weights. Don’t forget to include packaging and any liquids when estimating final weight.
Conclusion
You’ve got reliable options for weighing luggage at home without a dedicated scale, and you don’t need fancy gear to avoid surprises at the airport. Try the bathroom-scale lift, the bucket-and-fulcrum trick, or use a bathroom scale plus household items; if you travel often, consider buying a handheld or luggage scale and keeping a weight log. When in doubt or if you need an exact reading, use the airport scale before check-in to avoid fees.