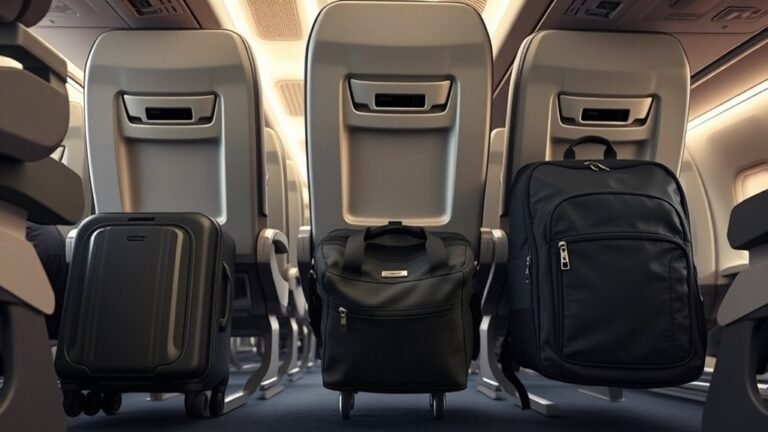
How to Use Roof Rails for Luggage Step by Step Guide
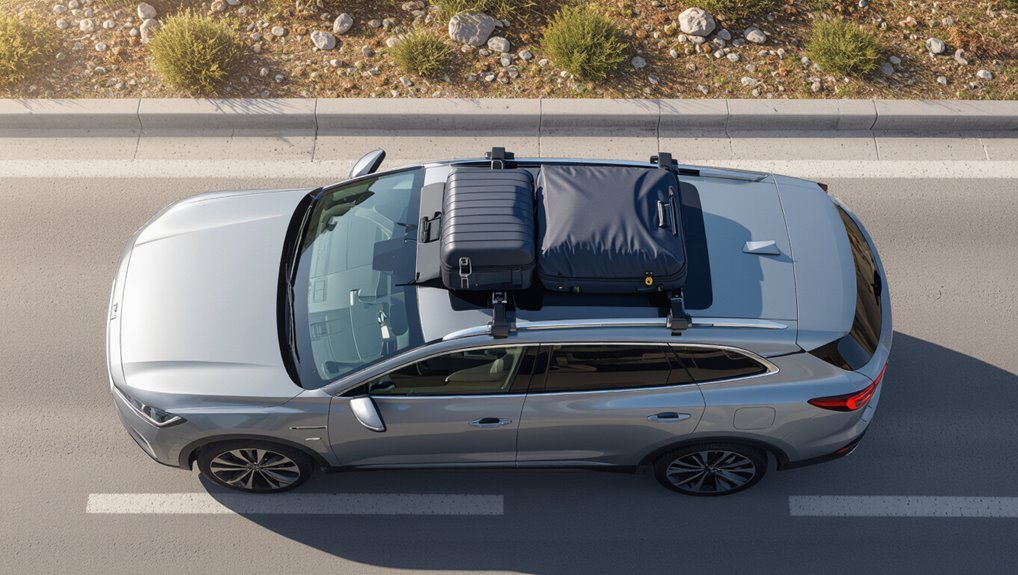
Inspect your roof rails and crossbars for damage, then fit compatible crossbars or a cargo bag. Center heavier bags over the vehicle’s midpoint and spread weight evenly side-to-side. Use rated straps or ratchet tie-downs, loop them through anchor points, and tighten securely, tucking excess webbing. Weatherproof soft cargo with a waterproof cover and abrasion guards. Recheck strap tension after a short test drive and periodically on long trips — continue for step-by-step tips and safety checks.
Quick Start: Load Your Luggage in 6 Steps
Start by gathering all gear and checking your roof rails, crossbars, and mounting hardware for damage or looseness.
Place heavier bags nearest the vehicle center, distribute weight evenly, and secure soft items in a cargo bag.
Use straps or ratchet tie-downs, tighten anchors, and tuck excess webbing.
Recheck stability, close doors gently, and test drive briefly to confirm no shifting.
Roof Rails 101: Types, Components, and Fit
While roof rails might look simple, they come in several types and rely on a few key components that determine what gear you can carry and how it mounts. Knowing their differences helps you pick the right setup for your vehicle and luggage.
While roof rails seem simple, their types and components dictate what gear you can carry and how it mounts.
You’ll check rails, crossbars, mounts, and endcaps to match load type and attachment method:
- Raised rails
- Flush rails
- Fixed points
- Integrated tracks
Vehicle and Roof Load Limits
Check your vehicle’s gross vehicle weight rating (GVWR) and tongue weight limits before loading the roof so you don’t exceed the car’s overall capacity.
Also confirm the roof rack’s maximum load rating and stick to that lower number when distributing luggage.
Overloading either the vehicle or the rack can damage suspension, affect handling, and create a safety hazard.
Vehicle Weight Capacity
Because your vehicle and roof have specific load limits, you need to know both numbers before loading luggage so you don’t exceed them.
Check your owner’s manual for gross vehicle weight rating (GVWR) and roof max load. Calculate current cargo/occupant weight, then subtract from GVWR.
Follow these steps:
- Find GVWR
- Find roof limit
- Weigh occupants/cargo
- Compute usable capacity
Roof Rack Load Limits
Check your owner’s manual and roof label for maximums, and account for dynamic forces while driving.
Distribute weight evenly, secure cargo tightly, and never exceed the lower of vehicle or rack limits to maintain stability and safety.
Choose the Right Roof Rack Accessories
When you’re loading gear on rails, pick accessories that match both your vehicle’s crossbars and the type of cargo you haul; using the right mounts, tie-downs, and carriers will make loading faster and keep gear secure.
- Choose crossbar-compatible mounts.
- Use rated straps and cam-buckle tie-downs.
- Fit cargo-specific carriers (bike, kayak, box).
- Add locks and padding for protection and theft prevention.
Tools for Loading Roof Racks
Now that you’ve picked the right mounts and straps, gather a few basic tools to make loading faster and safer: a sturdy step stool or small folding ladder to reach the rails, a set of cam-buckle or ratchet straps sized to your cargo, non-abrasive padding or foam blocks to protect finishes, and a tape measure to position gear evenly.
Also bring gloves for grip, a wrench for hardware, and a marker.
Plan Load Placement: Balance & Access
Because uneven weight can make handling unsafe and reduce fuel efficiency, you should plan where each item goes before hoisting anything onto the rails.
Because uneven weight affects handling and fuel economy, plan each item’s placement before loading the rails.
Place heavy, dense items centered and low; keep frequently used gear toward the rear or side for easy access. Consider wind profile and tie-down points.
- Heavy center
- Low placement
- Accessible items rear/side
- Even bilateral balance
Soft Bags vs. Hard Cases: What to Secure When
If you’re choosing between soft bags and hard cases, prioritize securing whatever’s most vulnerable to weather, impact, or theft—soft bags need continuous waterproofing and tight straps, while hard cases demand strong attachment points and lockable tie-downs.
You should keep heavy, dense items low and centered; fragile or valuable contents get extra padding and security.
Check straps and covers before driving.
How to Fasten Loads to Crossbars
You’ll want to pick tie-downs rated for roof use, like cam straps or ratchets with protective sleeves.
Position the load centered and balanced between the crossbars so weight’s even on both sides.
Use multiple straps crossing over and around the cargo to prevent shifting and keep straps tight.
Choose Proper Tie-Downs
When securing loads to crossbars, pick tie-downs rated for the weight and the job—ratchet straps, cam straps, and marine-grade ropes each have strengths and limits.
Use quality hardware, protect straps from abrasion, and inspect for wear before you go.
- Match strap capacity to load
- Use soft loops at sharp edges
- Tighten but avoid over-tensioning
- Secure loose ends and test stability
Position Load Evenly
Start by centering the heaviest items between the crossbars and as low as practical so your load stays stable and the roof’s center of gravity stays minimized.
Distribute remaining cargo evenly side-to-side and front-to-back, balancing weight around the vehicle’s midpoint.
Keep bulky pieces toward the center, check that nothing overhangs unevenly, and adjust positions until the load looks and feels symmetric before driving.
Secure With Multiple Straps
With the load centered and balanced, fasten it to the crossbars using multiple straps so nothing shifts on the road.
Use strong cam straps, route them over and under, and tighten securely. Check knots and buckle locks, then retighten after driving a short distance.
- Use two straps per side
- Cross straps for stability
- Protect load edges
- Recheck tension after 10 miles
Weatherproofing: Covers, Liners, and Abrasion Guards
Protective gear matters: you’ll want covers, liners, and abrasion guards that seal out rain and grit while fitting securely to your roof rails.
Choose waterproof, UV-resistant covers and padded liners to protect bags and cargo from moisture and rubbing.
Use abrasion guards where straps contact rails, inspect seals and stitching before trips, and replace worn pieces to maintain lasting protection.
Reduce Wind Noise and Fuel Drag
To cut wind noise and save fuel, keep your load’s profile as smooth and low as possible.
Choose aerodynamic carriers and cargo boxes that slice through air rather than catching it.
Fasten everything low and tight so nothing flaps or sticks up.
Streamline Load Profile
If you want less wind noise and better fuel economy, shape and position your gear so air can flow over it smoothly.
You’ll reduce drag by keeping profiles low and tapered. Follow these steps:
- Place bulky items toward the center.
- Stack low to high from front to back.
- Fill gaps to avoid turbulence.
- Secure soft bags on top.
Use Aerodynamic Carriers
When you swap bulky roof boxes or cheap racks for streamlined, aerodynamic carriers, you’ll cut wind noise and improve fuel economy by reducing drag; these carriers are shaped to channel air smoothly over your load, lowering turbulence and the pressure that slows your car.
Choose low-profile, certified carriers that match bar spacing, install per instructions, and center your gear to maintain balance and predictable airflow.
Secure Low And Tight
Start by keeping your load as low and snug as possible: mount bulky items flat against the roof bars, compress soft bags, and use straps to eliminate movement.
- Place heavy items closest to the roof.
- Lay gear flat and parallel to airflow.
- Tighten straps in stages, recheck after driving.
- Use wind deflectors or fairings to cut drag and noise.
Inspect Anchors and Re-Torque on Long Trips
Every few hundred miles on a long trip, check the roof-rail anchors and re-torque their fasteners to the manufacturer’s spec so your load stays secure.
Inspect mount points, bolts, and any visible hardware for looseness, corrosion, or movement.
Use a calibrated torque wrench, follow tightening sequence, and recheck after initial driving; address damaged anchors immediately to prevent failure.
Common Loading Mistakes That Cause Shifting or Damage
Because rooftop loads are exposed to wind, bumps, and cornering forces, a few wrong packing choices can quickly lead to shifting or damage.
You should avoid these errors:
- Overhanging items that catch wind and pry straps loose.
- Uneven weight distribution causing roll or sway.
- Loose straps that allow movement.
- Soft, compressible packing under rigid gear that crushes or slips.
Quick Packing Checklist Before Every Drive
Before you pull away, run through a quick checklist to confirm straps are tight, load is centered and secured, soft items cushion hard edges, and nothing overhangs or rubs against the roof.
Check strap tension, re-torque quick releases, zip or clip loose ends, inspect tie-down points, verify rear visibility, and confirm weight limits.
Recheck after a short drive.
Frequently Asked Questions
Can I Leave Luggage on Roof Rails While Parked Overnight?
You shouldn’t. You’re risking theft, weather damage, and wind stress on mounts; if you must, lock and cover luggage, use secure roof racks and straps, park in well-lit safe areas, and remove valuables before sleeping.
Will Roof Rails Void My Vehicle’s Warranty?
Generally, roof rails alone won’t void your vehicle’s warranty, but they can if related damage occurs. You’ll need to prove the manufacturer’s denial links directly to rail installation or use; keep receipts and follow specs.
Are Roof Rails Compatible With Sunroofs or Moonroofs?
Yes, they’re often compatible, but you’ll need to check clearance and mounting points; you shouldn’t block sunroof movement or drainage, and you’ll want professional installation or manufacturer-approved racks to avoid damage or warranty issues.
Can I Use Roof Rails to Transport Pets or Live Animals?
You shouldn’t use roof rails to transport pets or live animals; it’s unsafe and often illegal. Instead, secure pets inside the vehicle with harnesses or carriers, or use a well-ventilated pet-approved roof box designed for animals.
How Do I Prevent Theft of Roof-Mounted Luggage?
You’ll deter theft by using a lockable roof box or cable locks, securing mounts tightly, parking in well-lit or busy areas, removing valuables, adding a motion alarm or camera, and noting serial numbers for recovery.
Conclusion
You’ve got this—properly using roof rails keeps gear secure, protects your car, and saves fuel. Always check your vehicle’s load limits, choose compatible crossbars and mounts, and use quality straps or a cargo box. Distribute weight evenly, low and centered, and double‑check anchors before you drive. Re‑torque on long trips, watch for wind noise, and avoid overloading. Follow the packing checklist each time, and you’ll enjoy safer, stress‑free travels.