How to Strap Luggage Together Easy and Secure Methods
You can quickly and securely strap luggage together by laying two suitcases back-to-back, wrapping a sturdy adjustable luggage strap around both handles, and tightening until snug—clip the buckle and secure excess webbing with a keeper or zip tie. Balance weight low and centered, add a secondary strap or trolley loop for extra stability, and protect zippers with padding. Test by lifting both handles together to confirm stability; keep going to learn simple strap choices, measurements, and troubleshooting tips.
Quick Method: Strap Two Suitcases Together in 60 Seconds
Grab two suitcases, lay them back-to-back, and secure them with a single luggage strap threaded around both handles—tighten until they sit snugly together.
Clip the buckle, feed excess strap through the keeper, and lock if available.
Test stability by lifting both handles simultaneously; adjust tension until they move as one.
Stow fragile items centrally and use a short secondary strap for added peace of mind.
When to Bundle: 5 Situations to Strap Luggage
Now that you know a quick way to strap two suitcases together, you’ll want to pick that option only when it actually helps.
Strap luggage when: you’re maneuvering multiple bags through crowds, consolidating small items, securing odd-shaped gear, preventing rolling in transit, or keeping matching sets together.
Choose straps judiciously to simplify handling, reduce trips, and avoid damage without overcomplicating packing.
Choosing Straps vs Cords vs Connectors for Luggage
You’ll want to weigh straps, cords, and connectors based on strength, ease of use, and how they attach to your bags.
Straps are strong and adjustable, cords are lightweight and flexible, and connectors or hardware add security or quick-release convenience.
Think about the load, travel style, and how often you’ll need to fasten or release them.
Straps Versus Cords
When deciding between straps, cords, or small connectors to join luggage, think about strength, ease of use, and how they’ll affect handling.
Straps give firm, even pressure and quick buckles, so you’ll secure bulky pieces and keep balance.
Cords are lighter, flexible, and fit awkward shapes, but they need knots or tensioners and may shift more during transit.
Connectors And Hardware
Think of connectors and hardware as the small parts that decide whether your straps or cords perform like a secure system or a weak link; they link, lock, and adjust tension, so choose ones rated for the load and environment. Pick metal buckles for strength, polymer for weight, and quick-release for convenience.
| Type | Best use |
|---|---|
| Metal buckle | Heavy loads |
| Plastic clip | Light gear |
| Cord lock | Adjustable tension |
| Carabiner | Versatile attachment |
How to Measure Straps for the Right Fit
Before cutting or buying straps, measure your luggage so the fit is snug but not tight: lay cases together as you’ll pack them, wrap a tape measure or a flexible cord around the combined perimeter where the strap will sit, note the length plus 2–4 inches for overlap and buckles, and record both the minimum snug measurement and the maximum expanded measurement for bulky contents.
Before buying or cutting straps, wrap cases as packed, measure snugly, add 2–4″ for overlap and expansion.
- Measure snug length.
- Add 2–4″ overlap.
- Note max expansion.
How to Choose Durable Strap Materials for Long Trips
Now that you’ve measured for fit, pick strap materials that will stand up to long trips and rough handling.
Choose heavy-duty nylon or polyester webbing for abrasion and UV resistance.
Look for reinforced stitching, stainless-steel or brass hardware, and quick-release buckles rated for load.
Test for stretch and water resistance.
Replace straps showing fraying, rust, or weakened fibers before travel.
Best Luggage Straps for Securing Multiple Bags
When you need to move several bags at once, choose wide, adjustable straps with strong buckles and anti-slip features to keep everything aligned and balanced.
- Pick heavy-duty polyester or nylon for strength and low stretch.
- Use quick-release buckles or ratchets for fast, secure tightening.
- Prefer straps with padding or silicone grips to prevent shifting and protect handles while keeping weight evenly distributed.
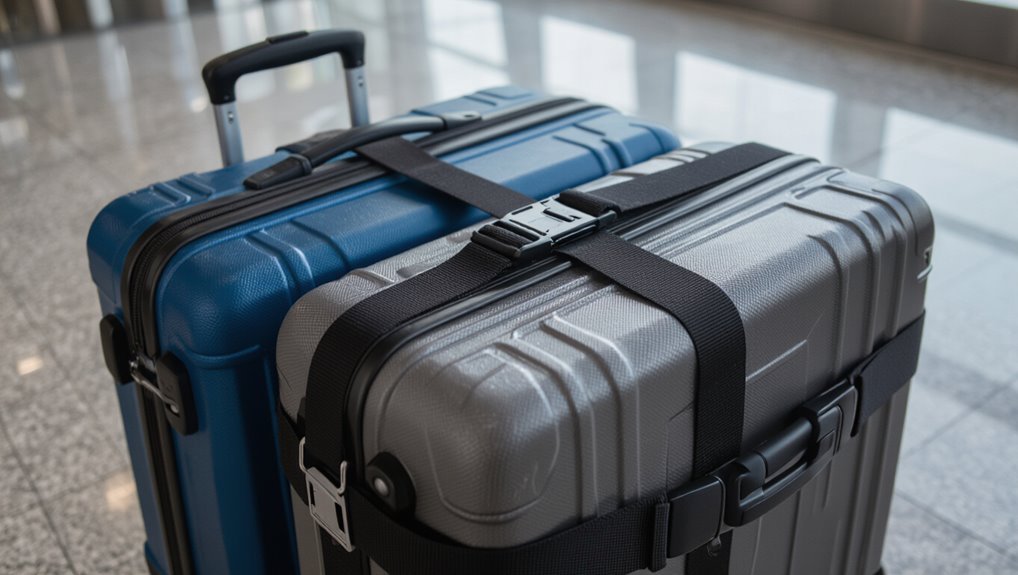
How to Use a Cross‑Strap to Link Suitcases
Line up the suitcase handles and zippers so they sit flush and won’t catch as you move.
Thread the cross-strap through both handles, then across the zipper pulls for added security.
Tighten the strap snugly and clip it to lock the bags together.
Align Handles And Zippers
Although it takes only a few seconds, aligning handles and zippers correctly makes a cross-strap connection secure and easy to carry; position both handles upright, mesh zipper pulls together, and guarantee shells sit flush.
Then thread the strap without twisting. Check tension and balance so bags don’t shift.
Follow this quick checklist:
- Handles aligned
- Zippers adjacent
- Shells flush and centered
Secure With Cross‑Strap
Before you fasten the cross-strap, position the suitcases so their handles and zippers stay aligned.
Then loop the strap over and under both bags to form an X across their faces.
Tighten the buckles evenly, secure excess webbing, and clip any locking mechanism.
Test stability by lifting both handles; adjust tension until the cases move as one and don’t shift.
Loop a Luggage Strap Through Handles (Step‑by‑Step)
Start by laying your luggage side by side with the handles facing up so you can easily see and reach each one. Then unclip the strap and straighten it out.
Thread the strap through both handles, adjust tension, and secure the buckle. Follow these steps:
- Feed strap through handle loops.
- Pull snug, align bags.
- Clip, test stability before moving.
Use Bungee Cords Safely With Luggage
One simple way to add extra hold is to use short bungee cords, but you’ll want to do it safely to avoid damage or accidents.
Choose coated cords with secure hooks, avoid overstretching, and loop them around rigid points—never through zippers or delicate handles.
Check tension often, pad contact points with cloth, and inspect cords for wear before each trip to prevent failure.
Join Soft Bags With Carabiners
If you’re pairing soft duffels or backpacks, clip sturdy carabiners through webbing loops or D-rings to keep them together without stressing zippers or handles.
You’ll balance weight and prevent shifting by linking points on opposite sides. Use locking carabiners for security, avoid thin fabrics, and clip through reinforced straps.
- Distribute weight evenly
- Secure multiple points
- Check attachments regularly
Using Luggage Connectors and Couplers Effectively
Luggage connectors and couplers make linking hard-shell suitcases and mixed bags quick and secure, so you can treat multiple pieces as a single unit while rolling or stowing them.
Choose low-profile connectors, align handles and wheels, attach at sturdy points, and tension couplers so they don’t slip.
Check locks and quick-releases before travel, and inspect connectors for wear after each trip.
How to Strap a Carry‑On to Checked Luggage
When you strap a carry‑on to checked luggage, pick straps rated for weight and abrasion so they won’t snap in transit.
Use secure attachment techniques—loop through handles and fasten with buckles or luggage-rated carabiners—to keep the carry‑on from shifting.
Also check airline and TSA rules before you travel so you won’t face fines or forced separation at the airport.
Choose The Right Straps
Picking the right straps makes a big difference in keeping your carry-on secure and easy to manage while it rides with checked luggage.
You’ll want durable, adjustable straps that won’t slip or damage bags. Consider:
- Nylon with quick-release buckles — lightweight, strong.
- Elasticized straps — absorb shock, keep tension.
- Lockable straps — deter tampering, add security.
Secure Attachment Techniques
Now that you’ve chosen straps that suit your bags, you’ll want to attach your carry-on so it stays put and won’t strain either piece.
Position the carry-on centered on the checked bag, thread a luggage strap through handles and around both bags, tighten evenly, and secure the buckle.
Use a secondary strap or luggage trolley loop for extra stability, avoiding overcompression.
Check balance before travel.
Airport Policy Considerations
Before you strap a carry‑on to checked luggage, check airline and TSA rules so you don’t run into surprises at the gate or baggage claim.
You’re responsible for compliance and liability; some airlines forbid attached personal items.
Consider:
- Size/weight limits — avoid excess fees or forced unpacking.
- Security screening — guarantee visibility of prohibited items.
- Fragility/labeling — protect items and make claims easier if needed.
Fasten Roll‑Aboard Bags for One‑Handed Movement
One simple way to make a roll‑aboard easy to move with one hand is to secure a secondary bag to its handle so both pieces roll together.
Loop a luggage strap or sturdy carabiner through both bag handles, tighten so the secondary bag sits stable behind the roll‑aboard, and test balance.
Keep weight centered to prevent tipping and guarantee quick release for security checks.
Stack and Strap Duffel Bags on a Suitcase
When you stack a duffel on top of a suitcase, secure it with a luggage strap that won’t slip while you move.
Make sure the heavier items sit lowest and centered so the load stays balanced.
Tighten the strap snugly and test the balance before you wheel away.
Secure With Luggage Straps
If you’re juggling a duffel and a suitcase, secure them quickly with a luggage strap to keep everything stable and hands-free.
Loop the strap through handles, cinch tight, and clip to the suitcase trolley. Use a lock if needed.
Benefits:
- Prevents slipping
- Speeds movement
- Saves effort
Adjust tension before transit.
Balance And Weight Distribution
Because uneven weight makes rolling awkward and risks tipping, you should stack and strap duffel bags so the heaviest items sit closest to the suitcase’s center and low to the wheelbase.
Place lighter bags on top, align handles and zippers, and use a secure strap crossing the load.
Check balance by tilting; adjust until the combined center of gravity stays near the suitcase.
Strap Backpacks Together for Transit
While you’re prepping for a trip, strap your backpacks together to keep them stable and easy to move; doing so prevents shifting, reduces wear, and frees up a hand for other gear.
Use sturdy straps, clip sternum or waist belts, and protect corners.
Follow this simple sequence:
- Align and compress
- Secure with cross straps
- Test balance and adjust
Make a Wheeled Trolley From Two Luggage Pieces
Combine two suitcases to make a simple wheeled trolley that saves you from carrying heavy loads and fits airport conveyor limits.
Place the wheeled case below and the lighter bag on top, aligning handles.
Use sturdy straps or a luggage connector to secure both tightly.
Lock strap buckles, tuck loose ends, and test roll stability before travel to prevent shifting or tipping.
Protect Electronics & Glass When Linking Bags
When you link bags, cushion fragile items like laptops and glassware with soft clothing or bubble wrap to absorb shocks.
Fit padded dividers around electronics to prevent them from shifting, and place glass in the center away from seams.
Then secure everything with straps so nothing moves during transit.
Cushion Fragile Items
Start by isolating your electronics and glassware in soft, impact-absorbing layers—wrap devices in microfiber cloths, bubble wrap, or padded sleeves, and enclose glasses in dish wraps or thick towels.
Then secure and cushion when linking bags:
- Place wrapped items centrally, away from seams.
- Fill gaps with soft clothing to prevent shifting.
- Fasten straps loosely over padding, not directly on items.
Use Padded Dividers
If you want to protect electronics and glass when linking bags, use padded dividers to create dedicated, cushioned compartments that prevent contact and absorb shocks.
Place fragile items between dividers, wrap individual pieces in soft sleeves, and position heavier items away from delicate compartments.
Check divider seams and adjust spacing so nothing shifts during transit, reducing impact and abrasion without adding bulk.
Secure With Straps
Padded dividers do a lot of the heavy lifting, but straps lock everything in place so electronics and glass can’t shift against one another.
You’ll use straps to compress, separate, and stabilize linked bags. Follow these steps:
- Tighten straps across fragile pockets.
- Add foam or cloth between devices.
- Check tension and re-tighten after transit starts.
Secure Fragile Items Between Bags (Padding Tips)
When you tuck fragile items between two suitcases, you create a natural protective sandwich that reduces movement and absorbs shocks; use soft layers like clothing, bubble wrap, or towels to fill gaps and cushion edges. You should center items, compress padding, and secure with straps so nothing shifts.
| Layer | Purpose |
|---|---|
| Clothing | Cushioning |
| Bubble wrap | Shock absorption |
| Towels | Gap filling |
| Foam | Edge protection |
| Clothes roll | Stabilization |
Protect Wheels and Handles When Strapping
After you’ve sandwiched fragile items between bags, turn attention to wheels and handles so they don’t get crushed or snag during travel.
Protect them by positioning handles tucked in and wheels facing outward, then secure straps with padding.
Position handles tucked in and wheels facing outward, then secure straps with padding to prevent snagging or crushing.
Follow these steps:
- Pad wheels with cloth or foam.
- Tuck and fasten handles inside straps.
- Tighten straps without compressing wheels.
Avoid Zipper Strain When Bundling Luggage
When you bundle bags, protect the zipper with a bit of padding—foam or fabric works well—to prevent teeth from catching.
Use cross straps to distribute pressure away from the zipper line so it doesn’t bear the load.
Pick low-profile buckles that won’t press into or rub the zipper during transit.
Protect Zipper With Padding
Zippers handle a lot of stress when you strap bags together, so give them a cushion to keep seams and sliders from pulling.
Wrap foam or folded fabric around zipper lines, secure with tape or small elastic, and check tension before travel.
- Pad critical zipper areas.
- Anchor padding so it won’t shift.
- Test closure to guarantee smooth operation.
Use Cross Straps Instead
One simple fix is to swap out relying on zipper seams and use cross straps to hold bags together, because they distribute pressure across fabric and buckles instead of concentrated zipper tracks.
Fit straps diagonally over stacked pieces, tighten evenly, and clip securely. You’ll reduce zipper stress, prevent splitting during transit, and keep items aligned.
Check tension periodically and adjust before motion.
Choose Low-Profile Buckles
Because bulky buckles press against zipper tracks, pick low-profile closures that sit flat and spread load across fabric, not teeth. You’ll protect zippers and keep straps discreet. Choose materials and positions that reduce wear.
- Pick slim metal or reinforced plastic buckles.
- Route straps over seams, not directly on zippers.
- Check tension; loosen before heavy impacts.
Use Packing Cubes With Strapped Luggage
Packing cubes make it easy to keep strapped luggage organized and balanced: slip cubes into compartments before tightening straps so clothes stay compact and don’t shift.
Use a mix of sizes to separate outfits, toiletries, and fragile items. Compressible cubes reduce bulk and prevent bulging under straps.
Label or color-code cubes for quick access without reopening everything. Check zipper security before travel.
Balance Weight Across Linked Bags
After you’ve organized items into cubes and tightened the straps, shift focus to distributing weight evenly across linked bags so they pull smoothly and won’t tip.
You should:
- Place heavier items near each bag’s center and low to the wheels.
- Match load sizes so one bag isn’t markedly heavier.
- Test by lifting handles together, adjusting until the set feels balanced and stable.
How to Lock and Secure Strap Buckles
You’ll want tamper-resistant locks that resist cutting and picking to keep straps secure during transit.
Check that buckles are firmly attached to webbing and reinforce weak stitching or attachment points with heavy-duty thread or adhesive-backed patches.
With the right locks and reinforced attachments, your linked bags stay together and more theft-resistant.
Choosing Tamper-Resistant Locks
When you want to keep strap buckles secure without compromising quick access, pick tamper-resistant locks that match your strap type and travel needs.
You’ll prioritize durability, simplicity, and TSA compliance.
Consider:
- Combination locks for shared access and no keys.
- Cable-style locks for threaded straps and irregular loops.
- Low-profile padlocks for slim buckles and carry-on compliance.
Reinforcing Buckle Attachment
If you want your luggage straps to stay put, reinforce each buckle attachment so it resists snags, tampering, and accidental release. Check stitching, add heat-shrink tubing, and secure loose ends with zip ties. Test tension and lock buckles with tamper-evident seals. Replace worn hardware promptly.
| Item | Action |
|---|---|
| Stitching | Double-stitch |
| Tubing | Heat-shrink |
| Ends | Zip-tie |
| Tension | Test |
| Hardware | Replace |
Use Zip Ties for Quick Temporary Fixes
Though not meant as a long-term solution, zip ties give you a fast, secure way to hold cracked handles or split zippers together until you can get professional repairs.
You’ll loop ties through broken hardware, trim flush, and check tension. Use durable ties and carry spares.
- Fast fix
- Low weight
- Temporary only
Convert a Luggage Strap Into an Emergency Tourniquet
Because luggage straps are strong, adjustable, and often on hand, you can use one as an emergency tourniquet to control severe bleeding until help arrives.
Loop the strap above the wound, tighten until bleeding slows, and secure with a stick or buckle to maintain tension.
Note time applied, avoid loosening, and seek professional medical care immediately for proper treatment.
How to Deter Theft With Luggage Straps (Practical Tips)
When you secure your bags with a visible, well-fitted luggage strap, you make them less attractive to opportunistic thieves and slow down anyone trying to open or snip them.
Use straps smartly:
Use straps smartly: pick bright, unique bands, add a TSA lock or seal, and hide valuables inside.
- Choose bright, unique straps for quick spotting and deterrence.
- Add a TSA-approved lock or tamper-evident seal for obvious protection.
- Keep valuables in carry-on and conceal expensive-looking gear inside layers.
Airline Rules for External Straps and Attachments
If you plan to use external straps, know that airlines and security agencies set specific limits on attachments to checked and carry-on bags, and those rules can affect whether your strap is allowed, treated as part of your baggage, or inspected separately. Check airline size, material, and visibility rules; remove prohibited items; label straps.
| Airline rule | Action required |
|---|---|
| Size limits | Use slim straps |
| Material ban | Swap materials |
| Visibility | Keep tags clear |
| Inspection | Be ready to open |
TSA & Security Checks for Strapped Luggage
After checking airline restrictions on straps and attachments, you’ll also need to evaluate how TSA handles strapped luggage during security screening.
After checking airline strap rules, remember TSA may inspect, request access, or remove straps during screening.
You should expect inspections, possible strap removal, and clear access requests.
Follow these tips:
- Use TSA‑approved locks or breakaway straps.
- Leave easy access to contents if asked.
- Label straps so agents can resecure items quickly.
How to Prepare Strapped Luggage for Check‑In
Before you head to the airport, check your airline and local security rules so your strapped luggage meets size, weight, and closure requirements.
Make sure straps are snug, excess material is trimmed or tucked, and any barcoded tags are attached where they won’t be obscured.
That way your bag stays secure and your check‑in goes smoothly.
Check Airline And Security Rules
When packing strapped luggage for check-in, check your airline’s size, weight, and strap-use policies so you won’t get hit with fees or have your bag delayed.
Verify TSA rules about external straps and accessible compartments. Confirm international differences and documentation.
Then follow these steps:
- Check airline limits and strap rules.
- Review TSA and local security guidance.
- Note documentation for international flights.
Secure Straps And Tags
1 simple step you shouldn’t skip is securing your straps and tags so your bag stays intact and easy to identify at check‑in.
Tighten straps snugly without overcompressing contents, tuck excess webbing, and attach a durable luggage tag with your contact info.
Add a secondary ID inside. Use tamper‑evident seals if you want extra security, and photograph your packed bag before handing it over.
How to Label and Tag Linked Luggage for Easy ID
Labeling linked luggage clearly saves time and prevents loss at busy terminals, so pick durable tags and place them where scanners and handlers can easily see them.
You should also add contact info and a brief itinerary on internal tags, and color-code or use matching ribbons to identify linked sets quickly.
- Durable visible tags
- Internal contact cards
- Color coding or ribbons
How to Test Strap Strength Before a Trip
Before you hit the road, give your straps a quick, practical check so they won’t fail when you need them most. Inspect for frays, test buckles, and pull to simulate tension. Replace damaged straps. Use this simple checklist to visualize tests:
| Inspect | Pull test | Buckle check |
|---|---|---|
| Frays | Firm tug | Latch snaps |
| Cuts | Hold 30s | No slip |
| Wear | Repeat | Smooth action |
How to Prevent Straps From Loosening During Travel
After you’ve inspected and tested your straps, take steps to keep them tight on the road: start by threading straps correctly and feeding webbing through the buckle so it cinches fully. Then lock excess length with a keeper or a zip tie to stop slippage.
After inspecting straps, thread and cinch webbing through the buckle, then lock excess with a keeper.
- Recheck tension after loading.
- Use friction-enhancing pads where straps cross.
- Secure loose ends and inspect at stops.
Choose Quick‑Release Systems for Frequent Stops
When you make frequent stops, pick quick‑release systems so you can loosen and resecure straps in seconds; they save time and reduce fumbling at rest areas or checkpoints.
Choose durable buckles with simple latch mechanisms, test them under load, and keep spare clips.
Use straps with easy‑grip pulls and audible clicks so you’ll know connections are secure, speeding changes without compromising safety.
Use Modular Connectors for Family Travel
If you’ve picked quick‑release straps for frequent stops, you’ll want connectors that snap together just as fast for family trips.
If your straps release quickly, choose connectors that snap together just as fast for seamless family travel.
You’ll link multiple bags into a single unit, swap modules for stroller or carry‑on, and reduce fumbling.
Use modular clips that lock, label each module, and practice one‑hand snaps before travel.
- Locking clips
- Interchangeable modules
- One‑hand operation
Keep Children’s Bags Attached Safely
Keep your child’s bag secured to yours with a small harness so it won’t slip or get left behind.
Use trolley strap clips to fasten backpacks to rolling suitcases for hands-free control.
Thread a luggage lock through both bag zippers and the strap for added security.
Secure With A Harness
A simple harness lets you secure your child’s bag to your luggage so it can’t wander off in crowds or on busy terminals.
You clip the harness to both handles, adjust snugly, and check clips. Use visible colors for quick spotting.
- Attach firmly
- Adjust for comfort
- Inspect clips before travel
Use Trolley Strap Clips
One or two trolley strap clips make it easy to fasten your child’s bag to your suitcase handle so it stays put through crowded terminals.
Clip straps quickly, adjust tension, and position the bag under the handle to lower the center of gravity.
Check clips for wear before travel, and use quick-release designs so you can detach the child’s bag instantly when needed.
Attach With Luggage Locks
You can pair trolley clips with small luggage locks to make sure your child’s bag stays attached without slipping or being opened.
Lock straps through handles, use TSA-approved locks for flights, and check tightness before moving.
Follow these steps:
- Thread lock through both handles.
- Use TSA lock at checkpoints.
- Tug to confirm security.
How to Secure Luggage in a Car Trunk
When loading your trunk, think regarding balance and restraint: place heavier bags low and centered, then secure them so they can’t shift.
Use straps or cargo nets anchored to tie-down points to immobilize stacks, and wedge smaller items around larger pieces.
Tighten straps evenly, test for movement, and keep emergency items accessible.
Lock the trunk and double-check before driving.
Strapping Luggage on Roof Racks (Vehicle Tips)
If you’re loading luggage onto a roof rack, start by arranging heavier items toward the center and front to keep the vehicle balanced and reduce wind resistance.
Then secure packs with cross straps and a cargo net, tighten to eliminate movement, and check clearance.
- Use cam straps for tension
- Protect with a roof bag or mat
- Recheck tightness after 10 miles
How to Stop Bags From Bouncing on Conveyor Belts
When you load bags onto a conveyor, secure them with luggage straps to keep items from shifting and catching.
Balance the weight inside each bag so it rides evenly and doesn’t tip or bounce.
If the belt is slick, put a bit of non-slip matting under the bags to grip the surface.
Secure With Luggage Straps
Although the conveyor’s jostling can send your suitcase careening, a well-secured luggage strap keeps multiple bags snug and prevents bouncing and shifting during loading.
Use a sturdy, adjustable strap and fasten tightly around joined pieces. Check buckles and pad contact points.
- Choose durable material.
- Tighten until movement stops.
- Inspect before each trip.
Balance Weight Inside
Because uneven packing makes your bag tip and bounce on the conveyor, distribute heavy items close to the center and along the base so weight stays low and balanced.
Place bulky but light items around edges, fill gaps with soft clothing, and secure fragile items in the middle.
Check weight distribution by gently rocking the bag; adjust until it sits flat and moves smoothly.
Use NonSlip Matting
Once your bag sits level, add a non‑slip matting layer to keep it from sliding and bouncing on the conveyor.
Cut or fold a rubberized mat to fit under straps, then secure edges so it won’t shift.
Use this quick checklist:
- Grip: choose textured, durable material.
- Fit: trim to avoid overhang.
- Secure: tape or tuck under straps tightly.
How to Repair a Broken Handle While En Route
If your suitcase handle snaps while you’re on the move, don’t panic—you can often rig a quick, sturdy fix with items from a hotel, airport shop, or your carry-on.
Thread strong tape, zip ties, or a shoelace through the broken hinge, wrap securely, and test weight.
Use a small padlock or carabiner to stabilize moving parts.
Seek proper repairs ASAP.
How to Use Everyday Items (Scarves, Belts) to Bind Bags
Grab a sturdy belt to cinch two bags together at the handles, threading the buckle through and tightening until they sit snugly.
If you don’t have a belt, wrap a long scarf around both pieces and knot it securely, distributing tension so it won’t slip.
Both methods keep your hands free and make managing multiple bags much easier.
Secure With A Belt
One simple way to keep two bags together is to loop a sturdy belt through their handles and buckle it snugly, so they move as one unit without slipping.
You’ll balance weight, prevent snagging, and free your hands.
Follow steps:
- Thread belt through both handles.
- Tighten to remove slack.
- Buckle and tuck excess for security.
Wrap Using A Scarf
A long scarf can quickly bind two bags together without any special gear, and you’ll only need a few simple folds to keep them secure.
Lay the scarf across both handles, wrap under and over, then tie a square knot. Tuck loose ends under the wrap to prevent slipping.
Check tension and adjust; the fabric cushions handles and stays snug during transport.
How to Strap Odd‑Shaped or Oversized Items
When items are oddly shaped or oversized, you’ll rely on a combination of strong straps, padding, and strategic anchoring to keep everything secure. Use heavy-duty cam straps, wrap soft padding around protrusions, and anchor to fixed luggage points.
Follow these steps:
- Distribute weight evenly.
- Cross straps for stability.
- Test movement before transit.
Protect Delicate Gear (Electronics, Glass) When Strapped
When you strap luggage that contains electronics or glass, put soft cushioning between items to absorb shocks.
Make sure fragile compartments are separately secured and won’t shift under the straps.
Don’t let straps press directly on delicate surfaces—use pads or edge protectors to avoid compression.
Cushioning Between Items
1. You’ll add cushioning between items to prevent shocks and scratching when straps compress them. Use soft, compressible layers and position padding where edges meet.
Consider:
- Bubble wrap — cushions impacts, conforms to shapes.
- Microfiber cloths — prevent scratches, absorb small movements.
- Foam sheets — maintain spacing, distribute pressure evenly.
Don’t let straps press electronics or glass directly against hard surfaces.
Secure Fragile Compartments
Because straps can shift and tighten unpredictably, you should isolate fragile items in dedicated compartments or rigid cases before fastening luggage together. Pad electronics with foam or clothing, secure glassware in bubble wrap, and lock cases to prevent movement. Use clear labeling and quick-access pockets for fragile contents.
| Item | Protection | Tip |
|---|---|---|
| Phone | Foam | Turn off |
| Glass | Bubble wrap | Upright |
| Camera | Hard case | Strap tight |
Avoid Direct Compression
If you’re strapping multiple bags together, don’t let straps press directly onto fragile electronics or glass—place a rigid barrier or padded spacer between the strap and the item so pressure distributes across a larger area and won’t crush delicate components.
You should also:
- Use foam, cardboard, or small cutting boards as shields.
- Loosen straps near delicate zones, tightening elsewhere.
- Wrap devices in microfiber or bubble wrap before shielding.
How to Avoid Overloading Straps and Splitting Handles
When you’re strapping multiple bags together, don’t assume handles can take unlimited weight — they’ll tear or split when overloaded. Distribute load evenly, use straps around the suitcase body (not just handles), and test carry weight before moving. Reinforce weak seams with tape or a secondary strap, and choose heavier-duty straps for bulky loads.
| Check | Action | Frequency |
|---|---|---|
| Handles | Inspect | Every trip |
| Load | Balance | Before lifting |
| Straps | Reinforce | As needed |
How to Maintain and Store Straps Between Trips
A dry, cool drawer will keep your straps in good shape between trips.
Store them coiled, away from sunlight and moisture. Clean and dry straps before storing to prevent mold or odors.
Check hardware for rust or wear before packing.
- Clean
- Coil
- Inspect
How to Choose the Right Strap Length and Width
Pick a strap length and width that match the size and weight of your luggage and the load you’ll secure. Measure around bags, allow overlap for buckles, and pick wider straps for heavy gear. Use sturdy materials and rated buckles.
| Size | Recommendation |
|---|---|
| Small | 1–1.5″ width |
| Medium | 1.5–2″ width |
| Large | 2–3″ width |
Compare DIY Methods vs Commercial Products
Whether you go the DIY route or buy a commercial strap, weigh trade-offs between cost, customization, and reliability—you’ll save money and tailor fit with homemade straps but get tested strength, convenience, and warranty from factory-made options.
You should assess materials, tools, and time. Decide what matters most: durability, price, or ease.
- Strength
- Cost
- Convenience
Troubleshoot Common Strapping Problems
When straps slip, fray, or jam, you’ll want quick fixes so your luggage stays secure and you don’t miss a flight. Check tension, trim frayed ends, lubricate buckles with silicone, and replace worn straps. If jammed, reverse feed and clear debris. Test before travel.
| Problem | Quick Fix | Preventive Tip |
|---|---|---|
| Slip | Tighten | Use non-slip pads |
| Fray | Trim/Seal | Heat-seal ends |
| Jam | Reverse/clean | Regular inspection |
Final Safety Checklist Before You Travel
After fixing slips, frays, and jams, run one last safety checklist to make sure your strapped luggage won’t cause delays or damage during travel.
After addressing slips, frays, and jams, run a final safety check to prevent travel delays or damage.
Verify tightness, inspect buckles, and confirm labels.
Then follow these steps:
- Test straps under pressure and retighten.
- Secure loose ends and pad sharp edges.
- Lock zippers and attach ID outside.
You’ll travel safer and stress less.
Frequently Asked Questions
Can I Strap Luggage Together Across Airline Seat Rows In-Flight?
You can, but you shouldn’t: airlines and crew may prohibit strapping luggage across rows for safety and evacuation reasons. If you must, ask crew permission, use soft straps, avoid blocking aisles or seatbelts, and secure quickly.
Will Strapped Bags Affect Travel Insurance Claims?
Yes, strapped bags can affect travel insurance claims: insurers may deny or reduce payouts if straps cause damage, alter baggage descriptions, or breach policy terms, so you should check your policy and document fastening and condition before travel.
How Do I Clean and Deodorize Straps After Dirty Trips?
You wash webbing straps with mild soap and warm water, scrub gently with a soft brush, rinse thoroughly, air-dry away from direct sun, then deodorize with a vinegar spray or baking soda paste, brushing off residue before storing.
Are There Weight Limits for Straps Rated in Kilograms Versus Pounds?
Yes — straps rated in kilograms versus pounds show the same limit expressed differently; you’ll convert by multiplying kilograms by 2.20462. Always check the working load limit, use safety margins, and match units before loading.
Can I Use Luggage Straps to Secure Bags on a Bicycle Rack?
Yes — you can use luggage straps to secure bags on a bicycle rack, but you’ll want heavy-duty, weatherproof straps rated for dynamic loads, double-check tightness, and add secondary tethering to prevent shifting or loss while riding.
Conclusion
Strapping your luggage together saves time and cuts stress—so try the quick 60‑second method when you’re rushing, pick straps over cords for strength, and measure carefully to get the right length and width. Use durable materials for long trips, compare DIY fixes with commercial options, and troubleshoot buckles or slipping before you go. Before you leave, run the final safety checklist: secure buckles, pad sharp edges, label bags, and test the whole setup one last time.