How to Repair Luggage Easily at Home
You can fix most luggage issues at home with basic tools, a few spare parts, and some patience. Inspect and photograph damage, decide if it’s cosmetic or structural, then clean the area. Replace sliders, wheels, handles or patch fabric with glue, patches, or sewing; reinforce seams and test moving parts. Use epoxy or plastic weld for hard-shell cracks and keep an emergency kit for travel. Keep going to find step-by-step fixes, parts sources, and pro-vs-DIY tips.
Quick Emergency Fixes to Get You Through Travel Day
When a zipper breaks, a wheel snaps, or a seam splits minutes before you board, don’t panic—reach for simple fixes that keep you moving. You can thread a paperclip or key through a stubborn zipper pull to regain grip, or use pliers to realign bent teeth.
Secure split seams with safety pins, strong tape, or a travel sewing kit for quick stitches. Replace a lost wheel with duct tape as a temporary skid, or stabilize wobble with zip ties.
Keep spare fasteners, adhesive, and basic tools in your carry-on so you can handle these fixes fast.
Decide: Repair, Restore, or Replace Your Luggage
Start by evaluating how bad the damage is—cosmetic scuffs mean something different than a broken wheel or cracked shell.
Then weigh repair cost against the bag’s value and how long you’ll keep using it.
Finally, consider your long-term travel needs to decide whether fixing, restoring, or replacing makes the most sense.
Assess Damage Extent
Before you decide whether to fix, restore, or replace your luggage, take a clear inventory of the damage: note broken zippers, ripped fabric, cracked shells, detached handles, and functional problems like wheels that don’t roll or locks that won’t latch.
Inspect structure, seams, and interior lining. Check whether parts are standard or proprietary and whether repairs will restore full function. Prioritize safety and usability.
Use the list below to guide your decision-making focus:
- Structural integrity: shell, frame, seams
- Functionality: wheels, handles, zippers, locks
- Appearance: fabric tears, scuffs, stains
Weigh Cost Versus Value
After cataloging the damage, compare repair costs and outcomes against replacement so you can choose the most practical option.
Tally parts, tools, and your time for fixes like zipper replacement, shell patches, wheel swaps, or handle repairs.
Check current luggage value, warranty status, and how much a new bag with similar features costs.
Factor in sentimental or specialty value if it’s unique.
If repair exceeds 50–70% of replacement, replacing usually makes more sense.
If fixes restore full function cheaply, repair.
Decide based on function, cost, and convenience rather than emotion to get the best return.
Consider Long-Term Needs
When you look beyond immediate fixes, think about how you’ll use the bag over the next several years and whether a repair will meet those needs. Consider frequency, destinations, and how important appearance is to you.
Ask if a patched seam or new wheel will last through your typical trips or if recurring fixes will cost more than replacement. Also weigh sentimental value and environmental impact.
Use this simple checklist to decide:
- Frequency: daily commuter, occasional traveler, or rare use?
- Durability: will the fix withstand similar stress?
- Value: sentimental, financial, or eco worth keeping?
Choose accordingly.
When to DIY vs. Hire a Pro for Luggage Repair
Look at how badly the bag’s damaged and decide whether a quick fix will hold or if structural repairs are needed.
Compare the repair cost to what the suitcase is worth and how long you plan to keep using it.
If the damage is complex or the price nears replacement, hire a pro; if it’s minor and cheap, you can handle it yourself.
Assess Damage Level
If you can confidently describe the damage in a few clear sentences, you can usually decide whether to tackle the repair yourself or call a pro. You should inspect structure, hardware, and fabric to judge complexity. Small, isolated faults are DIY-friendly; extensive frame damage or ruined linings usually need expertise.
- Frame: bent or cracked frames often require professional tools and experience.
- Hardware: missing zippers, wheels, or handles can be DIY if replacements fit; complex mounts might need a pro.
- Fabric/finish: surface tears or scuffs you can patch; large delamination or water damage calls for specialist repair.
Cost Versus Value
Why should you balance cost against the luggage’s remaining life and sentimental or replacement value? You’ll weigh repair cost, time, and outcome against buying new or keeping a beloved piece.
Estimate parts and tools for DIY: cheap fixes like zipper pulls or patching fabric often cost little and teach you skills.
Complex frame, wheel, or shell damage may need pro tools and expertise; shop quotes help decide.
Factor warranty, travel frequency, and sentimental worth.
If repair exceeds 50–70% of replacement or risks recurring issues, hire a pro or replace the bag for better long-term value.
Inspect Your Luggage Quickly and Document Damage
After you retrieve your bag, open it and do a quick, systematic scan—inside and out—so you don’t miss dents, tears, broken wheels, or zipper problems. Note each issue immediately and photograph damage from multiple angles. Write brief notes: location, size, and suspected cause. Prioritize repairs by usability impact so you can decide what to fix first.
- Record — timestamp photos and short descriptions.
- Rate — classify damage as cosmetic, functional, or critical.
- Plan — list steps or parts needed and estimate time.
Keep records for reference, warranty claims, or deciding if professional help is wiser.
Stock These Essential Home Luggage-Repair Tools
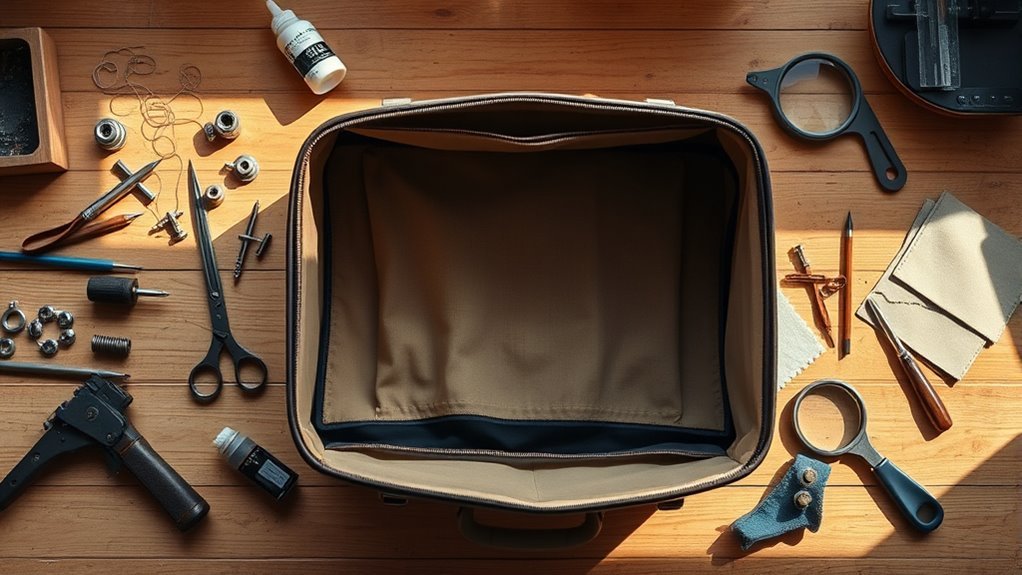
Before you start repairs, gather a compact kit so you won’t be hunting tools mid-job: a multi-bit screwdriver, needle-nose pliers, a seam ripper, heavy-duty thread and curved upholstery needles, a roll of strong tape (duct and fabric), a few zip ties, replacement zipper pulls and slider stops, a small selection of bolts/washers/screws, superglue and a plastic/metal epoxy, and a tire patch kit or spare wheel parts for wheeled bags.
Keep items organized in a small box or pouch. Label compartments, inspect supplies before each trip, and restock consumables.
With this kit you’ll tackle common fixes quickly and avoid unnecessary delays.
Must-Have Replacement Parts to Keep on Hand
When you’re prepping for repairs, keep a small stash of high-wear replacement parts so you can fix common failures on the spot: extra zipper sliders and pulls, spare teeth/stopper sets, replacement wheels and axles for rolling bags, spare buckles and cam straps, a few lengths of matching nylon webbing, and a couple sets of small screws, rivets, and washers.
Keep parts organized in labeled bags so you grab what you need fast. Focus on matching sizes and materials; mismatched components cause failures. Prioritize mobility, closures, and attachment hardware.
Store a tiny tool kit alongside.
- Wheels
- Zippers
- Buckles
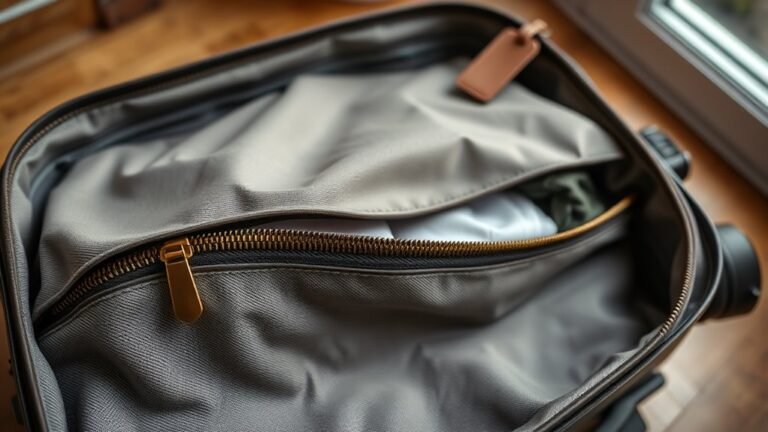
Diagnose Zipper Problems on Soft and Hard Shells
Though zippers look simple, they fail in a few predictable ways, so start by inspecting teeth, sliders, and stitching to pinpoint the issue quickly.
Check for missing, bent, or misaligned teeth on fabric and molded plastic chains; gaps mean replacement or realignment. Wiggle the slider to detect looseness or a split that won’t mesh teeth properly.
On hard shells, confirm the zipper tape sits flat in its channel and that mounting rivets or screws haven’t loosened. Look for frayed tape, detached stops, or foreign debris.
Note the exact failure before choosing repair parts or methods.
Jammed Zippers? Fast Fixes to Try Now
If your zipper’s stuck, don’t panic — many jams have quick fixes you can try with things around the house. You’ll want to inspect the teeth for fabric or debris and work gently to avoid bending metal.
- Apply a lubricant like graphite pencil, soap, or candle wax to the teeth, then gently move the slider back and forth.
- Use tweezers to free trapped threads or fabric caught at the base, holding the zipper steady as you pull.
- Tighten a loose slider slightly with pliers if it’s slipping, testing movement after small adjustments.
Replace a Zipper Slider Step by Step
Ready to swap out a stubborn slider? First, unzip fully and remove any stops at the zipper ends with pliers.
Slide the old slider off; cut it off if stuck. Match and buy the correct-size replacement slider.
Slide off the old slider—cut it free if needed—then match and buy the correct-size replacement.
Align the new slider with the teeth, feeding both sides evenly until it grips. Test by moving it gently up and down; if it skips, realign teeth and try again.
Crimp or reinstall zipper stops to prevent the slider from coming off.
Finally, lubricate lightly with wax or graphite for smooth action. Inspect for proper closure across the full zipper length.
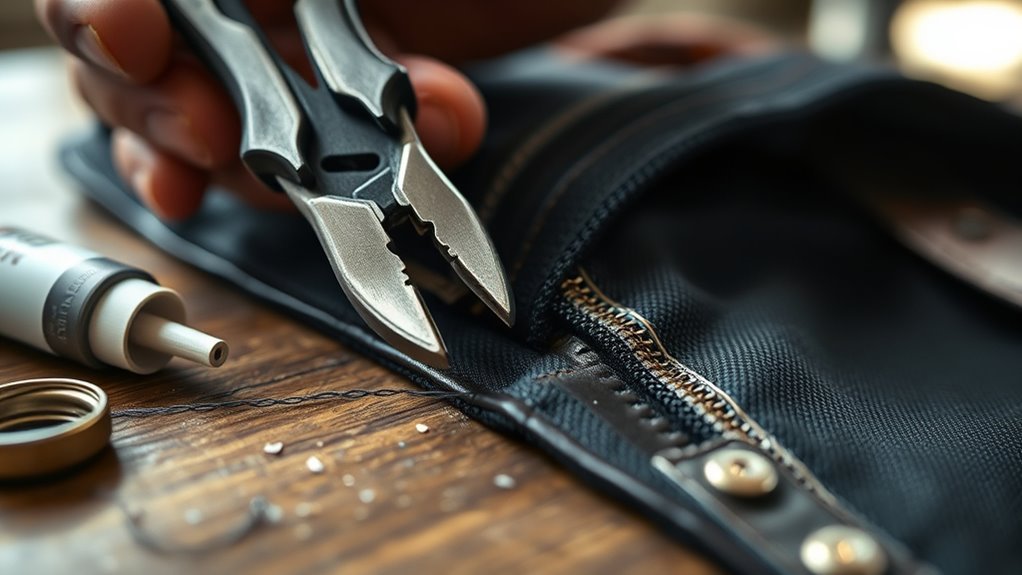
Temporarily Repair Missing or Torn Zipper Teeth
When a few teeth are missing or torn you can often get the zipper working long enough to get home or to a repair shop by creating a temporary stop and realigning the remaining teeth; you’ll need pliers, a replacement stop (or a crimped paperclip), and patience.
Follow these steps:
- Pinch a new stop into place just past the damaged area so the slider can’t pass over gaps.
- Realign misaligned teeth by gently squeezing them closed with pliers and running the slider back and forth slowly.
- Test cautiously; if it snags, move the stop slightly or switch to a proper replacement.
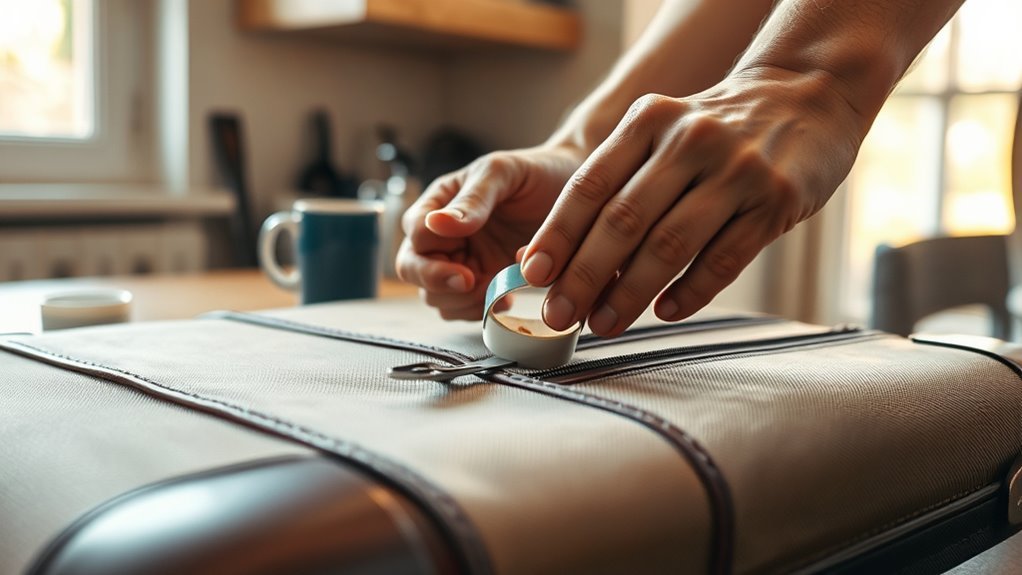
Patch Fabric Rips Without Sewing
First, clean the ripped area thoroughly so dirt and loose threads won’t keep adhesives from sticking.
Then, pick a fabric glue or an iron-on patch designed for luggage and follow the product’s instructions for application.
Press and let it cure fully before using the bag again.
Clean And Prepare Area
Before you patch a fabric rip without sewing, clear and clean the area so adhesives will bond properly. Remove loose threads and debris with tweezers, brush, or vacuum. Trim frayed edges close to the fabric without creating new holes. Degrease and sanitize the surface using isopropyl alcohol on a lint-free cloth; let it fully evaporate.
- Inspect: check backing, seams, and surrounding stress points.
- Flatten: press fabric smooth, align torn edges, and secure with clips if needed.
- Test: dab a small adhesive amount off to the side to confirm no staining.
You’re now ready to apply a patch.
Use Fabric Glue Patches
If you’re skipping stitches, fabric glue patches give a strong, quick repair that stays flexible and won’t bulk up seams.
Clean the tear and surrounding fabric, remove loose threads, and let the area dry.
Cut a patch slightly larger than the rip, round the corners to prevent peeling, and choose a glue rated for nylon or polyester if your luggage uses synthetic fabric.
Apply a thin, even glue layer to the patch or fabric per instructions, press firmly, and weight it while curing.
Trim excess, test the bond gently, and reinforce high-stress spots with another patch if needed.
Sew a Reinforced Patch for Canvas Bags
When a tear or worn spot shows up on a canvas bag, you’ll want a reinforced patch that restores strength without adding bulk.
Cut a patch from matching canvas plus a smaller nylon or interfacing layer. Pin layers over the damage, aligning grain for strength.
- Prep: trim fray, iron interfacing, mark stitch lines.
- Sew: use heavy thread, backstitch start/end, stitch closely around edges and in an X or grid across the patch.
- Finish: trim excess, apply a dab of fray sealant, and press.
Test the repair gently; the layered stitch pattern distributes stress and lasts.
Restore Worn or Broken Handles and Grab Straps
Because handles and grab straps take the brunt of hauling, you’ll want to assess wear quickly and decide whether to reinforce, replace, or reattach them. Inspect stitching, rivets, and attachment points; tug gently to locate weak spots.
For frayed fabric, trim loose threads and apply a leather or fabric patch, stitching around edges with heavy-duty thread.
Replace broken webbing using a matching strap and bar-tack or box-and-X stitch for strength.
For loose rivets, use a rivet setter or swap them with new ones sized to the original holes.
Finish by treating leather with conditioner or sealing fabric seams.
Replace Telescoping Trolley Handles Yourself
You can replace a broken telescoping trolley handle yourself with a few basic tools and the right replacement parts.
I’ll walk you through the step-by-step replacement so you can remove the old assembly, fit the new one, and secure it properly.
Follow the instructions carefully to avoid damaging the carry case or the new handle.
Tools And Materials
Before you start, gather the right tools and parts so the repair goes smoothly: a replacement telescoping handle sized to your suitcase, a set of screwdrivers (Phillips and flathead), hex/Allen keys, needle-nose pliers, a rivet gun or pop rivets if needed, masking tape, a small torque screwdriver or driver bits, and a soft cloth to protect finishes.
You’ll also want spare screws or rivets, replacement end caps, and manufacturer-specific brackets if required. Keep components organized and labeled. Prioritize quality parts to avoid repeat fixes.
- Inspect parts
- Organize workspace
- Protect finishes
Step-By-Step Replacement
With your tools and parts laid out and finishes protected, start by fully extending the current handle and inspecting how it’s attached—note screw heads, rivets, or end-cap clips so you know what to remove first. Remove fasteners methodically, keeping parts organized.
Slide out the old tubes; loosen any internal catches or springs. Fit the new telescoping assembly into the casing, aligning guide rails and locking detents. Reinstall screws or replace rivets, testing extension and retraction as you go.
Trim or refit end caps, seal gaps with tape or adhesive if needed, and perform a final load and lock test before regular use.
Diagnose Noisy, Stuck, or Wobbly Luggage Wheels
When your suitcase drags, squeaks, or veers, don’t ignore the wheels—diagnosing the problem first saves time and prevents further damage. Start by rolling the bag on a flat surface and noting sound, resistance, and wobble.
Inspect visible debris, cracked housings, or loose fasteners. Check axle play by lifting one corner and spinning the wheel; feel for rough spots or grinding.
- Listen: identify squeak vs. scrape to narrow causes.
- Visual: spot cracks, hair, or trapped zippers.
- Manual: test rotation and side-to-side play to locate looseness.
Remove, Clean, and Lubricate Spinner Wheels
Now that you’ve identified what’s wrong, remove the spinner wheels to get at the bearings and housing for a proper clean and lube.
First, retract the handle and flip the case; locate axle caps or screws and keep parts organized.
Pull wheels straight off or unclip retaining rings with pliers.
Wipe away dirt and old grease with a rag and isopropyl alcohol; use a toothbrush for crevices.
Inspect bearings and housing for damage.
Apply a drop of light machine oil or silicone lubricant to bearings and rotate wheels to distribute.
Reassemble in reverse order, ensuring smooth, quiet rotation before travel.
Replace Luggage Wheels: Tools and Parts Options
When you’re ready to replace luggage wheels, first identify the wheel type and size so your new parts match the original fit and load rating.
You’ll need basic tools like screwdrivers, pliers, and possibly a hex key or rivet tool, plus replacement wheels, bearings, and fasteners sized to your suitcase.
I’ll walk you through choosing compatible parts and the right tools for common wheel assemblies.
Wheel Types And Sizes
Luggage wheels come in a few common types—inline skate, spinner, and fixed—that affect how your bag rolls and what replacement parts you need, so you’ll want to identify which style you have before ordering tools or components.
Measure wheel diameter, axle type, and mounting bracket spacing to match replacements.
Note material—hard plastic, rubber, or polyurethane—since wear and noise differ.
Check whether wheels are sealed bearings or simple bushings; that determines longevity.
Consider wheel count and placement for load distribution.
- Match type
- Measure precisely
- Note material and bearing style
Tools And Replacement Parts
Before you start, gather the right tools and replacement parts so you don’t stop halfway through a repair. You’ll need a screwdriver set (Phillips, flathead, and Torx), small socket wrench, pliers, needle-nose pliers, hex keys, and a utility knife.
Keep replacement wheels matching size and mounting style—inline, swivel, or single-stem—and check axle diameters and hole spacing.
Bring spare rivets, screws, washers, and nylon bushings. For molded hubs, have epoxy or plastic weld. A quick-release wheel kit speeds swaps.
Store everything in a small toolbox and label parts to avoid confusion during reassembly.
Fix Broken or Bent Wheel Housings
If a wheel housing is cracked, bent, or pulling away from the shell, you can often restore its strength without replacing the entire luggage. You’ll need to assess damage, remove the wheel assembly, and clean the area.
Use epoxy or plastic-weld for cracks; clamp until cured. For bent housings, gently reshape with padded pliers or heat (on ABS/polycarbonate) and refasten hardware. Reinforce inside with a small metal or plastic plate bonded and riveted if needed.
Use epoxy or plastic-weld for cracks, gently reshape bent housings, and reinforce inside with a bonded plate.
Check alignment and spin freely before reassembly.
- Inspect thoroughly
- Repair and reinforce
- Test function and secure
Repair Split or Cracked Hard-Shell Corners
First, check how deep and wide the crack is so you know whether a patch or a full corner replacement is needed.
Pick materials that match your shell—epoxy or plastic welding for hard plastics, reinforced tape or a replacement corner for polycarbonate.
Then reinforce the repair from the inside, smooth and paint or seal the outside, and let it cure before using the bag.
Assess Damage Extent
When you inspect a split or cracked hard-shell corner, work methodically so you can judge whether a simple patch will do or if the shell needs replacing. Check the crack length, depth, and whether it flexes when you press around it. Look inside for fractured internal ribs or loose foam. Note edge separation and zipper alignment.
- Measure: length and width to estimate repair scope.
- Test: press and flex to reveal hidden structural failure.
- Record: photograph and note materials for parts that may require replacement.
Decide based on structural risk: if integrity’s compromised, replace the shell.
Choose Repair Materials
Now that you’ve assessed the damage and decided repair is viable, pick materials that match the shell’s plastic type and the level of structural support needed.
Identify whether the corner is ABS, polycarbonate, or polypropylene; use adhesives formulated for that plastic.
For small splits, flexible epoxy or plastic-specific superglue works.
For larger cracks or missing chunks, get a two-part epoxy putty or plastic welding kit and backing material like fiberglass cloth or scrap plastic.
Have sandpaper, Isopropyl alcohol, and clamps ready.
Choose color-matching filler or paint later.
Prioritize strength and compatibility to prevent further cracking.
Reinforce And Finish
Before you bond the split, make sure the area is clean, dry, and sanded so adhesives and backing materials will grip properly. You’ll apply backing, adhesive, and finish to restore strength and appearance. Choose a flexible epoxy or plastic-welding adhesive, cut a reinforcing patch to fit behind the crack, and clamp while curing.
- Prep: sand edges, remove dust, test fit patch.
- Bond: spread adhesive, seat patch, clamp per instructions.
- Finish: sand flush, fill gaps, paint or seal to match.
You’ll inspect, test flex, and touch up as needed to ensure durability and a neat look.
Replace Molded Corner Guards and Bumpers
Start by inspecting the damaged corner guards and bumpers to see whether they’re cracked, worn through, or just loose; this tells you if you need replacement parts or only reattachment. If replacements are needed, remove old pieces, clean the area, match new guards by size and shape, and secure them with adhesive or small screws. Press firmly and let cure.
| Shape | Wear | Fix |
|---|---|---|
| Rounded | Scuffed | Glue |
| Angled | Cracked | Replace |
| Flat | Thin | Patch |
| Reinforced | Loose | Screw |
| Rubber | Split | Swap |
Repair Broken Latches, Locks, and Clasps
When a latch, lock, or clasp fails, you can often restore function without replacing the whole suitcase by diagnosing whether the problem is mechanical (broken parts, stripped screws), alignment-related, or just gummed up with dirt.
Once you know the cause you’ll pick the right fix—tighten or replace fasteners, realign catches, clean and lubricate mechanisms, or swap damaged components—and have the case secure again.
Identify the issue, then tighten, realign, clean, lubricate, or replace parts to restore secure closure.
Inspect parts, gently pry open housings, and test movements. Use small screwdrivers, needle-nose pliers, and light oil. Prioritize safety and tested replacements.
- Diagnose
- Repair or replace
- Test thoroughly
Reset and Re-Key a TSA Lock Replacement
If your suitcase lock has failed or you’ve installed a new TSA-approved replacement, you can reset and re-key it yourself with a few small tools and a bit of patience. Locate the reset pin or button, set dials to factory code, press and hold the pin, change to your chosen combination, then release. For keyed models, remove the cylinder retaining screw, swap in the new keyed core, and secure it. Test the mechanism several times. Keep your code recorded in a safe place.
| Tool | Purpose |
|---|---|
| Screwdriver | Access cylinder |
| Pin/Probe | Reset dials |
| New core | Re-key lock |
Deal With Stubborn or Jammed Sliders and Zippers
Though stubborn sliders and jammed zippers can seem hopeless, you can usually free them with a few simple steps and common tools.
Inspect the track and slider for fabric, thread, or debris, then gently pull fabric out with tweezers.
Carefully check the zipper track and slider for caught fabric or debris, and gently remove it with tweezers.
Lubricate metal teeth with a graphite pencil or a tiny dab of paraffin; avoid oils on nylon.
Work the slider slowly back and forth while aligning teeth.
- Clear obstructions
- Lubricate sparingly
- Realign and test
If a slider is split, replace it using a matched-size replacement clip-on slider; crimp gently with pliers and retest.
Repair Interior Linings and Reattach Pockets
Check the lining for tears, stains, or detached seams so you know whether you need a patch, resewing, or a full replacement.
Pick the repair method that fits the damage and your skills—fabric glue or iron-on patches for small rips, and stitching for larger or load-bearing areas.
When reattaching pockets, secure them with strong thread and reinforced seams so they’ll hold up to travel.
Assess Lining Damage
When you open the suitcase, turn the bag inside out or spread the lining flat so you can see seams, pockets, and any worn spots clearly. Check for tears, detached pocket edges, stains, and frayed stitching. Note where fabric has thinned or where padding shows.
- Prioritize structural damage that lets contents show through or shifts padding.
- Mark pocket detachment points and seam gaps you’ll need to resecure.
- Estimate material salvageability: small tears vs. large replacements.
Record measurements and take photos. That lets you plan repairs efficiently without guessing the extent or necessary supplies.
Choose Repair Method
Now that you’ve mapped out tears, seam gaps, and detached pockets, pick the repair method that matches each problem and your skill level.
For small fabric tears, use fusible web or fabric glue for a quick, neat fix; choose a patch when material is weak.
Open seams need needle and thread—use strong polyester or nylon and backstitching—or a sewing machine if available.
For foam or padding separation, use spray adhesive or contact cement sparingly. Match adhesives to lining material and allow full cure.
When in doubt, practice on scraps; prioritize durability over appearance for frequently used compartments.
Reattach Pocket Securely
If a pocket has come loose, you can reattach it so it holds up to frequent use by matching the repair method to the pocket type and lining material. Inspect seam damage and fabric: thin linings need fusible interfacing, heavy canvas benefits from stitched reinforcement. Use matching thread and a sharp needle or a sewing machine if available.
For stubborn areas, add a backing patch to spread stress.
- Assess: note fabric, pocket stress points, and closure type.
- Prepare: trim loose threads, apply interfacing or patch.
- Sew: stitch with even, reinforced seams and test strength.
Replace or Reposition Dividers and Straps
Because dividers and straps keep your belongings organized and secure, you’ll want to check them first when they loosen, tear, or shift out of place. Inspect seams, Velcro, buckles, and stitch points.
If a strap detaches, remove damaged stitching and sew it back using nylon thread and a sturdy needle, or replace with a matching webbing strap and new buckles.
For torn dividers, trim ragged edges, reinforce with fabric tape or a patch, or replace the panel entirely using same-weight fabric and reinforced seams.
Adjust repositioned dividers so they lie flat and straps run without twisting for reliable, long-lasting use.
Restore Scuffed Polycarbonate and ABS Shells
Start by evaluating the surface damage so you know whether scratches are superficial or need deeper work.
Clean and degrease the shell thoroughly to remove oils and grit that will interfere with repairs.
Finish by carefully buffing and polishing the polycarbonate or ABS to restore shine and blend scuffs.
Assess Surface Damage
Wondering how bad that scuff really is? You’ll inspect the shell visually and by touch to judge depth and spread. Light surface marks may polish out; deeper gouges need filler or patching. Note any cracking or separation at seams—those mean structural repair.
Use this quick checklist to decide next steps:
- Surface: run your fingernail—if it catches, it’s deeper than a polish.
- Extent: map how far scuffs spread to estimate materials and time.
- Structural: look for cracks, flexing, or exposed layers that require reinforcement.
Record findings before you clean so you don’t miss hidden damage.
Clean And Degrease
How will you remove the grime without damaging the shell? Start by rinsing loose dirt with lukewarm water.
Mix a few drops of mild dish soap in water, dampen a microfiber cloth, and wipe in gentle strokes.
For grease, use isopropyl alcohol on a clean cloth and test a hidden spot first.
Avoid abrasive pads or solvents like acetone.
Use cotton swabs for seams and zippers.
Rinse soap residue with a damp cloth and dry thoroughly with a soft towel.
Let the shell air-dry fully before any repair or polishing step to guarantee products adhere properly.
Buff And Polish Shell
Once your shell’s clean and dry, you can buff out light scuffs and restore shine with a few simple tools and steady motions. Use a soft microfiber cloth, a bit of plastic polish or toothpaste, and gentle pressure. Work small areas in circular motions, then wipe residue.
- Prep: remove dirt, mask edges.
- Buff: apply polish, rub evenly, inspect.
- Seal: wipe clean, add a thin carnauba paste for gloss.
Don’t press hard or use abrasive pads. Deep gouges need filler or professional repair. Repeat periodically to maintain protection and luster.
Repair Leather Trim, Handles, and Straps
When leather trim, handles, or straps start to crack, stretch, or detach, you can often restore them without replacing the entire piece; start by cleaning the leather, evaluating the damage, and gathering the right glue, stitching tools, and conditioners. You’ll glue delaminated layers, stitch torn seams with heavy thread, and edge-condition faded areas to restore suppleness. Reinforce weakened attachment points with patches or rivets, let adhesives cure fully, and finish with balm to protect. Test strength before travel. Small fixes keep a beloved bag usable and meaningful.
| Pain | Relief |
|---|---|
| Loss | Repair |
| Fear | Confidence |
Remove Stains, Odors, and Mildew From Interiors
Start by spot cleaning stains with a mild detergent or upholstery spray so you don’t soak the lining. After treating spots, deodorize with baking soda or a fabric-safe spray to neutralize odors.
Finish by airing the bag thoroughly and using a fan or low-heat dryer setting to prevent mildew.
Quick Spot Cleaning
Wondering how to tackle stains, odors, or mildew inside your luggage without a full deep clean? You can handle most spots fast: blot fresh spills, sweep loose debris, and use gentle cleaners on a microfiber cloth. Test any solution on a hidden seam first. Focus on small areas, not the whole lining.
- Mix mild detergent with water, dab, then blot dry.
- Use isopropyl alcohol for sticky residue; ventilate the area.
- Apply diluted vinegar to mildew spots briefly, then rinse and blot.
Finish by letting the spot air-dry while keeping the suitcase open.
Deodorize And Dry
If your suitcase still smells or shows mildew after spot cleaning, tackle odors and moisture next so stains don’t set and mold won’t spread. Open everything, remove liners and pockets if possible, and vacuum seams.
Mix one part white vinegar to three parts water in a spray bottle; mist interiors lightly and let sit 10–15 minutes before blotting.
For stubborn odors, sprinkle baking soda, leave overnight, then vacuum.
Dry fully in sunlight or near a fan—avoid direct heat that can warp plastic.
If mildew persists, repeat with diluted hydrogen peroxide on a hidden patch first.
Store dry with silica packets.
Reinforce Weak Seams and Stitching
When seams start to fray or stitching loosens, you’ll want to reinforce them before the damage spreads and ruins the bag’s structure. Inspect seams, remove loose threads, and decide if hand-stitching or a machine is best.
Use heavy nylon or polyester thread and a sharp needle for durability. Sew tight, even stitches, backstitching at ends to lock.
Apply seam sealant or clear fabric glue for extra hold on fabric luggage. For leather, use waxed thread and a saddle stitch.
Follow this quick checklist to prioritize repairs:
- Clean area
- Choose thread/type
- Reinforce and seal
Temporary Emergency Fixes Checklist for Travel Day
Because travel days are hectic, you’ll want a compact plan for quick, reliable fixes that keep you moving. Pack a tiny kit: strong tape, zip ties, a travel sewing kit, needle-tip pliers, safety pins, fabric glue sachets, and a spare strap.
Inspect wheels, zippers, handles, and seams at check-in. Use tape for cracked shells, zip ties for broken handle hinges, and safety pins to secure torn lining until you can sew.
Fasten loose wheels or external pockets with fabric glue or tape. Keep receipts and photos if you need later repairs, and stash the kit in an outer pocket for fast access.
Salvage Valuables if Luggage Is Beyond Repair
Should your bag be ruined beyond quick repair, act fast to salvage what matters most: pull out passports, cash, credit cards, electronics, medications, and any irreplaceable documents or jewelry first.
Then sort clothes and toiletries by priority so you can pack a temporary carry-on. Check pockets, seams, and hidden compartments; use a flashlight.
Photograph damaged items for claims. Keep small valuables on your person. If you need to redistribute items, use waterproof bags or zip ties.
Prioritize essentials.
- Secure IDs and money.
- Protect electronics and meds.
- Photograph and document damage.
Choosing OEM Parts, Universal Kits, or 3D Prints
If you want a repair that lasts, pick parts with fit and function in mind: OEM components match the original specs, universal kits trade perfect fit for flexibility and lower cost, and 3D-printed pieces let you customize geometry for hard-to-find or obsolete parts.
Decide by evaluating damage, load, and finish needs. Choose OEM for structural or load-bearing parts like frames and handles.
Evaluate damage, load, and finish—use OEM for structural, load-bearing parts like frames and handles.
Use universal kits for zippers, wheels, or straps when exact match isn’t critical.
Consider 3D prints for small brackets or adapters; pick durable filament and refine designs for strength.
Test fit before final installation.
Where to Buy Affordable Parts and Tools
When you’re hunting for affordable parts and tools, start with online marketplaces and specialty retailers that cater to luggage repair—you’ll find OEM replacements, universal kits, and basic tool sets at competitive prices.
Check local hardware stores for low-cost screwdrivers, rivet tools, and adhesive.
Thrift shops and salvage yards sometimes carry usable components from discarded suitcases.
Compare prices, shipping, and return policies before buying.
- Online marketplaces — broad selection, user reviews, price filters.
- Specialty retailers — higher quality, luggage-specific parts, warranties.
- Local sources — immediate pickup, negotiating leverage, eco-friendly reuse.
Buy what fits the repair and skips unnecessary extras.
Complete Luggage-Overhaul Checklist
A single, systematic checklist keeps you from missing small fixes that turn into big problems later, so start by laying out the suitcase’s major systems—shell, handles, zippers, wheels, frame, interior, and hardware—and note the condition of each, required parts, tools, and estimated time for repair.
Inspect shell for cracks, dents, or scuffs. Test telescoping handle and side grips for play. Run zippers and check sliders, teeth, and stops. Spin wheels and examine axles. Check frame alignment and seams. Look inside for torn lining, straps, or mold.
List parts, prioritize tasks, and schedule work in logical order.
Document Repairs for Warranties and Insurance
Why document each repair step? You’ll prove work done, preserve warranty claims, and simplify insurance reimbursements. Photograph damage, progress, and final results; timestamp files and back them up. Keep clear notes of parts, costs, and methods used so providers can verify repairs.
- List parts, model numbers, receipts.
- Photograph stages with dates and captions.
- Save communications, estimates, and tracking info.
When filing a claim or warranty request, submit your concise packet: photos, dated notes, and receipts. That organized evidence speeds approvals and keeps you protected if disputes arise.
Frequently Asked Questions
Can I Safely Repair Luggage With Mold or Insect Infestations at Home?
You shouldn’t; mold and insect infestations can pose health and structural risks, so don’t try extensive repairs at home. You should isolate the luggage, wear protective gear, and consult professionals or dispose of severely contaminated items.
How Do I Fix Electronics Integrated Into Modern Smart Suitcases?
You’ll diagnose the smart suitcase electronics by checking power, fuses, wiring, and connectors, then update firmware, replace faulty modules or batteries, and reseal with proper adhesives; if water or pests damaged boards, consult a pro for repair.
Will Home Repairs Void My Luggage Manufacturer Warranty?
It depends: you’ll likely void the warranty if you open or alter hardware, use nonapproved parts, or ignore manufacturer repair instructions; check the warranty terms and contact the maker first to confirm authorized repair options and preserve coverage.
How Can I Dispose of Irreparable Luggage Responsibly and Sustainably?
You should donate salvageable parts, recycle shell materials through local programs, upcycle fabric into bags or mats, return to manufacturer take-back schemes, or use textile recycling services — don’t trash; choose responsible disposal options.
Are There Legal Issues Replacing TSA Locks or Modifying Security Features?
Yes — you can replace TSA locks or modify luggage, but you shouldn’t defeat required airport security features; tampering that obstructs inspection can violate laws. Check airline and country rules, and keep locks TSA-approved to avoid issues.
Conclusion
You’ve got the basics to handle most luggage problems on the fly or decide when to call a pro. Inspect damage, document it, and carry a small toolkit so you can patch zippers, wheels, and handles quickly. Weigh repair vs. replace based on cost, warranty, and trip importance, and keep receipts or photos for claims. With a little prep and the right parts, you’ll keep traveling without major delays or costly surprises.