How to Remove Stickers From Luggage Easy Methods
You can quickly remove stickers from luggage by first deciding whether to keep the label, then checking the material so you don’t damage it. Warm the adhesive with a hair dryer, peel a corner slowly at a low angle, and use waxed floss or a plastic scraper on hard shells. Clean residue with rubbing alcohol, mild soap, or a light oil, testing solvents on a hidden spot first. Follow these steps and you’ll get cleaner luggage — keep going to learn specific tips.
Quick Answer: Remove Stickers From Luggage
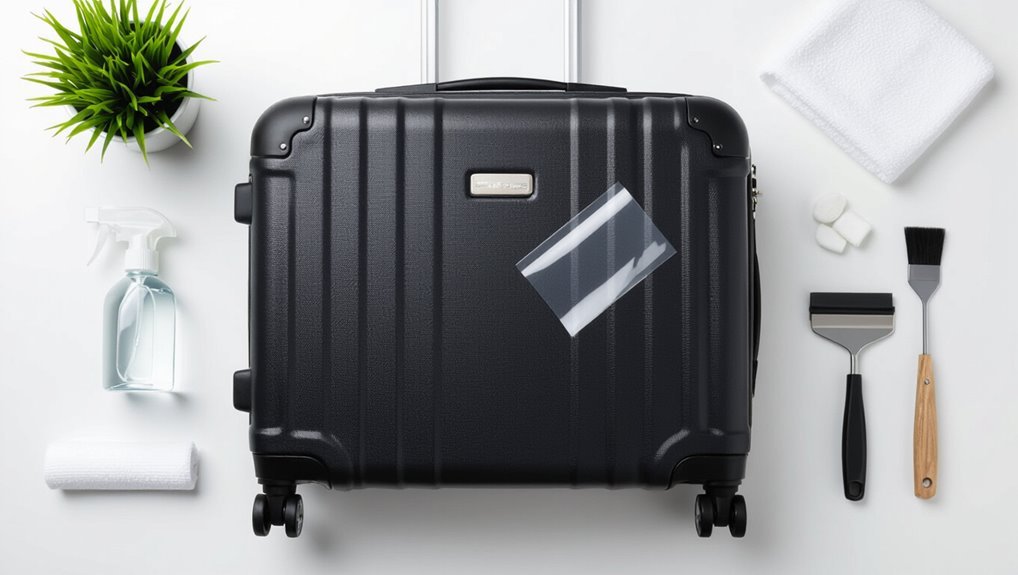
Start by peeling up a corner of the sticker and gently lifting it—if it resists, warm it with a hair dryer to loosen the adhesive.
Once loosened, peel slowly at a low angle.
Peel slowly at a shallow angle to lift the sticker cleanly without tearing or leaving residue.
Use adhesive remover or rubbing alcohol for residue, then wipe with a soft cloth.
Finish by cleaning the surface with mild soap and drying to restore your luggage’s appearance.
Decide: Remove Sticker Or Preserve Label
Now that the sticker’s off (or ready to be), decide whether you want to remove it entirely or keep it as a label or memento.
Consider value, sentimental meaning, and resale impact. If it’s damaged or sticky, remove it.
If it tells a story or aids identification, preserve it—trim edges, seal with clear tape or a protective patch.
Make a deliberate choice.
Check Your Luggage Material First
Because different fabrics and finishes react differently to solvents, abrasives, and heat, check your luggage material before you try removing a sticker.
Inspect whether your case is hard shell, soft fabric, leather, or coated canvas. That determines which methods you’ll avoid to prevent discoloration, warping, or surface damage.
Note seams, trims, and any tags that need extra care.
Test Solvents Safely On A Patch
Pick a hidden spot on your luggage and apply a small amount of solvent to a patch.
Wait the recommended time, then inspect the surface for color change, swelling, or finish damage.
If it looks OK, you can proceed to larger areas; if not, try a gentler cleaner.
Choose A Hidden Spot
Before you apply any solvent, find a small, inconspicuous area on the luggage—inside a seam, under a handle, or along the interior lining—and test there first.
You’ll confirm compatibility and avoid damage.
Check these points quickly:
- look for hidden seams or folds
- inspect textured vs. smooth finishes
- note colorfastness and finish change
Try Solvent On Patch
Now that you’ve found a hidden spot that won’t show damage, it’s time to try solvents on a small patch to see how they’ll react. Dab a cotton swab, wait a minute, then blot. If no color lift or finish change, proceed. If unsure, stop and choose a milder solvent.
| Solvent | Test Time | Result |
|---|---|---|
| Rubbing alcohol | 60s | OK |
| Goo Gone | 60s | OK |
| Vinegar | 60s | Check |
Wait And Inspect Surface
After you dab the solvent, wait about a minute and then gently blot the area to see if the finish or color shifts; if you see any lifting, discoloration, or tackiness, stop and try a milder product or a different spot.
Then inspect closely and proceed cautiously.
- Check for color change.
- Feel for tackiness.
- Repeat elsewhere if safe.
Remove Paper Stickers With Soapy Water
1 simple tool you probably have is plenty for removing paper stickers: a bowl of warm soapy water and a soft cloth.
Dip the cloth, wring it so it’s damp, then press onto the sticker for a few minutes to soften adhesive.
Gently rub in circular motions until the paper lifts. Rinse residue, blot dry, and repeat if needed.
Loosen Vinyl Decals Using Dental Floss
Before you start, gather a length of waxed dental floss and a soft cloth so you’ve got everything on hand.
Slide the floss gently behind a corner of the vinyl decal and work it back and forth to separate the adhesive from the luggage surface.
Once the sticker lifts, wipe away any residue carefully with the cloth.
Gather Supplies First
When you’re ready to remove vinyl decals, gather strong dental floss, a pair of gloves, and a soft cloth so you can work cleanly and avoid scratching the luggage.
Prepare a small bowl of warm soapy water to soften edges and a bottle of isopropyl alcohol for residue. Keep these essentials handy:
- Dental floss
- Gloves
- Soft cloth
Slide Floss Behind Sticker
Gently work a length of dental floss under the edge of the sticker, holding one end taut while sawing the floss back and forth to separate the vinyl from the luggage surface.
Pull steadily, keeping the floss close to the luggage to minimize scratching. Use fresh floss sections as adhesive lifts, and stop if the surface resists to avoid damage.
Remove Residue Carefully
After you’ve loosened the sticker with floss, tackle the sticky residue left behind by working the floss under the softened edges and pulling it across the adhesive to lift as much as possible.
Use gentle, even strokes and a clean section of floss as needed.
- Scrape remaining bits with the floss
- Wipe with rubbing alcohol
- Rinse and dry the area
Use Heat (Hair Dryer) To Loosen
Aim a hair dryer at the sticker to warm the adhesive until it softens, then peel gently with your fingernail or a plastic scraper—moving the heat around if one edge resists. Work slowly to avoid melting or warping. If residue remains, reheat and scrape.
| Tool | Temp | Tip |
|---|---|---|
| Hair dryer | Medium | Keep moving |
| Scraper | Low risk | Use plastic |
| Finger | Safe | Gentle peel |
Apply Rubbing Alcohol For Residue
Apply rubbing alcohol to a soft cloth or cotton ball and dab it onto the sticker residue until the adhesive starts to soften; you’ll see it darken or loosen within a minute or two.
- Rub gently in circular motions to lift residue without scratching.
- Wipe with a clean, damp cloth to remove alcohol and loosened adhesive.
- Repeat as needed, then dry thoroughly before packing.
Use Oils (Cooking Oil, WD‑40) Safely
Pick an oil that’s safe for your luggage finish—light cooking oil for plastics and fabric, or WD‑40 sparingly on metal and hard plastics.
Apply a small amount to soften the adhesive, let it sit a minute, then rub gently with a cloth.
Wipe the area with soapy water and dry thoroughly to remove any oily residue.
Choose Safe Oil Types
When removing stickers, choose oils that’re safe for both your luggage’s material and your skin.
Pick mild options, test discreetly, and avoid solvents that strip finishes.
Consider these choices:
- Light cooking oil — gentle on plastics and leather.
- Mineral oil — nonreactive, safe on most surfaces.
- WD‑40 — use sparingly, patch‑test first and protect your hands.
Apply And Soften Adhesive
Now that you’ve chosen a safe oil, use it to soften the adhesive by applying a small amount directly onto the sticker edges and letting it sit for a few minutes; this loosens the glue without scrubbing or harsh chemicals.
Gently lift a corner with a fingernail or plastic scraper, reapply oil if needed, and work slowly to avoid scratching or stretching the luggage surface.
Clean Residue Thoroughly
Scrub away remaining sticky residue by gently rubbing a small amount of your chosen oil—cooking oil or a spray like WD‑40—into the area with a soft cloth or cotton ball.
Letting it sit for a minute if the glue’s stubborn.
- Wipe oil away with a clean cloth.
- Wash surface with mild soap and water.
- Dry and inspect; repeat if needed.
Try Commercial Removers (Goo Gone, Alternatives)
Reach for a commercial adhesive remover like Goo Gone or a citrus-based alternative to dissolve stubborn sticker residue without excessive effort.
Test on a small, hidden area first to verify it won’t damage the finish.
Apply sparingly, let it sit per instructions, then wipe with a soft cloth.
Repeat if needed, then clean the surface with mild soap and water.
Remove Stickers From Hard-Shell Suitcases
When you’re working on a hard-shell suitcase, warm the sticker with a hair dryer to loosen the adhesive and peel it off gently.
If residue remains, use a bit of rubbing alcohol or a commercial adhesive remover and wipe with a soft cloth.
Protect the surface by testing cleaners in an inconspicuous spot and avoid abrasive scrubbing that can dull the finish.
Heat And Peel
Warm the adhesive with a hairdryer or heat gun set to low, then peel the sticker off slowly at a shallow angle; the heat softens the glue so it lifts cleanly from hard-shell luggage without scratching the surface.
- Heat briefly, keep tool moving.
- Start at a corner, pull gently.
- Stop if plastic warps, cool and retry.
Adhesive Residue Removal
If some sticky film stays after you peel the sticker, don’t worry—you can remove it without damaging your hard-shell suitcase. Use isopropyl alcohol, oil, or a gentle commercial adhesive remover; rub with a soft cloth, rinse, and dry. Test first in an inconspicuous spot.
| Product | Method | Drying Time |
|---|---|---|
| Alcohol | Dab, rub | 1–2 min |
| Oil | Soak, wipe | 5–10 min |
| Remover | Apply, rinse | 2–5 min |
Surface Protection Tips
Although stickers can be convenient, they can also scratch or dull your suitcase finish, so protect the surface before you peel anything off.
You should test methods on an obscure spot, work gently, and shield surrounding areas.
Consider these steps:
- Apply painter’s tape around the sticker edge.
- Use a soft cloth under tools.
- Heat gently with a hairdryer, not too close.
Remove Stickers From Fabric Or Soft Luggage
Start by gently peeling any loose edges of the sticker to see how firmly it’s attached; fabric and soft luggage need more careful handling than hard-shell suitcases because aggressive scraping or harsh solvents can damage fibers and coatings.
If it resists, soften adhesive with a warm, damp cloth or diluted dish soap, then lift slowly.
Use adhesive remover sparingly, test an inconspicuous spot first.
Remove Stickers From Leather And Faux Leather
For leather and faux leather, you’ll be gentler than you were with fabric: these surfaces can crack, discolor, or lose finish if you scrape or soak them.
- Test a hidden spot with mild soap and water first.
- Apply a cotton swab with rubbing alcohol or leather cleaner, blot gently.
- Condition the area afterward to restore oils and sheen, avoiding harsh chemicals.
When To Use A Plastic Scraper
When you should reach for a plastic scraper depends on the surface, the sticker’s age, and how much adhesive remains: use it on hard, nonporous shells like polycarbonate or ABS when the sticker is mostly intact or softened by heat, but avoid it on delicate finishes, fabrics, or leather where it can scratch or lift the finish.
Hold scraper at a low angle, pry gently, and stop if resistance increases.
Clean, Deodorize, And Restore Finish
Once you’ve removed the bulk of the sticker with a scraper or peel, you’ll want to clean and deodorize the area and restore the finish so your luggage looks and smells fresh.
Use mild soap, spot-treat odors, then condition or polish the surface. Suggestions:
- Clean with gentle soap and water, dry thoroughly.
- Neutralize odor with baking soda or spray.
- Apply appropriate polish or conditioner to restore shine.
Remove Dye Transfer From Labels
If colored labels or stickers have left behind bluish or red stains, you can usually lift the dye without damaging the luggage finish by using targeted cleaners and gentle agitation.
Test a mild solvent (rubbing alcohol or isopropyl) in an inconspicuous spot. Apply with a cotton swab, blotting—don’t rub—then rinse with a damp cloth.
Repeat sparingly until the tint fades.
Prevent Scratches, Fading, And Water Damage
Because luggage takes a beating in transit, you’ll want to shield it from scratches, sun fading, and water damage with simple preventive steps.
Use a hard-shell cover or sleeve, avoid overpacking to reduce abrasion, and store away from direct sun.
- Apply a protective film or clear tape on vulnerable spots.
- Use UV-resistant sprays for fabric.
- Keep dry with silica packs.
Quick Fixes At The Airport Or On-Road
Even with protective measures, stickers and labels still peel, tear, or smudge while you’re traveling, so it’s helpful to know quick fixes you can do right at the airport or on the road. Use tape to lift edges, rubbing alcohol for residue, or a credit card to scrape gently. Quick actions prevent permanent marks.
| Problem | Quick Fix |
|---|---|
| Peeling edge | Clear tape |
| Sticky residue | Rubbing alcohol |
| Smudged ink | Damp cloth |
| Small tear | Clear tape patch |
Prevent Stickers: Labeling And Packing Tips
To avoid sticker headaches, use removable luggage tags so you can swap out info without adhesive residue.
Wrap your bag in a clear protective cover or cling film to block labels from sticking directly to the surface.
These simple steps keep your luggage cleaner and make any needed sticker removal much easier.
Use Removable Luggage Tags
Anyone who travels regularly knows stickers and permanent tags can damage your bag and leave residue; use removable luggage tags instead.
You’ll protect finishes and avoid sticker removal later. Choose durable, peel-off tags that clip on securely.
Replace paper labels with reusable tags. Keep contact info simple and removable before storage.
- Buy reusable clip-on tags
- Peel tags before storing
- Use minimal contact info
Wrap In Protective Material
Wrap fragile or finish‑sensitive areas in protective material before you label or stow your bag, so stickers and stamps never get a chance to stick.
Cover seams, glossy surfaces, and zippers with clear tape, painter’s film, or a thin cloth secured by elastic bands.
Use removable sleeves for handles and ID windows.
You’ll prevent adhesive residue and protect finishes during transit.
Frequently Asked Questions
Can Sticker Residue Damage a Suitcase Warranty?
Yes, sticker residue can void your suitcase warranty if it damages the finish or alters original condition. Check the warranty terms, document the residue, and contact the manufacturer before attempting removal to avoid invalidating coverage.
Will Sticker Removal Void Airline Baggage Inspections?
No, removing stickers won’t void airline baggage inspections; you’ll still be subject to standard screening and inspections. Just avoid altering security seals or tampering with locked inspection indicators, and keep evidence of any authorized opening intact.
Can Stickers Harbor Bedbugs or Pests?
Yes — stickers can harbor bedbugs or pests if eggs or insects get trapped under edges or adhesive; you should inspect, peel and clean luggage promptly, and launder or heat-treat contaminated items to prevent infestations.
Are There Hypoallergenic Sticker-Removal Options?
Yes — you can use hypoallergenic options like oil-based gentle cleansers (olive or coconut oil), fragrance-free adhesive removers, or mild soap with warm water; you’ll test a tiny spot first and avoid harsh solvents to prevent irritation.
How to Remove Stickers From Zippers and Pull-Tabs?
You’ll peel gently, warm adhesive with a hair dryer, then use rubbing alcohol or adhesive remover on a cotton swab to dissolve residue; avoid soaking metal, dry thoroughly, and lubricate zipper teeth with graphite or silicone afterward.
Conclusion
You’ve got options for removing stickers from luggage, so pick what suits the material and whether you want to keep a label. Test solvents on an inconspicuous spot, use soapy water for paper residue, and tackle dye transfer gently to avoid fading or scratches. If you’re traveling, use quick fixes like rubbing alcohol or adhesive tape. For the future, label smartly and pack with protective layers to prevent stuck-on messes and damage.