How to Open Travelon Luggage Tags Step by Step
Find the latch or seam along the tag edge, then press, slide, or lift the tab to release the cover—no tools needed for most models. Flip open the cover or unzip the pouch, remove the ID card, update details, then reseat the card flat and snap or slide the cover until it clicks. For leather flaps loosen the snap, warm if stiff, and check straps or cables for damage before reattaching. Keep going to learn specific tag types and fixes.
Quick Answer: Open and Update Any Travelon Tag Fast
Open your Travelon tag in seconds by locating the small latch or sliding tab along the edge, then pressing or sliding it to release the cover—no tools needed.
Flip the cover, remove the ID card, update your contact details, and slide it back.
Make sure the card sits flat and the latch clicks. You’ll secure updated info quickly before travel.
Which Travelon Tag Do You Have? (Quick ID)
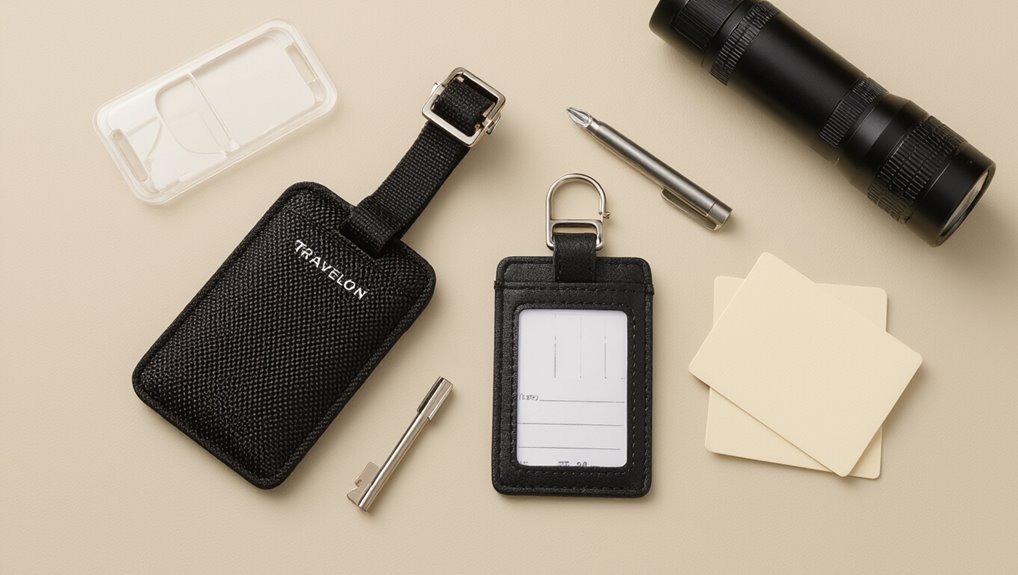
First, look at the tag’s shape and size to spot whether it’s a slim ID, thick protective case, or novelty shape.
Check how it attaches—strap, loop, or metal cable—since that affects how you’ll open and reattach it.
Note the material and closure type (plastic snap, zipper pouch, or leather flap) so you know what tools or steps you’ll need.
Tag Shape And Size
Look at the tag’s outline and size to identify which Travelon model you have; most tags fall into a few distinct shapes—rectangular with rounded corners, slim vertical ID cards, or compact square sliders—so matching the profile speeds identification.
Note dimensions, presence of windows, and any sliding panels. Compare those details to product images or listings to confirm the exact model before attempting to open it.
Attachment Style Type
1 quick check you can do is examine how the tag connects to your bag—Travelon uses a few distinct attachment styles (looped strap, metal chain, snap-on clip, and integrated strap) and recognizing which one you have tells you how it opens and what tools or motions you’ll need.
Check these common types so you can open or remove the tag correctly:
- Looped strap
- Metal chain
- Snap-on clip
- Integrated strap
- Elastic cord
Material And Closure
When you check the tag’s material and closure type, you’ll quickly narrow down which Travelon model you have and how to open it—plastic housings with snap closures behave differently from leather sleeves with a press-stud or zippered fabric holders.
Inspect edges, seams, and fasteners: snaps pop, press-studs lift, zippers unzip, and glued plastics may require gentle prying.
Match actions to materials for safe opening.
How to Tell a Plastic-Sleeve vs. Leather-Flap Tag
Curious how to tell whether your Travelon tag has a plastic sleeve or a leather flap? You’ll spot differences quickly by touch and look:
- Feel: smooth, slick for plastic; textured, flexible for leather
- Edge: welded seams on plastic; stitched edges on leather
- Transparency: plastic often clear; leather opaque
- Noise: plastic crinkles; leather softens
- Wear: plastic resists scuffs; leather shows patina
How to Identify a Clear Cardholder Travelon Tag
A clear cardholder Travelon tag is easy to spot once you know what to look for: it’s a transparent or semi-transparent pocket attached to the tag’s backing that shows the ID card without removing it, usually sealed around the edges and secured with a snap, zipper, or adhesive flap.
You’ll see the card through plastic, edges fused or stitched, and a visible opening for inserting the ID.
How to Spot a Snap-Closure Travelon Tag
Look for a small, visible snap mechanism on the tag where two plastic pieces meet so you can identify a snap-closure.
You’ll notice the clip is molded from rigid plastic rather than soft leather or fabric.
Pressing the snap should produce a quick-release action that pops the pieces apart.
Visible Snap Mechanism
When you inspect a Travelon tag for a snap closure, check the edges for a small, raised circular button or groove where the strap meets the tag body; that visible snap is usually centered and contrasts slightly in texture or color so you can spot it at a glance.
- Look for a round, raised button
- Note a matching indentation
- Feel for a firm click
- Observe slight color shift
- Centered alignment indicates snap
Plastic Clip Material
Noticing that raised snap or color shift helps, but feel and material give the clearest clue: snap-closure Travelon tags use a firmer, slightly stiffer plastic for the clip area so it resists bending and produces a definite click when you press it.
Run your thumb along the clip edge; if it feels rigid and textured rather than flimsy and smooth, you’re looking at a snap-style clip.
Quick Release Action
Feel for a distinct, tactile click as you press the clip—snap-closure Travelon tags are designed to release with a quick, decisive action rather than a sluggish slide.
You’ll notice immediate separation and a reset when you let go. Check these cues:
- Firm, audible click
- Single-handed operation
- Rapid, clean release
- No sliding track
- Visible spring mechanism
How to Recognize a Zippered Travelon ID Tag
If you’re trying to spot a zippered Travelon ID tag, look for a slim, rectangular pouch with a visible zipper track along one edge and a clear plastic window on the front for your ID card. You’ll also notice fabric backing, a small loop for attachment, and compact padding that protects the card.
| Feature | What to check |
|---|---|
| Window | Clear ID display |
| Zipper | Smooth track |
| Loop | Attachment point |
| Padding | Card protection |
Tools You Need for Travelon Tags (None to Household)
Now that you can spot a zippered Travelon ID tag, you’ll find that opening or maintaining it usually requires little more than items you already have around the house.
You’ll need minimal tools; most tasks use common items. Keep these handy:
- Small flathead or butter knife
- Toothpick or cotton swab
- Tweezers
- Soft cloth
- Spare key or paperclip
Safety Checks Before Opening Any Luggage Tag
Before you open a Travelon luggage tag, check its condition and surroundings so you don’t damage the tag or lose important contents.
Inspect for cracks, wetness, or pests; work on a clean, flat surface; guarantee good lighting; keep small parts contained; verify no sharp tools are nearby; and confirm any personal info is visible before you proceed.
Remove the Strap Without Damaging It
Start by locating the strap’s connection point and tensioning it slightly so you can see how it’s fastened; you’ll usually find a small buckle, snap, or keyed loop that releases with gentle pressure or a sliding motion.
- Inspect for wear or hidden release tabs
- Press gently while pulling the strap free
- Use a thin tool for tight loops
- Keep screws or clips contained
- Store strap safely for reuse
How to Open a Clear-Sleeve Travelon Tag
Once the strap is free and set aside, you can focus on the clear sleeve itself — the thin plastic pouch that holds your ID or itinerary. Slide the card toward the open edge, pinch the seam if needed, and lift gently. If stuck, use a fingernail to separate layers. Replace contents and reseal flat to avoid creases.
| Step | Action | Tip |
|---|---|---|
| 1 | Locate open edge | Work on flat surface |
| 2 | Pinch seam | Use fingernail |
| 3 | Slide card out | Go slowly |
| 4 | Inspect sleeve | Clear debris |
| 5 | Reseal | Smooth wrinkles |
How to Open a Leather-Flap Travelon Tag
To open a leather-flap Travelon tag, flip it over so the flap faces up and loosen any snap, button, or magnetic closure by pressing or pulling the fastener while holding the body steady; if the flap feels stiff, warm it briefly in your hands to soften the leather and make unfastening easier.
- Hold tag steady
- Locate closure type
- Press or lift gently
- Slide ID card out
- Close flap securely
How to Open a Snap-Closure Travelon Tag
If the leather-flap method didn’t apply because your Travelon tag uses a snap closure, you’ll handle it a bit differently: locate the metal or plastic snap, press the male stud inward while lifting the female side with your thumb or fingernail.
Separate the two halves gently to avoid tearing.
Replace information card, align snaps, then press firmly until you hear or feel the snap click closed.
How to Open a Zippered Travelon Tag
Locate the zipper along the edge of the Travelon tag and slide the pull gently toward the corner until the compartment opens; feel for the fabric gusset so you don’t catch the lining.
You’ll then:
- Hold the tag steady with one hand.
- Use the other hand to unzip fully.
- Check for trapped fabric at seams.
- Pry open gently if stiff.
- Inspect contents without removing cards.
How to Flip Out and Remove an Internal Info Card Safely
First, find the small release tab inside the tag and flip it toward you to open the card slot.
Then gently pry the slot open with your thumbnail or a flat tool, keeping pressure even to avoid bending the card.
Finally, slide the info card out slowly and hold it by the edges to keep it clean and intact.
Locate The Release Tab
One small plastic tab releases the Travelon tag’s internal info card, and you’ll flip it outward gently to free the card without bending it.
- Look along the tag edge for a tiny raised tab.
- Use your thumbnail to feel for movement.
- Don’t force; it should pivot smoothly.
- Keep the tag steady with your other hand.
- Slide the card out once the tab’s open.
Gently Pry Card Slot
With the release tab open, gently insert your thumbnail or a thin, flat tool into the card slot and ease the card outward; you’ll feel a slight give as the card pivots on its hinge. Don’t force it. Once flipped, support the card edge so it won’t snap back.
| Tool | Angle | Pressure |
|---|---|---|
| Thumbnail | 30° | Light |
| Thin pry | 25° | Gentle |
| Card edge | 20° | Moderate |
Remove Card With Care
Flip the info card out slowly, supporting its edge as it pivots so the hinge doesn’t bear all the strain.
Use steady pressure and avoid bending the card. When removed, slide it straight out to prevent tearing.
- Hold near the hinge
- Pivot gently
- Keep fingers clean
- Slide, don’t force
- Inspect for damage before replacing
How to Slide a New Card Into a Clear-Sleeve Tag
Start by opening the clear-sleeve tag along its top or side seam so the pocket is fully accessible; you’ll feel a small give where the seam separates.
Align your replacement card with the sleeve opening, keep it flat, and slide it in gently until it seats against the back.
Smooth any air bubbles, check orientation, and close the seam securely before reattaching the tag.
Replace a Card Under a Leather Flap Without Stretching
You’ll lift the leather flap gently with your fingertips to avoid stretching the material.
Slide the old card out along the seam, keeping your movements smooth.
Then slip the new card in the same way, tucking the flap back down without forcing it.
Lift Flap Gently
Lift the leather flap gently at its stitched edge and slide the old card out while supporting the surrounding material so you don’t stretch it; work slowly and keep your fingertips close to the seam to prevent tugging.
- Use your thumbnail to lift a tiny corner
- Hold the tag flat on a table
- Don’t pull from the flap center
- Keep movements small
- Pause if resistance appears
Slide Card Out
Slide the card out by gripping its exposed edge between your thumb and forefinger, keeping the tag flat on the table so the leather stays supported; pull straight and slow, stopping if you feel resistance to avoid stretching the seam.
If the card sticks, wiggle it gently side-to-side while maintaining downward pressure on the leather to prevent lifting, then continue a steady, even pull until removed.
Replace Without Stretching
With the card removed, tuck the new one under the leather flap without pulling or stretching the edges; hold the tag flat on the table and angle the card slightly so its leading edge slides under the flap first.
- Align card corner with flap edge
- Slide gently, don’t force
- Keep tag flat
- Smooth flap over card
- Check visibility and fit
Reseal Snap and Zipper Tags So They Stay Secure
Press the snap firmly and run a finger along the zipper’s teeth to seat them before closing the tag; this guarantees the seal lines up and won’t gap during travel.
Align edges, then press the snap until it clicks and zip slowly to feel consistent resistance.
Check for gaps, flex the tag slightly, and re-seat any misaligned teeth so the closure stays tight on the move.
Tuck Emergency Contact Info Discreetly Inside a Tag
After you’ve confirmed the closure is secure, tuck a small card with emergency contacts inside the tag so your information stays private but accessible.
You’ll want concise, legible details that aid identification without oversharing. Consider including:
- Full name
- Primary phone
- Secondary phone
- Allergies/medical note
- Local contact or hotel info
Check visibility and reseal tightly before travel.
Make a Durable Paper Card That Fits Travelon Tags
If you want a contact card that survives handling and humidity, cut sturdy paper to the tag’s insert size and reinforce it for durability.
Laminate both sides with clear packing tape or use self-adhesive laminating sheets, trimming edges flush.
Write with a waterproof pen, include only essential contact details, and test the fit before sliding the card into the tag to avoid bending.
Protect Your Privacy on a Travelon Tag
Anyone who uses a visible luggage tag should take steps to limit what strangers can see; you can still make your bag identifiable without exposing unnecessary personal data.
Use these quick tips to protect privacy:
Use these quick tips to protect your privacy while keeping luggage identifiable and secure.
- Display only your last name or initials
- Include a phone number with country code
- Omit home address
- Use email with limited info
- Consider a privacy flap or cover
Use a Business Card Instead of a Handwritten Card
One simple swap is to slip a printed business card into your Travelon tag instead of handwriting your details; it looks neater, reads clearly, and reduces errors from smudges or cramped writing.
You can print essential contact info on both sides, include an emergency contact, and use a durable card stock so it stays legible.
Replace copies before long trips.
Update Address or Phone Mid-Trip With Minimal Fuss
If you need to update your address or phone mid-trip, follow quick access steps to open the tag, swap or write new info, and close it securely.
I’ll show secure reclosure tips so your changes don’t fall out or get exposed.
We’ll also cover temporary contact options like a hotel number or short-term phone to keep you reachable.
Quick Access Steps
Need to change your contact info while you’re on the road? You can update Travelon tags fast. Follow these quick access steps and keep moving:
- Locate the snap or zipper on the tag
- Open gently to expose the card slot
- Slide the info card out a bit
- Write new details or swap cards
- Slide back and reseal securely and test visibility
Secure Reclosure Tips
When you’ve updated your address or phone, reseal the tag so it stays closed through bumps and baggage handlers: press edges firmly, align flap, and snap or velcro securely. Check once after handling. Use a small strip of tape for extra hold if needed.
| Step | Action | Result |
|---|---|---|
| 1 | Align flap | Even seal |
| 2 | Press | No gaps |
| 3 | Test | Secure tag |
Temporary Contact Options
After you’ve resealed the tag, you’ll sometimes need to update contact details quickly without opening it fully.
You can use temporary methods that stay secure and readable until you reach a permanent solution:
- Write on a small adhesive label with ballpoint pen
- Slip a paper note under the flap
- Use a tiny printed sticker
- Attach a waterproof tag sleeve
- Note info on your phone and photo the tag
Waterproof Your Info Card Inside a Travelon Tag
Protect your contact details from spills and rain by sealing the info card before sliding it into the Travelon tag; you can do this quickly with clear packing tape, a self-laminating pouch, or by placing the card inside a small zip-top bag and trimming it to fit.
After sealing, smooth edges, test fit, and confirm text remains legible. Replace seal if worn or peeling.
Replace a Damaged Travelon Cardholder
If your Travelon cardholder is cracked or torn, inspect it closely to see what’s broken and whether it’s just the sleeve or the whole holder.
Then order the correct replacement parts from Travelon or an authorized retailer, matching size and model.
Finally, install the new cardholder by sliding your info card in and snapping or stitching it back into place as needed.
Inspect Damaged Cardholder
Start by holding the tag up to good light and checking the cardholder for cracks, splits, or peeling edges—you’re looking for any damage that could let your ID or card fall out or expose the RFID layer.
- Note hairline cracks near seams
- Check adhesive failure or bubbling
- Test card snugness by shaking gently
- Inspect corners for delamination
- Look for discoloration indicating material fatigue
Order Replacement Parts
When a Travelon cardholder is cracked, torn, or no longer holds cards securely, you’ll want to order a replacement part promptly to restore function and protect your ID and RFID protection.
Check Travelon’s website or authorized retailers for the correct model number, verify dimensions and material, and purchase OEM or compatible parts.
Keep order confirmation and tracking for returns or warranty claims.
Install New Cardholder
Carefully align the replacement cardholder with the luggage tag frame so the slots and RFID window match, then snap or slide it into place following the model’s attachment method.
You’ll verify fit, secure edges, and restore function.
- Inspect edges for damage
- Match RFID window orientation
- Snap evenly from one side
- Test card insertion smoothly
- Close and tug gently to confirm
Repair a Broken Strap or Buckle on Travelon Tags
If your Travelon luggage tag strap or buckle breaks, you can usually fix it quickly with a few simple tools and a replacement part — no special skills required.
Inspect the failure, buy a matching strap or buckle online or at a travel store, remove the damaged piece with pliers, thread and secure the new part, and test the connection before using your bag.
Swap a Travelon Tag Between Bags Quickly
You can move a Travelon tag between bags in under a minute by using the quick-release buckle or threading method built into most models.
Remove the tag, align buckle ends, or unthread strap, then attach to the new bag and secure.
- unclasp buckle
- thread strap through handle
- tuck excess strap
- snap until heard
- check security
Open Sealed or Stiff Tags After Long Storage
If a Travelon tag has stiffened from storage, you can gently soften the plastic first by warming it with your hands or a warm (not hot) cloth.
Run warm water along the seal to loosen any hardened grime, then try opening it carefully.
If it still sticks, apply a small amount of lubricant like silicone spray or a dab of dish soap to the seam and work it open.
Soften Plastic Gently
Warm the tag gently to relax the plastic; hold it in your hands or place it near a warm (not hot) surface for a few minutes to make seals and stiff edges more pliable.
- Test flexibility by bending edges slightly
- Use soft cloth to protect surfaces
- Avoid direct heat sources like heaters
- Work slowly to prevent tearing
- Recheck seals before inserting cards
Use Warm Water
Start by filling a bowl with comfortably warm water and submerging the tag for a minute or two so the plastic relaxes and seals loosen.
Remove it, pat dry, and flex the edges gently to check movement.
Repeat once if still stiff, keeping water temperature moderate to avoid warping.
Dry thoroughly before attempting to open or reattach to luggage.
Lubricate The Seal
Apply a small amount of lubricant along the tag’s sealing edge to loosen grime and dried plastic that’s keeping it shut.
Work it in gently with a cotton swab, wait a minute, then pry carefully with fingernail or plastic tool. Repeat if needed.
- Use silicone spray or rubbing alcohol
- Avoid oil-based lubricants
- Test a corner first
- Wipe excess clean
- Dry before resealing
Avoid Common Mistakes That Tear Tags or Cards
Because Travelon tags and ID cards are thin, you’ll want to handle them deliberately to avoid rips and creases—don’t tug at the slot when removing the card, don’t fold the tag to force it into tight pockets, and avoid sharp tools or fingernails that can score the plastic.
Instead, slide cards straight out, support the tag edges, replace seals gently, and store tags flat to preserve integrity.
Open Tags With Limited Light or Space
When you’re working in dim or cramped spots, put on a headlamp or use your phone’s flashlight so you can see seams and tabs clearly.
Keep small tools like a flathead or tweezers within reach so you don’t fumble or drop parts. That way you can open the tag quickly without damaging it.
Use A Headlamp Or Phone
Grab a headlamp or use your phone’s flashlight to free up both hands while you open the Travelon tag; having steady, directed light makes it easier to see small tabs, screws, or snap points you’ll need to manipulate.
- Angle light to reduce glare
- Clip headlamp for hands-free control
- Use low beam to avoid reflections
- Steady phone in one hand if needed
- Pause to relight if shadows hide parts
Keep Tools Within Reach
Having your light sorted, set out the small tools you’ll need within arm’s reach so you don’t fumble in tight or dim spaces. Keep a slim flathead, tweezers, and a thin pry tool ready; place them on a cloth to avoid scratches. Reach, grab, open.
| Tool | Purpose |
|---|---|
| Flathead | Pry seams |
| Tweezers | Extract pins |
Open Tags If You Have Limited Dexterity or Strength
If you have limited hand strength or dexterity, you can still open Travelon luggage tags by using simple aids and adjusted techniques that reduce grip and finger strain.
- Use a rubber jar opener for extra grip.
- Pry edges gently with a flat plastic card.
- Stabilize tag on a table rim.
- Press release button with a pen cap.
- Ask a travel companion for a quick assist.
Open and Update an RFID-Blocking Travelon Tag
Open the RFID-blocking Travelon tag by locating the small release tab on the seam, then slide it gently to separate the two halves so you can access the ID card slot and internal electronics for updating.
Remove the ID card, replace or write new information, then realign the halves and press until the tab clicks.
Test the tag visually and confirm the seal is secure.
What to Expect at Check-In With a Travelon Tag
When you check in with a Travelon tag, expect a quick visual inspection of your ID card and, if it’s an RFID-blocking model, little to no extra handling by staff; they’ll confirm your contact details and may ask you to show the tag’s attachment to the bag.
- Present ID and tag clearly
- Keep info visible
- Show attachment point
- Answer staff questions briefly
- Retrieve tag if requested
When to Replace a Travelon Tag Instead of Repairing
If your Travelon tag shows visible structural damage—cracks, broken buckles, or torn seams—you should replace it rather than try to fix it.
Also swap it out if you keep having the same functional failures, like a stuck zipper, unreadable ID window, or a broken attachment that recurs after repairs.
Replacing is usually safer and more reliable than repeated fixes.
Visible Structural Damage
Because a luggage tag protects your contact info and often rides through rough handling, you should replace it the moment you see any structural damage that affects its function—cracked plastic, split seams, broken buckles, or deep gouges that expose the inner ID card.
- cracked shell
- torn seams
- broken buckle
- exposed ID window
- warped or split loop
Replace immediately to avoid lost-contact risk.
Recurrent Functional Failures
Structural damage is an obvious reason to replace a Travelon tag, but repeated functional failures can be just as problematic—especially if they undermine the tag’s purpose even without visible breakage.
If the ID window fogs, zipper pulls detach, or attachment clips slip off repeatedly, don’t keep repairing.
Replace it when failures recur, compromise security, or waste your time—you’re better off getting a reliable tag.
Best Replacement Cards & Printable Templates
Anyone who’s lost a Travelon tag insert knows how handy having replacements or printable templates can be — they let you quickly restore contact info and personalize tags for trips.
Choose durable PVC cards or printable cardstock. Look for template PDFs with clear fields. Print test on paper, then on card stock.
Keep measurements to Travelon insert size. Store a spare set in your travel kit.
- PVC replacement cards
- Printable PDF templates
- Cardstock recommendations
- Measurement guide
- Spare kit storage
Photograph and Store a Digital Backup of Tag Info
Snap clear photos of your Travelon tag insert and store them securely so you can access contact info even if the physical card gets lost.
Photograph front and back, include full name, phone, email, and emergency contact.
Back up images to encrypted cloud storage and an offline folder on your phone.
Label files with trip date and luggage ID for quick retrieval.
Label Tags for Family or Group Travel Coordination
After you’ve photographed and backed up each tag insert, label the tags so everyone in your group knows which bag belongs to whom and what each contains.
Use clear, concise labels and durable pens. Consider color-coding and quick contents notes.
- Name and phone number
- Color or symbol for each person
- Brief contents (clothes, meds)
- Flight/hotel code
- Emergency contact
Clean and Care for Different Travelon Tag Materials
Different tag materials need different care, so check what you’ve got first—plastic windows, leather straps, nylon loops, or metal clasps—and treat each accordingly.
Wipe plastic with a damp cloth and mild soap; dry thoroughly.
Condition leather occasionally with a leather balm.
Rinse nylon with mild detergent and air-dry.
Polish metal clasps gently and lubricate hinges if stiff.
Store tags dry to prevent mold.
Choose the Right Travelon Tag for Frequent Travel
If you travel several times a year, pick a Travelon tag that balances durability, visibility, and ease of use so it won’t slow you down at busy airports.
You’ll want features that withstand handling and make identification quick:
- Sturdy material (silicone or metal)
- Bright, contrasting color
- Clear ID window
- Secure attachment loop
- Lightweight, slim profile
Quick Checklist: Open, Update, Reseal in Under Two Minutes
Now that you’ve picked a durable, visible tag, you’ll want a quick routine to open, update, and reseal it without wasting time at the gate.
Release the snap or zipper, slide out the ID card, update contact details, replace carefully, align edges, and fasten securely.
Check for a tight seal and visible info—you’re ready to go in under two minutes.
Troubleshooting: My Travelon Tag Won’t Close – Next Steps
If your Travelon tag won’t close, first inspect the locking mechanism for dirt, bent parts, or anything blocking the catch.
Then re-align the tag components so the flap and slot meet squarely before you press them together.
If it still won’t seal, note any damage and consider contacting Travelon or replacing the tag.
Inspect Locking Mechanism
Before you assume the tag’s broken, take a close look at the locking mechanism to spot any obvious issues—dirt, bent parts, or misaligned components can prevent it from closing.
- Check for debris in the latch groove.
- Wiggle the lock to feel resistance.
- Look for cracked or bent metal/plastic.
- Test the spring tension gently.
- Clean with compressed air and a soft brush.
Re-Align Tag Components
While you’ve already cleaned and inspected the latch, try re-aligning the tag components so the closure can seat properly: gently press edges, align posts, and test fit until it snaps. If it still won’t close, loosen the strap slightly and realign the ID window.
| Top edge | Bottom edge |
|---|---|
| Latch tab | Guide slot |
| Post pin | Recess |
| Strap hole | Buckle catch |
Frequently Asked Questions
Can I Use a Luggage Tag as a TSA Baggage Claim Identifier?
Yes — you can use a luggage tag as a TSA baggage claim identifier, but you’ll want to include your name, phone number, and email, avoid full address, and secure it so it won’t fall off during transit.
How Do Airlines Handle Tags With Visible Contact Info During Security Checks?
Airlines usually accept visible contact info; security may inspect tags and photos, but they won’t remove them. You should avoid sensitive details; they’ll scan or open bags if needed and follow legal privacy and security procedures during checks.
Are Travelon Tags Allowed on Checked Bags With Fragile Contents?
Yes — you can use Travelon tags on checked bags with fragile contents; just make sure they’re securely attached and won’t shift or press against delicate items, and you’ll want cushioning and clear “fragile” labels for handlers.
Can I Attach a Travelon Tag to Non-Standard Items (Sports Gear, Bike)?
Yes — you can attach a Travelon tag to non-standard items like sports gear or a bike, as long as it’s securely fastened and visible; you’ll want to reinforce mounting points and avoid obstructing moving parts or safety features.
Do Hotel Concierge Services Accept Tags for In-House Luggage Storage?
Yes, many hotel concierges will accept tagged luggage for in-house storage; you’ll leave tags attached, they’ll note identifying info, and you’ll get a receipt—just confirm their policy, hours, and liability before handing items over.
Conclusion
Now you know how to open, update, and reseal any Travelon luggage tag quickly. Identify whether yours is a plastic sleeve, clear cardholder, or snap-closure, then follow the matching steps and care tips so it stays functional trip after trip. Pick a durable material if you travel often, and use the quick checklist to finish in under two minutes. If it won’t close, try cleaning or replacing worn parts before contacting the manufacturer.