How to Open Locked TSA Luggage Without Damage
If your TSA lock won’t open, first verify it’s TSA‑approved and note any model or reset holes, then try the manufacturer reset code or gently rotate each dial while applying light tension to the shackle; use magnification and listen for clicks. Inspect zippers and sliders for caught fabric and lubricate if needed. Photograph markings and stop at the first sign of damage; call TSA or a locksmith if unsure. Keep going to learn safe, step‑by‑step techniques.
What People Mean When They Search “Open Locked TSA Luggage
When people search “open locked TSA luggage,” they’re usually trying to solve one of three problems: they forgot or lost their combination, a TSA agent left a lock damaged or ajar after inspection, or they’re looking for the right way to let TSA inspect a bag without breaking the lock.
You want clear options tailored to each situation: recovering or resetting a combination, evaluating damage from an inspection, or using TSA-approved methods to permit searches.
You expect practical steps that avoid unnecessary risk to contents, minimize repair needs, and respect regulations. You need concise guidance so you can act confidently and quickly.
Quick Safety Checklist Before You Try Anything
Before you try anything, check what kind of lock you’re dealing with—TSA-approved combination, keyed lock, or an integrated mechanism. See if there’s an obvious keyhole or a lost-key override that lets you get access without force.
Quickly inspect the suitcase for damage or weak seams so you don’t make a repair problem worse.
Assess Lock Type
If you’re about to try opening a locked TSA luggage, first identify the lock type so you pick a safe, effective approach. Look at the mechanism: is it a built-in combination, a detachable padlock, or a zipper with a small TSA keyhole?
Note markings like “TSA007” or a diamond logo indicating TSA acceptance. Inspect for electronic panels, reset holes, or exposed shackles.
Determine whether the lock is mechanical or electronic, and whether the zipper pull uses a locking loop.
Photograph the lock for reference. This assessment guides your next steps and helps avoid damaging the luggage or voiding warranties.
Check For Key Access
Since you’ll be working on or near the lock, check for a visible keyway or a small TSA keyhole first so you know whether a physical key can open it. Look for stamped “TSA” labels or a narrow slot; if present, you may need an authorized key rather than forcing the mechanism. If unsure, try gentle manipulation with light pressure to confirm movement without damaging the zipper or housing. Note keyhole shapes and nearby screws for later steps. Use the table below to quickly categorize observations and next actions.
| Observation | Likely Action | Risk |
|---|---|---|
| TSA keyhole visible | Contact TSA or use authorized opener | Low |
| Generic keyway | Try appropriate key | Moderate |
| No keyway | Use non-destructive methods | Higher |
Inspect Luggage Integrity
Now that you’ve checked for a keyway, take a moment to inspect the luggage’s overall integrity with a quick safety checklist before attempting any opening methods.
Look for cracks, warped edges, or split seams that could worsen with prying. Check zippers for teeth alignment and pull strength; stuck sliders may free with lubrication rather than force.
Examine handles, wheels, and attachment points to avoid breaking hardware. Confirm no fragile contents near suspected entry areas.
If you find structural damage or brittle plastic, stop and consider professional help—forcing it risks permanent damage or injury.
Proceed only if the case is sound.
Identify Whether the Lock Is TSA-Approved
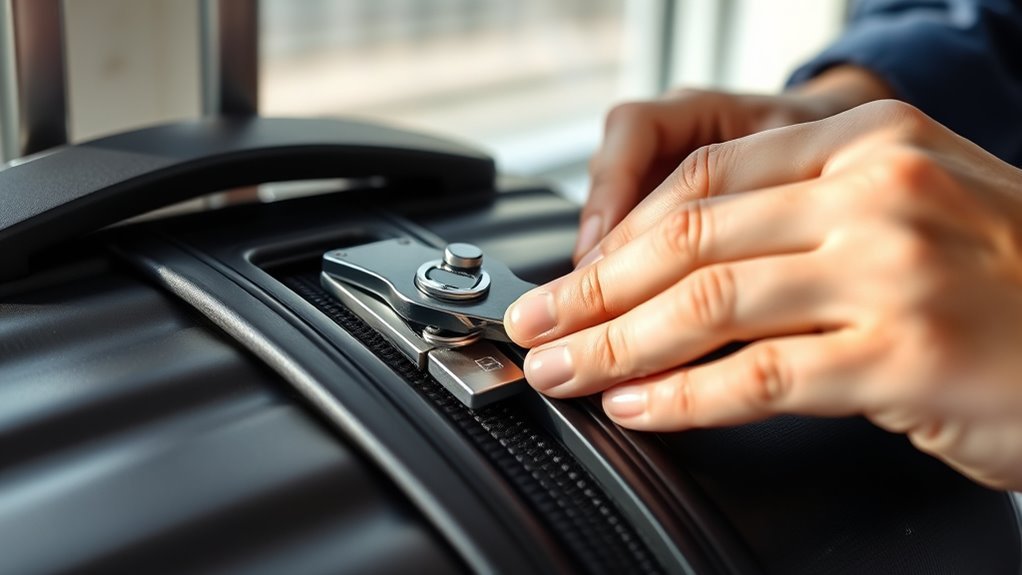
When you check your luggage lock for TSA approval, look for a red diamond-shaped Travel Sentry logo or a similar accepted mark—those symbols tell you Transportation Security Administration agents can open and relock your case without damaging it. You’ll also spot accepted brands like Travel Sentry or Safe Skies stamped or printed near the mechanism.
Look for the red diamond Travel Sentry logo or accepted brand markings to ensure TSA agents can open and relock safely.
If there’s no logo, don’t assume approval. Check the manufacturer’s label or documentation, or search the brand online to confirm. If unsure, treat the lock as non‑TSA and avoid forcing it—ask a professional or use alternative access methods.
- Look for a red diamond logo
- Check brand names
- Inspect nearby markings
- Verify online documentation
Locate the Lock Model, Serial, and Reset Mechanism
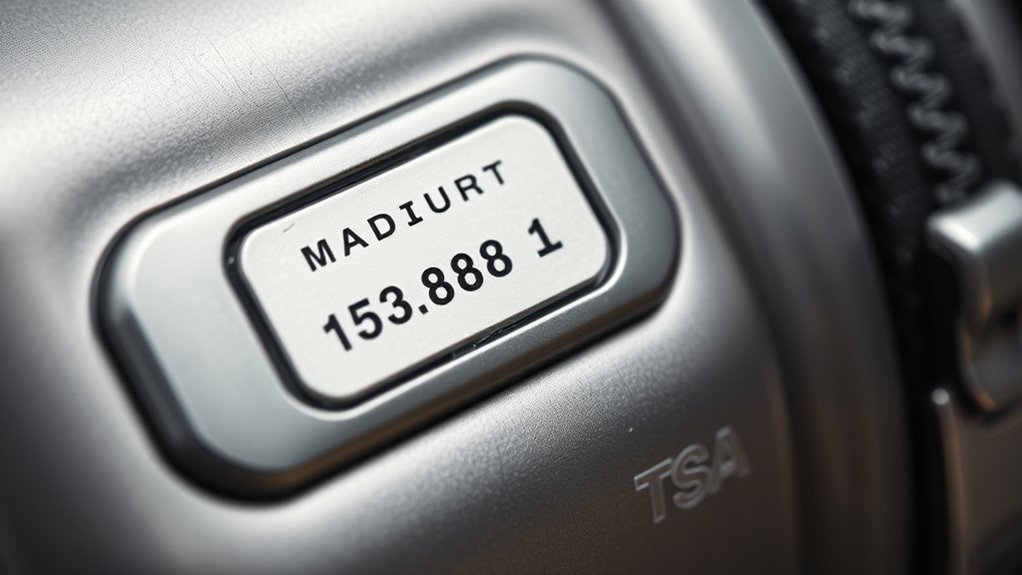
Next, you’ll identify the lock brand so you know what tools or instructions apply. Check for a small serial tag or embossed number on the lock body or zipper pull to confirm the specific model.
Then locate the reset mechanism—usually a pinhole, switch, or recessed button—so you can follow the correct reset or opening procedure.
Identify Lock Brand
Before you try any manipulation, inspect the lock area closely so you can identify the brand, model, and any visible reset mechanism or serial number—these details determine how you’ll proceed and whether you should contact the manufacturer or an authorized locksmith.
Look for stamped logos, molded plastic shapes, or printed labels near zippers or the latch. Check the shackle, dial face, and housing for tiny markings. Note any recessed reset buttons or keyholes that differ from common TSA styles.
- Match visual cues to online brand images.
- Photograph the lock for reference.
- Record any codes or part numbers you see.
- Don’t force or pry components.
Find Serial Tag
Locate the serial tag and model markings around the lock area—on the case interior, zipper head, or metal housing—so you can confirm the exact lock type and any reset mechanism it uses. Check for stamped numbers, tiny labels, or etched logos; use a flashlight or phone camera to read small print.
Note model, serial, and any patent or code references, and photograph them for reference. Don’t rely on assumptions—different models on one brand can behave differently.
Record details before attempting entry to guarantee you use correct, non-damaging methods and to help customer service or locksmiths if needed.
Locate Reset Mechanism
Now that you’ve documented the serial and model details, turn your attention to finding the lock’s reset mechanism so you can change or recover the combination without damage. Inspect the lock closely: some brands hide a tiny pinhole, others use a recessed button or sliding tab. Use proper light and a magnifier if needed. Don’t force parts.
- Check the lock face for a small reset pinhole near the dials.
- Look along the lock’s edge for a recessed switch or sliding tab.
- Inspect the underside or inside the zipper clasp for hidden buttons.
- Consult the model’s manual or manufacturer site for diagrams.
Try the Manufacturer Reset Code First
If your TSA lock came with a reset code or default combination, try that first — many makers ship locks set to 0-0-0 or a simple factory number, and resetting it back to the manufacturer code can let you open the case without force.
Check documentation, labels inside the case, or the manufacturer’s website for the specific reset code. Use the reset pin or button you located, follow the exact reset steps, then enter the manufacturer code slowly.
If it opens, immediately set a new memorable combination and record it somewhere safe to avoid repeating this process.
Systematically Try Common Default Combinations
If trying the manufacturer code didn’t work, move on to systematically trying common defaults used by many TSA locks. You’ll save time by working through likely combinations in a set order instead of random guessing. Start simple, stay patient, and stop if you feel resistance.
- Try 000, 111, 222, then 333, moving sequentially.
- Test calendar patterns like 123, 1111 (for four-wheel), or 0000 when applicable.
- Use obvious repeats (1212, 2580) only after basic sequences.
- Note any click or subtle give; record tried combos to avoid repeats.
Work methodically until it opens.
Gentle Dial Manipulation for Combination Locks
While you gently turn each dial, pay close attention to subtle feedback—small clicks, changes in resistance, or a tiny give—and pause when you feel anything different so you don’t force the mechanism.
Work methodically, rotating one wheel at a time through all ten positions while noting any notches or repeatable sensations. Reset if you lose track, and mark dials that exhibit distinct feedback.
Keep movements slow and deliberate to avoid slipping past a delicate detent. If a dial seems to settle, hold it gently while testing the others.
Stop if you encounter firm resistance; forcing risks internal damage and voiding warranties.
Use Tension and Small Rotations Safely
When you apply gentle tension to the shackle or latch, keep it steady so the lock gives subtle feedback.
Make small, incremental rotations of the dials or wheels and stop when you feel a tiny click or change in resistance.
Monitor those tactile cues closely and adjust pressure and rotation slowly to avoid forcing the mechanism.
Apply Gentle Tension
Because a small, steady amount of tension helps the tumblers settle, place the lock so you can pull gently while you turn the dials—hold the shackle or latch firmly and use your thumb and forefinger to apply consistent pressure. You’ll feel subtle clicks; don’t yank or force the mechanism. Keep tension steady between attempts, pause when you sense resistance, and reset your grip if fingers slip.
Gentle, even pressure reduces binding and prevents damage. Practice on a spare lock until you gain tactile feedback.
- Breathe and stay patient
- Use fingertip control, not your whole hand
- Rest briefly between tries
- Switch hands if needed
Small Incremental Rotations
Now that you’ve got steady tension, start turning the dials in very small increments—about a quarter turn at a time—so the tumblers can settle under the load. You’ll feel subtle clicks; pause after each quarter turn and keep tension steady. If a dial resists, reverse slightly and try again—don’t force it. Repeat this slow process across all three dials until the lock gives. Use patience: small rotations avoid misaligning tumblers or damaging the mechanism. Track progress mentally and stay consistent with pressure. A methodical, tactile approach is safer and often successful without brute force.
| Quarter | Pause | Listen |
|---|---|---|
| Gentle | Steady | Clicks |
| Repeat | Reverse | Open |
Monitor Lock Feedback
As you keep steady tension and make those small, deliberate dial turns, pay close attention to what the lock tells you — subtle clicks, a slight give, or a change in resistance all indicate tumblers setting into place.
You’ll notice patterns: some numbers feel firmer, others release. Pause when you sense a click, reapply gentle tension, then nudge the dial again. Don’t force anything; forcing hides feedback.
Keep breaths steady, work methodically, and stay patient. Trust tactile cues over speed.
- Listen for small clicks
- Feel for changes in resistance
- Pause after each confirmed click
- Avoid forcing the dial
Read Tiny Indicator Windows or Markers
Look for the small indicator windows or colored markers near the lock mechanism—they tell you whether a TSA agent has opened the suitcase. You’ll spot a tiny window that changes color or a recessed pin that pops when inspected. Check these before prying; they confirm official access and prevent unnecessary force. If the marker shows tampering, document it with photos and report it to the airline. If it’s unchanged, you can proceed with non-destructive methods. Keep notes on marker location for future trips so you can quickly verify lock integrity.
| Marker Type | Location | What It Means |
|---|---|---|
| Window | Lock face | Opened by TSA |
| Colored tab | Slider | Unchanged = intact |
| Pin | Inside latch | Tampered = inspect |
| Sticker | Zipper area | Official access |
Open Zipper and Slider Locks Without Cutting
When a zipper or slider lock refuses to budge, you can often work it open without cutting by manipulating the slider and pulls gently with tools like a thin flathead, a paperclip, or your fingers—just take care not to force or damage the fabric.
Inspect the slider for trapped fabric or threads, align teeth by moving the slider back and forth, and use a lubing dab (soap or graphite) to ease movement.
If pulls are locked together, thread a thin tool into the loop to separate them and then gently wiggle until the slider advances.
- Check for caught fabric
- Realign zipper teeth
- Lubricate slider lightly
- Separate locked pulls
Travel Tools for Luggage Access (Shims, Picks)
You’ll want to start by understanding TSA-approved lock basics so you know what can and can’t be legally bypassed.
Pick a shim that’s the right size and shape for your luggage hardware to avoid damaging the zipper or latch.
If you use lock picks, do so safely and legally—practice on your own locks and never tamper with others’ property.
TSA-Approved Lock Basics
Although TSA-approved locks are designed to let Transportation Security Administration agents inspect checked baggage without breaking your lock, they also use standard keyways that specialized tools can interface with—most commonly shims and travel picks. You’ll learn how these locks balance traveler convenience and security: they’ve identifiable keyholes for master keys, simple internal latches, and varying resistance levels.
You’ll use gentle technique to avoid damage and know when to stop and seek professional help. Understand construction, recognize markings (like the Travel Sentry logo), and practice on nonessential locks before trying luggage.
- Look for Travel Sentry or Safe Skies logo
- Note zipper vs. latch mechanisms
- Test tension lightly before inserting tools
- Stop if parts feel stuck
Choosing The Right Shim
Before picking a shim, assess your luggage’s lock type and materials so you match tool size and flexibility to the mechanism. You’ll want a thin, springy shim for zipper-tab latches and a slightly stiffer one for tubular or flat metal catches. Test on a spare zipper or seam to avoid damage. Keep shims clean, deburred, and labeled by thickness. If a lock shows plastic housings, avoid overly rigid shims that can crack or deform parts.
| Shim Type | Best For |
|---|---|
| Thin spring steel | Zipper tabs |
| Medium steel | Metal catches |
| Rigid brass | Stiff locks |
| Plastic shim | Fragile housings |
Safe Use Of Lock Picks
After you’ve matched a shim to your lock, move on to lock picks with the same care: they’re more delicate and can damage pins or wafers if you force them. Treat picks gently, rotate tension sparingly, and feel for subtle feedback. Practice on cheap locks before trying luggage. Keep tools clean and aligned; bent picks ruin both your kit and the lock. Respect legal and ethical boundaries—use picks only on your property or with permission.
- Start light with tension, increase slowly
- Use proper picks for wafer vs. pin locks
- Replace warped picks promptly
- Store tools dry and protected
How to Use a Small Shim to Release a Latch
If you find a simple latch jammed and you’ve ruled out other noninvasive options, a small metal shim can slip into the gap between the latch and the body to push back the catch and release the mechanism.
Choose a thin, sturdy shim—old credit card laminate, a flattened metal strip, or a purpose-made shim. Slide it gently alongside the latch, angling toward the catch, and apply slight pressure while wiggling.
Once you feel the catch give, push the latch open. Work slowly to avoid bending parts. Stop immediately if something resists; try another approach or seek professional help.
Overview: Single-Pin Methods for Suitcase Key Locks
When you work with a single-pin suitcase key lock, start by locating the pin so you know what you’ll be manipulating.
You’ll apply light tension with a tool while feeling for the pin’s feedback.
With steady pressure and small movements, you can coax the mechanism to the open position.
Identify Pin Location
Where exactly is the pin that releases a single-pin suitcase lock? You’ll find it near the keyway or along the latch seam, a small metal nub that aligns when the lock’s internal cam clears.
Look for subtle cues: light gap, tiny hole, or a shallow recess that matches the pin’s movement. Gently probe visually and with a thin tool to confirm location without forcing anything.
- Inspect the keyhole area first for off-center features
- Check the latch seam for a tiny exposed tip
- Use good lighting and magnification if needed
- Note orientation before attempting release
Use Tension Tool
Because the pin needs steady pressure to clear the cam, you’ll use a tension tool to apply consistent rotational force while you probe the release point.
Hold the tool lightly between thumb and forefinger at the lock’s keyway, applying minimal torque—just enough to create resistance.
With one hand steadying tension, use the other to feel for the single pin’s feedback, small clicks, or subtle movement.
Keep torque constant; changing pressure resets feedback and complicates locating the release.
If you slip, relax and reapply gentle tension.
Practice on a spare lock to calibrate force before working on your suitcase.
Manipulate Pin Mechanism
If you want to open a suitcase key lock that uses a single-pin cam, you’ll need to gently manipulate that pin to its release point while maintaining steady tension. This method focuses on feeling for the one tactile feedback rather than manipulating multiple tumblers.
You’ll insert a slim tension tool, apply light rotational pressure, and use a thin pick or flattened metal to nudge the cam pin. Feel for a subtle give or click; once sensed, increase rotation slowly until the cam clears.
Work patiently to avoid bending parts or breaking the keyway.
- Use light, steady tension
- Probe with delicate tools
- Sense the single click
- Stop if resistance spikes
Remove a Stuck Key or Broken Shank Without Damage
When a key breaks or gets stuck in your TSA lock, stay calm and work deliberately so you don’t make the problem worse. Assess the fragment’s position and whether any part protrudes.
Use fine tweezers or needle-nose pliers to grip the exposed tip and pull straight out, avoiding twisting that can jam the lock.
If the fragment is recessed, insert a thin pick or feeler to lift it while you pull.
Keep the lock steady and apply gentle, consistent force.
If removal fails or you risk damage, stop and seek a professional locksmith or TSA agent for safe extraction.
Household Items That Can Help Without Harming the Bag
Although you mightn’t have specialized tools, common household items can often help open a stuck TSA lock without harming your bag; think thin, sturdy, and non-abrasive implements like a paperclip, sewing needle, or plastic shim.
You’ll work carefully, avoid prying with metal that scratches, and use items that flex slightly to slip catch mechanisms. Test gentle pressure and small movements to feel tumblers engage.
Keep tools clean to prevent grime transfer and set them aside once the lock yields to avoid damage. Use steady hands and patience to reduce force and risk of breakage.
- Paperclip (straightened)
- Sewing needle
- Plastic card shim
- Small flathead screwdriver
Prevent Accidental Resets While Attempting Entry
Because fiddling with a lock can easily change its combination, take steps to keep the dials steady while you work: brace the shackle so it can’t move, mark the current positions with a pen or tape, and avoid rotating any dial unless you’re deliberately testing it.
Keep tension minimal; excessive force can slip a dial into a neighboring number.
Work one dial at a time and confirm its click before moving on.
Use a small tool or fingertip to isolate a single wheel.
Pause if something feels out of place, then recheck your marks.
That careful pacing reduces accidental resets and preserves the code.
How to Document the Lock and Contents First
Before you try to open the lock, take clear photos of the exterior from multiple angles so you’ll have a record.
Then quickly inventory the internal contents and note any fragile or valuable items.
Finally, write down the current lock setting or take a close-up photo of the combination for reference.
Photograph Lock Exterior
When you arrive at the luggage, take clear, well-lit photos of the lock and surrounding area so you’ve documented its exact condition before you touch anything. Position your phone to capture the lock face, shackle, nearby fabric or shell, and any scratches or marks. Snap multiple angles and a close-up of the TSA logo or keyhole.
Use timestamped photos or enable location tagging for records. Keep images organized in a dedicated album.
- Close-up of the lock face and code dials
- Wide shot showing the lock on the bag
- Side angle revealing shackle and wear
- Photo including nearby tags or stickers
Inventory Internal Contents
Now that you’ve photographed the lock and exterior, open the bag carefully and catalog its contents methodically. Lay items out in a clear, logical order—clothing, electronics, toiletries, documents—so you can spot anything missing or shifted.
Note fragile or valuable pieces and any signs of tampering: torn packaging, loose stitches, or unexpected stains. Count small items and group similar ones, photographing each group from multiple angles.
Record descriptions, quantities, and locations in a quick list or on your phone. Keep receipts and warranties together.
These steps preserve evidence and make repacking—or filing a claim—much easier.
Note Lock Settings
Because the lock setting can be essential evidence, note and record it immediately before you change anything. You’ll want a quick, precise record: photograph the combination dials, capture the lock body and any markings, and write down visible settings or damage.
Also document the suitcase interior and item positions so you can restore or report changes accurately.
- Take a clear close-up photo of the lock and dials.
- Snap a wider photo showing the suitcase and contents.
- Write the numeric setting, any scratches, and model numbers.
- Log time, date, and who’s present during documentation.
How to Check for Hidden Release Tabs or Travel Features
If you suspect your suitcase has a hidden release, run your fingers along seams, zippers, and handles to feel for small tabs, recessed buttons, or inconspicuous slides. These travel features are often tucked into pockets, under name-tag flaps, or inside trim to avoid accidental opening.
Check interior linings and pocket backs for pull tabs or snap studs that disengage locks. Inspect telescoping handles for release levers and under-rail cavities for catches.
Gently press and slide likely spots—don’t force anything. Use a flashlight and narrow mirror to reveal obscured mechanisms.
Note any findings before trying adjustments or seeking professional help.
When to Stop and Avoid DIY Opening
When you encounter stubborn resistance, visible damage, or any sign that forcing the mechanism will worsen the problem, stop and step back—continuing risks breaking the lock, ruining the luggage, or trapping contents. You’ll want to pause if the zipper tears, the combination sticks, or metal deforms; pushing past those signs usually makes repairs harder.
Consider the value of the bag and contents, your skill level, and time constraints before trying more. If you’re unsure, step away and reassess rather than escalate.
- Zipper teeth split or fabric rips
- Lock housing cracks or bends
- Combination dial jams completely
- You lack proper tools or confidence
How to Ask TSA or the Airline for Help
If you can’t open your TSA-locked bag, ask a TSA officer at the checkpoint for assistance — they can inspect and, if needed, open cleared luggage.
If you’re already past security or need airline-specific help, contact your airline’s counter or customer service for guidance on claims or baggage handling.
Keep your ID, boarding pass, and any lock or luggage receipts handy to speed up the process.
Requesting TSA Assistance
Need help getting your locked bag opened at the airport? Approach a TSA officer calmly, explain the issue, and show ID plus boarding pass.
If TSA can’t open it, they’ll advise next steps or call a supervisor.
- Ask where the nearest TSA inspection area is and follow directions.
- Request they document the inspection if contents are sensitive.
- If you’ve got a spare key or combination, offer it to speed things up.
- Be polite and patient; security protocols can take time.
TSA can open locks when necessary without damaging approved locks; follow their instructions.
Contacting Your Airline
After you’ve spoken with TSA, contact your airline for help opening or replacing a locked bag and to confirm any checked-baggage procedures or liability policies. Call the customer service number or visit the ticket counter; explain the TSA interaction, show ID, and ask about repair or reimbursement options. Note timelines for claims and whether you must keep damaged items. Be polite but firm, record names, times, and claim numbers, and request written confirmation.
| Who to contact | What to show | Expected outcome |
|---|---|---|
| Ticket counter | Photo ID | Immediate help |
| Customer service | TSA report | Claim initiation |
What to Expect If TSA Opens Your Bag at the Airport
When TSA opens your bag at the airport, you’ll usually find a notice inside explaining why agents inspected it and what they did. You might notice the lock has been opened with a TSA key or cut, contents checked, and resealed. Stay calm, inspect items, and photograph damage or missing things before leaving the area.
If something’s wrong, report it immediately to the airline’s baggage service or local TSA office.
- Look for an orange or white inspection notice and tape
- Check zippers, straps, and locks for damage
- Verify fragile items and medication are intact
- Get a written report if items are missing
When to Call a Professional Locksmith vs. a Baggage Shop
If your lock is broken, the zipper is shredded, or TSA has cut through metal hardware, call a professional locksmith—otherwise, a baggage repair shop can usually handle routine zipper pulls, broken handles, or replacing standard combination locks.
You should choose a locksmith when structural metal, welded components, or integrated locking mechanisms are damaged, when keys are lost for high-security locks, or when precise non-destructive entry is required.
Use a baggage shop for cosmetic fixes, zipper track realignment, wheel or handle replacement, and low-cost lock swaps.
Always check credentials, ask for damage guarantees, and get an estimate before authorizing work.
Repairing or Re-Keying the Lock After Access
Because you’ve gained access, you’ll want to secure the lock before you travel again; compromised locks can fail or leave your bag vulnerable. Inspect the mechanism, note visible damage, and decide whether a simple reset, replacement, or re-keying is needed.
Since your lock was accessed, inspect it, repair or re-key as needed, and secure before traveling again
If you replace the lock, choose a TSA-approved model and test it several times.
When re-keying, either follow manufacturer instructions for spool changes or contact a locksmith for proper pining.
Keep any original key or code records, and document repairs for warranty claims.
Properly secured luggage reduces stress and prevents surprise access or failure in transit.
- Inspect and test thoroughly
- Replace with TSA-approved lock
- Re-key via manufacturer or locksmith
- Keep records and receipts
Money- and Time-Saving Tips When You’re on the Go
While you’re on the move, smart prep and quick fixes will save both money and time, so pack a compact repair kit, keep a spare TSA-approved lock or combination records in your carry-on, and learn two simple ways to reset or bypass common zipper and latch issues.
Carry a tiny multi-tool, spare zip ties, strong tape, and a needle for emergency stitching.
Photograph your lock’s serial and combo; store details in email or notes.
Practice a quick zipper trick and latch depress method at home.
If TSA opens your bag, note damage immediately and file a claim to avoid replacement costs.
Best Replacement TSA Locks to Buy Next
When you’re ready to replace a worn or lost TSA lock, pick one that balances security, ease of use, and airport compatibility. You’ll want a lock with TSA approval, durable materials, and a simple resettable code or keyed option.
Consider weight if you’re packing light and choose corrosion-resistant finishes for coastal travel. Match the lock type to your suitcase: zipper-friendly cable locks for soft bags, integrated locks for hard shells.
Keep locks lightweight for carry-on ease and choose corrosion-resistant finishes; use cable locks for soft bags, integrated latches for hard shells.
- Travel Sentry-approved combination lock, resettable
- Keyed TSA lock with two keys
- Cable-style TSA lock for multiple pulls
- Slim integrated TSA latch lock
How to Secure Luggage to Avoid Repeat Lockouts
If you want to avoid the frustration of repeated lockouts, make securing your luggage part of a simple routine: choose the right TSA-approved lock, confirm the combination or key works before you leave, and keep a record of codes or a spare key in a separate place.
When setting combinations, pick memorable but non-obvious numbers and write them down digitally and on paper stored separately from the bag. Test locks after packing and before travel, and reset combinations only when sure you won’t forget them.
Use labels inside luggage with contact info, and rotate locks periodically to prevent wear-related failures.
Common Mistakes That Damage Bags : And How to Avoid Them
Because you’ll want your bag to last through many trips, watch out for common handling and packing mistakes that cause most wear and tear. You can prevent damage by packing smart, lifting correctly, and protecting vulnerable areas. Treat zippers gently, avoid overstuffing, and use padding for hard or sharp items.
Inspect wheels and handles before travel and address small issues early.
- Forcing zippers closed when overpacked
- Dragging soft-sided bags across rough surfaces
- Storing liquids without double-sealing
- Tossing bags into trunks or conveyors without using handles
Quick Troubleshooting Flow: Try These Steps in Order
You’ve already learned how small mistakes accelerate wear, and many problems can be fixed before they become serious—so start with the simplest checks first.
Inspect the zipper for fabric caught in teeth, clear debris, and gently move the slider; don’t force it.
Confirm the combination or key is correct and try gently aligning dials while pulling the zipper.
Tug the pull tabs straight, not sideways.
If a lock is jammed, apply a small amount of lubricant to the mechanism and work it slowly.
If nothing yields, note the lock model and consider professional help to avoid damaging the bag.
Final Checklist Before You Leave Home or Hotel
Before you lock the suitcase and walk out the door, run a quick, methodical checklist to avoid surprises at the airport. Check your lock works, TSA key access is clear, and zippers close smoothly. Verify documents, charger cables, and any restricted items are accessible. If you’d like to open the lock, re-secure it or note where you left evidence of inspection.
- Test the combination or key one last time.
- Confirm nothing bulky jams the zipper or lock.
- Keep TSA tags or notes visible for claim clarity.
- Stow a small tool or printed instructions in case reopening’s needed.
Frequently Asked Questions
Can TSA Record or Report My Lock-Opening Attempt?
Yes — TSA can record or report your lock-opening attempt. If agents suspect tampering, they’ll document it, possibly photograph evidence and file reports. You should cooperate, explain why, and keep records of the interaction.
Will Opening the Lock Void My Luggage Warranty?
It might. If the lock or tamper evidence is part of the warranty, opening it could void coverage; check your luggage’s warranty terms and contact the manufacturer—don’t assume repairs or replacements will remain covered without confirmation.
How to Prove Ownership if Airline Questions My Opened Bag?
Show your ID, boarding pass, and baggage claim tag; ask the agent to note the inspection on their form or receipt; take photos of the opened bag and locks, and keep any written report to prove you owned the luggage.
Are Smart/Electronic TSA Locks Handled Differently?
Yes, they’re handled similarly: TSA can inspect smart locks and may remove or disable them if needed, and you’ll still be asked to prove ownership; you should carry backup keys, codes, and photos of your bag and contents.
Can Humidity or Temperature Affect Lock Operation?
Yes — humidity and temperature can affect lock operation. You’ll find metal parts can corrode or swell, lubricants may thicken or evaporate, plastics can warp, and electronic locks might glitch when exposed to extreme moisture or heat.
Conclusion
When you’re locked out, stay calm and work methodically: check for a TSA logo, find the lock model and reset info, and try the manufacturer’s code or reset method before forcing anything. If it’s non‑TSA, contact the manufacturer or a locksmith rather than cutting the bag. Secure your luggage with clear marks and a backup lock to prevent repeat lockouts. Do a quick final check of codes and keys before you leave.