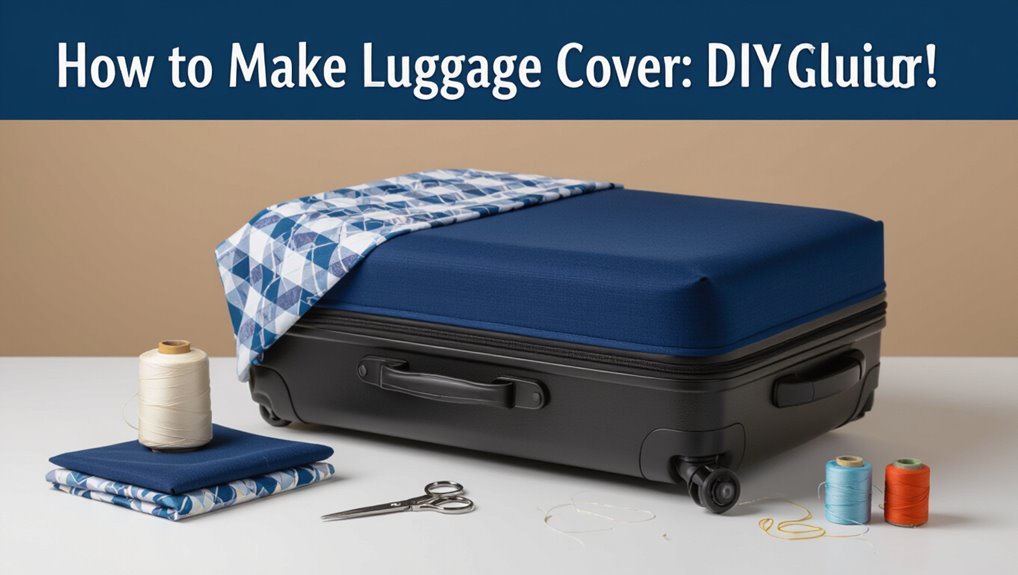
How to Make Luggage Cover Diy Guide
You can make a durable, custom-fit luggage cover fast using stretch fabric, basic sewing tools, and three precise measurements (height, width, depth). Cut matching front and back panels, sew side and base seams with stretch stitch, and add a hem channel for elastic so the cover grips your case. Reinforce handle openings and corners, then personalize with patches or paint. Follow care labels for washing, and keep going to learn sizing, materials, and step-by-step tricks.
What This DIY Luggage Cover Helps You Make
This DIY luggage cover helps you make a snug, protective sleeve that slips over your suitcase to guard against scratches, dirt, and light rain while making your bag easier to spot on the carousel.
You’ll create a tailored, washable shell that preserves finishes, conceals wear, and adds personality with color or pattern.
It fits handles and wheels, stays secure, and packs flat when not in use.
Quick Make: Slip-On Luggage Cover in 20 Minutes
You’ll only need a few simple tools and materials to get started—stretchy fabric, scissors, pins, and a sewing machine or needle and thread.
Follow quick cutting and sewing steps to shape a snug slip-on cover without fuss.
Finish by fitting it to your suitcase and making final tweaks for a clean, secure fit.
Tools And Materials
Quick, small, and effective—gathering the right tools and materials makes the 20-minute slip-on luggage cover easy to finish.
You’ll need lightweight stretch fabric (about 1–1.5 yards depending on case size), matching thread, a fabric marker, measuring tape, straight pins or clips, elastic (¼–½ inch), sharp scissors, and a basic sewing machine or needle for hand-stitching.
Keep supplies organized and ready.
Cutting And Sewing
Start by laying your fabric right-side down and placing the suitcase on top to trace a simple rectangle for the main body, adding ½–1 inch seam allowance all around; then cut two identical pieces for front and back, a long strip for the sides/edge (height = suitcase depth + seam allowances), and four small corner tabs if your case has rounded edges.
Sew pieces right sides together, leaving opening.
- Pin edges evenly
- Use stretch stitch for knits
- Reinforce stress points
Fitting And Finishing
Now try the cover on the suitcase to check fit and mark adjustments: slip it over, align seams with the case edges, and note any excess fabric or tight spots.
Pin or clip adjustments, then sew trimmed areas or add elastic at corners for snugness.
Finish raw edges with a zigzag stitch or bias tape, press seams, and test the fit again before final trimming.
Who This Guide Is For
- Travelers wanting custom style
- DIYers improving sewing skills
- Savers avoiding expensive branded covers
Measure Your Suitcase: Five Exact Dimensions
Before you cut any fabric, measure five exact dimensions of your suitcase: height, width, depth, wheels, and handle and pocket depth.
You’ll record each measurement to guarantee the cover fits snugly and won’t obstruct wheels or handles.
Use a tape measure and note dimensions to the nearest centimeter or inch.
Height, Width, Depth, Wheels
Start by taking five exact measurements—height, width, depth, wheel offset, and handle clearance—so your cover fits snugly without rubbing or bulging.
Measure height from base to top (exclude handle), width across the widest point, depth from front to back including bulges. Note wheel clearance so fabric won’t drag.
- Record each measurement precisely.
- Add 1–2 cm seam allowance.
- Check wheel alignment.
Handle And Pocket Depth
When you measure handle and pocket depth, make sure the cover won’t pull on the telescoping handle or gape over external pockets.
Measure the handle clearance from the suitcase top to the fully retracted handle and the pocket depth from the pocket opening to its back, recording each to the millimeter so your pattern accommodates closures and straps without binding.
Then add seam allowances and clearance for zippers.
How Much Fabric Per Suitcase Size
Choose fabric based on your suitcase’s external dimensions and how much wrap and seam allowance you want; a typical carry-on (around 22″ tall) needs about 1.5 to 2 yards of 45″‑wide fabric.
A medium checked bag (24–26″) takes roughly 2 to 2.5 yards, and a large suitcase (28–30″+) will need 2.5 to 3 yards.
- Measure height, width, depth
- Add 4–6″ for seams and hems
- Account for pattern repeats or matching
Choose Fabric: Waterproof, Stretchy, or Padded
Decide whether you need waterproof protection or a more breathable fabric based on where you travel and how you store your suitcase.
Think about stretch for a snug fit versus padded layers for impact and scratch resistance.
We’ll compare the pros and cons so you can pick the right balance of waterproofing, stretch, and padding.
Waterproof Versus Breathable
1 clear choice you’ll make early on is whether you want waterproof protection, breathable stretch, or cushioned padding—each trades off moisture resistance, flexibility, and impact absorption in different ways.
You’ll weigh conditions: rain, hot climates, or frequent handling. Pick fabric that matches usage and maintenance.
Consider:
- Waterproof shell for wet trips
- Breathable fabric for ventilation
- Hybrid options for balance
Stretch And Padding Choices
Having settled whether you need waterproofing or breathability, next think about how much give and protection your cover should offer—stretchy fabrics give snug, flexible fits while padded options add impact absorption and structure.
Choose spandex blends for easy slip-on, neoprene for cushioning, or thin foam liners for extra protection. Match stretch level to suitcase shape and padding thickness to travel risk.
Tools Checklist: Essential Items
Before you start cutting fabric, gather a few reliable tools that’ll make the job smooth and accurate:
You’ll need basic, precise items to measure, cut, and finish seams neatly. Keep everything handy so you work efficiently.
- Sharp fabric scissors
- Measuring tape and tailor’s chalk
- Sewing machine or heavy-duty needle and thread
Create a Paper Template Step-by-Step
With your tools ready, lay the suitcase on a large sheet of paper and trace its outline, including handles and wheels, so you capture the exact shape you’ll cover.
Mark zipper lines, seams and flap placement, then add seam allowances (usually 1–1.5 cm).
Mark zipper lines, seams, and flap positions, then add 1–1.5 cm seam allowances for accurate assembly.
Number each piece and note grain direction.
Cut out templates carefully, test-fit by taping paper to the case, and adjust as needed.
Cut Fabric Cleanly
Before you cut, make sure you’ve got a sharp rotary cutter or scissors so edges stay crisp.
Lay the fabric flat on a stable surface and pin or tape your paper template to prevent shifting.
Cut slowly along the lines so you don’t need to trim sloppy edges later.
Choose Sharp Cutting Tools
Grab a sharp rotary cutter, quality fabric shears, or a fresh utility blade—dull tools tear fibers and leave jagged edges, so they’ll ruin precise patterns and seams.
You’ll cut faster and truer with blades kept clean and replaced often. Use these tips:
- Rotate blades for consistent sharpness
- Match tool to fabric weight
- Keep scissors only for fabric, not paper
Stabilize Fabric Before Cutting
Now that your tools are ready and blades are sharp, make sure your fabric won’t shift while you cut.
Pin or clip layers to a flat surface, use pattern weights for single pieces, and smooth wrinkles away.
If the fabric is slippery, spray a light starch or use a temporary adhesive sheet.
Cut slowly with steady pressure for crisp, accurate edges.
Sewing Basics: Stitches & Seam Allowance
Because neat seams keep your luggage cover durable and tidy, you’ll want to get comfortable with a few basic stitches and how to manage seam allowance.
Learn to:
- Use a straight stitch for seams and a zigzag for stretch edges.
- Press seams open and trim corners for neatness.
- Mark and maintain a consistent 1/4–5/8″ seam allowance for accuracy.
Slip-On Luggage Cover Pattern for Hard-Shell Suitcases
Start by measuring your suitcase’s height, width, and depth so the cover fits snugly without pulling.
When you cut the pattern, add seam allowance and shape panels for rounded corners, then mark where elastic and closures will sit.
Use a stretch-friendly elastic band and a simple hook or zipper closure to keep the cover secure and easy to remove.
Measurement And Fit
Measurement matters: get three precise dimensions—the height, the widest width across the front, and the depth from front to back—so your slip-on cover fits snugly without slipping or stretching.
You’ll add seam allowance and account for handle and wheel protrusions. Measure twice, note symmetry, and choose stretch percentage.
- Include seam allowance
- Allow handle/wheel clearance
- Check fabric stretch
Pattern Cutting Tips
With your dimensions and allowances confirmed, you’re ready to lay out the pattern pieces for a slip-on cover designed to hug a hard-shell suitcase.
Trace main body, side panels, and base on folded fabric to get symmetry. Add seam allowances and mark grainlines, notches, and handle openings.
Cut carefully, keeping edges smooth for accurate stitching and a snug fit.
Elastic And Closure
While you’ve got the shell and panels ready, focus now on how the cover will grip and close: elastic around the hem and a secure closure at the top will keep the slip-on snug over a hard-shell case.
You’ll sew a deep hem channel for braided elastic and add a top flap with hook-and-loop or a zipper.
Consider:
- Elastic tension
- Closure durability
- Access to handles
Sew a Zipper for Full-Access Covers
Now you’ll install the zipper that turns a simple slip-on into a full-access cover, letting you open the case wide for packing and cleaning.
Measure and mark the seam line, baste edges, and choose a zipper length matching the opening.
Pin one side, stitch with a zipper foot, then repeat opposite side.
Test smooth operation, trim excess, and finish raw edges with a tight zigzag.
Add Stretch Panels for Easy Fit
Because luggage sizes vary, add stretch panels to give the cover a snug, forgiving fit that slips on and off easily.
Cut elastic-knit fabric for sides or corners, stitch with stretch stitch, and secure seams. Use panels to absorb differences in depth and handle placements.
- Choose durable stretch fabric
- Reinforce stress points
- Test fit before final stitching
Padded Luggage Cover for Fragile Items
You’ll pick the right materials and padding options to cushion fragile items without adding too much bulk.
Then you’ll follow a clear step-by-step construction plan to sew and layer the protective sections.
Finally, you’ll secure fragile contents with internal straps or pockets so nothing shifts during travel.
Materials And Padding Options
When you’re packing fragile items, choosing the right materials and padding for a DIY padded luggage cover can make the difference between intact gear and shattered pieces; opt for high-density foam or closed-cell EVA for impact resistance.
Pair it with soft quilted lining to prevent scratches, and use durable outer fabrics like ballistic nylon or heavy canvas to resist tears and abrasion.
- High-density foam or closed-cell EVA
- Quilted or fleece lining
- Ballistic nylon or heavy canvas
Step-By-Step Construction
Start by laying out your materials and measuring the item you’re protecting so you can cut foam and fabric to fit snugly; precise measurements avoid gaps that let things shift.
Cut foam panels, wrap them in fabric, and sew seams with reinforced stitching.
Attach foam to an inner lining, add zipper or flap closure, and test the fit.
Trim excess and finish edges neatly.
Securing Fragile Contents
Having finished the shell and closures, focus now on protecting fragile contents by adding targeted padding and restraint points so items won’t shift or collide during travel.
You’ll add foam panels, sewn pockets, and anchor straps to keep everything stable. Use soft lining, firm inserts, and adjustable ties.
Test fit items and adjust padding thickness until nothing moves.
- foam panels
- sewn pockets
- anchor straps
Add a Waterproof Lining Without Bulk
If you want to keep contents dry without making your luggage bulky, choose thin, heat-bondable waterproof fabrics like laminated nylon or PUL and fuse them to the bag’s interior panels; they add protection while keeping seams slim and flexible.
Cut panels to fit, trim seam allowances, and use a low-temperature iron or heat press.
Topstitch minimally to secure edges without adding stiffness.
Reinforce Corners and Handle Openings
You’ll want to reinforce the handle openings so they don’t tear under strain.
Strengthen the corner seams with bar tacks or extra stitching to stop fraying and split seams.
Add small pads or foam at high-wear points for extra shock protection.
Reinforce Handle Openings
Because handles see the most stress, reinforcing their openings is essential to keep your cover from tearing where the suitcase gets grabbed most.
Add interfacing, stitch a box-and-X, and topstitch around the cutout. Use durable fabric and bar tacks at stress points.
- Use lightweight fusible interfacing
- Sew a box-and-X reinforcement
- Add bar tacks and topstitching
Strengthen Corner Seams
Trim and reinforce the corners to stop fraying and rip-through where your cover takes the most abuse.
Fold raw edges twice, stitch with a short zigzag, then topstitch close to the edge.
Add small triangular patches of heavy fabric inside corners and around handle openings, stitching through all layers.
Use bar tacks or reinforced box stitches at high-stress points for lasting strength.
Add Protective Padding
Add a layer of cushioning at the corners and around handle openings to absorb impact and prevent fabric wear.
You’ll cut foam or batting patches, stitch or glue them inside the cover, and trim for a snug fit. Focus reinforcement where stress concentrates.
- Use closed-cell foam for durability
- Secure with strong thread or fabric glue
- Test fit before final stitching
Attach Straps and Buckles for Security
Start by deciding how many straps you need and where they’ll sit so the cover stays snug during travel.
Measure and mark anchor points, then sew reinforced webbing or attach rivet plates.
Use adjustable buckles and quick-release clips for easy access and tensioning.
Opt for adjustable buckles and quick-release clips to secure and swiftly tension the cover for easy access.
Test fit the cover, tighten straps evenly, and trim excess webbing.
Reinforce stress points to prevent tearing on rough handling.
Decorative Options: Appliqués, Patches, Paint
Whether you want a subtle logo or a bold statement piece, appliqués, patches, and fabric paint give you flexible ways to personalize your luggage cover.
Choose iron-on or sew-on patches for durability, or stencils and fabric paint for crisp designs. Test colors on scrap fabric first.
Keep placements balanced and avoid obstructing zippers.
- durable materials
- simple layouts
- test before finalizing
Personalization Tips for Fast Baggage ID
Use bright color contrasts on your cover so your bag stands out on the carousel and is easy to spot from a distance.
Add unique ID markers like a bold monogram, patterned tape, or a quirky charm to make your luggage unmistakable.
These small choices speed up identification and reduce mix-ups.
Bright Color Contrast
Color makes your bag impossible to miss: pick hues that sharply contrast with common luggage shades—think neon coral against navy or lime green accents on charcoal—and you’ll spot your suitcase at a glance.
Use bold panels, straps, or piping to create contrast. Choose durable, washable fabrics so colors stay vivid.
- Panels for quick recognition
- Accent straps for edges
- Piping to silhouette shape
Unique ID Markers
If you want to spot your bag instantly, add unique ID markers that combine visibility with personal meaning: embroidered initials, a custom-painted pattern, or a brightly colored luggage tag with a QR code.
Choose durable materials, place markers on both sides, and contrast colors for quick recognition.
Add a discreet contact card or encoded QR that links to your info for fast, secure retrieval.
Upcycle an Old Blanket or Sheet Into a Cover
When you’ve got an old blanket or sheet gathering dust, turn it into a protective luggage cover with just a few simple cuts and stitches; this lets you customize size, pattern, and padding while keeping fabric out of the landfill.
Measure your suitcase, cut panels, sew seams and elastic corners for a snug fit.
Consider:
- Adding padding
- Reinforcing stress points
- Using bold patterns for ID
No-Sew Option: Fabric Glue & Iron-On Tape
Skip the needle and thread by using fabric glue and iron-on tape to assemble a sturdy, custom-fit luggage cover.
Measure panels, cut fabric slightly larger, and bond seams with glue for flexible hold.
Reinforce stress points with iron-on tape or hemming tape applied with a hot iron.
Let adhesive cure fully before fitting, and test durability with gentle tugging.
Make a Removable Top-Only Cover
You’ve got a quick no-sew option down, so now focus on a top-only cover that’s fast to remove and won’t bulk up your suitcase.
Cut durable fabric to fit the lid, hem edges, and add elastic or Velcro for a snug fit. Keep it lightweight, washable, and low-profile.
- Velcro or elastic closure
- Light, durable fabric
- Machine-washable design
Convert a Stretch Dress Into a Suitcase Sleeve
If you’ve got a stretchy dress that’s past its prime, turn it into a snug suitcase sleeve by cutting off the skirt and fitting the hem over your case like a custom sock.
Trim excess, reinforce seams with zigzag stitches, and add elastic or a drawstring at the open end for security.
Slide on for scratch protection and quick refresh before travel.
Care & Cleaning: Washing Tips by Fabric
After repurposing a dress into a snug suitcase sleeve, you’ll want to keep your makeshift cover looking and performing its best—washing methods vary a lot by fabric.
Check care labels, treat stains promptly, and air-dry when possible.
Follow these quick rules:
- Knit/stretch: cold wash, gentle cycle, lay flat to dry
- Cotton: warm wash, tumble low
- Delicate/silk: hand wash, dry flat
Troubleshoot Common Fit Problems
When a DIY cover feels too tight, too loose, or uneven, don’t panic—small adjustments usually fix the problem quickly.
Check seam alignment, loosen or tighten elastic channels, and reposition drawstrings.
Add small fabric panels or darts where it pulls, or trim excess and hem for a neater fit.
Test on the suitcase, tweak tension, and secure with reinforced stitches for lasting results.
Airline Weight & Rules: Will a Cover Affect Your Bag?
Because most luggage covers are lightweight, they rarely push you over an airline’s weight limit, but you should still weigh bags with the cover on to be sure.
Check rules for carry-on versus checked, and remember security may inspect covers. Carry documentation if needed.
- Weigh packed bag with cover
- Know airline size/weight limits
- Remove bulky covers for strict carriers
When to Choose Custom Fit vs Universal Covers
If you want a snug, protective fit and don’t mind spending a bit more time and money, go with a custom cover tailored to your suitcase model.
For a snug, protective fit—and if time and budget allow—choose a custom cover made for your suitcase model.
Choose a universal cover if you value quick fit, budget-friendly options, and flexibility across different bags.
Opt for custom when you need precise access to handles, wheels, and pockets.
Pick universal for occasional use, varied luggage, or fast swaps.
Cost Comparison: DIY vs Store-Bought
Although a DIY cover can save you money upfront, you’ll want to compare material, tool, and time costs against the convenience and warranty of a store-bought option.
You’ll weigh savings versus durability, customization, and hassle.
Consider:
- Upfront cost: fabric, zippers, tools
- Long-term value: repairability, replacement
- Convenience: fit guarantee, return policy
Where to Buy Materials & Patterns
Supplies matter: you can find quality fabrics, zippers, and pattern templates at local fabric stores, big-box craft retailers, and online marketplaces like Etsy or specialized sewing sites.
Check dollar-per-yard, material weight, and zipper durability. Buy waterproof coatings if needed.
Look for downloadable patterns with size charts or adjustable templates. Read reviews, compare shipping, and order swatches when unsure to avoid returns or mismatched materials.
Eco-Friendly Options: Recycled & Upcycled Fabrics
You’ve picked the right materials, but you can also make greener choices by using recycled and upcycled fabrics for your luggage cover.
Choose durable scraps, salvage old garments, or repurpose thrifted textiles to cut waste and add character.
Consider these quick benefits:
- Reduces landfill waste
- Lowers resource use
- Creates unique, personalized covers
Time Estimates and Skill Level by Design
When choosing a design, consider how much time you can realistically commit and what skills you already have—simple slip-on covers with elastic hems take under an hour and suit beginners, while fitted, zippered, or padded designs can take several hours and require intermediate sewing skills like installing zippers, topstitching, and working with thicker fabrics.
Estimate 30–60 minutes for basics; 2–6 hours for complex builds.
Final Checklist: Finish, Fit-Test, and Pack
Before you call the project done, run a quick finish-and-fit checklist to catch loose threads, uneven seams, or alignment issues that could show up only when the cover’s on the luggage.
Try the cover on, adjust straps, and confirm closures. Then pack a trial load to test stretch and access.
- Inspect seams and hems
- Test zippers and straps
- Pack and simulate travel
Frequently Asked Questions
Can a Luggage Cover Interfere With TSA Inspections or Security Scans?
Yes — it can. You’ll sometimes need to remove or partially open the cover for TSA inspections or X‑ray clarity, and tightly wrapped covers might slow down screening; stay cooperative and follow officer instructions to avoid delays.
Will the Cover Void Suitcase Manufacturer Warranties?
Generally, no — adding a luggage cover usually won’t void your suitcase warranty, but you should check your manufacturer’s terms since damage caused by an aftermarket cover or modifications might not be covered; keep receipts and follow care instructions.
How Do I Prevent Color Transfer Onto Clothing Inside?
Use colorfast, prewashed fabrics and apply a clear fabric sealant; avoid dark dyes on light interiors. Line the cover with white muslin or polyester, and test a hidden swatch before packing to prevent transfer.
Can I Add a GPS Tracker or Smart Tag to the Cover?
Yes — you can add a GPS tracker or smart tag to the cover. Attach it in a discreet, padded pocket or reinforced loop, guarantee it’s accessible for charging or retrieval, and check airline rules about tracking devices before travel.
Are There Fabric Flame-Retardant or Safety Concerns for Travel?
Yes — you should. Fabrics can be flammable; you’ll want flame-retardant materials or treatments, check airline and safety standards, avoid aerosol sprays near heat, and test treated fabric for durability and odor before travel.
Conclusion
You’ve now got everything to make a snug, stylish luggage cover that protects your case and makes it easy to spot at baggage claim. With quick slip-on options for beginners and sewing variations for more practice, you can choose eco-friendly or upcycled fabrics to match your values. Measure carefully, follow the pattern, and do a fit-test before travel. Pack your tools, try a trial run, and enjoy personalized protection on every trip.