How to Make a Luggage Tag: Easy DIY Guide for Travelers
You can make a durable luggage tag fast using cardstock, leather scraps, or a vinyl sleeve, cut to about 3.5″x2.5″, then reinforce edges and the hole with laminate or a grommet. Add high-contrast name and phone (or a city and secondary contact) and seal info with clear tape or a spray sealer. Attach with paracord, a metal loop, or a quick-release strap and test for strength. Keep going to get step-by-step tips and upgrades.
Quick: Durable Luggage Tag in 10 Minutes
If you’ve only got ten minutes, you can still make a luggage tag that’s sturdy enough for repeated trips. Grab a piece of thick cardstock or thin plastic, a clear adhesive laminate or packing tape, scissors, a hole punch, and a strong strap or zip tie.
If you’ve only got ten minutes, make a tough DIY luggage tag with cardstock, tape, a punched hole, and a secure strap.
Cut a 3.5×2.5 inch rectangle, write or print your contact info, and center it.
Cover both sides with laminate or tightly wrap with tape, smoothing bubbles.
Punch a reinforced hole and thread the strap, knotting securely.
Test the attachment; trim edges if needed.
You’re ready to tag and travel.
Who This Guide Is For
That quick build works for most travelers, but this guide is for anyone who wants options — whether you need a simple, fast tag for a last-minute trip, a more durable or stylish solution, or instructions tailored to kids, frequent flyers, or handmade-gift makers.
You’ll find step-by-step projects suited to beginners and more advanced crafters. If you like customizing colors, adding security features, or using upcycled materials, you’ll get clear choices.
Parents, teachers, and gift-givers will appreciate kid-friendly and batch-making tips. Frequent travelers get suggestions for durability and ID protection.
Everyone can pick a method that fits time, skill, and purpose.
What You’ll Need Upfront
Before you start, gather a few basic tools and materials so the build goes smoothly: a sturdy tag base (plastic, leather, or thick cardstock), a means of attaching it (nylon strap, metal loop, or zip tie), writing supplies or an insert for your contact info, scissors or a craft knife, a hole punch or awl, and optional supplies like clear laminating sheets, decorative paper, adhesives, or a name-covering sleeve for privacy.
Pick durable materials if you travel often. Choose a readable pen or print an insert for clarity. Keep spare straps and a small ruler for straight cuts. Lay everything out on a clean work surface.
Cheap Upgrades Worth Buying

Looking to make your luggage tag last longer and work better? Add a few inexpensive upgrades: clear adhesive laminate or self-laminating sleeves protect info from smudges and moisture, and cost next to nothing.
Use a sturdy split ring or small carabiner instead of flimsy elastic to keep the tag attached through rough handling.
Invest in a waterproof marker and a printed privacy insert to hide personal details while still showing contact info.
Colorful, reflective tape or a bright silicone sleeve makes identification faster on crowded carousels.
These small buys boost durability, visibility, and peace of mind without breaking the bank.
Basic Tools Every Maker Needs
Wondering what tools you really need to get started? You don’t need a workshop—just a few reliable basics will make crafting luggage tags easy and satisfying.
Gather items that feel sturdy in your hands and spark confidence; they’ll turn ideas into tidy, lasting results. Choose quality over quantity so each tool earns its place in your kit.
- A sharp utility knife that slices cleanly and safely
- A cutting mat that protects surfaces and steady hands
- A metal ruler for straight, confident lines
- A hole punch that makes neat attachment points
Safety Tips Before You Start
If you’ve got your tools ready, take a moment to set up a safe workspace. Clear a flat surface, guarantee good lighting, and keep a fire extinguisher or first-aid kit nearby.
Wear eye protection and gloves when cutting or gluing, and secure small pieces with clamps or tape to avoid slips.
Keep flammable adhesives away from heat, and work in a well-ventilated area to avoid fumes.
Store sharp tools out of children’s reach and unplug power tools when not in use.
Take breaks to prevent fatigue; a rested maker is a safer, more precise maker.
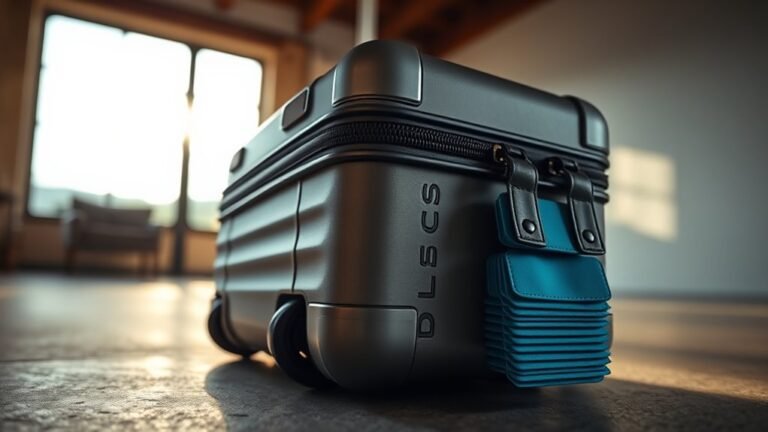
Choose the Right Tag Style
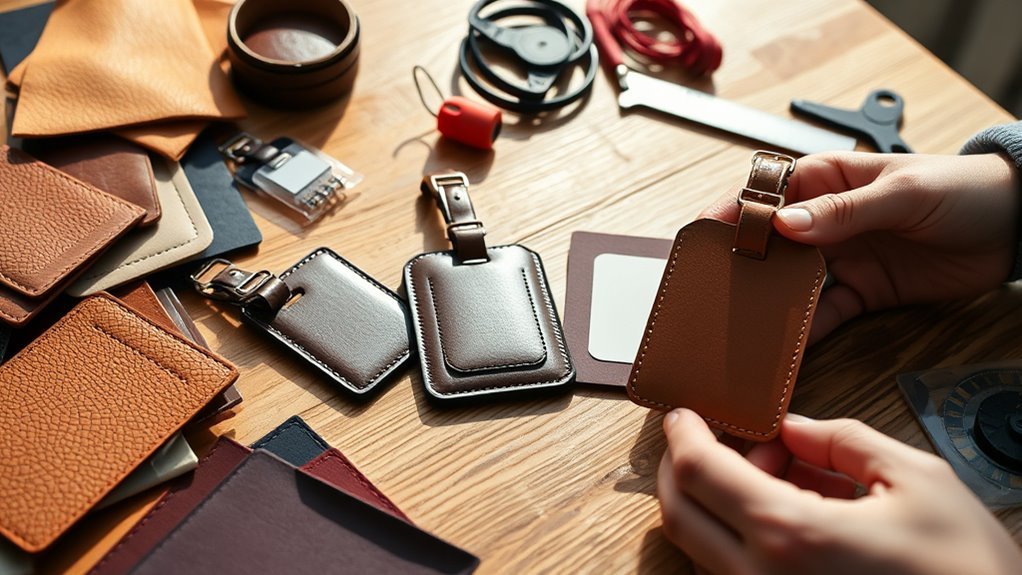
When you pick a tag style, think about how you’ll use it and what it needs to survive—briefcase vs. backpack, checked bag vs. carry-on, or gift luggage for a short trip all call for different shapes, materials, and attachment methods.
Choose sturdy options for rough handling, slim ones for sleek bags, and bright designs for fast spotting. Decide if you want privacy (covered info) or display (funny name).
Consider attachment security: loop, buckle, or rivet. Match style to travel frequency and personal taste so your tag feels like part of the journey.
- Pride when it’s noticed
- Relief at easy spotting
- Comfort in durability
- Joy in matching you
Minimalist Luggage Tag: Materials + Steps
Because you want something sleek and reliable, this minimalist luggage tag uses just a few durable materials and simple steps you can finish in under an hour.
Gather heavy-duty vinyl or waterproof cardstock, clear laminate or self-adhesive sleeve, sturdy nylon strap or metal loop, and a permanent marker or printed info card.
Cut a 3.5″x2″ rectangle, round corners, and insert your contact card into the laminate or sleeve.
Punch a reinforced hole, thread the strap or loop, and secure tightly.
Test durability by tugging gently.
Optionally seal edges with clear tape for extra water resistance and longevity.
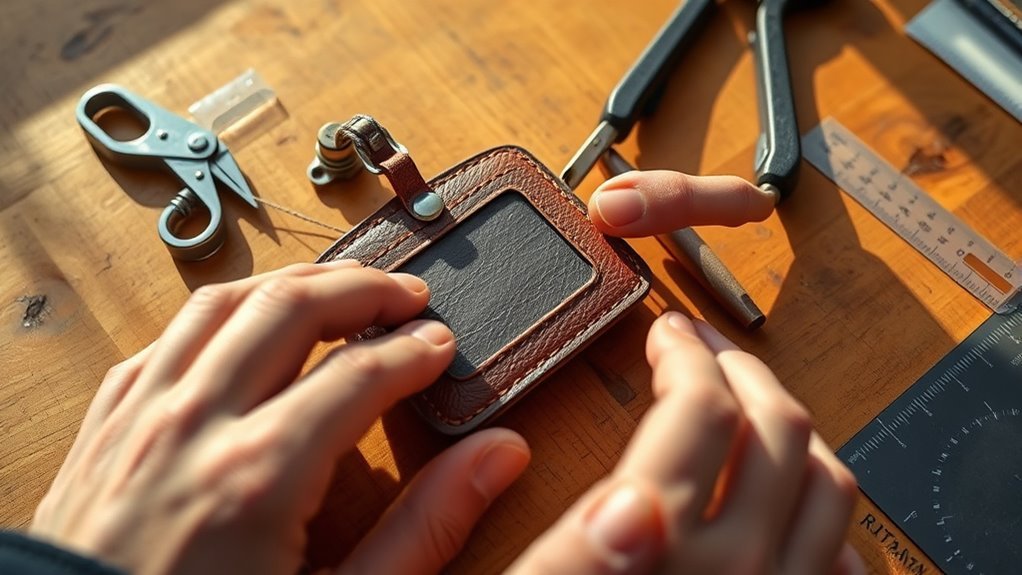
Leather-Look Tag for Adults: Steps
Since you want something stylish yet sturdy, start by selecting a faux leather or thin real leather piece about 4″x2.5″ so it comfortably holds your contact card and fits most luggage handles.
Cut two identical rectangles, punch a slot for a clear ID window or stitched pocket, and round the corners.
Layer, glue, then topstitch close to the edge for durability.
Add a small strap or riveted loop, and finish edges with wax or edge paint.
Slide in your contact card and attach to your bag.
- Confident craftsmanship
- Warm, tactile luxury
- Travel-ready resilience
- Subtle personal flair
Recycled Clear-Card Tag: Step-by-Step
Gather a clear ID card, a recycled plastic sleeve or old credit card, a punch or awl, and a few simple tools so you can assemble the tag without fuss.
Lay out the steps for cutting, punching, and securing the card, then personalize it with your contact information or decorative inserts.
You’ll finish with a sturdy, see-through tag that’s easy to attach and uniquely yours.
Materials And Tools
Before you start cutting and assembling, make sure you have the right materials and tools on hand: a clear plastic card (recycled from old loyalty or gift cards), a printable paper insert, a craft knife or scissors, a hole punch, clear adhesive tape or laminating sleeves, a ruler, and a pen for labeling. Gather everything in a tidy workspace with good light.
Check the card for cracks and trim the insert to fit snugly. Keep tape or sleeves handy to secure the insert without bubbles. Have spare cards and paper in case you make mistakes.
- Pride in reuse
- Joy of simplicity
- Calm preparedness
- Confidence to travel
Assembly And Personalization
With your materials ready, you’re set to assemble and personalize the recycled clear-card tag.
Slide your printed info into the clear card sleeve, aligning text so it’s legible through the plastic.
Trim any excess paper flush with the card edges.
Insert a thin backing, like cardstock, to stiffen the tag and protect writing.
Punch the hole through both layers using the hole punch, reinforcing with a grommet if you have one.
Thread the strap or key ring through the hole and secure it to your luggage.
Add a decorative sticker or washi tape for quick ID and durability.
Fabric Tag for Backpacks and Duffels
If you want a durable, washable tag that won’t scratch metal gear, a fabric tag for backpacks and duffels is a smart choice. You’ll cut sturdy canvas or nylon, sew a clear ID pocket, and reinforce edges with bias tape. Attach with a sew-on loop or metal grommet and webbing strap for security. Pick bright colors or patterns so your bag stands out; add embroidery or a vinyl name for clarity. Care for it by spot-cleaning or gentle wash.
- It feels personal and handcrafted.
- It sparks pride when found.
- It comforts you on long trips.
- It keeps your gear recognizable.
Kid-Friendly Toy-and-Sticker Tag
Want to make a luggage tag your child will actually love and keep? Use a sturdy clear vinyl pocket, insert a colorful card with name and contact info, then attach a small toy (plastic animal, charm) using a short zip tie or split ring.
Make a kid-friendly luggage tag: slip a colorful contact card into clear vinyl and attach a tiny toy for fun.
Let your child pick themed stickers to decorate the card and vinyl—avoid covering contact details. Laminate the decorated card or seal edges with clear tape for durability.
Fasten to bags with a durable strap or luggage loop. Test that the toy won’t detach in transit.
This playful tag is durable, identifiable, and fun for kids to personalize.
Photo ID Tag With Printed Image
When you want quick identification and a personal touch, make a photo ID tag by printing a clear, high-contrast image of yourself (or your child) on sturdy cardstock. Then slip it into a protective vinyl sleeve or laminate it for durability.
Choose a smiling, recent photo so handlers recognize the bag and you reconnect faster. Add your name, phone, and an email on the back in legible type.
Attach with a secure loop or clip to withstand travel. Keep privacy in mind—use reversible info or a QR code linking to contact details.
- Warmth of a friendly face
- Relief at easy recognition
- Pride in a personalized touch
- Comfort knowing contact info is nearby
Laminated Paper or Vinyl Tag
Though simple in construction, a laminated paper or vinyl tag gives you tough, travel-ready protection for any printed ID or design. You’ll print or write your contact details, cut to size, and seal between laminating sheets or a vinyl sleeve.
Trim edges, punch a reinforced hole, and attach a sturdy strap or keyring. Choose clear laminate for visibility or colored vinyl for personality.
Waterproofing resists spills and rough handling, while lamination prevents smudging and tearing. Replace the insert if details change; the outer shell lasts longer.
It’s an affordable, low-effort option that performs well.
Fold-Over Wallet Tag to Hide Info
You’ll need cardstock or thin leather, a ruler, scissors, and a secure fastener to make a fold-over wallet tag.
Fold and glue or stitch the edges to create a slim pocket that hides your contact info while leaving a quick-access flap.
Make sure your personal details sit inside the pocket and the closure stays snug to keep them private.
Materials And Tools
Before you start cutting and sewing, gather a few reliable materials and tools so the fold-over wallet tag comes together cleanly and lasts through travel. You’ll want durable materials that feel good in your hand and protect your info.
Choose a sturdy exterior (leather or heavy vinyl), a soft interior liner, a secure closure, and a strap that won’t snap. Precision tools make assembly faster and neater.
- Thick vegetable-tanned leather for a classic, comforting weight
- Soft felt or microfiber liner to cushion cards and hide info
- Snap or magnetic closure for confidence and ease
- Strong luggage strap with reinforced buckle
Folding And Assembly
Once you’ve cut and prepared your pieces, fold the exterior leather over the liner so the ID window sits snugly inside the front pocket. Align edges precisely, then clamp or weight the layers to hold them while you stitch.
Fold the flap down to cover personal details, checking that it tucks cleanly without bulging. Mark stitch lines along three sides, leaving the top or one side open for the strap and card access.
Use a saddle stitch for durability, keeping tension even. Trim excess edges, burnish seams, and apply edge finish.
Attach the riveted strap or loop, then test fit on luggage.
Secure Personal Details
With the flap folded and the strap attached, focus on keeping your personal details hidden while still accessible when needed. You’ll make a fold-over wallet tag: tuck a business card or paper into the inner pocket, seal edges so it won’t slip, and leave a small opening to peek at info without exposing everything. Choose muted ink and only essential contact details—an email and secondary phone.
Test visibility through the flap in low light and secure with a snap or adhesive. Balance privacy and retrievability so lost luggage can be returned without broadcasting your home address.
- Relief when privacy is protected
- Confidence during travel
- Calm knowing info is secure
- Joy in simple cleverness
Add a QR Code to Tags
If you want your luggage tag to do more than display a name, add a QR code so anyone who finds your bag can scan it and contact you quickly.
Generate a simple QR linking to a contact card or short web form—use a reputable generator and test scans on multiple devices.
Print the code at high contrast and laminate or cover it with clear tape to prevent smudging.
Place the code where it’s visible but not likely to rub off.
Include a brief instruction like “Scan to contact” and avoid embedding sensitive data directly in the code; use a relay form or email link instead.
Add Phone-Based Tracking Affordably
QR codes help someone who finds your bag reach you, but you can also use your phone to keep closer tabs on luggage in real time. Use affordable Bluetooth trackers that pair with your phone and show last-seen locations. Slip a slim tracker into a tag pocket or sew a small pouch; choose models with replaceable batteries. Enable notifications for separation alerts so you’ll know if bags lag behind.
Consider free or low-cost tracking apps that crowdsource location for lost items and let you mark a safe zone.
- Relief when your bag stays visible
- Calm during crowded transfers
- Confidence on solo trips
- Joy at reunited luggage
What Contact Info to Include
Decide which name format works best for you—full name, initials, or a combination—so find the balance between recognition and privacy.
Include at least one phone number and consider adding a secondary number or messaging app contact for backup.
For your address, choose between a minimal city/state or a full street address based on how much detail you want to share.
Full Name And Initials
When you put your name on a luggage tag, include the version that makes identification quick and secure — usually your full legal name plus any common initials you use. Use the name airline staff or border officials will recognize, but keep it readable. If you travel with a partner or professional alias, add that too. Avoid nicknames that could confuse handlers.
- Seeing your full name brings calm when bags arrive
- Initials feel personal, like a gentle signature
- Clear names speed reunions with tired travelers
- Familiar initials reassure you that your bag is home
Phone Number Options
If you want someone to reach you fast, include a primary phone number that’s most likely to be answered while you travel—your mobile with country code—and, if space allows, a secondary number such as a partner’s or hotel contact.
List numbers in international format (+ country code) to avoid confusion.
Use the number you actively monitor; voicemail should clearly state your name.
If you prefer privacy, consider a callback instruction like “Text first.”
Avoid offering multiple competing contacts that clutter the tag.
Keep entries short and legible, using numerals and separators (spaces or dashes) for quick reading.
Minimal Vs. Detailed Address
Because space on a luggage tag is limited, choose contact details that balance usefulness with privacy. You’ll decide between minimal entries (name + city + phone) and detailed ones (full address, email) based on risk tolerance. Minimal keeps you safer from identity theft and still helps airlines return bags.
Detailed info speeds recovery if luggage is far away but exposes more personal data. Consider temporary tags with full details and permanent ones with less. Always include at least one reliable contact.
- Relief when a kind stranger calls you
- Panic avoided with a clear return plan
- Privacy preserved, sleep restored
- Reunion joy when luggage returns
Privacy-Conscious Labeling Options
Want to keep your contact details private while still ensuring lost luggage finds its way back to you? Use indirect identifiers: include your initials, city, and a secondary email that forwards to your main account.
Add a phone number with the country code only, or a travel-only SIM number. Use a QR code linking to a minimal online form or contact card hosted privately; label it “Scan for owner.”
Opt for a business address or hotel instead of home, or a P.O. box. Consider removable inserts so you can swap sensitive info when needed.
Test each method to confirm recoverability and privacy.
Design a Legible Tag Layout
When you design a luggage tag, prioritize clear hierarchy and contrast so someone can read your info at a glance. Use bold for your name, medium weight for contact, and smaller type for secondary details. Choose high-contrast colors and simple fonts, leave breathing room around text, and align elements for quick scanning.
Limit content to essentials—name, phone, and an email or emergency contact—and place them predictably. Consider icons for phone or email to aid recognition without words.
Test readability at distance and in low light before finishing.
- Wanderlust-ready
- Reassuringly simple
- Confidently clear
- Calmly dependable
Stenciling and Stamping for Neat Text
If you want perfectly uniform lettering without relying on steady handwriting, stenciling and stamping give you crisp, repeatable results that suit both minimalist and decorative tag styles.
Choose stencils with simple, roomy letterforms so names and numbers stay readable; secure the stencil with low-tack tape to prevent smudges. Use a foam brush or sponge for paint, dabbing lightly to avoid bleed.
For stamps, pick rubber or polymer sets and ink pads rated for your tag material. Practice on scrap material, align with a ruler or guide, and let ink or paint fully dry before sealing or handling.
Hand-Lettering Tips for Craft Tags
Although you don’t need calligrapher-level skills, steady hand-lettering gives craft tags a personalized, professional look—so start by choosing pens with tips that match your style (fine liners for neat print, brush pens for flourish). Practice basic strokes on scrap material, sketch your layout lightly in pencil, and keep letters evenly spaced.
Work slowly, rest your hand, and embrace small imperfections—they add charm. Seal finished tags with a clear coat to protect ink.
- Imagine a friend’s smile when they read your name.
- Feel proud handing over something handmade.
- Recall the trip every time you see the tag.
- Let your style tell a story.
Use a Label Maker for Clarity
Because clear, legible text makes a tag instantly usable, use a label maker to print names and contact details that stay readable at a glance. You’ll pick a clean font, appropriate size, and contrast that survives smudges and wear.
Choose waterproof, adhesive tape or laminated label strips to resist rain and friction. Center text and avoid all-caps blocks that can blur; include only essential info—name, phone, email or city—and consider a short backup contact.
Test print on scrap material to confirm alignment and legibility before applying. A label maker speeds production and gives a polished, durable finish.
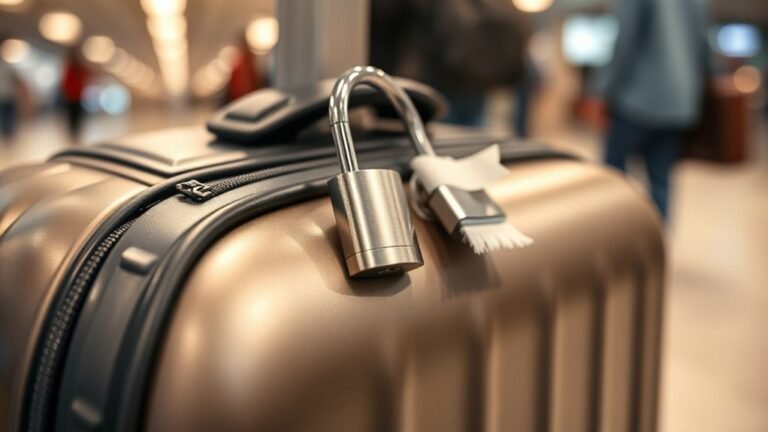
Best Ways to Attach Tags
When you attach your tag, choose a method that balances strength and convenience. Use durable options like metal cables or reinforced straps for long trips.
And consider quick-release clips or buckles when you want fast removal at security checkpoints. Match the attachment to how you travel so your tag stays put but can be taken off easily when needed.
Durable Attachment Options
If you want your luggage tag to stay put through handling, rough baggage belts, and weather, choose attachment methods that combine strength and ease of use. You want confidence that your contact info won’t vanish mid-journey, so pick options that resist tearing, snapping, and corrosion while staying simple to fit.
- Metal cable loop: rugged, secure, and won’t fray — gives peace of mind.
- Leather strap with rivet: classic, durable, and ages beautifully.
- Heavy-duty zip tie: cheap, tamper-resistant, and reliable under stress.
- Polycarbonate buckle strap: strong, weatherproof, and easy to tighten.
Quick-Release Methods
Although you want a tag that stays secure, you’ll also appreciate attachments that let you remove or swap tags fast—especially during security checks or when switching bags. Use quick-release buckles, carabiners with snap gates, or luggage straps with clips so you can detach instantly. Elastic loops slide off handles; magnetic mounts offer fast on/off but check strength. Test each method for flight, rain, and rough handling.
| Method | Best for |
|---|---|
| Side-release buckle | Speed, adjustability |
| Snap carabiner | Durability, frequent swaps |
| Elastic loop | Minimal bulk |
| Magnetic mount | Rapid removal |
| Clip strap | Universal fit |
Make a Strong Paracord Strap
Ready to make a strap that won’t snap mid-trip? Choose 550 paracord, cut a 12–18 inch length, and melt ends to prevent fray. Fold cord for a doubled strength, thread through your tag’s slot, and create a secure cobra or box knot. Tighten evenly, trim excess, and seal tips.
Test the loop under firm tugging so you trust it before packing.
- Feel confident every time you lift your bag
- Know your tag won’t vanish at the carousel
- Enjoy the peace of a dependable connection
- Travel without worrying about sudden failures
Metal Ring vs. Looped Strap
When choosing between a metal ring and a looped strap, think about durability and how you’ll attach the tag: a metal ring gives you a slim, tamper-resistant connection that slips easily through tight handles, while a looped strap (like paracord) offers flexibility, cushioning, and easier removal when you need it. You’ll pick metal for minimal bulk and secure hold; pick a loop if you want shock absorption and simple DIY threading. Consider weight, wear, and noise. Test both on your bag before finalizing.
| Option | Pros | Cons |
|---|---|---|
| Metal ring | Secure | Rigid |
| Looped strap | Flexible | Bulkier |
| Hybrid | Balanced | Slightly complex |
Quick-Release Options for Security Checks
When you need to show ID quickly, choose a quick-release buckle that snaps open with one hand.
You can also use magnetic fastenings for smooth, silent removal, or pick a TSA-friendly breakaway strap that agents can open without cutting.
Compare how secure each option is and how easily it reconnects after inspection.
Quick-Release Buckle Types
If you want to breeze through security checks without fumbling your luggage tag, choosing the right quick-release buckle matters. You’ll pick between side-release plastic, metal snap, pull-tab sliders, and push-button designs.
Consider durability, ease with gloves, and how loudly they click—some feel reassuring, others annoyingly flimsy. Match the buckle to your travel style: rugged trips need metal, business travel benefits from discreet push-buttons, family travel loves easy side-releases, and winter trips favor large pull-tabs.
Test tension so your tag stays put but detaches fast when needed.
- Relief when it unclips smoothly
- Confidence from sturdy metal
- Joy at kid-friendly ease
- Annoyance-free clicks
Magnetic Fastening Options
Side-release and push-button buckles work well, but magnetic fastenings give a different kind of convenience for security checks. They snap together instantly and pull apart with a quick, deliberate tug, so you can open and close your tag one-handed without wrestling clips.
Choose neodymium or coated rare-earth magnets sized to resist accidental opening yet allow intentional release. Embed one magnet in the tag flap and its mate in the strap housing, aligning polarity for secure closure.
Test strength against luggage jostle and airport handling. Add a fabric or silicone surround to prevent scratching and keep the magnetic join discreet and durable.
TSA-Friendly Breakaway Straps
Because airport security sometimes requires quick access, you’ll want a luggage tag strap that breaks away cleanly but stays secure in normal use. Choose a molded breakaway clasp rated for light tension so it releases under inspection but resists everyday jostling. Test materials like woven nylon or thin leather with the clasp to balance durability and release force.
Keep the attachment simple: loop, clasp, and reinforced stitching. Label placement should stay visible when the strap releases. These straps reduce delays and protect your tag without sacrificing peace of mind.
- Relief when lines move faster
- Confidence in your gear
- Comfort knowing inspections won’t damage
- Pride in smart design
Luggage-Tag Weatherproofing: Sealing & Laminating
When you’re making a luggage tag, sealing and laminating are the last steps that keep your contact info readable and your tag intact through rain, spills, and baggage handling.
First, trim edges and wipe away dust.
Trim the edges neatly and wipe away any dust before sealing.
Use a clear adhesive spray or brush-on sealer for inkjet prints—apply thin, even coats, letting each dry.
For durability, use a pouch laminator or self-adhesive laminate sheets; center the tag, remove air bubbles with a card, and seal edges well.
Reinforce punched holes with clear reinforcements or heat-sealed plastic washers.
Let fully cure before attaching to prevent smudging or delamination.
Waterproof Cheap Paper Tags Affordably
You’ll need a few basic supplies—sturdy paper, clear tape or laminating sheets, a punch and some strong string—to get started.
I’ll show simple waterproofing techniques like tape seals, heat laminating, and clear-coat sprays that you can do at home.
If you’re on a tight budget, I’ll also suggest cheap alternatives and where to source them affordably.
Materials You’ll Need
Want durable, inexpensive luggage tags that survive rain and rough handling? You’ll gather simple, low-cost materials that make sturdy, weather-resistant tags without fancy tools. Choose materials that balance strength, flexibility, and affordability so your tags last trip after trip. Keep everything compact and easy to assemble.
- Thick waterproof paper or synthetic cardstock — feels reassuring in your hand
- Clear self-adhesive laminate or sleeves — protects info and soothes worry
- Strong nylon cord or zip ties — secures tag through hectic travel
- Fade-resistant permanent marker or printed insert — keeps contact details readable
Waterproofing Techniques
If you’re using cheap paper for your tags, don’t assume it can’t be made weatherproof — several low-cost methods will keep your contact info dry and legible.
First, laminate with self-adhesive sheets or clear packing tape; smooth out bubbles and trim edges.
Second, coat both sides with clear nail polish or acrylic spray for a lightweight seal; allow full drying.
Third, slide the paper into a small zip-top bag or DIY plastic sleeve cut from a grocery bag and staple or sew closed.
Finally, reinforce the hole with a paper or plastic grommet before attaching to your luggage.
Budget-Friendly Alternatives
Now that you’ve got simple waterproofing tricks down, let’s look at low-cost materials and methods that keep paper tags durable without spending much. You’ll protect your info and still feel clever for saving cash.
Choose heavy cardstock, laminate with clear packing tape, or use a clear badge holder. Reinforce holes with punched rings or tape so straps won’t tear. If you need temporary ID, write with a permanent marker and cover it with tape.
These fixes are quick, cheerful, and effective—so your tag survives bumps, rain, and airport chaos without costing a lot.
- Sturdy cardstock: confidence
- Packing-tape laminate: relief
- Badge holder: pride
- Reinforced hole: assurance
Reinforce Stress Points to Prevent Tears
Because luggage tags get tugged, tossed, and rubbed, you’ll want to reinforce the points that take the most strain—like the hole for the strap, the corners, and any seams—to prevent tearing and lost tags.
Punch a clean hole and back it with a metal eyelet or grommet, or glue a small leather or fabric patch behind the hole.
Sew or topstitch corners, and use rivets where layers meet.
Apply clear fabric or adhesive tape over vulnerable seams for added abrasion resistance.
Test attachment strength before travel.
These simple reinforcements extend lifespan and keep your contact info secure.
Use Color and Pattern to Stand Out
When you pick bold colors and high-contrast patterns for your luggage tag, it’ll jump out on a crowded carousel and make spotting your bag faster. Choose hues that reflect your personality and pair stripes, chevrons, or geometric prints to create instant recognition. Bright contrasts reduce search time and add playful flair. Keep patterns simple so details remain visible from a distance.
Consider durable inks or fabrics to preserve vibrancy.
- Joy: a sunny color lifts your mood at arrival.
- Confidence: a distinct tag signals ownership.
- Relief: faster spotting cuts travel stress.
- Pride: your tag becomes a small, proud statement.
Add Reflective Tape for Night Travel
If you’re traveling late or expect dimly lit baggage areas, add reflective tape to your luggage tag so your bag stands out under headlights and overhead lights. Choose thin, weatherproof tape in silver or fluorescent colors; cut strips that fit your tag without covering important info.
Clean the tag surface, press tape firmly, and seal edges with clear nail polish or a narrow strip of laminating film to prevent peeling.
Position tape where it catches light from multiple angles—edges and a central stripe work well. Reflective tape boosts visibility, speeds identification at night, and improves safety without altering your tag’s design.
Personalize Tags for Families/Groups
When you’re tagging luggage for a family or group, use color-coded straps so everyone can spot their bag at a glance.
Add compact family contact cards with names and a cell number tucked inside a clear sleeve for quick identification.
Consider simple group theme designs—like matching stickers or icons—to make sets easy to recognize and a bit more personal.
Color-Coded Identification
Because a quick glance should tell you whose bag is whose, color-coding luggage tags lets families and groups spot items fast and avoid mix-ups. Pick distinct hues for each person, use bright tones for kids and muted ones for adults, and match colors to personalities or initials. Attach easy-change straps so colors stay consistent across trips. Keep designs simple so colors read from a distance; avoid tiny patterns that blur. Use durable materials to prevent fading.
Celebrate identity while staying practical—color codes reduce stress at baggage claim and make every reunion feel immediate and joyful.
- Relief when the right bag appears
- Pride in a personalized hue
- Joy spotting a child’s color
- Calm at crowded carousels
Family Contact Cards
Want to make sure everyone’s reachable without crowding a tiny tag? Create a slim family contact card to slip into a clear pocket on each tag. List primary contact, secondary contact, and an emergency number—use initials to save space.
Include your family name and a shared email or trip reference. Laminate or use durable cardstock so info survives baggage handling. Make a matching set so handlers spot related bags quickly.
If privacy’s a concern, print a QR code linking to a secure online contact form instead of full details. Keep cards updated before each trip.
Group Theme Designs
If you’re traveling with family or a group, coordinate matching theme designs so your bags stand out and everyone recognizes each other’s luggage at a glance; pick a color palette, motif, or logo that’s simple enough to see from a distance and consistent across tags. You’ll create unity and reduce mix-ups by assigning variations—different colors, initials, or symbols—while keeping the core design.
Let each person add a small personal touch so tags feel individual yet connected. Durable materials and clear printing matter. Use these ideas to make arrivals warmer and departures calmer:
- Joyful sunrise colors that feel optimistic
- Playful icons that spark smiles
- Bold initials for quick ID
- Shared slogan that bonds the group
Match Tags to Luggage Intentionally
While you can grab any tag that fits, matching tags to your luggage intentionally makes spotting and protecting your bag easier. Pick colors and materials that contrast with your suitcase so your tag stands out at a glance.
Use durable materials on checked bags and lighter, decorative tags on carry-ons.
Assign consistent styles for family or group members to speed identification.
Add a small unique mark—stitching, sticker, or washi tape—for extra distinction without revealing personal details.
Balance visibility with privacy: include essential contact info inside a flap rather than on the outer face to deter casual view.
Troubleshoot Common DIY Tag Failures
Even with a careful match between tag and suitcase, DIY tags can fail in predictable ways—faded ink, broken fasteners, peeling laminates, or water damage are the usual suspects. You’ll spot issues early by inspecting before travel: rub the ink, tug the strap, check edges, and feel for moisture.
Even matched to your bag, DIY tags fail—check ink, straps, edges, and moisture, and replace any weak parts.
Choose fade-resistant pens, reinforced holes, waterproof coatings, and sturdy clips to reduce risk. If something looks weak, replace it rather than gamble. Trust your instincts—a reliable tag saves stress.
- Frustration when ink blurs
- Anxiety over a snapped strap
- Disgust at swollen laminate
- Fear of soaked contact info
Repair Hacks for Transit Damage
When your tag gets roughed up in transit, act fast to salvage it—small fixes often prevent a total replacement.
If edges fray, trim stray threads and seal with clear nail polish or fabric glue to stop unraveling.
For cracked plastic, use a strong adhesive or transparent epoxy; clamp briefly for a flush bond.
Replace torn straps with cable ties or a slim leather loop; reinforce with extra stitching or a metal washer to spread stress.
Smudged info? Slip a clear laminate or packing tape over the card, or photo and store a digital copy on your phone for backup.
When to Replace a Worn Tag
Although a few scuffs don’t mean you’re out of options, you should replace a luggage tag the moment it can’t reliably identify your bag or survive another trip. You want clarity at a quick glance: faded text, cracked plastic, torn straps, or peeling adhesive all mean risk.
Replace tags that wobble loose, hide your contact details, or show water damage that blurs info. Don’t wait until a connection’s lost at baggage claim—swap it for a sturdy, readable tag.
Trust your gut: if the tag makes you uneasy, it’s already failed its job.
- Frustration when info’s unreadable
- Panic at lost-contact moments
- Regret over avoidable mishaps
- Relief with a fresh tag
Test Your Tag Before Traveling
Before you head to the airport, give your luggage tag a quick hands-on check so you’re not surprised later. Inspect attachment points, clasps, and seams for weakness; tug gently to guarantee they hold under stress.
Verify your contact info is legible and up to date; replace faded ink or scratched windows. Shake and simulate handling to confirm the tag won’t flip closed or snag.
If you used adhesive, confirm it bonds firmly to the surface. Test waterproofing by sprinkling a few drops or using a damp cloth.
Fix any issues now so your bag stays identifiable on arrival.
Pack and Store Spare Attachments
Keep a small pouch with spare parts like straps, clips, and nameplates so you can fix your tag on the road.
Label compartments or use clear bags to stay organized and grab what you need quickly.
Store the pouch in your carry-on or a dedicated pocket so replacements are always within reach.
Spare Parts Organization
Wondering what spare attachments to bring and how to stow them for easy access? You’ll streamline repairs by grouping essentials by function: ID straps, extra rivets, a spare loop, and a tiny carabiner.
Pack them in a compact pouch you can grab mid-trip, and label compartments so you don’t fumble. Keep items separated to avoid scratches and tangles, and place the pouch near your travel documents for swift retrieval.
Small, visible organization reduces stress and keeps your DIY tag usable. Use the list below to imagine the relief of being prepared when a strap gives way.
- Relief when a strap snaps
- Confidence fixing on the go
- Calm knowing parts are ready
- Satisfaction of quick, neat repairs
Attachment Storage Tips
When you pack spare attachments, group them by function—straps with straps, fasteners with fasteners—so you can grab exactly what you need without digging. Use small zip pouches, labeled compartments, or elastic loops inside a roll-up organizer. Clip tiny parts to a keyring so they won’t scatter, and tuck fragile pieces between soft layers. Keep a minimal repair kit with needle, thread, and superglue. Rotate supplies after trips to replace used items.
| Category | Example | Storage |
|---|---|---|
| Straps | Nylon loop | Zip pouch |
| Fasteners | Buckles | Keyring |
Smart Tag Features Worth Upgrading
If you want a luggage tag that actually makes travel easier, prioritize features that boost tracking, security, and convenience. You’ll want durable materials, a replaceable ID card, and clear visibility while keeping your info private. Upgrade options should help you relax, not complicate packing.
Choose tactile loops and quick-release buckles for fast handling. Pick bright accents for spotting bags in a crowd. Consider waterproof windows and reinforced stitching to survive rough handling.
Balance tech and simplicity so your tag still works if batteries die. Small thoughtful upgrades save time and stress on every trip.
- Durable, reassuring
- Private, confident
- Quick, relieving
- Visible, joyful
Add Tracking Without Buying a Tracker
You can add simple tracking to your tag without buying a gadget by hiding a Bluetooth-capable phone inside your luggage and setting it to share its location.
Another option is to attach a clear QR code label that links to your contact details or a live tracking page so anyone who finds the bag can scan and notify you.
Both methods keep costs down while giving you practical ways to locate lost luggage.
Hide A Bluetooth Phone
Want to add simple tracking to your bag without buying a separate tracker? Hide an old Bluetooth phone inside your luggage and use its built-in location features or a free tracking app. Turn off sounds, keep it charged with a low-drain power bank, and secure it in a padded pocket so it won’t shift. Test Bluetooth and location permissions before travel.
- Comfort: knowing you can locate your bag brings calm.
- Relief: a hidden phone feels like a safety net.
- Confidence: you’ll travel with more control.
- Smart: reuse tech instead of buying more.
Use QR Code Tag
Curious how a simple QR code can help you track luggage without buying extra hardware? You generate a QR linking to a contact form, cloud note, or real-time location-sharing page.
Print it on durable material and attach it to your tag. Add instructions like “Scan if found” and include minimal contact details or a promise of reward.
If someone scans, they’ll see how to contact you or submit where they found the bag. You can update the linked page anytime to show a temporary phone number or safe pickup spot.
It’s cheap, private, and works anywhere with a smartphone.
Eco-Friendly and Upcycling Tag Ideas
How can a luggage tag do more than just ID your bag? You can turn scraps into meaningful, eco-friendly tags that tell a story. Use reclaimed leather, fabric from worn shirts, or cardboard sealed with beeswax. Upcycling reduces waste and makes your bag feel personal. Choose durable fastenings and readable info to keep it practical.
- A tag from a favorite shirt keeps memories close.
- Stitched denim evokes adventure and resilience.
- Pressed-map insert sparks wanderlust each trip.
- Seed-paper tags promise new life after wear.
Make choices that respect the planet and your journeys.
Cheap Creative Finishing Touches
When you want to finish a luggage tag without spending much, small, clever touches can make a big impact—think painted edges, contrasting stitching, or a strip of reflective tape for night visibility.
Add a dab of clear sealant to protect ink and painted details.
Add a small dot of clear sealant to keep ink and paint crisp and travel-ready.
Use washi tape for patterns or to reinforce corners; it peels off if you change designs.
Knot colorful cord or paracord for the strap, or braid thin fabric scraps for texture.
Punch a tiny hole and insert a metal grommet for durability.
Finish with a stamped initial or simple inked icon to personalize.
Quick Checklist to Finish Today
Grab the materials you need and set them out so you can work without interruptions.
Follow the step-by-step assembly checklist to put the tag together quickly and correctly.
Finish with a final quality check to confirm stitching, attachment, and legibility before you head out.
Materials You Need
Before you start, gather the handful of items that’ll let you finish a durable luggage tag today. You’ll want materials that’re sturdy, weatherproof, and simple to use so the project stays quick and satisfying. Pick a main tag material, a clear ID window or laminate, secure attachment hardware, and basic tools. These let you create a tag that feels reliable every trip.
- Thick cardstock or thin plastic — strong, lightweight, travel-ready
- Clear laminate sheet or self-laminating pouch — protects info, keeps it neat
- Durable strap or metal ring — won’t snap in transit
- Waterproof marker or printed insert — legible, private
Step-by-Step Assembly
Once you’ve got your materials, lay everything out on a clean surface and follow these concise steps in order so you’ll finish a sturdy luggage tag in one session.
Cut your main tag shape from durable material, keeping edges smooth.
Trim the backing slightly smaller for a neat seal.
Write or print contact info, then laminate or cover with clear plastic.
Center the backing and press firmly, using adhesive or sewing as chosen.
Punch a hole reinforced with a grommet.
Thread the strap or loop and secure it.
Let adhesives cure fully or stitch twice for extra hold before use.
Final Quality Check
Ready to make sure your luggage tag will last the trip? Do a quick quality check so your effort stays proud and useful. Inspect edges for secure seams, feel for stiff spots, and flex the tag; it shouldn’t crease or tear. Verify attachment hardware stays locked and won’t slip off a handle. Confirm personal info is readable, protected by clear coating or plastic sleeve. Shake the tag gently to listen for loose parts.
Once everything passes, you’ll have a durable, confident tag that sparks travel joy.
- Pride in craftsmanship
- Relief that info is safe
- Excitement to travel
- Confidence in durability
Frequently Asked Questions
Can I Make a Luggage Tag That’s Tsa-Approved for Checked Bags?
Yes — you can make a TSA‑approved checked-bag tag by including a written emergency contact, durable materials, and a visible phone number; stick clear protection over info, use secure attachment, and avoid blocking barcode areas.
How Do I Sterilize Tags After Travel to Prevent Germ Spread?
You should wipe tags with a disinfectant wipe or cloth soaked in 70% isopropyl alcohol, let them air-dry, avoid soaking leather, and replace paper inserts; sanitize hands afterward and regularly clean tags between trips to reduce germs.
Can I Legally Include My Child’s Full Name and Birthday on Tags?
You can, but you shouldn’t display full name and birthdate publicly; you’ll increase identity-theft and safety risks. Use initials, a contact phone, or emergency-only info, and keep sensitive details hidden or removable for travel.
Will Homemade Tags Affect Airline Liability for Lost Luggage?
No, homemade tags won’t change an airline’s legal liability for lost luggage, but they can affect identification speed; you should include clear contact info, avoid overly personal details, and use durable attachment to help recovery.
How Do I Attach a Tag to Wheeled Suitcases With Rigid Handles?
You can secure tags by looping a durable zip tie, luggage strap, or adhesive-backed loop through the handle base or pull tab, or slip a tag onto the retractable handle when extended, ensuring it won’t snag or detach during transit.
Conclusion
You’ve now got a speedy plan to make a durable, personalized luggage tag in minutes. With basic supplies, a few cheap upgrades, and simple tools, you can create something sturdy, searchable, and stylish—without breaking the bank. Try upcycling materials to keep it green, add a QR code or phone label for tracking, and finish with creative touches. Grab your kit, follow the quick checklist, and leave for your trip confident and organized.