How to Fix Luggage Zipper: Quick Fixes That Actually Work
First, diagnose: is the zipper stuck, split, or missing parts? Free fabric with tweezers, nudge the slider with a small screwdriver, then lubricate teeth with graphite, soap, or lip balm. Realign bent teeth with needle‑nose pliers and gently tighten a loose slider. Use a paperclip or keyring as a temporary pull; seal small fabric splits with tape or glue. Pack a mini repair kit for trips, and if you keep going you’ll find step‑by‑step fixes and when to replace the case.
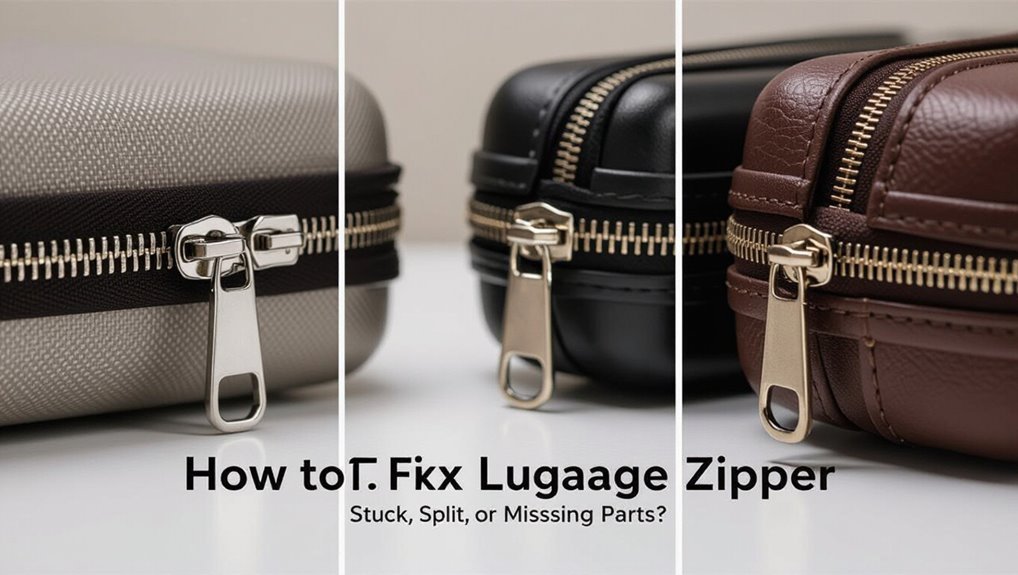
Quick Zipper Diagnosis: Stuck, Split, or Missing Parts?
Before you start repairs, figure out exactly what’s wrong with the zipper: is it stuck, the teeth won’t mesh and the slider just pulls apart, or are parts like the slider, stop, or pull missing or broken?
Inspect the teeth for bends or fabric caught, test the slider’s grip, check end stops and pull tab, and note whether damage is cosmetic or requires part replacement.
Tools and Household Items to Fix a Zipper Now
You don’t need a repair kit to get a zipper working again — common tools like pliers, a needle and thread, and safety pins can handle most jobs.
For lubrication, try a graphite pencil, soap, or a dab of lip balm, and keep alternatives like paper clips or a keyring handy for temporary pulls.
These simple items will let you stop the problem fast and decide if a longer fix is needed.
Common Household Tools
A handful of everyday items can get a stuck or misaligned luggage zipper working again without a trip to the repair shop.
You’ll use simple tools to realign teeth, tighten sliders, and remove fabric snags. Try these:
- Needle-nose pliers
- Small flathead screwdriver
- Sewing needle and thread
- Tweezers
Follow careful, gentle steps to avoid damage.
Lubricants And Alternatives
Reach for a lubricant when the zipper sticks, but pick the right one—graphite, silicone spray, and household alternatives like candle wax, bar soap, or even lip balm can free stubborn sliders without damaging fabric.
Test on a hidden seam first, apply sparingly to teeth or slider, work zipper gently, and wipe excess.
Avoid oils that stain; repeat as needed for smooth operation.
Quick Temporary Fixes
If you need a fast fix, grab common items around the house—paperclip, safety pin, key, pencil, or even a flathead screwdriver—to jury‑rig a slider, guide teeth, or hold the zipper closed temporarily.
You can:
- Thread a paperclip as a temporary pull.
- Use a safety pin to hold teeth together.
- Wedge a pencil to align teeth.
- Pry with a flathead to nudge the slider.
Immediate Triage: Your 60‑Second Zipper Rescue
Spot the problem fast and you can usually fix a stuck or misaligned luggage zipper in under a minute.
Check slider alignment, straighten teeth with fingers or pliers, and press the slider gently while moving it.
Lubricate with graphite or soap if movement’s stiff.
If the pull’s detached, reattach or thread a paperclip as a temporary tab.
Test fully before travel.
Free a Zipper Stuck in Fabric or Lining
When fabric gets caught in the teeth or slider, don’t yank—work slowly to loosen it. Use steady tension and gentle wiggling to free fibers.
If visible, tease fabric out with tweezers or a blunt toothpick. Avoid cutting.
- Hold zipper steady
- Pull fabric back gently
- Wiggle slider slowly
- Use tweezers for trapped threads
Lubricating Zipper Teeth: What to Use – And What to Avoid
1 simple trick to keep a zipper sliding smoothly is to lubricate the teeth—but pick the right product and avoid anything that can gum up, stain, or damage the fabric.
Use a dry silicone spray, paraffin wax, or a graphite pencil for metal teeth.
Don’t use oil, grease, or heavy waxes that attract dirt or discolor nylon.
Apply sparingly and test first.
Realign Separated Zipper Teeth, Step by Step
After you’ve lubed the teeth to reduce friction, it’s time to fix any sections that have come apart. You’ll realign teeth and restore smooth travel.
- Inspect the separated area and back the slider past it.
- Use pliers to gently squeeze misaligned teeth into shape.
- Re-thread tape edges into slider carefully.
- Test by moving the slider slowly, repeating adjustments as needed.
Slider Won’t Close Teeth? How to Fix It
If your slider moves but won’t close the teeth, start by checking the slider itself for wear or spread; a gap in the slider’s channel or a bent pull tab often keeps the teeth from meshing. Inspect, realign teeth into the channel, and replace the slider if cracked. Use a spare slider or zipper kit to restore function quickly.
| Problem | Quick Fix |
|---|---|
| Gap in channel | Replace slider |
| Bent pull tab | Straighten carefully |
| Worn slider | Use zipper kit |
Tighten a Loose Slider Safely With Pliers
First check how the slider grips the teeth by closing it over a few zipper teeth to assess the pinch fit.
If the fit’s loose, use small needle-nose pliers and grip the slider’s back plate—don’t squeeze the front or deform the track.
Apply a gentle, even squeeze and test the zipper frequently until it closes reliably.
Assess Slider Pinch Fit
When the zipper keeps separating even though the teeth look fine, check the slider’s pinch fit to see whether it’s too loose; you’ll be looking for play between the slider and the zipper tape and for misaligned or rounded pinch edges.
- Inspect slider alignment.
- Wiggle to gauge play.
- Note rounded pinch surfaces.
- Mark problem spots.
If loose, you’ll tighten carefully with pliers next.
Grip And Squeeze Carefully
Grab a pair of small, flat-nose pliers and position the zipper slider so its front (the pinch faces) sits squarely between the jaws; you’ll be squeezing just enough to close the gap without crushing the slider or bending the teeth.
Hold fabric away, apply gentle, even pressure, then test the zipper.
Repeat in tiny increments until the slider grips smoothly and teeth align properly.
Replace a Broken Slider Without Sewing
If the zipper slider’s broken but the teeth are intact, you can replace the slider without sewing by removing the old one and sliding on a new, matching-size slider—no needle or thread needed.
Follow these steps:
- Pry off the old slider with pliers.
- Check slider size matches teeth.
- Align slider and press onto teeth.
- Crimp the end stop to secure the new slider.
Install a New Zipper Pull With Key Rings or Cord
One simple fix is to attach a key ring or a short cord to the slider’s pull tab to restore grip and make zipping easier.
Thread a small split ring through the tab hole or loop cord and knot tightly. Choose durable materials—paracord, leather strip, or metal ring—that fit pockets and handles.
This gives reliable leverage and a neat, lasting replacement pull.
Travel Hacks: Temporary Pulls and Emergency Fixes
When a zipper pull breaks on the road, you can rig quick, effective fixes from items in your bag to keep moving without delay.
Use everyday items to create temporary grips and secure sliders until you can replace them.
Make quick, everyday fixes to fashion temporary zipper grips and secure sliders until you can replace them.
- Paperclip bent as a loop
- Keyring threaded through slider
- Strong shoelace knotted tight
- Safety pin hooked through pull tab
Repair Missing or Damaged Top and Bottom Zipper Stops
Because the top and bottom stops keep the slider from coming off the track, you’ll want to inspect and replace them as soon as you spot damage or loss; doing this prevents the zipper from separating or the slider from sliding off entirely. Check stops, crimp new metal stops, or sew fabric stops. Use pliers, thread, or adhesive.
| Issue | Fix | Time |
|---|---|---|
| Missing stop | Crimp metal | 10m |
| Damaged stop | Sew fabric | 15m |
| Loose stop | Glue+crimp | 12m |
| Temporary | Safety pin | 2m |
Put an Off‑Track Slider Back On (No Removal)
After you’ve checked and secured the top and bottom stops, you can deal with a slider that’s slipped off one side without removing it entirely.
You’ll realign teeth and ease the slider back on with steady pressure.
- Open fabric to expose track.
- Align misaligned teeth.
- Hold slider perpendicular, push on gently.
- Test smooth travel; lubricate if needed.
When to Remove and Reattach a Stuck Slider?
If the slider won’t budge after basic lubrication and cleaning, you’ll need to remove and inspect it.
Check the teeth around the slider for bends, breaks, or missing pieces—severe damage usually means you should replace the slider or the whole zipper.
If replacement is practical and parts are available, reattaching a new slider is often the quickest fix.
When Slider Won’t Move
When your zipper slider refuses to budge despite lubrication and gentle coaxing, it’s time to contemplate removing and reattaching it—especially if the teeth are intact but the slider is jammed, bent, or stripped.
- Inspect slider for visible damage.
- Unzip fully and protect fabric.
- Carefully pry open side plate with pliers.
- Re-seat slider, test, then crimp plate closed.
Slider Teeth Are Damaged
1 clear sign you should remove and reattach the slider is visibly damaged or missing teeth that stop the zipper from closing properly. If teeth misalign only near the slider, you’ll remove it, realign teeth, and reattach carefully. Test movement before sewing stops. Use this quick checklist:
| Step | Tool | Result |
|---|---|---|
| Inspect | Light | Find damaged teeth |
| Remove | Pliers | Free slider |
| Realign | Tweezers | Teeth match |
| Reattach | Zip pull | Smooth glide |
Replacement Is Practical
You may have realigned damaged teeth and still find the slider stuck or too worn to grip the teeth reliably; that’s when replacing the slider becomes the practical option.
You’ll remove the old slider, check for bent teeth, and reattach a matching slider. Follow these steps:
- Unzip to the stopper.
- Pry off stopper gently.
- Slide off old slider.
- Fit new slider, replace stopper.
Seal Small Fabric Splits Near the Zipper (Glue or Tape)
If you spot a tiny split in the fabric along the zipper, seal it quickly with adhesive or tape to stop fraying and keep the zipper track from catching.
Clean the area, apply a small dab of fabric glue or clear tape over the tear, press flat, and let dry.
Check the zipper movement; reapply if edges lift.
This prevents worsening and keeps functionality.
Reinforce Weak Seams Around the Zipper Fast
Check the stitching and fabric around the zipper for loose threads, stretched seams, or thinning material so you know exactly where it’s weak.
If you need a quick fix, run a few tight hand-sewn stitches to secure the seam and trim any stray threads.
For a stronger short-term repair, add fabric glue or a strip of heavy-duty tape along the inside edge to hold the seam while you plan a permanent repair.
Inspect Stitching And Fabric
When the zipper still works but the fabric or seams around it are fraying, act quickly to prevent a small problem from turning into a larger tear.
Inspect closely for loose threads, separated seam lines, fabric thinning, and pulled tape.
Then:
- Trim stray threads.
- Apply fabric glue sparingly.
- Reinforce with seam tape.
- Note areas needing future stitching.
Quick Hand-Sew Reinforcement
Although you’re aiming for speed, take a moment to position the fabric and zipper so your stitches will be neat and secure.
Thread a heavy needle with strong polyester thread, knot the end, and use small, even backstitches along the weakened seam.
Reinforce stress points with a few extra passes, trim excess thread, and test the zipper gently before putting luggage back into use.
Use Fabric Glue Or Tape
Grab fabric glue or strong adhesive tape to shore up worn seams around the zipper quickly and neatly.
You’ll reinforce fabric without sewing, sealing frays and preventing further damage. Apply carefully, press, and let cure. Use this when seams are small or you need a fast fix.
- Clean area
- Apply glue/tape
- Press firmly
- Let dry
Sew a New Zipper Stop: Quick Stitches That Hold
One quick way to stop a zipper from sliding off is to sew a new zipper stop yourself; you’ll need only a needle, strong thread, and basic stitches. Thread double, make tight whipstitches at the desired stop, knot securely, trim excess. Test slider movement. If needed, add a dab of glue.
| Tool | Stitch | Tip |
|---|---|---|
| Needle | Whip | Double thread |
| Thread | Backstitch | Tight knots |
| Scissors | Trim | Test slider |
| Glue | Optional | Reinforce |
| Time | 5–10 min | Quick fix |
Replace a Whole Zipper on Soft‑Side Luggage (Basics & Time)
Replacing the whole zipper on soft‑side luggage takes patience and basic sewing skills, and you’ll want to set aside 1–2 hours depending on the bag.
You’ll remove old stitching, match a replacement zipper, and sew carefully.
Steps:
- Remove old zipper tape.
- Clean seam and measure.
- Pin new zipper in place.
- Sew with backstitches for strength.
Choose Pro Repair vs. DIY: Decision Checklist
Deciding whether to hire a pro or tackle the zipper yourself comes down to time, skill, cost, and how much risk you’re willing to accept.
Assess damage severity, tools required, and your repair confidence.
Choose pro for complex replacements, structural frames, or warranty needs.
DIY suits minor fixes, simple slider swaps, and urgent travel.
Factor turnaround time and total expense before deciding.
Where to Buy Cheap Replacement Sliders and Pulls
You can find affordable replacement sliders and pulls at many outlets, so pick the one that fits your budget and urgency.
You can easily find affordable replacement sliders and pulls—choose the outlet that best matches your budget and timeline.
Check these options and buy the right size and style:
- Online marketplaces (Amazon, eBay) for fast selection.
- Hardware stores for sturdy metal parts.
- Sewing and craft shops for small, varied pulls.
- Luggage repair suppliers for matched sliders and kits.
Clean and Lubricate Suitcase Zippers for Longevity
Before you lubricate a suitcase zipper, remove dirt and debris with a soft brush or compressed air so grit doesn’t grind the teeth.
Once it’s clean and dry, apply a suitable lubricant—graphite powder or a silicone-based zipper lubricant works best—sparingly along the teeth and slider.
Test the zipper a few times to work the lubricant in and wipe away any excess.
Remove Dirt And Debris
When dirt and grime build up in your suitcase zipper, it can catch, stick, or even break; cleaning and lubricating the track keeps it moving smoothly and extends the life of your bag.
- Use a soft brush to remove surface debris.
- Vacuum the teeth with a narrow nozzle.
- Wipe with a damp cloth and mild soap.
- Dry thoroughly before reassembly or storage.
Apply Suitable Lubricant
After cleaning the track, pick a lubricant made for zippers—wax, graphite, or a silicone-based spray—to reduce friction and prevent future sticking.
Apply sparingly along teeth, moving the slider back and forth to work it in. Wipe excess with a cloth.
Reapply every few months or after exposure to dirt or salt. Proper lubrication keeps the zipper smooth and extends suitcase life.
Protect Suitcase Zippers During Packing and Transit
1 simple habit will cut down on most zipper problems: protect the teeth and slider while you pack and travel.
Use these steps to avoid snags, dirt, and stress on zippers.
- Zip gently and avoid overstuffing.
- Cover sliders with fabric or tape.
- Keep zippers clean and dry.
- Pack fragile items away from zipper lines.
Fixes for Fabric Pockets on Hard‑Shell Suitcases
Hard-shell suitcases often include fabric pockets that can tear, detach, or sag—so you’ll want quick, practical fixes to keep them usable.
Patch small tears with fabric glue or iron-on patches; sew larger rips with heavy nylon thread.
Reattach detached pockets using strong adhesive or by sewing through the shell’s rivet holes.
Add lightweight backing to stop sagging and reinforce seams for durability.
Deal With Rusted or Corroded Zipper Teeth
If you spot rust or corrosion on the teeth, start by removing surface rust with a soft brush and a bit of white vinegar or baking soda paste.
After cleaning, lubricate the teeth carefully with a zipper-safe lubricant to restore smooth action.
If teeth are badly corroded or missing, replace that section of the zipper to prevent further damage.
Remove Surface Rust
Rusty zipper teeth can seize a slider or split a seam, but you can often restore function by removing surface corrosion carefully.
You’ll need minimal tools and patience. Steps:
- Brush loose rust with a soft toothbrush.
- Apply white vinegar or lemon juice to the teeth.
- Let sit 5–10 minutes, then scrub gently.
- Rinse, dry thoroughly, and test the zipper.
Lubricate Teeth Carefully
Lubricate the zipper teeth sparingly to help freed corrosion move smoothly without attracting dirt or staining the fabric.
Use a cotton swab to apply a tiny amount of penetrating oil or graphite paste along affected teeth, work the slider back and forth gently, and wipe excess immediately.
Test movement several times; repeat minimal applications as needed to restore glide without over-lubricating or staining.
Replace Severely Corroded Teeth
When corrosion has eaten through several teeth or the slider can’t engage them reliably, you’ll need to replace the damaged section to restore function and prevent further fabric damage.
Follow these steps:
- Assess extent and note tooth type.
- Remove damaged teeth or a short tape section.
- Install matching replacement teeth or sew in a new zipper segment.
- Test and secure ends to prevent recurrence.
Fix Two‑Way Zippers and Locking Suitcase Sliders
Two-way zippers and locking suitcase sliders add security and convenience, but their dual pulls and integrated locks mean a few extra checks and tweaks compared with a single-slider zipper.
Inspect both sliders, align teeth, and guarantee pulls engage tracks. Lubricate slider channels, tighten loose slider screws, and realign bent stops.
Test locking mechanism after adjustments; replace a damaged slider or lock to restore reliable function.
Travel‑Friendly Zipper Repair Kit: What to Pack
When you travel, pack a compact multi-tool with pliers, a small screwdriver, and needle-nose tips to handle bent teeth and stuck sliders.
Include a few essential replacement sliders in common zipper sizes so you can swap out broken pulls on the spot.
These lightweight items save time and prevent a damaged zipper from ruining your trip.
Compact Multi-Tool Options
Pack a small, well-chosen multi-tool kit so you can quickly fix zipper issues on the go; include a mini screwdriver set (flat and Phillips), needle-nose pliers, a seam ripper or small scissors, a few replacement zipper pulls and stops, and a tube of fabric-safe lubricant.
Choose compact, lightweight tools that fit a travel pouch and stay organized.
- Screwdrivers
- Pliers
- Cutters
- Lubricant
Essential Replacement Sliders
A small set of essential replacement sliders can save your trip when a zipper head breaks or slips off; include a handful of sizes and styles that match common luggage zippers (coil, molded plastic, and metal) so you can swap them quickly.
Pack a tiny screwdriver, pliers, and a few locking and nonlocking sliders in a slim pouch.
Test fit before boarding.
Quick Pre‑Trip Zipper Checklist
Before you head out, run a quick zipper checklist to prevent surprises at the gate:
- Inspect teeth for bends, gaps, or debris.
- Glide the slider along; note sticking spots.
- Tighten loose slider screws or pinch gently with pliers.
- Lubricate teeth lightly with wax, soap, or graphite.
Do this before packing heavy items so you can address issues calmly.
Common Mistakes That Make Zipper Problems Worse
When you try quick fixes or ignore small signs of wear, you can turn a fixable zipper into a full-blown failure.
Don’t force stubborn sliders, jam fabric without clearing teeth, or skip cleaning grit. Avoid crude glue or excessive lubrication that attracts dirt.
Don’t tug misaligned teeth; realign them gently. Follow proper steps to prevent small issues becoming irreparable.
When to Replace Your Suitcase Instead of Repairing
If you’ve followed proper repair steps and the zipper still fails, it’s time to contemplate replacing the suitcase instead of spending more time or money on fixes.
- Recurrent failures after repairs.
- Frame damage or broken shell.
- Missing or irreparable teeth across length.
- Replacement cost rivals new suitcase.
You should replace when safety, functionality, or value are compromised.
Frequently Asked Questions
Can Zipper Damage Be Covered by Travel Insurance or Airline Liability?
Sometimes yes—if you bought travel insurance with baggage damage coverage or the airline accepts liability for mishandled luggage. Check your policy and the airline’s rules, file claims promptly, keep receipts and photos as evidence.
Can I Use a Hairdryer to Soften and Realign Plastic Zipper Teeth?
Yes — you can use a hairdryer briefly to warm plastic zipper teeth, which softens and helps realign them, but don’t overheat; keep heat moderate, move the slider gently, and test frequently to avoid warping or melting.
Are There Eco-Friendly Lubricants Safe for Zipper Longevity?
Yes — you can use eco-friendly lubricants like beeswax, plant-based silicone alternatives, or biodegradable paraffin substitutes; they’re gentle on fabrics, won’t harm teeth, and you’ll extend zipper life with occasional, light applications.
How Do I Stop a Repaired Zipper From Snagging Delicate Clothing?
You’ll prevent snags by covering the repaired zipper with a fabric strip or seam tape, smoothing edges, applying a thin silicone or wax lubricant, and testing gently; avoid rough pulls and keep delicate items separated when zipping.
Can Temperature Changes Affect Zipper Function on Metal vs. Plastic Teeth?
Yes — temperature changes affect metal and plastic zipper teeth differently. Metal contracts and expands less predictably, risking stiffness or misalignment; plastic can become brittle in cold and warp in heat, so you’ll notice differing performance.
Conclusion
You’ve got this—small zipper issues aren’t the end of travel plans. Use quick diagnosis, simple tools, and smart lubricants to free stuck teeth, realign sliders, or replace missing stops. Pack a tiny repair kit and run a pre‑trip zipper check to avoid surprises. Avoid common mistakes like forcing a jammed slider. If damage’s extensive or teeth are warped, consider replacing the suitcase. With basic fixes and a little care, most zippers behave again.
