How to Customize Luggage: Easy Ideas to Make It Unique
You can make your luggage stand out and work better with quick, durable tweaks you’ll actually use. Add a bright tag or handle wrap for instant ID, stick on waterproof vinyl decals, or sew a discreet RFID sleeve inside a pocket. Reinforce corners, swap zipper pulls, or use removable stickers and straps to protect and personalize. Choose temporary or permanent options based on durability and resale value, and keep tools simple—see below for step-by-step projects and tips.
Who This Guide Helps and What You’ll Learn

Who’s this guide for and what’ll you get from it? You’re a traveler who wants personalized, functional luggage without hassle. You’ll find simple DIY tweaks, material suggestions, and step-by-step quick wins for tags, straps, decals, and interior organization.
You’ll learn budget-friendly options, basic tools, and safety tips so your changes last and won’t damage bags or void warranties. Whether you prefer subtle updates or bold statements, you’ll get practical ideas that suit carry-ons, checked bags, and backpacks.
Why Customize Luggage: Visibility, Protection, Identity
Now that you know what you’ll learn and which projects fit your skills, let’s look at why customizing luggage matters. You want easy visibility at crowded carousels, extra protection from scuffs, and a suitcase that reflects your style so it’s unmistakably yours. Custom touches save time, prevent mix-ups, and deter theft by signaling care. Below is a quick visual summary to guide choices.
| Benefit | What it does |
|---|---|
| Visibility | Spot luggage fast |
| Protection | Reduce wear and tear |
| Identity | Express personal style |
| Practicality | Add functional upgrades |
Quick Fixes You Can Do in Under 5 Minutes
You can make your suitcase stand out in minutes with a bright luggage tag that’s easy to spot on the carousel.
Wrap the handles with colorful tape or fabric for extra grip and personality.
Stick on washable stickers for quick, removable flair.
Bright Luggage Tags
If your suitcase blends into the carousel, brighten it in minutes with a bold luggage tag that’s as functional as it’s eye-catching. You’ll grab attention and avoid mix-ups with a few smart choices: durable material, readable info, and vivid color.
Pick a waterproof tag, slip in an address card with minimal details, and clip it where it won’t snag. Consider reflective or neon shades for low-light baggage claim.
Replace generic labels before each trip so they stay fresh. Quick, cheap, and practical, a bright tag saves time and adds personality without altering your bag’s look.
- Choose durability
- Keep info minimal
- Use vivid color
Colorful Handle Wraps
When you want a fast, visible identifier for your bag, colorful handle wraps slide on in seconds and make a big difference at the carousel. You’ll find neoprene, silicone, or fabric wraps in bold solids, stripes, or patterns; pick a hue that stands out against your case.
Slip one over the pull handle or top grip to add cushion, improve grip, and spot luggage instantly. Many wraps fasten with Velcro or snaps, so you can swap styles or remove them for washing.
They’re inexpensive, travel-friendly, and won’t alter airline handling—perfect for quick, practical personalization.
Washable Stickers
Although they sound simple, washable stickers can transform your bag in under five minutes—peel, press, and go. You’ll refresh scuffs, add personality, and change styles between trips. Choose weatherproof vinyl or cloth-safe paper so stickers lift cleanly when you swap looks. Apply on flat, clean surfaces and smooth bubbles with a credit card.
- Pick a theme: travel icons, florals, or bold initials.
- Mix sizes: a focal sticker plus smaller accents tells a story.
- Change often: washable options keep your luggage current.
They’re cheap, removable, and perfect for instant customization.
How to Choose the Right Customization Approach Fast
Think about how and where you travel most — short weekend trips, rough international layovers, or checked-bag-only vacations — and use that to guide your choices.
Match customization materials to durability needs: rugged stickers or reinforced straps for rough handling, and delicate patches for gentle carry-ons.
That way you’ll pick options that last without wasting time.
Assess Travel Habits
Because your trips vary in length and purpose, start by listing where you go, how often, and what you pack most. That quick audit lets you pick customization that actually solves problems rather than just looks good.
You’ll tailor choices to real needs: frequent weekenders prioritize quick-access pockets; international travelers want clear ID and tamper-evident features; adventure seekers prefer attachment points.
Use this 3-item checklist to guide decisions:
- Trip frequency and duration
- Typical contents and organization
- Primary travel modes (car, plane, train, hike)
This focused assessment helps you choose visible and functional tweaks that match your routines.
Match Material Durability
How tough should your luggage customizations be for the materials you already own? You’ll match technique to material: fabric bags take sewing, patches, iron-ons, or fabric paint; hardshell cases suit stickers, adhesive-backed decals, or molded attachments.
Check seam strength, coating, and flexibility before gluing or stitching. For fragile trims, test adhesives on a hidden spot.
If you travel rough, pick abrasion-resistant options like reinforced patches or riveted tags. Lighter travel calls for removable decorations so you can update styles.
Balance permanence with repairability—choose methods that won’t void warranties or weaken the original construction.
What Tools and Supplies You’ll Actually Need
Before you start modifying your bag, gather a compact kit of essentials so you won’t stop mid-project. You’ll need basics that cover cutting, attaching, marking, and repairing. Keep tools small and multipurpose for travel-friendly customization.
Before you begin, pack a compact toolkit of cutting, attaching, marking, and repair essentials for on-the-go bag tweaks.
- Utility knife, scissors, seam ripper — for precise cuts and adjustments.
- Strong adhesive, fabric glue, needle and thread — for permanent or temporary bonds.
- Painter’s tape, measuring tape, chalk marker — for alignment and clean designs.
Also include spare hardware (zipper pulls, rivets), a small ruler, and a protective mat. Pack everything in a pouch so you can customize anywhere.
Check Your Luggage Material First (Hard vs Soft)
Before you start customizing, check whether your case is a hard shell or soft fabric so you know what techniques will work.
Hard shells take paints, vinyl wraps, and adhesive decals well but won’t accept sewing or patchwork.
Soft fabric lets you sew on patches, add embroidery, or use fabric paint, though you’ll need to take into account seam strength and weatherproofing.
Hard Shell Considerations
When you’re choosing between hard and soft shell luggage, start by checking the material—polycarbonate and ABS offer rigid protection, while ballistic nylon and canvas give you flexibility and external pockets.
For hard shells, focus on durability, finish, and customization options. You’ll want to weigh scratch resistance, weight, and how decals or paints adhere. Think about locking mechanisms and impact zones.
To guide choices, remember:
- Protection: rigid shells resist crushing better than fabrics.
- Surface: glossy finishes show scratches; matte accepts vinyl wraps.
- Weight: lighter polycarbonate balances strength and portability.
Soft Fabric Options
If you prefer flexibility and pockets, check the fabric type—ballistic nylon, polyester, and canvas each handle customization differently. You’ll find ballistic nylon is tough, resists fraying, and accepts heat-transfer patches and embroidered name tags well.
Polyester is lightweight and dye-friendly, so fabric markers, iron-on patches, and fabric paint stick nicely.
Canvas soaks up color and can be stenciled, dyed, or hand-painted for a rugged look, though it may need sealing. Test your method on a hidden spot first.
Always avoid heavy hardware on weak seams, and reinforce attachment points to prevent tearing during travel.
Simple ID Tags and Colorful Luggage Straps
Though small, simple ID tags and colorful luggage straps make a big difference: they help you spot your bag quickly, deter casual thieves, and add a touch of personality. You can choose durable leather, clear address windows, or privacy-friendly tags with contact apps. Bright straps secure zippers and show off your style without bulky decorations. Pick colors that contrast with your suitcase for instant recognition.
- Use readable info to speed recovery.
- Select woven straps for strength and visibility.
- Match strap color to mood, not trends.
Replace worn tags and straps before each trip.
Bright Ribbons, Luggage Tape, and Quick Knots
You can tie bright ribbons to handles and zipper pulls for instant visibility and personality.
Use durable luggage tape on seams or hard-shell edges to add color and protect wear without peeling off.
Learn a few fast decorative knots to keep ribbons secure and easy to remove.
Bright Ribbon Placement
When you want your bag to stand out on the carousel, bright ribbons are the quickest, most visible option; secure them with luggage tape and finish with a simple quick knot so they stay put through handling.
Place ribbons where they contrast color and texture—handles, zipper pulls, or a top corner—to catch the eye and avoid snagging.
Loop twice for security, trim excess, and tuck ends under tape.
Consider ribbon width for balance: narrow for small bags, wide for large.
Use a quick knot you can release fast at security.
Durable Luggage Tape
Bright ribbons draw the eye, but durable luggage tape keeps those accents—and your bag—secure through rough handling. Use clear, waterproof tape rated for outdoor use to reinforce seams and secure ribbon ends without bulky knots.
Press tape firmly along edges and across synthetic fabrics; heat-activated varieties bond best to plastics. Trim ribbon tails before taping to avoid fraying, and apply tape in smooth, overlapping strips to prevent peeling.
For removable decoration, place tape on a fabric patch or loop instead of the bag surface. Inspect tape after trips and replace any lifting sections to maintain protection.
Fast Decorative Knots
Although simple to tie, fast decorative knots can transform plain straps into eye-catching identifiers and keep ribbon ends secure, even after rough handling. You’ll pick bright ribbons or luggage tape, then add quick knots for flair and function. Use snag-resistant materials and tuck ends under bands so they won’t fray.
Practice three reliable knots: the overhand, the square, and the slip knot; each balances speed with security.
- Overhand: simplest, stops fraying.
- Square: lies flat, looks tidy.
- Slip: adjustable, quick release.
You’ll make luggage distinct without bulk or fuss.
Adhesive Decals and Vinyl Stickers That Last
If you want your luggage to show personality without peeling or fading, choose high-quality adhesive decals and vinyl stickers designed for outdoor use. Look for UV-resistant, waterproof materials and strong acrylic adhesives so designs survive handling and weather.
Measure smooth areas first and clean them with isopropyl alcohol to guarantee full contact. Apply slowly, smoothing from center outward to avoid bubbles; a credit card wrapped in cloth works great.
Mix small and large decals for balance, and place them where zippers or straps won’t rub. Pick removable vinyl if you may update designs later without damaging the shell.
How to Remove Decals Safely
Before you start, make sure you’ve cleaned and dried the surface so dirt won’t scratch the finish.
Pick a solvent that’s safe for your luggage material and test it on an inconspicuous spot.
Work slowly to lift the decal and then remove any adhesive residue gently to avoid damage.
Prepare The Surface
When you’re ready to remove stickers or decals from your luggage, work methodically to avoid scratches, adhesive residue, or warped finishes. First, clear the area and test a small corner to see how the material reacts.
Use gentle tools and steady pressure, and warm stubborn edges with a hair dryer to loosen adhesive without scraping. After removal, clean the surface with a mild, lint-free cloth and let it fully dry before any customization.
Finally, inspect for remaining residue and repeat gentle warming if needed.
- Assess surface type.
- Use soft tools and warmth.
- Clean and dry thoroughly.
Choose Safe Solvents
Because different luggage materials react differently to chemicals, you should pick solvents that remove adhesive without harming the finish. Test any product on an inconspicuous spot first.
For hard plastics and metal, isopropyl alcohol (70–90%) or adhesive removers labeled safe for plastics work well.
For coated fabrics or leatherette, use mild soap and water or a citrus-based remover diluted per instructions.
Avoid acetone on varnished or painted surfaces.
Use a soft cloth and gentle pressure; don’t soak seams or zippers.
Wear gloves, work in a ventilated area, and follow manufacturer warnings to protect both your luggage and yourself.
Remove Residue Carefully
Want decals gone without damaging your luggage? You can remove residue safely by working patiently and testing first. Start with a gentle approach: warm soapy water and a soft cloth. If that fails, use isopropyl alcohol or a citrus-based adhesive remover on a hidden spot to check compatibility.
- Clean surface, warm water, soft cloth — avoid scrubbing hard.
- Test solvent on an inconspicuous area; wait for color change.
- Gently lift softened adhesive with a plastic scraper, then wipe and dry.
Take your time; rushing or harsh tools will scratch or discolor your case.
Use Straps and Buckles for Security and Style
Though simple at first glance, adding straps and buckles transforms your luggage into something both tougher and more personal. They secure contents, deter theft, and give you a chance to inject color or texture.
Choose durable webbing and quick-release buckles for convenience, or leather straps for a classic look.
Measure so straps bed flat across seams and handles, then mark attachment points to avoid hardware interference.
Use rivets or reinforced stitching where stress concentrates.
Consider a detachable strap you can swap by trip, and pick bright or patterned straps to spot your bag fast while improving security without altering the case permanently.
Sew Fabric Wraps and Removable Sleeves for Protection
Pick tough, water-resistant fabrics like canvas or ripstop to keep your bag safe from scuffs and spills.
Measure your luggage carefully—account for seams, handles, and zippers—so the wrap or sleeve fits snugly without restricting access.
Use removable closures like snaps, Velcro, or magnetic strips so you can secure the cover quickly and take it off for washing or storage.
Choosing Durable Fabrics
Durable fabric choices make the difference between a cover that protects your luggage and one that wears out after a trip, so start by prioritizing abrasion resistance, tear strength, and water resistance. You’ll pick materials that stand up to handles, zippers, and rough handling while still looking good.
Consider weight, flexibility, and how seams will hold up. Test small swatches against scuffs and water. Think about easy cleaning and UV resistance for sun exposure.
Balance cost with longevity so your sleeve lasts seasons. Choose hardware and closures that match fabric strength for reliable protection.
- Nylon
- Canvas
- Cordura
Measuring For A Fit
Before you cut or sew, measure the suitcase precisely so the wrap or sleeve fits snugly without pulling at seams or hardware. Use a tape measure to record height, width, and depth, noting curves, handles, wheels, and raised logos.
Add seam allowances—generally 1/2 inch per seam—and extra ease for removable sleeves so they slip on without stretching. Mark fabric templates with chalk, matching grain to travel wear.
If you’ll line the wrap, measure lining separately. Double-check measurements by pinning a paper mockup around the case before cutting fabric to avoid costly mistakes.
Attaching Removable Closures
How will you secure the wrap so it stays put on the go? Think removable closures: snaps, Velcro, and elastic channels let you add protection without altering the bag. You’ll sew a fabric sleeve sized to fit snugly, then attach closures that match your routine—easy on, easy off.
- Measure twice: guarantee snugness without stretching.
- Choose closures: snaps for strength, Velcro for speed, elastic for stretch.
- Reinforce seams at stress points to prevent tearing.
You’ll test fit, adjust closure placement, and finish edges. Removable sleeves protect surfaces and let you swap styles fast.
Iron‑On Patches and Appliqués for Canvas and Hardshells
If you want a quick, low‑commitment way to personalize canvas or hardshell luggage, iron‑on patches and appliqués are perfect — they stick on fast and add instant character. Choose heat‑transfer patches for canvas and peel‑and‑stick or sew‑on appliqués for textured or coated shells.
Clean the surface, test a hidden spot, and follow manufacturer heat settings to avoid warping. For extra hold on smooth hardshells, use a few stitches or fabric glue rated for plastics.
Arrange patches before applying to balance design. Remove gently with heat or adhesive remover when you want a fresh look.
Attach Enamel Pins and Dangling Charms Safely
Enamel pins and dangling charms give your luggage personality without the permanence of paint or permanent stickers, but you’ll want to attach them so they stay put and don’t damage fabric, zippers, or polycarbonate shells. Check backings and clasps, pick placement away from seams or weak spots, and favor soft ties for delicate surfaces.
Secure metal pins with rubber clutches or locking backs; use small washers inside soft liners to spread pressure. For charms, clip to internal straps or a keyring loop, not to zipper teeth. Remove before rough handling or airport X‑ray if recommended.
- Inspect
- Protect
- Remove when needed
Paint a Hardshell With Stencils: Step‑by‑Step
When you want a crisp, customized look on a polycarbonate or ABS hardshell, stencils give you controlled, repeatable results with minimal mess. Prep by cleaning, sanding lightly, and taping edges. Choose spray or acrylic paint formulated for plastics; test on scrap. Secure stencil with low-tack tape, mist thin coats, letting each dry. Peel stencil carefully to avoid smudges. Seal with a clear polyurethane designed for luggage to protect from scratches. Pack lightly after 24–48 hours. Enjoy the personal touch and reassure yourself every trip with a suitcase that’s unmistakably yours.
| Joy | Confidence |
|---|---|
| Pride | Durability |
| Excitement | Recognition |
| Freedom | Identity |
| Calm | Adventure |
Fabric Paint Techniques for Canvas Bags
Although canvas takes paint well, you’ll get the cleanest results by prepping the bag, choosing the right paint, and practicing your technique first. Clean, prime, and clip seams so paint won’t bleed. Use fabric acrylics or textile paints and thin with medium if needed. Test brushes and pressure on scrap canvas to control edges and texture. Fix layers with heat per paint instructions. Seal lightly for durability. Consider washable designs and placement for wear.
- Plan: sketch and measure placement.
- Practice: test colors, strokes, and dilution.
- Protect: mask areas and heat-set finished work.
Spray Painting Hard‑Side Luggage Without Damage
Before you spray, prep and mask the suitcase thoroughly—tape off zippers, wheels, and handles to protect moving parts and hardware.
Pick a paint formulated for plastics or polycarbonate and use thin, even coats to avoid runs and adhesion problems.
Work in a well-ventilated area and follow the paint maker’s instructions for drying and recoat times.
Prep And Mask Carefully
Ready to protect the parts you don’t want painted? You’ll prep by cleaning, drying, and removing hardware where possible. Use low-tack painter’s tape and plastic or paper to mask wheels, zippers, handles, locks, and seams so spray won’t seep under edges. Press tape firmly and overlap edges; use small pieces for curves. Keep ventilation and work on a flat, dust-free surface.
- Remove detachable parts.
- Tape edges and cover openings.
- Inspect for gaps and re-tape.
Check tape after moving the case; reapply if it lifts. Masking well saves finish and function.
Use Appropriate Paint
When you pick paint, choose one formulated for plastics or polycarbonate so it bonds without cracking or peeling. Test a small area, sand lightly with fine grit, clean, and apply thin, even coats. Let each coat dry fully and avoid heavy buildup near seals or handles. Use primer made for plastics if color change is drastic. Work in a well ventilated space and wear a mask.
| Step | Tip |
|---|---|
| Test | Spray inside corner |
| Sand | 400–600 grit |
| Clean | Isopropyl wipe |
| Primer | Plastic-specific |
| Coats | Multiple thin coats |
Dye Canvas Luggage for a Custom Base Color
If you want a bold, even base color, dyeing canvas luggage gives you control over the tone and finish—just plan, test, and work methodically.
Remove hardware, clean fabric, and choose a fiber-reactive or suitable fabric dye. Test on a scrap to confirm shade and saturation.
Apply dye evenly with sponge or immersion, working quick for uniformity, then rinse until water runs clear.
Heat-set per dye instructions and reassemble once dry.
- Prep: clean, remove parts, test dye.
- Apply: even strokes or immersion for consistency.
- Finish: rinse, heat-set, dry, then reattach hardware.
Add Protective Corner Guards and Bumpers
Because corners take the brunt of travel wear, adding protective guards and bumpers will extend your luggage’s life and keep it looking sharp. Pick guards that match your style—metal corners for a vintage vibe, rubber bumpers for modern resilience, or leather patches for a refined look.
Measure and mark placement so protection sits flush with edges and wheels. Use adhesive-backed pieces for easy DIY or rivet/screw-on options for heavy-duty security.
Clean surfaces before applying and press firmly, letting adhesives cure. These simple upgrades prevent scuffs, absorb impacts, and keep your case functional and attractive over many trips.
Reinforce Handles and Zippers for Longevity
Although you probably don’t think about them until they fail, your handles and zippers take the most abuse and deserve targeted reinforcement to keep your luggage reliable. You can extend life and prevent mishaps with simple upgrades and regular checks.
Although often ignored until they break, handles and zippers deserve simple reinforcements to keep luggage reliable.
Focus on stress points, swap weak components, and add protection where needed. Try these practical steps:
- Replace thin zipper sliders with metal, lubricate teeth, and sew a fabric guard.
- Reinforce handle mounts with rivets or heavy-duty stitching and a leather wrap.
- Add a nylon strap bridge under handles to distribute load and reduce strain.
Quick Repairs for Scuffs, Scratches, and Gouges
First, check what you’re dealing with — a surface scuff, a shallow scratch, or a deeper gouge — since each needs a different approach.
For quick DIY fixes, you can buff scuffs with a microfiber cloth and mild cleaner.
Fill scratches with matching paint or repair kits.
Use adhesive patches or epoxy for gouges.
To keep issues from returning, add protective films, edge guards, or mindful handling habits.
Assess Damage Type
When you inspect your luggage, check whether the damage is a surface scuff, a shallow scratch, or a deeper gouge—each needs a different quick fix. You’ll assess depth, material, and location:
Scuffs sit on finishes, scratches cut fibers or coating, gouges remove chunks. Note if wheels, corners, or fabric are involved and whether hardware is bent.
Decide if the piece is cosmetic or structural—cosmetic affects looks, structural affects use. Photograph damage for reference. Then rank urgency so you can prioritize repairs or professional help.
Use this clear assessment before you move to DIY solutions.
- Depth
- Material
- Location
Quick DIY Fixes
Now that you’ve assessed the damage, you can tackle most scuffs, shallow scratches, and small gouges yourself with a few targeted fixes. Clean the area, use a soft eraser for scuffs, apply polish or a matching marker for scratches, and fill gouges with colored repair compound. Buff lightly and seal.
| Tool | Action | Result |
|---|---|---|
| Soft eraser | Rub gently | Removes surface marks |
| Microfiber | Clean | Prepares surface |
| Matching marker | Color fill | Conceals scratch |
| Repair compound | Fill gouge | Restores contour |
| Clear sealant | Protect | Blends repair |
Prevent Future Scuffs
Want to keep new scuffs, scratches, and gouges from piling up on your luggage? You can prevent damage with simple habits and small upgrades. Use protective covers, avoid dragging bags on rough surfaces, and store them carefully between trips. Treat existing marks quickly so they don’t worsen.
- Apply corner guards and a durable shell or slipcover.
- Keep a small repair kit: adhesive, touch-up marker, and clear sealant.
- Use straps or a luggage harness to limit friction and impact.
Follow these steps and you’ll maintain a cleaner, longer-lasting suitcase that still shows your personal style.
Anti‑Theft Tweaks That Don’t Scream “Nice Luggage”
Because flashy locks and designer tags can make your bag a target, you’ll want low-key anti-theft tweaks that blend in and work.
Slip a slim RFID-blocking sleeve into a hidden pocket to protect cards and passports.
Slip a slim RFID-blocking sleeve into a hidden pocket to quietly protect cards and passports.
Swap flashy zipper pulls for small, matte zip ties or cable loops you can cut in emergencies.
Add a discreet luggage strap with internal compartments for essentials and a muted color so it doesn’t shout “expensive.”
Sew a tiny, reinforced pouch inside the lining for valuables.
Finally, attach a neutral-colored tracker inside a seam so it’s hidden but retrievable if needed.
Personalize With Monograms, Labels, and Nameplates
After you’ve made low-key security tweaks, add personality without advertising value by using monograms, labels, and nameplates that stay subtle. You’ll keep identification discreet while expressing style. Pick fonts and metals that match your bag’s tone, and place plates in inconspicuous spots—inside pockets, under flaps, or along seams.
Consider leather tags embossed with initials for a classic feel or matte metal nameplates for modern restraint. Keep color contrast minimal so it doesn’t shout. Think practical: durability, legibility, and how it affects resale.
- Initials
- Slim leather tag
- Matte metal plate
Temporary vs. Permanent Customizations: When to Choose Which
Think about how long you’ll want the change: you’ll choose temporary options if you need short-term flexibility, and permanent ones when durability matters.
Consider how wear will affect each choice—stickers and tags can peel, while engraved plates hold up better.
Also weigh resale value, since removable customizations keep options open for future buyers.
Short-Term Flexibility
When you’re deciding how to customize your luggage, weigh how long you’ll need the change and how it might affect resale or airline rules. You want options that match trips and evolving tastes.
Use removable patches, straps, and covers when you’ll switch styles often or sell the bag. Go permanent only if you love the look long-term.
- Removable: quick swaps, no impact on value.
- Semi-permanent: adhesives or clips that leave minor marks.
- Permanent: dye, stitching, or hardware changes for a signature piece.
Choose flexibility to adapt without regret.
Durability And Wear
Short-term flexibility is great for switching looks, but you also need to think about how long each customization will hold up under real use. You’ll weigh temporary options like stickers, straps, and luggage covers against permanent changes such as paint, patches, or welded hardware.
Choose temporary when you want versatility or expect heavy handling; they’re easy to replace if scratched or dirty. Pick permanent when you need lasting identification or structural improvements, but know repairs may be harder.
Consider abrasion, weather, and cleaning methods—select materials and attachment methods that match your travel habits to avoid premature wear.
Resale And Value
How will your customizations affect your luggage’s resale value? You’ll balance personal style with future buyers’ preferences. Choose temporary changes if you might resell: stickers, removable straps, or painted-on decals that peel off.
Permanent alterations—deep dye, structural mods, glued-on décor—can lower resale unless done professionally or tastefully.
- Temporary: preserves original condition, broad appeal.
- Reversible professional work: can add value if high-quality.
- Permanent DIY: risky—may limit buyers and lower price.
Think like a buyer: keep receipts, document reversible steps, and avoid irreversible changes if you want the best resale outcome.
Travel‑Safe Adhesives: What Works and What to Avoid
Because adhesives meet a lot of wear and airline scrutiny, you’ll want to pick products that stick reliably without risking damage or security delays.
Use fabric glue for patches, double-sided tape for temporary decals, and outdoor-rated contact cement for heavy embellishments.
Avoid solvent-based glues that can soften plastics or leave strong odors that trigger inspections.
Test any adhesive on a hidden spot to verify it won’t discolor or warp polycarbonate and leather.
Heat-activated tapes and peel-and-stick vinyl work well for smooth surfaces.
Keep labels removable when possible so you can update or remove decorations before resale or repair.
Plan a Cohesive Look: Color, Pattern, and Theme Tips
Once you’ve picked adhesives that won’t damage your suitcase or trigger inspections, think about how colors, patterns, and themes will work together so your luggage looks intentional rather than haphazard.
Choose safe adhesives, then coordinate colors, patterns, and a single motif so your luggage feels curated, not random.
Choose a primary color, a contrasting accent, and a pattern that complements both. Limit motifs to one theme—botanical, geometric, or travel icons—to avoid clutter. Use repeatable elements for balance and leave breathing space so stickers or fabric panels read clearly.
Test a small swatch first to check hue and scale. Consider destination-appropriate palettes to make pieces feel curated, not random.
- Pick a dominant color
- Add one accent
- Stick to one motif
Kid‑Friendly Customizations for Family Travel
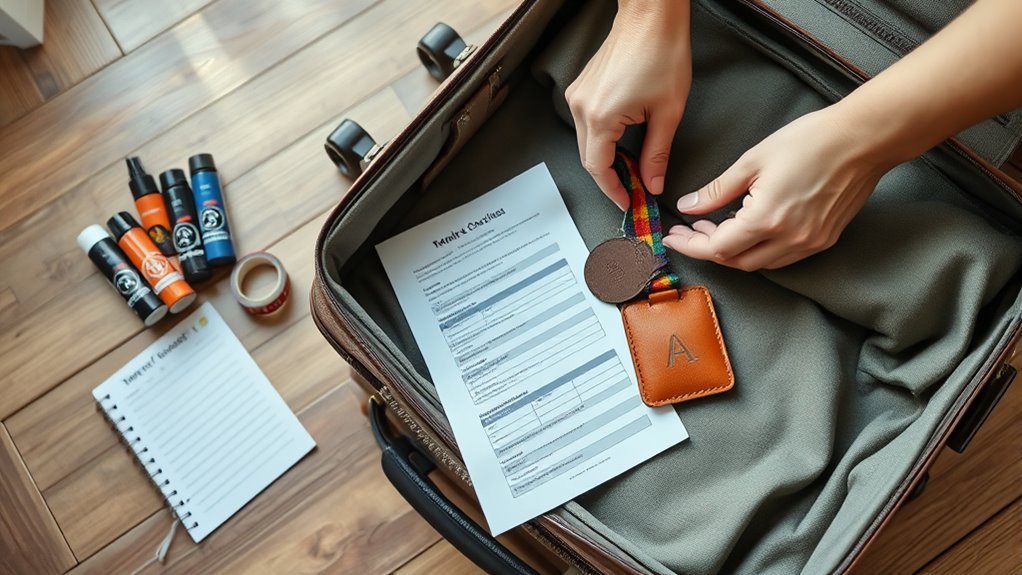
When you’re customizing luggage for family trips, focus on durability, safety, and fun so the pieces actually stand up to kids and make travel easier for everyone. Pick sturdy fabrics, reinforced corners, and smooth-rolling wheels so little hands can manage bags.
Add bright, washable name tags and ID pockets for quick contact details. Use themed patches, removable stickers, or luggage straps kids choose to personalize ownership and reduce mix-ups.
Attach GPS trackers or tamper-evident zipper locks for peace of mind. Keep pockets organized with clear pouches for snacks, wipes, and entertainment to simplify security checks and handovers.
Business Luggage Tweaks That Look Professional
If you want luggage that reads as professional at a glance, focus on clean lines, muted colors, and purposeful features. Choose a slim silhouette in charcoal, navy, or black and remove bulky decorations. Add subtle personalization like a debossed initial or a tasteful metal tag.
Opt for a slim, muted suitcase with clean lines and minimal adornment—subtle personalization keeps it professional.
Prioritize function: smooth wheels, a TSA lock, and organized compartments. Maintain a polished look with wrinkle-free fabric or hard-shell finish.
- Slim profile: minimizes visual clutter.
- Muted palette: signals seriousness.
- Functional upgrades: improve efficiency and perception.
Dress your bag for meetings, and it’ll speak for you.
Budget Ideas Under $10 That Make a Big Impact
You don’t need to spend much to give your luggage a sharper, more professional feel—small, inexpensive tweaks can make a big visual and functional difference.
Swap generic tags for a bold, durable ID tag; color-coded straps or ribbon make your bag easy to spot.
Add a silicone corner protector set to prevent scuffs and stealthy zipper pulls for smoother handling.
Use adhesive luggage patches or a fabric marker to add initials.
Replace worn handle wraps with cheap leather-look sleeves.
These under-$10 changes sharpen appearance, boost durability, and personalize your case without pricey upgrades or permanent alterations.
Mid‑Range Upgrades That Look Custom‑Made
Because mid-range upgrades balance cost and craftsmanship, they’re the smartest way to make your luggage feel bespoke without a full custom build. You can pick upgrades that last and refine the bag’s look.
- Replace hardware: swap zippers, pulls, and corner guards for brushed metal or leather-wrapped pieces to elevate function and style.
- Add a leather handle wrap and matching luggage tag to introduce texture and a tailored color story.
- Install an internal organizer or removable divider to improve organization and give a tailored, built-in appearance.
Choose durable materials and professional installation for results that read bespoke, not DIY.
Premium Makeovers for Investment Luggage
Want your investment luggage to look and perform like a bespoke piece? Choose high‑quality materials and expert services: leather reconditioning, precision stitching repairs, and custom metal hardware upgrades.
Add a tailored interior—removable dividers, padded tech pockets, and silk-lined compartments—to protect valuables and streamline packing.
Opt for professional color restoration or a restrained two-tone repaint to preserve value while revitalizing appearance.
Install discreet tracking and reinforced wheels for longevity.
Work with certified craftsmen who document changes for warranty and resale.
These measured, reversible enhancements elevate function and aesthetics without compromising authenticity or collector appeal.
Seasonal and Holiday Luggage Accents
When the seasons shift, small, thoughtful accents can refresh your luggage without altering its core value. You can switch charms, straps, and tags to reflect holidays or weather: lightweight knit wraps for winter handles, bright ribbon for spring, or metallic tassels for festive nights.
Rotate items so the base piece stays protected and recognizable. Use reversible or removable pieces that won’t mark surfaces. Consider cohesive color palettes to keep things elegant.
Maintain practical visibility and avoid bulky attachments that snag. Change accents to match travel mood, not trend, so your luggage feels seasonal while staying functional and respected.
- Knit handle wrap
- Holiday charm set
- Reversible name tag
Pack and Store Your Customized Luggage Safely
If you’ve customized your luggage, pack and store it so those details stay intact and the bag performs reliably on future trips. Clean exterior embellishments gently, empty pockets, and detach fragile add-ons if they’re removable. Use dust bags or pillowcases to shield decals and fabric paint from scratches and sun fading.
For hard shells, stuff interiors with acid-free tissue to preserve shape and prevent shifting hardware. Store wheels off cold floors or on racks to prevent flat spots and moisture buildup. Keep zippers lubricated and silica packets inside to control humidity.
Label storage so you retrieve the right piece quickly.
How to Change or Remove Customizations Later
Even with careful packing and storage, your tastes and needs will change, so you’ll want options for updating or removing customizations later. Start by testing removability on a hidden spot to avoid damage. Use gentle heat for vinyl decals and peel slowly; adhesive removers lift stubborn residue.
For sewn or glued patches, unpick stitches or use a seam ripper—replace with matching fabric if needed. Hard attachments like charms or straps often unscrew or unclasp; keep spare tools.
If paint or permanent markers wear or bother you, consider repainting or covering with fabric wraps.
- Test first
- Remove carefully
- Replace smartly
Airline Rules and Legal Things to Check First
Because airlines and security agencies each set their own rules, check carrier policies and local regulations before you customize luggage for travel. Confirm size, weight, and visible ID requirements—some carriers penalize bulky attachments or altered dimensions.
Check airline and local rules before customizing luggage; verify size, weight, and visible ID to avoid penalties.
Avoid adding materials that could be misinterpreted (explosives, liquids, dense batteries) or that obstruct TSA inspections. If you add locks, use TSA-approved models.
Verify trademark and copyright laws before applying logos or branded art. Check country-specific biosecurity rules for natural materials (seeds, wood).
When in doubt, contact the airline or airport security for written guidance to prevent delays or fines.
DIY Templates and Inspiration Sources
Now that you’ve checked rules and limits, let’s look at where to get ideas and ready-to-use templates for customizing your luggage. You’ll find free printable stencils, vector decals, and layout grids online that fit carry-on sizes. Pick sources that specify dimensions so your designs scale properly. Save inspiration boards and reference photos to guide color and placement choices.
Use templates to avoid trial-and-error on expensive shells.
- Download scalable SVG stencils for precise cutting and painting.
- Collect mood boards from travel sites and social media for cohesive themes.
- Use printable layout grids to test spacing before committing.
Two Projects: Sticker Collage and Stenciled Hardshell (Checklist)
When you’re ready to personalize your luggage, choose between two straightforward projects—a sticker collage for a quick, removable update, or a stenciled hardshell for a durable, professional look—and use the checklist below to keep each step organized.
For a sticker collage: clean surface, plan layout, peel and place stickers, smooth bubbles, seal edges with clear laminate if desired.
For a stenciled hardshell: sand lightly, wipe dust, secure stencil, apply paint in thin coats, remove stencil while tacky, cure fully, add clear coat.
Pack tools, test materials on scrap, and allow full drying time before travel.
Frequently Asked Questions
Can I Customize Luggage Without Voiding the Manufacturer Warranty?
Yes—you can often customize luggage without voiding the warranty if you use non-permanent, non-destructive methods like luggage tags, straps, stickers, or fabric paint. Check your warranty terms first, and avoid drilling or altering structure.
Will Airport Security Remove or Damage Temporary Decorations?
Yes — they might. TSA or other agents can remove, inspect, or damage temporary decorations if they obstruct screening or need closer inspection. You’ll minimize risk by using removable, nonmetallic items and keeping them easy to detach for checks.
What Are Safe Cleaning Methods for Customized Surfaces?
You should gently wipe customized surfaces with a soft microfiber cloth and mild soapy water, avoid harsh solvents, test inconspicuous areas first, use rubbing alcohol sparingly on stickers, and let everything air-dry before packing.
Can I Customize Luggage With Embedded GPS or Trackers?
Yes—you can embed GPS or trackers, but check airline rules and battery/airline regulations. You’ll want a secure, concealed pocket, waterproofing, and removable power. Consider privacy, tracking permissions, and reliable signal for useful tracking.
How Do I Ensure Customizations Survive Checked Baggage Handling?
Use durable materials, reinforce seams and attachments, and secure decorations with strong stitching or rivets; test under stress, use protective covers, keep electronics in padded compartments, label clearly, and follow airline size and weight rules to avoid damage.
Conclusion
You’ve got everything you need to make your luggage unmistakably yours—whether you want a quick ID fix or a bold, stenciled statement. Start small if you’re unsure, test removable options first, and always check airline rules so your customizations don’t cause trouble. Keep basic tools on hand, save templates, and plan for removability if you’ll change styles. Now pick a project, have fun, and let your bags reflect your personality on every trip.