How to Check Luggage Weight at Home Without Scale (Easy Hacks)
You can quickly check luggage weight at home without a scale using three easy hacks: weigh yourself on a bathroom scale with and without the bag and subtract; stabilize the bag on a board or book to get steadier readings; or weigh representative items (toiletries, shoes, electronics) on a kitchen scale in ziplocks, then add those totals. Empty pockets, tare or zero any scale, and repeat for accuracy. Keep going to learn practical packing tweaks and troubleshooting tips.
Fast Answer: 3 Reliable Ways to Check Luggage Weight
If you don’t have a scale, you’ve still got options: use a bathroom scale with a simple lift method, weigh yourself holding the bag and subtract your body weight, or estimate by comparing with known-weight items (like a filled suitcase you’ve weighed before or standard-weight packing blocks) for a quick ballpark.
Try the lift method: weigh yourself, then weigh yourself holding the luggage; the difference is the bag.
Weigh yourself, then weigh again holding the luggage — the difference is the bag’s weight.
For balance, hang the bag from a sturdy broom handle over a tub and compare feel to a similarly packed item.
Use household items with labeled weights to refine your estimate.
Why Estimating Weight Matters Before You Go
Because airlines charge fees and enforce limits, estimating your luggage weight before you leave prevents surprises at the counter and saves time and money. You’ll avoid last-minute repacking, costly overweight charges, and stress that can derail travel plans.
Knowing approximate weight helps you decide what to carry-on, what to wear, and whether to redistribute items between bags or remove nonessentials. It also speeds up check-in and reduces the chance of gate hold-ups.
For business trips or long vacations, estimating keeps you within allowances for souvenirs and guarantees compliance with airline and international baggage rules. You’ll travel smarter and calmer.
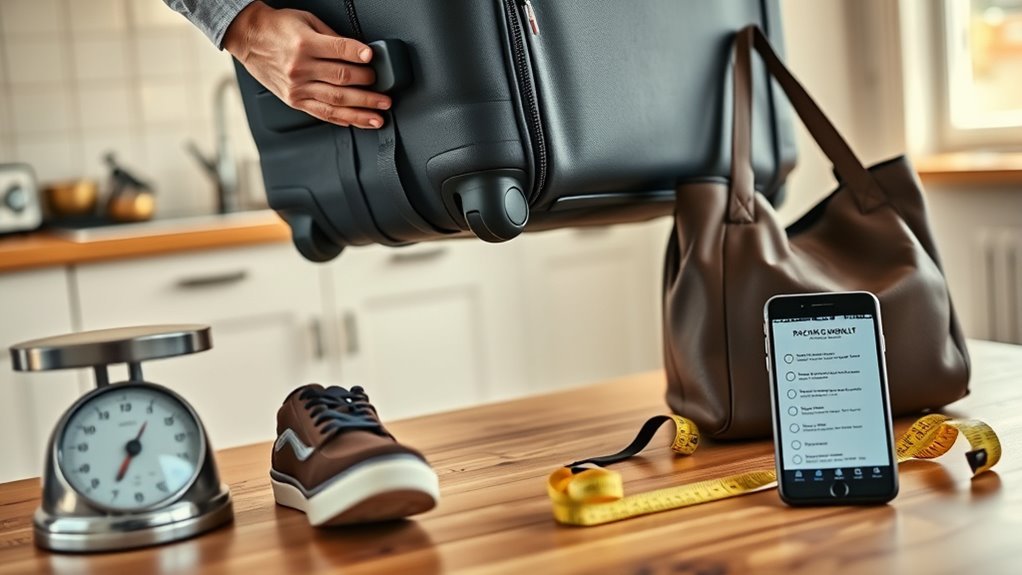
Quick Checklist Before You Weigh Your Bag
Now that you know why estimating luggage weight matters, take a moment to run through a quick checklist before you actually weigh your bag.
Empty pockets, remove loose items, and secure any straps or wheels so nothing flops out or adds uneven bulk. Close and zip compartments you won’t open during weighing. Shift heavy items toward the center to mimic packed balance.
Note removable electronics or toiletries you can weigh separately later. Have a tape measure and luggage tag ready if dimensions matter.
Clear a flat spot for weighing and a pen to jot adjustments—you’re ready to get an accurate estimate.
Weigh Yourself With and Without the Bag (Bathroom Scale)
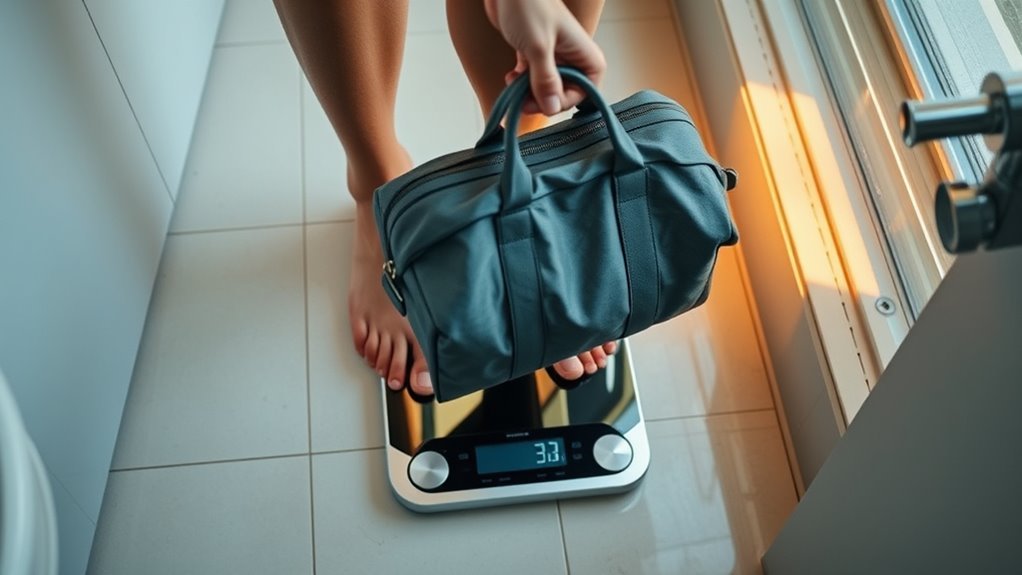
When you step on a bathroom scale with your packed suitcase and then again without it, you’ll get a quick, reliable measure of the bag’s weight by subtraction.
First, place the scale on a flat, hard surface and zero it if possible.
Place the scale on a flat, hard surface and, if possible, reset it to zero before weighing.
Step on holding the packed bag, note the reading, then set the bag down and weigh yourself alone.
Subtract your solo weight from the combined weight to find the luggage weight.
Repeat twice for consistency and average the results.
Wear similar clothes for both measurements and avoid leaning or shifting.
This method’s simplicity works well for most travelers.
Balance-Trick to Improve Bathroom-Scale Accuracy
If your bathroom scale wobbles or gives slightly different readings each time, try a simple balance trick to improve accuracy: place a sturdy, flat board (like a cutting board or hardcover book) on the scale and center the suitcase on that board before weighing.
This spreads weight evenly, reduces pressure points, and stabilizes the scale so you get repeatable numbers. Stand nearby to prevent slips, and note the reading once it settles. Repeat once for confirmation.
Use this when you lack a luggage scale, but don’t attempt heavy lifting alone.
- distribute weight evenly
- minimize scale wobble
- improve repeatability
- prevent edge pressure
- confirm with a second reading
Two-Person Lift Method for Heavy Suitcases
If the suitcase is too heavy or awkward to lift onto a board or scale safely, get a partner to help using a two-person lift: stand facing each other, squat with straight backs, communicate who’ll count and who’ll move first, and lift together on the agreed cue while keeping the bag close to your bodies. Use this to shift or place the case on a stable surface for weighing or inspection. Practice one coordinated dry run. Table quick guide:
| Role | Cue | Safety check |
|---|---|---|
| Lifter A | “One” | Grip secure |
| Lifter B | “Go” | Feet stable |
Use a Luggage Strap Plus Bathroom-Scale Hack
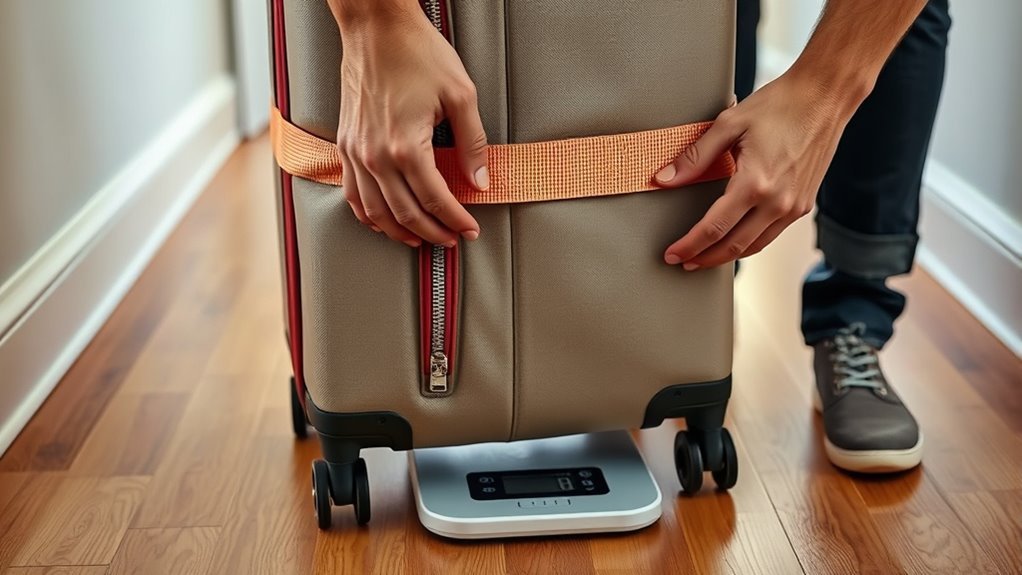
Though a bathroom scale alone can’t handle awkward luggage, you can get an accurate reading by looping a sturdy luggage strap under the bag, lifting the strap ends, and standing them on the scale so the scale measures the bag’s weight indirectly. This keeps the weight centered, reduces tipping, and avoids damaging the scale.
Use a rigid strap, center the bag, lift evenly, zero the scale with the strap if possible, and read steady numbers. Practice once to find balance. Check straps for wear. Don’t overload the scale’s capacity.
Use a rigid strap, center and lift evenly, zero the scale, watch for steady readings, and avoid overloading.
- Stability matters over speed
- Even lift prevents errors
- Protect the scale
- Inspect gear
- Recheck readings
Hang-and-Pull Method Using a Sturdy Frame
When you can’t use a scale directly, hang the bag from a sturdy frame and pull down on a fixed point to transfer its weight so you can measure it reliably. This method uses leverage and a stable anchor to keep the load steady while you read numbers.
Secure a strong rope or strap around the bag handle, loop it over a beam or doorframe rated for weight, and attach the free end to a spring scale or your bathroom scale placed under tension.
Pull gently until the bag is suspended, note the reading, and repeat for consistency. Don’t exceed the frame’s limit.
Weigh Pockets and Accessories With a Kitchen Scale
Grab a kitchen scale to weigh small items like toiletries and chargers before you pack them. Put each pocket item on the scale, note its weight, and add the totals as you go.
If you’ve already weighed the packed bag, subtract these accessory weights to get an accurate luggage-only figure.
Weigh Small Items
If you’ve got small items like chargers, toiletries, or loose change stuffed in pockets or pouches, weigh them on a kitchen scale before you pack to avoid surprises at the airport. Put a container or cloth on the scale, tare it, then add grouped items—earbuds, cables, or travel bottles—to get precise weights. Record each group so you know what’s adding up.
This helps you decide what to leave out or move to carry-on.
- chargers and cables
- travel-size toiletries
- jewelry and watches
- coins and keys
- medication bottles
Tally And Subtract
While you’re packing, use a kitchen scale to weigh items still in pockets or attached to the bag, then subtract those totals from your packed weight so you know your real luggage load.
Lay out pockets, belts, cables, chargers, travel pillows, and pouches. Zero the scale with a bowl or tray, then weigh each item and note its weight.
Add the small-item weights to get a pockets/accessories subtotal.
If some items stay in the bag during weighing, weigh the packed bag, remove the accessories, weigh again, and subtract. This gives you an accurate packed-only weight to avoid surprises at check-in.
Small-Bag Technique: Kitchen Scale + Ziplock Method
Start by packing a small bag with the items you’d normally put in your luggage so you get an accurate sample.
Place that bag inside a sealed ziplock to protect your kitchen scale, then tare the scale with the empty ziplock if possible.
Weigh the sealed bag and subtract the ziplock weight to estimate how much that portion will add to your suitcase.
Prep Your Packing Bag
Before you pack, organize small items into clear ziplock bags and weigh each bag on your kitchen scale so you’ll know exactly how much every cluster of gear adds to your total. Then label bags and group them by use—toiletries, tech, documents—so you’ll assemble your bag quickly and avoid overweight surprises.
Arrange heavier bags near the suitcase wheels and lighter ones on top; this keeps balance and makes weight distribution predictable. Use this prep to plan removals if needed, and keep an essentials bag that stays packed last.
- Toiletries
- Chargers & cables
- Documents & meds
- Clothing layers
- Extras
Weigh With Ziplock
Now that you’ve grouped and labeled items, use the Ziplock small-bag technique to get precise weights without a luggage scale. Fill a clear Ziplock with one item or a small set, seal it fully, and tare your kitchen scale with an empty identical Ziplock.
Place the filled bag on the scale and record the weight. Repeat for each group, noting weights on your packing list.
For bulky or oddly shaped things, use two bags and subtract the tare accordingly. Add all item weights plus your empty suitcase’s estimated weight to check compliance with airline limits. Adjust contents as needed.
Use Household Items as Weight References (Books, Water)
If you don’t have a scale, you can use common household items as weight references—books, bottled water, and canned goods all have predictable weights that make rough estimates easy. You’ll compare your bag against known masses by lifting, balancing, or stacking equivalents.
Note package labels (e.g., 1 L water ≈ 1 kg, standard hardcover ≈ 0.5–1 kg, 400 g can). Use consistent technique and count increments to avoid error. Apply conservative margins to stay under limits.
- 1 L bottled water ≈ 1 kg
- Standard hardcover ≈ 0.5–1 kg
- 400 g canned food labels
- Laundry detergent box weights
- Bag of rice or flour weights
Calibrate DIY Tests With Filled Water Bottles
When you fill several water bottles to known volumes, you create simple, repeatable weights that make your at-home estimates far more reliable.
Use bottles marked in milliliters or weigh once on a borrowed scale to confirm mass (1 mL ≈ 1 g). Label each bottle with its volume and weight.
Use milliliter-marked bottles or a one-time scale check (1 mL ≈ 1 g). Label volume and weight.
To test luggage, add or remove bottles until the bag feels comparable to your reference set; note how many bottles match the airline limit. Repeat the comparison a couple times to reduce error.
Store bottles together so you can quickly recreate the same calibration for future packing sessions.
Measure Bag Volume to Estimate Clothes-Only Weight
Because clothing has a fairly consistent density, you can estimate a clothes-only weight by measuring your bag’s usable volume and multiplying by an average fabric mass per liter.
First, flatten the bag, fill shapes with boxes or towels to find usable liters, or measure interior dimensions (length × width × height) in cm and convert to liters (÷1000).
Use a conservative fabric mass like 0.25–0.4 kg/L depending on garments. Multiply volume by that factor for an estimated clothes weight. This avoids itemizing everything and helps pack strategically.
- Measure usable space, not external size
- Use conservative density values
- Include compression effects
- Round up for safety
- Recheck after packing
Count-and-Average Common Items to Estimate Totals
Measuring volume gives you a quick clothes-only estimate, but counting items and averaging their typical weights brings more precision for mixed packing.
List categories: T-shirts (150–200g), pants (400–600g), underwear (50–100g), toiletries bottles (100–300g), chargers and cables (50–200g), books (200–500g).
Tally items in each category, pick a median weight, then multiply and sum.
For unknowns, weigh a single representative item using kitchen or hanging scale if available, or compare to a known-weight object.
Record your totals and add a safety margin of 5–10% for extras and packing material.
Estimate Shoes’ Weight and Cut Pairs Smartly
Wondering how much that pair of shoes will add to your bag? You can estimate by comparing to known items: a pair of sandals ~300–500g, sneakers ~700–1000g, dress shoes ~800–1200g.
Estimate shoe weight mentally: sandals 300–500g, sneakers 700–1000g, dress shoes 800–1200g — add 10% for packaging.
Weigh one shoe mentally as half the pair, then add 10% for packaging or insoles.
Cut pairs by utility: keep versatile, ditch duplicates, or wear the bulkiest during travel.
Use these quick rules to trim without a scale.
- Favor lightweight over specialty; choose multi-purpose pairs
- Prioritize comfort for long days
- Pack one formal and one casual pair max
- Consider removable insoles
- Test bulk by hand-feel
Backpack Compression Test to Check Weight Distribution
After trimming shoes and other bulky items, check how their placement affects your bag by doing a backpack compression test. Fill the pack as you’d for travel, then close it and press down firmly from the top.
Notice where pressure concentrates—high, low, or to one side. Shift items toward the center and lower back area for stability, then compress again.
Use soft items to fill gaps and balance heavy pieces near your spine. If straps dig or the pack leans, redistribute until it sits snug and even.
Repeat until compression feels balanced and comfortable for carrying long periods.
How Fabrics and Packing Affect Weight
Pay attention to fabric choices because heavy materials like denim or canvas add more weight than lightweight synthetics.
How tightly you pack matters too — dense, rigid items stack up heavier than soft, compressible clothing that you can squish into corners.
Think bulky versus compressible pieces when arranging your bag to keep weight down and balance easy.
Fabric Weight Differences
Because different fabrics carry weight differently, what you pack can change a suitcase’s heft as much as how much you pack. You’ll notice cotton and denim feel heavier per item than lightweight synthetics.
Wool retains bulk and weight when layered, while linen wrinkles but stays relatively light. Choosing blends or thin technical fabrics cuts grams without sacrificing coverage.
Leather and suede add significant mass; avoid heavy shoes and jackets if you’re weight-watching. Check garment labels for fabric content and compare similar items by touch to decide what to bring.
- Cotton and denim: dense, heavier
- Synthetic: light, compressible
- Wool: warm, adds bulk
- Leather: heavy, avoid excess
- Blends: balance weight and function
Packing Density Impact
How tightly you pack affects more than space—it changes the effective weight you’ll feel and how airlines assess it. When you compress garments and nest items, you reduce air gaps so weight concentrates; that makes bags denser and harder to lift, even if mass is unchanged.
Heavier fabrics pressed together shift balance and can trigger airline weight limits faster than loose packing. Distribute dense items near wheels and center to keep handling manageable and avoid tugging that feels heavier.
Use soft items to pad fragile gear without adding bulk. Check straps and zippers—overstuffing strains closures and may add incidental weight.
Bulky Versus Compressible
When you mix bulky fabrics like wool coats and down jackets with compressible items such as tees and thermals, you’ll notice the same mass can take up very different amounts of space and change how heavy the bag feels to lift.
You can exploit compressibility to lower perceived heft: roll tees, stuff socks into shoes, and use compression sacks for down. Bulky items sit near the center to balance weight.
You’ll judge real weight by heft, not volume; dense fabrics like jeans weigh more than fluffy layers. Aim for even distribution so the bag feels lighter when you carry it.
- Roll compressible items
- Use compression sacks
- Stuff gaps smartly
- Center bulky pieces
- Balance left/right
Use Vacuum Packing and Rolling to Reduce Bulk
If you want to squeeze more into your bag without adding weight, vacuum packing and rolling are your best bets.
Use vacuum-seal bags for bulky but compressible items: squeeze air out with a hand pump or your own breath, then fold flat.
For clothes you need quick access to, roll tightly to minimize volume and prevent wrinkles.
Place vacuumed items at the base or along suitcase sides to stabilize weight distribution.
Keep fragile or frequently used items separate so you don’t unzip everything mid-trip.
These tricks reduce bulk, help you judge remaining capacity, and avoid surprising overweight luggage.
Swap Heavy Items for Lighter Alternatives at Home
You can shave pounds by swapping bulky shoes for a single pair of lightweight sneakers or foldable flats.
Replace full-size toiletry bottles with travel-sized containers or solid bars to cut weight and leaks.
Pick clothes in lightweight fabrics like linen or technical blends so you can bring more outfits without the extra heft.
Swap Bulky Shoes
Because bulky shoes add unnecessary pounds to your bag, swap them for lighter alternatives at home to shave off weight without sacrificing comfort. You’ll free space and reduce stress at check-in by choosing versatile, lightweight options and wearing the heaviest pair on travel days.
Evaluate necessity: ditch extra boots for one compact pair, replace heavy sneakers with packable trainers, and favor sandals or slip-ons for downtime.
Protect delicate shoes with cloth bags and use compression to nest pairs. Pack only what matches your itinerary so every shoe earns its spot.
- Choose multipurpose footwear
- Wear the bulkiest pair while traveling
- Nest shoes to save space
- Use lightweight materials
- Limit pairs to essentials
Replace Toiletry Bottles
When you’re prepping your bag, swap full-size shampoo, conditioner, and lotion for travel-size containers or solid bars to shave pounds without losing your routine.
Pack multi-use items—cleansing balm that doubles as makeup remover and face wash, or a combined shampoo-conditioner—so you carry fewer bottles.
Decant liquids into lightweight, leak-proof travel bottles and label them to avoid duplicates.
Replace glass or thick plastic with squeezable travel tubes or aluminum tins.
Solid soap, shampoo bars, and toothpaste tablets cut liquid weight and bypass TSA limits.
Stash travel-sized sunscreen and deodorant to keep essentials compact and light.
Choose Lightweight Fabrics
If you’re trying to shave ounces without sacrificing style, swap heavy denim, wool, and bulky knits for lightweight alternatives like linen blends, performance synthetics, and thin merino or cashmere blends that pack small and dry fast. You’ll notice immediate weight savings and more outfit options when you choose fabrics that compress and resist wrinkles.
Test at home by layering garments in your hands to compare bulk and flexibility. Prioritize pieces that multitask—dressy tops that double as layers or travel pants that roll tight. Pack fewer, smarter items and you’ll travel lighter without losing looks.
- Linen-blend shirts for breathability
- Thin merino sweaters for warmth
- Performance tees that wick and pack
- Lightweight travel pants with stretch
- Packable down alternatives for warmth
Label Compartments to Spot Heavy Zones
Start by assigning simple labels to each compartment—A, B, C or by function like shoes, clothes, electronics—so you can quickly see which sections hold the most weight.
Feel each labeled area after packing: heft each zone with both hands, note which feels dense or pulls the bag off-balance. Jot observations on a sticky note or in your phone: “A heavy” or “C light.”
Swap items between zones to even out load: move shoes away from center, distribute toiletries in smaller pockets, and put bulky but light items toward the middle. Repeat until balance feels stable and no zone dominates.
When to Borrow a Luggage Scale or Visit a Store
Once you’ve balanced compartments by feel and made adjustments, there’ll still be times you should borrow a luggage scale or pop into a store for a quick weigh. You’ll want a precise measurement when limits are tight, fees are steep, or your packing feels marginal.
Borrowing is fast, accurate, and removes guessing—especially before flights, long trips, or returning with purchases. Use a scale when you’ve repacked heavy items, need exact allowance per bag, or must split weight between bags. If you’re uncertain, visiting a store avoids surprises at check-in.
- Confirm airline limits
- Avoid overweight fees
- Split weight fairly
- Check after shopping
- Verify final pack
Phone Apps and Shipping Calculators to Estimate Weight
While a phone can’t weigh your bag, apps and shipping calculators can give you quick, usable estimates by converting dimensions and item lists into approximate weights.
Use parcel apps that ask for box dimensions and material; they’ll return a dimensional or volumetric weight you can compare to airline limits.
Inventory apps let you tap common items (clothes, shoes, electronics) with typical weights to build a pack list.
For better accuracy, measure your packed bag’s size with a tape and enter itemized weights rather than guessing.
Treat results as estimates—use them to avoid surprises and decide if you need to trim or redistribute.
Carry-On vs Checked: Packing Rules and Weight Limits
Although carry-on and checked bags often seem interchangeable, airlines treat them very differently—so you should know the size, weight, and content rules for each. You’ll generally get stricter size limits and lighter weight allowances for carry-ons; checked bags accept more weight but may incur fees. Check your carrier’s specific dimensions, permitted items, and fee tiers before packing.
Carry-on and checked bags aren’t interchangeable—know size, weight, and content rules before you pack.
Remember liquids, batteries, and valuables usually belong in carry-on. Use home hacks to estimate whether an item fits the carry-on envelope or will push checked baggage over fee thresholds.
- size limits matter more for carry-on
- weight caps trigger fees for checked bags
- liquids/batteries rules differ
- valuables should stay with you
- oversized items may incur surcharges
Prioritize Items to Remove When Over the Limit
If your bag’s over the limit, start by removing bulky clothing like jackets or heavy shoes and wear them instead.
Next, ditch nonessentials—extra toiletries, duplicate chargers, or items you can buy at your destination.
That’ll usually trim enough weight to meet airline rules.
Remove Bulky Clothing
When your suitcase nudges the limit, take off the bulkiest layers you’ve packed and wear them instead — think heavy coat, thick sweater, or lined boots — so you instantly shave pounds without ditching items.
You’ll free space and avoid fees by wearing your heaviest pieces through the airport and on the plane.
Layer smart: choose items that compress under travel clothing and still look intentional. Keep essentials handy in pockets. If security or comfort requires removal later, you can stow them in the overhead or under-seat.
- Heavy coat
- Thick sweater
- Lined boots
- Puffer vest
- Wool scarf
Ditch Nonessentials First
Once you’ve put on your heaviest items, start pulling out things you won’t really need on the trip and set them aside. Decide quickly: ditch duplicates, bulky extras, and items easy to buy there. Prioritize by weight and necessity—keep meds, documents, chargers. Use a small pile for donation/swap and a carry-on checklist for essentials.
| Keep (must) | Consider (maybe) | Remove (lighten) |
|---|---|---|
| Passport | Extra shoes | Heavy books |
| Meds | Second jacket | Duplicate toiletries |
| Charger | Fancy outfit | Large hair tools |
Pack a Lightweight Emergency Kit for Surprise Fees
Because airline rules can change and baggage fees can pop up unexpectedly, pack a compact emergency kit that keeps you covered without weighing you down. Include slim, high-impact items that solve common hiccups so you won’t have to buy heavy replacements at the airport. Tuck this kit into an accessible pocket or your personal item and keep it under an ounce when possible.
Use multipurpose pieces and replace bulky packaging with travel-size or refillable containers. Review contents before each trip to swap items you used or that gained weight.
- Collapsible tote bag
- Inflatable neck pillow
- Small toiletry refill kit
- Foldable rain shell
- Lightweight universal charger
Test Pockets and Hidden-Weight Accessories
Don’t forget to check all pockets, including hidden zips and linings, for forgotten items that add weight.
Feel for sewn-in pouches or reinforced bases that can hide extra bulk and remove anything unnecessary.
If you’re unsure, test each pocket by filling it with known items (like toiletries or a book) to estimate how much they add.
Check All Pockets
If you want an accurate sense of your bag’s weight before you leave, check every pocket and compartment—including hidden sleeves, zippered inner pouches, and external organizers—because small items tucked away can add surprising ounces.
You should empty and pat each area, feeling for coins, cords, and spare batteries. Test pockets by turning them inside out and shaking gently; unzip fabric folds and lift linings. Note anything you forgot or don’t need.
Prioritize relocating dense items to carry-on or leaving them behind to avoid fees.
- Coins and loose change
- Charging cables and adapters
- Power banks and batteries
- Toiletry bottles and lids
- Small souvenirs
Find Hidden Accessories
When you inspect your bag for hidden accessories, probe seams, linings, and removable organizers where extra weight often hides—think sewn-in key clips, detachable straps, hidden pen sleeves, and velcro pouches.
Check under flaps and between layers for sewn-in pockets or folded rain covers. Remove any organizer inserts and shake them out; small items cling in corners.
Unclip straps and stowables, testing tactile resistance to spot metal bits. Don’t forget zipper garages and reinforced bottoms where rivets hide.
After removing these, redistribute remaining items to reduce bulking, then close the bag and note how much looser it feels.
Weigh With Items
Now that you’ve pulled out hidden organizers and loose bits, it’s time to weigh the bag by feel and pockets. You’ll test pockets, add known items, and compare firmness to a light and heavy reference bag.
Focus on where weight hides: seams, lining, and external pouches. Don’t forget detachable straps or battery packs. Use clothing bundles to mimic weight distribution and note whether the bag tilts or strains zippers.
- Fill a pocket with socks to simulate 0.5–1 kg
- Slip a paperback into side pouch
- Add a toiletry kit to internal compartment
- Clip on a charger or battery
- Test zipper tension and handle strain
Troubleshoot Inconsistent Bathroom-Scale Readings
Although bathroom scales can seem reliable, they often give inconsistent readings because of placement, battery level, or surface unevenness—so you’ll want to check a few simple things before blaming your luggage.
First, place the scale on a flat, hard surface; carpet and uneven tiles skew results. Calibrate if your model has a reset or zero function, and replace weak batteries that cause flickering numbers.
Step on and off once to let the scale settle, then stand still with weight centered. Repeat measurements a couple times; if readings still vary widely, try a different scale or use another weighing method.
Common Estimating Mistakes to Avoid
Don’t pack every personal item “just in case” — you’ll end up overpacking and misjudging the weight.
Remember to account for the weight of bags, packing cubes, and toiletry containers, since those add up fast.
Check items and containers separately so your estimate stays accurate.
Overpacking Personal Items
When you toss every “just in case” item into your bag, you’ll quickly add pounds that aren’t obvious when you eyeball the load; you’ll overestimate necessity and underestimate weight.
Trim duplicates, pick multipurpose items, and decide what you’ll actually use. Lay items out, then remove half of the nonessentials.
Pack worn layers to save space. Use this quick checklist to rethink what’s truly needed:
- One multipurpose toiletry instead of separate bottles
- One versatile footwear option plus travel sandals
- Minimal chargers with a single power bank
- Foldable jacket that doubles as a pillow
- Small first-aid kit, not a full medicine cabinet
Ignoring Container Weight
If you skip accounting for the suitcase or bag itself, you’ll underestimate your total weight by a surprising amount—especially with hard-shell cases, heavy duffels, or bulky packing cubes.
Don’t forget the container: weigh it mentally or compare it to a known object. Subtract its estimated weight when using a bathroom scale with you standing on it, or add it to your hand-lift estimate.
Check handles, wheels, and built-in organizers—they add ounces that add up.
When in doubt, overestimate the case by a pound or two to avoid surprises at the airport counter and potential overweight fees.
Practice These Hacks Before Your Trip
Before you leave, run through a few quick practice hacks so you’ll know how your luggage behaves and what adjustments to make. Try folding, redistributing, and using makeshift handles so you can judge bulk and balance. Test carry and lift motions to spot awkward pockets or hidden weight. Note how soft vs. hard cases compress. Time yourself packing to avoid last-minute overloading.
- Pack heavy items centrally for balance
- Use clothing as padding, not just filler
- Weigh by feel with one-arm lift comparisons
- Repack to shift dense items closer to wheels
- Mark removable items to ditch if needed
Day-of Quick-Reference Cheat Sheet
On travel day, keep a one-page cheat sheet with gate-check essentials so you know what to expect from airlines.
Use quick volume estimates (clothing bundles, shoes, and toiletries) to judge if a bag’s likely over the limit.
If something looks heavy, do a last-minute redistribution between carry-on and checked to avoid fees.
Gate-Check Essentials
When you’re heading to the gate, keep a compact checklist handy so you can gate-check smoothly and avoid last-minute hassles. You’ll want to confirm airline size rules, redistribute items between carry-on and checked bag, and have ID and boarding pass ready. Double-check fragile labeling and secure loose straps. Be prepared to accept gate-check tags and know where to retrieve items on arrival.
- Verify gate-check eligibility and fees
- Move valuables and essentials to your personal item
- Compress soft items to save space
- Lock zippers with TSA-approved locks
- Attach contact info and fragile tags
Quick Volume Estimates
You’ve handled gate-check tasks; now get a fast sense of how full your bag really is with a few simple volume checks you can do in minutes. Open the bag, compress soft items, and judge how much empty space remains. Use fist, shoe, and book comparisons to visualize capacity quickly. If a fist fits in three spots, it’s lightly packed; if shoes fill half, expect heavier load. Note rigid items near wheels—they concentrate weight.
| Visual Cue | Space Taken | What It Means |
|---|---|---|
| Fist | 1–3 spots | Light |
| Shoe | half | Moderate |
| Book | corner | Dense |
| Bulge | full | Heavy |
Last-Minute Redistribution
If a quick weight check shows your bag borderlining the limit, act fast: redistribute dense items toward the center and over the axle, shift soft layers to fill gaps, and move bulky but light items to the top or outer pockets to balance feel and meet weight rules.
You’ll want a simple sequence: open, remove, swap, test by lift, and seal.
Prioritize liquids and electronics in carry, heavy shoes near wheels, and fragile items centered.
Use compression to tuck soft items and clip-on pouches for small extras.
Final check: lift by handles to confirm manageable weight and balance.
- Open, remove, swap
- Put heavies over axle
- Softs in gaps
- Bulky lights outside
- Lift-by-handle test
Frequently Asked Questions
Can I Rely on Suitcase Size Limits Instead of Weight for Airlines?
You shouldn’t rely solely on size limits instead of weight; airlines often enforce weight for checked bags and sometimes for carry-ons. Check your airline’s specific rules, weigh bags when possible, and redistribute items to avoid fees.
How Do International Airline Weight Rules Differ for Checked Bags?
They vary by carrier and route: international airlines set different per-bag or total weight limits, often 20–32 kg economy, higher for premium classes, with differing piece allowances, fees for excess weight, and stricter rules for specific countries.
Will Dividing Items Into Two Bags Always Save Money?
Not always. You’ll save money only if the airline charges per bag or enforces strict per-bag weight limits; otherwise you might incur two bag fees or higher combined charges, so check fares and allowances beforehand.
Is It Worth Paying Extra for Overweight Baggage at the Airport?
Sometimes it’s worth paying extra at the airport if you’re short on time or can’t redistribute items; you’ll avoid missed flights and stress, but compare fees versus shipping or repacking beforehand to save money.
How Accurate Are Postal Office Scales for Luggage Weighing?
Postal office scales are generally accurate and calibrated for parcels, so you can trust them for luggage estimates, but they might vary slightly; you should allow a small margin and confirm with the airline if you’re very close to limits.
Conclusion
You’ve got simple, reliable ways to check your luggage weight without a fancy scale, so you won’t hit surprise fees at the airport. Try the weigh-yourself method, the balance trick, or compare packed items to known weights. Double-check with the quick checklist, avoid common estimating mistakes, and practice once before travel day. Keep the quick-reference cheat sheet handy, stay within limits, and you’ll breeze through check-in confident your bag meets the rules.