How to Check in Luggage: Step-By-Step Airport Guide
Decide if you need a checked bag or carry‑on based on trip length, bulky items, and fragile or valuable contents. Check your airline’s size, weight limits and fees, then pack accordingly—valuables and meds go in your carry‑on; bulky items in checked luggage with cushioning. Weigh and measure your suitcase at home, arrive early, use a kiosk or counter to print and attach tags, keep receipts, and report damage right away; keep going to get step‑by‑step tips and troubleshooting.
Do You Need to Check a Bag or Carry On?
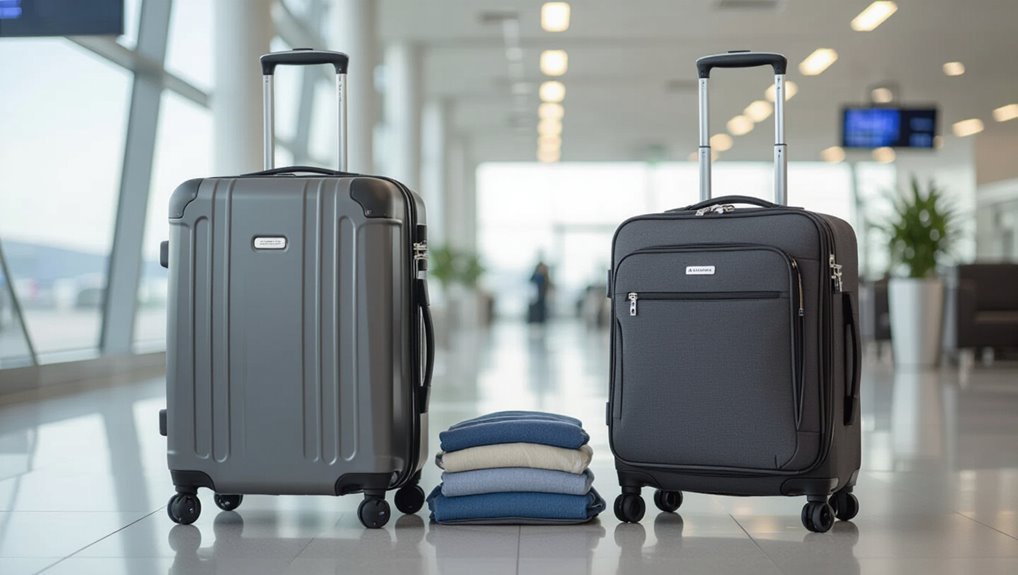
Wondering whether to check a bag or carry on? You’ll weigh trip length, items you need immediate access to, and how much you want to haul through airports.
Choose carry-on for short trips or fragile valuables you’ll monitor. Check a bag when you have bulky items, liquids over limits, or want hands-free travel.
Factor costs, convenience, and connection times.
Know Airline Size and Weight Limits for Checked Bags
Before you check a bag, check your airline’s size and weight rules so your suitcase meets their maximum dimensions and weight allowance.
If your bag is over the limit, you’ll face oversize or overage fees that can be pricey.
Compare limits across carriers and pack or redistribute items to avoid surprises at the counter.
Airline Size Restrictions
Most airlines set both size and weight limits for checked bags, so check your carrier’s exact dimensions and pounds before packing. Measure length, width, and height including wheels and handles. If your bag exceeds linear size, you’ll face oversize fees or refusal. Choose a compliant suitcase to avoid surprises.
| Airline | Max Linear Size | Note |
|---|---|---|
| Airline A | 62 in | standard |
| Airline B | 158 cm | metric |
| Airline C | 62 in | sports gear |
Weight Allowance Limits
Every airline sets a specific weight allowance for checked bags, so you should confirm the pound or kilogram limit before you pack.
Check your ticket, airline website, or mobile app for allowance per bag and per passenger. Note differences for international, premium, or basic fares and for frequent‑flyer status.
Weigh your bag at home to avoid surprises at check‑in.
Oversize And Overage Fees
If your bag goes beyond the airline’s published dimensions or weight, you’ll face overage and oversize fees—so check both limits before you pack.
Fees vary by carrier and route; heavier or larger items can cost considerably more than standard checked baggage.
Measure and weigh at home, redistribute or ship bulky items, and pay online in advance when possible to save money and avoid surprises.
Check Baggage Fees, Allowances, and Extras
1 key step before you pack is understanding the airline’s checked baggage fees, size/weight limits, and optional extras so you won’t face surprises at the counter. Check fees online, compare allowance by fare class, prepay if cheaper, and note extra charges for sports gear or priority handling.
| Item | Typical Fee | Tip |
|---|---|---|
| First bag | $25–35 | Prepay online |
| Second bag | $35–45 | Weigh at home |
| Oversize | $75–200 | Measure dimensions |
What to Pack in Checked Luggage vs. Carry‑On
While carry‑ons should hold essentials you’ll need during the flight, put items you won’t need until you reach your destination in checked luggage—bulky clothes, extra shoes, and nonessential toiletries.
Keep valuables, medication, travel documents, electronics, chargers, a change of clothes, and fragile items in your carry‑on.
Pack liquids in checked bags only if allowed, and cushion breakables to prevent damage.
How to Weigh and Measure Your Suitcase at Home
Before you head to the airport, you’ll want to choose a reliable scale so you can check your bag’s weight at home.
Measure the suitcase’s length, width, and height precisely to match airline dimension limits.
Don’t forget to include the weight of packed items and any straps or tags when you tally the total.
Choose A Reliable Scale
If you want to avoid surprise fees at the airport, get a reliable luggage scale so you can weigh and measure your suitcase at home.
Choose a digital hanging scale with clear readouts, sturdy hooks, and a tare function.
Check accuracy reviews, battery life, and weight limits.
Compact, durable models fit carry-on or checked bags and save you time and stress.
Measure Dimensions Accurately
Now that you’ve got a dependable scale, next make sure your suitcase fits the airline’s size rules by measuring its dimensions accurately at home.
Lay the bag flat, measure height, width, depth including wheels and handles. Use a straight ruler or tape, record numbers in centimeters and inches, compare with airline limits, and note if compression or external pockets affect overall size.
Account For Packing Weight
Once you’ve confirmed the suitcase fits, it’s time to weigh what you’ll actually pack so you don’t hit airline limits at the airport.
Weighing at home lets you rearrange contents and avoid fees. Use a reliable scale, note the tare, and target a buffer under the limit before leaving.
- Use a luggage or bathroom scale
- Weigh with handles/straps
- Subtract empty suitcase weight
- Redistribute heavy items
- Aim for a 1–2 kg/lb buffer
Pick Luggage That Makes Checking Bags Easier
Choose luggage that actually makes checking bags less of a hassle: pick lightweight, durable suitcases with smooth wheels, sturdy handles, and clear compartments so you’ll pack efficiently and avoid surprises at the carousel.
Use a suitcase with external pockets for documents, reinforced corners, and a reliable zipper or TSA lock.
That’ll speed check-in, reduce damage risk, and help you spot your bag faster.
Labeling and Protecting Fragile or Valuable Items
When you pack fragile or valuable items, label the bag and the specific compartment clearly as “FRAGILE” so handlers know to treat it gently.
Use sturdy padding—bubble wrap, clothing layers, or foam pouches—and lock or secure loose parts to prevent movement.
For extra protection, put breakables in the center of your suitcase away from seams and wheels.
Label Fragile Contents Clearly
If your bag holds delicate or valuable items, clearly mark them as fragile so handlers know to take extra care.
Use visible, weatherproof “FRAGILE” stickers and attach a note inside the bag with contact details.
Point out fragile areas at check-in, and request gentle handling when possible.
- Place sticker on top
- Use bright colors
- Add contact info
- Note contents inside
- Ask staff politely
Secure And Cushion Items
Pack fragile and valuable items with layers of protection so they survive handling and transit.
Wrap each item in bubble wrap or clothing, place them in sturdy boxes or hard-sided compartments, and fill gaps with foam or packing peanuts.
Use tamper-evident tape and interior straps to prevent shifting.
Label contents as fragile and keep small valuables in your carry-on whenever possible.
Secure Your Bag: Locks, Straps, and TSA Rules
Because airport security balances traveler safety with quick inspections, you should secure your checked bag without blocking screeners’ access.
Use TSA-approved locks, avoid sealed bags that can’t be opened, and fasten straps snugly. Label your luggage and keep valuables with you. Follow airline limits and remove external tags if damaged.
- TSA-approved lock
- Sturdy luggage strap
- Clear external ID
- No prohibited items
- Notify if inspected
Print or Download Boarding Passes and Baggage Receipts
Before you leave for the airport, print or download your boarding passes and baggage receipts so you can breeze through check-in and security; keeping digital copies on your phone and a printed backup covers you if one method fails.
Save screenshots, email confirmations, or airline app passes, and guarantee barcodes scan clearly.
Keep receipts until baggage claim and final flight confirmation to resolve any disputes quickly.
When to Arrive at the Airport With Checked Bags
Now that you’ve got your boarding passes and baggage receipts sorted, plan your arrival time with checked luggage in mind.
Aim to arrive earlier than carry-on only travelers: allow time for drop-off lines, security, and unexpected delays. Consider peak hours, airline cutoffs, and airport size.
Plan to arrive earlier than carry-on travelers — allow extra time for drop-off lines, security, and delays.
- Arrive 90–120 minutes for domestic flights
- Arrive 2–3 hours for international
- Check airline cutoff times
- Factor transit time to terminal
- Add buffer for busy days
Check a Bag at a Self‑Service Kiosk
Step up to a self‑service kiosk to check your bag quickly and skip long counter lines: follow on‑screen prompts, scan your booking or passport, select “Check baggage,” and enter weight/count.
Print bag tags, attach them securely to each suitcase, then follow signage to the baggage drop.
Keep your receipt and confirmation for tracking and fee questions. Ask staff if anything’s unclear.
What to Expect at the Baggage Drop Counter
When you get to the baggage drop counter, have your boarding pass and ID ready so the agent can verify your documents quickly.
They’ll weigh and tag your bag, and may open it for a brief inspection if anything looks suspicious or needs screening.
Stay nearby while they handle the process so you can answer any questions and get your receipt.
Required Documents
Before you reach the counter, have your boarding pass and government ID ready—plus any visas or travel documents required for your destination—so the agent can confirm your identity and destination quickly.
You’ll also need proof of vaccination or negative test if required; have copies accessible. Bring printed confirmations for special baggage or connecting flights.
- Boarding pass
- Government ID/passport
- Visas/entry permits
- Health documents
- Baggage receipts
Bag Inspection Process
With your documents ready, approach the baggage drop counter and be prepared for a quick inspection of your luggage.
An agent may ask to open bags, scan contents, or remove electronics and liquids.
Cooperate promptly, follow instructions, and mention anything fragile or restricted.
If an issue arises, you’ll either rearrange items, pay fees, or be directed to a security screening area for further checks.
Curbside vs. Counter Check‑In for Checked Bags
Decide whether you want speed or control: curbside check-in gets your bags handled quickly by airline staff right at the curb, while counter check-in gives you more time to verify tags, ask questions, and resolve issues inside the terminal.
- Choose curbside for quick drop-off.
- Use counter to confirm special requests.
- Expect curbside fees sometimes.
- Bring ID to either spot.
- Ask about oversized or fragile items.
Airport Security Screening for Checked Luggage
Once your bags are checked—whether curbside for speed or at the counter for extra oversight, you’ll want to know how they’ll be screened.
TSA or equivalent agencies X‑ray, swab for explosives, and may open luggage if alarms trigger.
Don’t pack prohibited items; declare valuables and medications.
Follow staff instructions; delayed inspection can add time but keeps the flight safe and compliant.
Track Your Checked Bag During the Journey
You can stay in the loop about your checked bag from drop-off to arrival using airline tracking tools, the baggage claim tag number, and airport monitors.
Check status online or via the carrier app, note the tag code, watch gate/claim displays, and enable notifications.
Track your bag online or in the airline app—save the tag, watch displays, and enable alerts for updates.
Keep receipts handy and ask staff for updates if needed.
- Use the airline app
- Save the tag number
- Monitor airport displays
- Enable push/SMS alerts
- Ask baggage services for help
What to Do If Your Bag Is Delayed, Damaged, or Lost
If your bag is delayed, damaged, or lost, report it immediately at the airline’s baggage desk so they can start a claim.
Take photos and note every damage or missing item to document your case.
Then check the claim status regularly and follow up until your bag is returned or you receive compensation.
Report Immediately At Desk
Head straight to the airline’s baggage desk as soon as you notice your bag is delayed, damaged, or missing; reporting it immediately guarantees staff can start tracing, document damage, or file a lost-bag report while details are fresh.
Tell staff your flight, bag tag, and contact info, keep receipts, and get a reference number.
- Provide flight and bag tag
- Show ID
- Describe contents briefly
- Keep receipts
- Request reference number
Document All Damages
After reporting the issue at the baggage desk, make a detailed record of any damage or missing items before you leave the airport.
Take clear photos from multiple angles, note time, flight number, and staff names, and get a written property irregularity report (PIR).
Keep copies of boarding passes and tags, and ask for contact info and claim reference before you depart.
Track Claim Regularly
Once you’ve filed a property irregularity report, keep close tabs on your claim and follow up regularly—daily at first, then every few days if progress stalls.
Check the airline portal, note reference numbers, and stay polite but firm when calling. Save all emails and receipts for reimbursement.
- Track online updates
- Call customer service
- Request escalation
- Keep receipts
- Confirm delivery or settlement
How to Avoid Checked‑Bag Fees and Common Mistakes
If you want to skip checked-bag fees and dodge common mistakes, plan ahead and use the carrier’s rules to your advantage: know size and weight limits, join frequent-flier or credit-card programs that include free bags, pack smartly to stay within weight limits, and confirm fare-class baggage allowances before you buy.
Also weigh bags at home, consolidate items, use carry-on when possible, and prepay fees online.
Tips for Tight Connections and International Transfers
When you’ve got a tight connection or an international transfer, prioritize time and paperwork: know your minimum connection time, check whether you’ll need to clear customs or recheck luggage, and confirm whether your connection is protected by the airline.
For tight connections, prioritize time and paperwork—know minimum connection times, customs and baggage rules, and airline protections.
Act fast, pack essentials in a carry‑on, and alert staff if delayed.
- Carry travel documents accessible
- Use through‑checked bags when possible
- Choose same‑carrier itineraries
- Allow extra layover time
- Know immigration rules
Quick Troubleshooting: Common Problems and Fixes
Because small issues can derail travel plans, you should know quick fixes for the most common luggage check problems: lost tags, delayed bags, damaged items, and incorrect routing.
| Problem | Immediate Action | Who to Contact |
|---|---|---|
| Lost tag | Reprint tag, keep receipt | Check-in agent |
| Delayed bag | File trace, get essentials | Baggage service |
| Damaged | Document, tag item | Airline claims |
Pre‑Flight Checklist: Step‑By‑Step Before You Fly
1 clear checklist keeps your pre‑flight routine efficient and stress‑free: confirm your flight details, check baggage allowances and restrictions, weigh and measure your luggage, pack essentials and valuables in carry‑on, secure fragile items, attach durable tags and ID, and have printed or digital boarding passes and ID ready.
- Verify passport and visas
- Confirm check‑in time
- Weigh checked bags
- Pack chargers and meds
- Lock and tag luggage
Frequently Asked Questions
Can I Check Flight‑Only Items Like Car Seats or Strollers for Free?
Yes — you can usually check car seats and strollers for free; policies vary by airline and route, so check your carrier’s rules beforehand, gate-check bulky items if needed, and bring protective bags or straps to secure them.
Are Pets Allowed in Checked Baggage on Any Airlines?
No, you generally can’t check pets as regular checked baggage; airlines restrict or prohibit that for safety, though some allow specific kennel cargo services for larger animals—check your carrier’s rules, health requirements, and seasonal weather limitations.
How Do I Claim Duty Reimbursement for Lost Checked Items Overseas?
You file a loss report with the airline, get written confirmation, keep receipts and photos, submit a claim per carrier rules, then contact your travel insurer or credit card issuer for duty reimbursement, following their documentation and timelines.
Can I Store Perishables or Medications in Checked Luggage Safely?
You can, but you shouldn’t leave perishables or temperature-sensitive medications in checked luggage; they can spoil or become ineffective. Pack meds in carry-on with documentation, use insulated containers or gel packs, and check airline rules first.
Will My Airline Transfer Checked Bags on Separate Tickets Automatically?
Usually no — airlines don’t automatically transfer checked bags between separate tickets unless they have an interline agreement and you’re booked through a single agent. Check with both carriers, request through-checking, and allow extra connection time.
Conclusion
Checking a bag doesn’t have to be stressful. Decide if you need to check or carry on, confirm your airline’s size, weight limits, and fees, and pack smartly—put fragile, valuable, and essential items in your carry‑on. Weigh and measure your suitcase at home, avoid common fee triggers, and plan extra time for tight connections or international transfers. Use the pre‑flight checklist, troubleshoot quickly if issues pop up, and enjoy a smoother travel day.