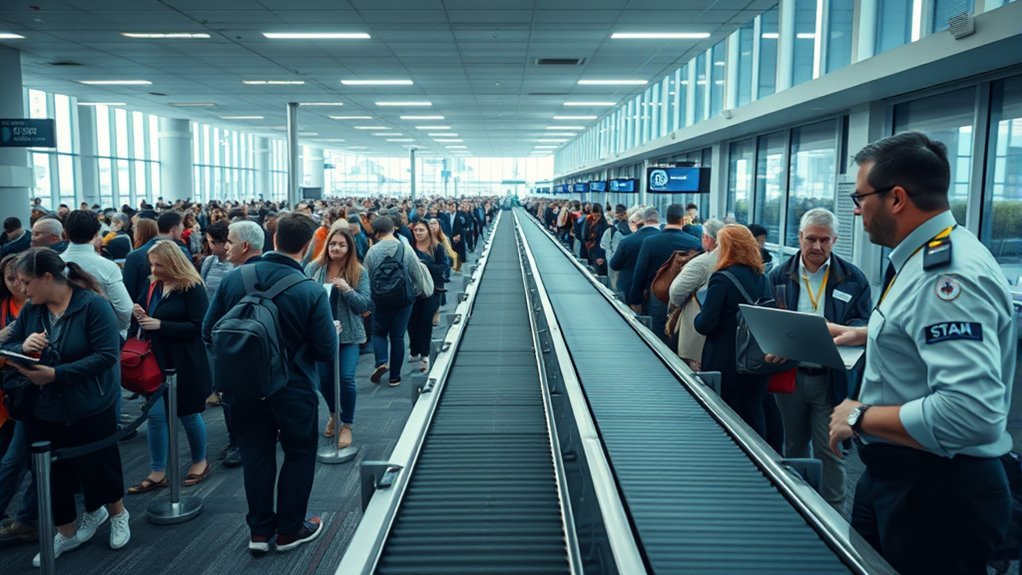
How Long Does TSA Take at Airport Security
You can usually get through TSA security in about 5–45 minutes depending on airport size, time of day, and staffing—think 5–15 minutes at small regional airports, 10–30 at mid-sized, and 30–60+ at big international hubs during peaks. Weekends, holiday mornings, and mid-mornings are busiest; evenings and early mornings are fastest. Packing, PreCheck/CLEAR, and checkpoint layout also matter. Keep buffers for checked bags or alerts, and read on for tips to speed things up.
Quick Answer: TSA Wait Times by Airport Size
Wondering how long TSA will slow you down? You’ll usually spend 5–15 minutes at small regional airports, where fewer travelers and simpler checkpoints speed things along.
At mid-sized airports expect 10–30 minutes; peak periods can push you toward the upper end.
At mid-sized airports, plan on 10–30 minutes for TSA, with peak times pushing you toward the higher end.
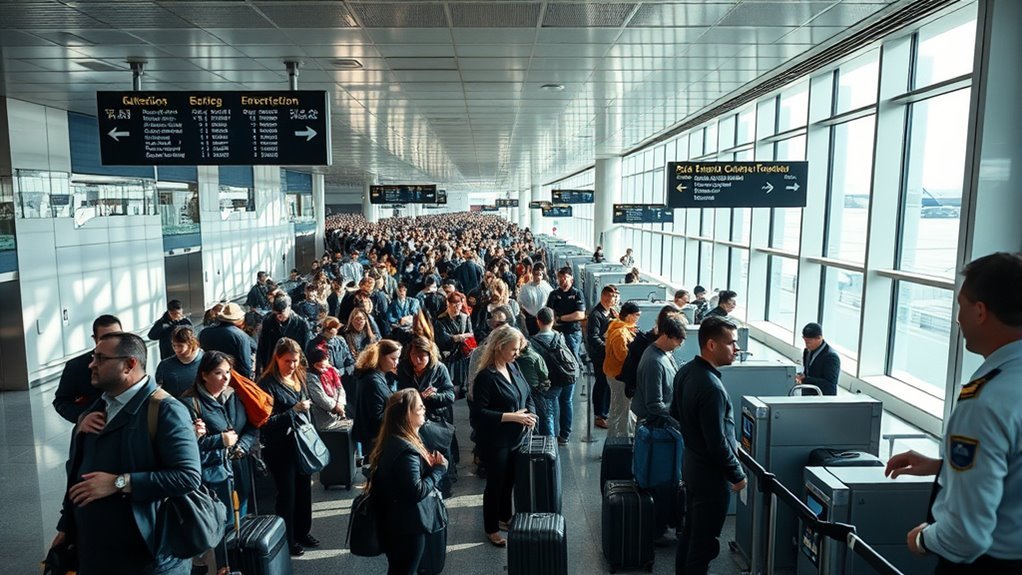
Large hub airports often mean 20–45 minutes, especially with varied flight schedules and multiple security lines.
Major international gateways can require 30–60 minutes or more during busy travel days.
Plan using these ranges: small (5–15), mid (10–30), large (20–45), international hubs (30–60+).
Always add buffer for unexpected delays.
How Time of Day Affects TSA Wait Times
Because passenger flow changes throughout the day, the hour you arrive can make a big difference in TSA wait times. You’ll usually find the shortest lines during early morning hours before peak business travel picks up and late evening when flights taper off.
Mid-morning and late afternoon often bring the longest waits as waves of departures cluster. If you fly during a known peak window, arrive earlier than usual or enroll in TSA PreCheck to speed screening.
Check real-time airport apps or airport websites before you go; they’ll help you pick a departure time that minimizes security delays.
How Day of Week and Season Change Wait Times
You’ll notice wait times shift depending on the day of the week, with Fridays and Sundays often seeing the longest lines as people start or end trips.
Holidays and peak seasons like summer and winter break bring predictable passenger surges that can add significant delays.
Plan extra time on those peak travel days and during busy seasons to avoid rushing.
Peak Travel Days
How much longer will security take if you fly on a holiday or weekend? You’ll usually face longer lines on peak travel days—holidays, long weekends, and major event dates. Plan extra time, arrive earlier, and use options like TSA PreCheck when possible.
- Holiday mornings: expect the longest waits; crowds peak early.
- Fridays/Sundays: business and leisure overlap, increasing lines.
- Early summer weekends: many travelers start vacations, adding congestion.
- Event days: concerts or sports nearby can spike local airport traffic.
Check airport advisories and adjust your arrival time to avoid stress.
Seasonal Passenger Surges
When travel ramps up for certain days of the week or seasons, expect security lines to stretch and processing times to rise. Mondays and Fridays bring business traffic while summer, winter holidays, and spring break drive big seasonal spikes.
You’ll face longer waits during early morning and late afternoon peaks on weekdays and sustained congestion on holiday eves. Airports add staff, but demand often outpaces adjustments, so factor extra time.
Check airline and airport alerts, use TSA PreCheck or CLEAR if eligible, and aim for off-peak flights midweek or midday. Pack efficiently to move through screening faster and reduce surprises at checkpoints.
What Slows Security: Staffing, Alerts, Layout
Though peak travel days are the obvious culprit, slow security usually comes down to three practical issues: understaffed checkpoints, frequent alerts or secondary screenings, and inefficient terminal layouts. You notice lines stretch when agents are short, when alarms force everyone to pause, or when bottlenecks funnel travelers poorly.
You can ease your own experience by arriving early, following packing rules, and staying ready at the conveyor.
- Faster processing needs adequate staffing levels and flexible scheduling.
- Alerts and secondary checks interrupt flow and add unpredictable delays.
- Poor checkpoint layout creates chokepoints and wasted movement.
- Clear signage and staff direction reduce confusion and speed throughput.
How TSA PreCheck Speeds Your Screening

If you enroll in TSA PreCheck, you’ll usually hit much faster security lines designed just for low-risk travelers. You’ll face fewer bag checks and can keep shoes, belts, and laptops in your carry-on, which cuts screening time.
That streamlined process also speeds up boarding so you get to your gate sooner.
Faster Security Lines
Because TSA PreCheck separates you from the general screening line, you’ll move through security far faster—no removing shoes, belts, light jackets, laptops, or most liquids—so wait times are typically shorter and more predictable.
- You skip slow prep steps, so your throughput per minute rises.
- Shorter lines mean fewer surprises; rush-hour spikes hit you less.
- You keep essentials on you, reducing fumbling and speeding progress.
- Dedicated lanes often have staff tuned to quick, familiar procedures.
Fewer Bag Checks
How do fewer bag checks actually speed up your TSA PreCheck experience? You move through screening with fewer interruptions because TSA agents rarely need to open or re-screen your carry-on.
With standard lanes, random or suspicious items trigger manual inspections that stall lines; in PreCheck, clear protocols and trusted-traveler status mean agents accept screening results more often. That reduces conveyor delays and lets bins clear faster.
You still pack sensibly, but you won’t frequently unpack electronics or liquids. Fewer bag checks cut down both individual wait time and overall queue congestion, making the security checkpoint noticeably quicker and more predictable.
Simplified Boarding Process
When you have TSA PreCheck, boarding becomes more straightforward: dedicated lanes, prioritized screening, and clearer procedures mean you spend less time at the security checkpoint and more time getting to your gate. You move through with less hassle, keep shoes and light jackets on, and leave laptops and liquids in your bag.
That consistency reduces stress and helps you plan arrival times confidently. Use PreCheck when possible to streamline tight connections and early departures.
Consider enrollment if you travel frequently; the time you save adds up quickly.
- Faster queues
- Less shoe removal
- Laptops stay packed
- Predictable timing
Get or Renew TSA PreCheck: Timelines
If you’re planning to get or renew TSA PreCheck, expect different timelines depending on whether you’re enrolling for the first time or simply renewing online.
New applicants typically schedule an enrollment appointment within a few weeks and receive a Known Traveler Number (KTN) within 2–6 weeks.
New applicants usually book an enrollment appointment within weeks and get a Known Traveler Number in 2–6 weeks.
While most eligible renewals are processed within 3–5 days if done online.
You’ll complete an online application, pay the fee, and attend a short in-person appointment for biometrics and ID verification.
Check your email for conditional approvals, add your KTN to reservations, and allow extra time if background checks flag issues or documentation needs clarification.
How Global Entry and CLEAR Compare to PreCheck
While TSA PreCheck speeds you through airport security for domestic and some international departures, Global Entry and CLEAR take different approaches:
Global Entry fast-tracks your re-entry into the U.S. after international travel and includes PreCheck benefits.
Whereas, CLEAR expedites identity verification at select airports so you bypass ID-check lines but still go through the physical security screening.
- Global Entry: best if you travel internationally often; includes PreCheck access so you skip certain screening steps.
- CLEAR: ideal for cutting ID lines quickly; pairs well with PreCheck for maximal speed.
- Cost: Global Entry is pricier but covers more.
- Enrollment: both require background checks and appointments.
How Airport Staffing Levels Affect Wait Times
Because staffing levels directly shape how quickly you move through security, understaffed checkpoints create bottlenecks that lengthen lines and increase stress for travelers. You’ll notice fewer open lanes, slower document checks, and reduced throughput per officer, especially during peak hours.
When staffing’s adequate, screeners can process people, handle carry-on screenings, and clear alarms faster, cutting your wait. Airlines and airports coordinate staffing based on schedules, but sudden absences or delays can still reduce capacity.
To minimize your risk, arrive early, monitor real-time wait info when available, and consider off-peak travel times to avoid staffing-driven delays.
How Random Checks and Security Alerts Add Delays
When TSA officers pull individuals or bags for random checks or respond to security alerts, you’ll face additional screening steps that can halt the flow through a checkpoint. You might be moved aside, asked questions, or have belongings re-examined, and those interactions create unpredictable pauses for everyone. Procedures vary by situation and can include explosives trace swabs, hand searches, or electronic device inspections.
Expect altered queue dynamics and occasional secondary lines when alerts occur.
- You’ll be separated briefly for questioning.
- Bags may undergo manual inspection.
- Devices can get powered on or tested.
- Alerts trigger temporary lane closures.
Why Checkpoint Layout and Open Lanes Matter
If the checkpoint’s layout channels you efficiently and features enough open lanes, you’ll move through far faster than at a cramped, poorly staffed setup. You’ll notice how conveyor placement, spacing between lanes, and signage cut confusion and bottlenecks.
Wide queuing areas let agents pull aside travelers for quick secondary checks without halting the main flow. Multiple open lanes let TSA distribute passengers by flight time or risk category, smoothing peaks.
Conversely, narrow aisles and poorly marked entry points force shuffling, delays, and agent handoffs. When you pick terminals with smarter layouts or arrive when more lanes are open, you save time.
How Carry-On Size and Packing Slow Screening
If your carry-on is too big or jammed full, it can trigger extra checks and slow everyone down.
Overpacked bags take longer for officers to inspect and may get pulled aside for manual screening.
And if liquids aren’t packed in clear, compliant bags you’ll be stopped to repack or remove them.
Oversized Carry-On Issues
Because oversized carry-ons jam bins and slow X-ray conveyors, they’re one of the most common causes of bottlenecks at TSA checkpoints. You’ll notice agents pausing to reposition bags, request gate checks, or open larger items for manual inspection. That interrupts flow and adds minutes for everyone.
- You’ll be asked to gate-check bulky roller bags that won’t fit.
- You’ll unwrap oddly shaped items for separate scans.
- You’ll get delayed when agents re-run oversized bags through machines.
- You’ll face longer lines if others carry oversized items.
Pack to standard dimensions to keep lines moving.
Overpacked Bags Delay
How much extra time will an overstuffed carry-on add to your screening? When your bag bulges or is tightly packed, agents often pause to unzip, reshuffle, and run additional X-ray checks.
You’ll be asked to remove dense layers, separate electronics, or open compartments, which stalls the line and can trigger manual inspection. Tight packing hides items and creates cluttered images that take longer to interpret, so expect five to fifteen extra minutes depending on crowding.
To speed screening, compress smartly, use clear pouches for small gear, and leave one easy-access layer for quick surveillance checks.
Improperly Packed Liquids
When you cram full-size toiletries or bury quart-sized bags deep in your carry-on, TSA agents stop the X-ray belt to verify volumes and test suspicious containers. That pause slows everyone, especially during peak times.
You can speed screening by packing clearly and following rules so agents don’t pull your bag for inspection.
- Keep liquids in a single, transparent quart-sized bag.
- Place that bag near the top of your carry-on for immediate visibility.
- Avoid unmarked bottles; use original containers or label replacements.
- If you carry medication or baby formula, declare it before screening to prevent delays.
What Electronics and Liquids Mean for Screening
If you’re carrying electronics or liquids, expect a few extra steps at the security checkpoint: laptops, tablets, and large electronic devices usually need to come out of bags and go through X-ray bins.
Liquids must follow the 3-1-1 rule and be presented separately.
Liquids follow the 3-1-1 rule — keep them in a clear quart bag and present separately at screening.
You’ll place small electronics (phones, e-readers) in carry-on or bins unless asked. Remove cases or sleeves if requested to improve imaging.
Keep liquids in a clear quart-sized bag and pull it out for screening.
If an item triggers additional inspection, follow officer instructions and allow a bit more time before boarding.
Screening With Kids, Seniors, and Family Tips
If you’re traveling with a stroller, know the TSA process for gate-checking or sending it through screening so you’re not caught off guard.
Prep seniors by organizing medications, mobility aids, and ID where they’re easy to reach to speed their screening.
Use simple family strategies—assign one person to manage bags and another to escort kids or assist a senior—to move through security smoothly.
Traveling With Strollers
Traveling with a stroller can feel overwhelming, but TSA screening for families is straightforward if you know what to expect.
You’ll collapse or fold the stroller, unless gate-checking, and place it on the X-ray conveyor or in the screening lane.
Keep your child nearby; TSA often allows one adult to carry them through the metal detector.
Expect a quick pat-down of the stroller or swab for explosives if needed.
Have boarding passes and ID ready to speed the process.
- Fold or collapse stroller when directed.
- Gate-check bulky models if preferred.
- Carry children through detectors.
- Keep essentials accessible.
Senior-Friendly Preparation
You can use the same calm, organized approach you apply with strollers when helping seniors through security. Walk them through the steps beforehand: remove belts, shoes, and items from pockets; place medication and devices in clearly labeled bags; and keep a boarding pass and ID handy.
Request a TSA officer for assistance or a private screening if mobility or hearing needs make standard lanes stressful.
Offer a seat while waiting and explain each action so nothing surprises them.
Pack essential aids—hearing devices, mobility supports—in accessible spots and communicate any accommodations you’ve requested to staff promptly.
Family Security Strategies
When you’re moving a group through security, plan roles and pace so everyone knows what to do and when to do it. Assign one person to the bag line, another to corral children, and a calm lead for seniors. Bring snacks, distractions, and any medical documentation. Request family lanes or assistance if needed.
- Pack a clear, labeled carry-on with meds and essentials.
- Use collapsible strollers and gate-check them to simplify screening.
- Explain steps to kids in plain language and practice removing shoes at home.
- Ask TSA about accommodations ahead to reduce surprises and speed processing.
TSA Rules for Medical Items and Throughput
Although medical items get special consideration, TSA still requires you to follow screening procedures for devices, medications, and supplies. Know the rules for carry-on and checked items, declare anything unusual to officers, and allow extra time if you need exam lanes or manual inspection.
You should separate medications and supplies from luggage for X-ray screening, label prescriptions, and keep liquids within allowance or declare exceptions. Battery-powered devices may need removal and possible testing.
Notify officers about ostomy supplies, injections, or ice packs; they’ll inspect but aim to preserve items. Plan extra time—manual checks take longer and affect throughput.
Special-Needs Travelers: Expedited Options and Help
If you have mobility, cognitive, or sensory needs, don’t assume standard lanes are your only option—TSA and many airports offer expedited and assisted screening to help you move through security faster and with less stress. You can request assistance at curbside, ticket counters, or by contacting your airline ahead of time.
TSA Cares provides pre-screening help and coordination for special situations. Know your rights, carry documentation if helpful, and arrive early to allow time for accommodations.
Staff can arrange private screenings, wheelchair escorts, and help with belongings so you get through security comfortably.
Staff can provide private screenings, wheelchair escorts, and assist with belongings to ensure a comfortable, stress-free security experience.
- Request assistance early
- Contact TSA Cares
- Bring documentation
- Ask for private screening
How Airline Check-In and Gate Crowds Affect Lines
When you arrive during peak check-in times, you’ll usually face longer security lines because more people are funneling through the same checkpoints.
Late gate boarding and crowded jetways can spill back into screening areas and slow throughput.
Plan extra time if your airline’s check-in or boarding window is busy.
Peak Check-In Times
Because airlines bundle many passengers into a few narrow time windows, peak check-in and gate crowds can quickly swell security lines, and that surge will directly affect how long you wait. You’ll notice mornings, late afternoons, and holiday blocks concentrate travelers, so plan accordingly. Watch flight schedules and airport alerts, arrive earlier when multiple flights cluster, and use mobile check-in to skip counters.
- Busy windows: expect longer lines 60–90 minutes before clustered departures.
- Airline staffing: understaffed counters push more people to TSA lanes.
- Flight delays: delayed waves create secondary peaks.
- Early arrival: simplifies screening and reduces stress.
Gate Boarding Congestion
Peak check-in waves don’t stop at security; they spill into gate areas and magnify line congestion as passengers jockey to board. You’ll notice how delayed flights, tight connection schedules, and simultaneous gate assignments create surges that slow boarding and push crowds into aisles and security chokepoints.
When gates get crowded, boarding lines lengthen, overhead bin competition increases, and passengers circle back through security areas, adding pressure. To avoid delays, arrive earlier for busy flights, watch boarding calls, and prep carry-on essentials to speed boarding.
If you see a surge, move away from the gate edge to let lines flow and reduce stress.
Estimating How Early to Arrive for Your Flight
If you want to avoid last-minute stress and missed flights, plan your arrival time around the airport’s size, the airline’s check-in rules, and whether you’re checking bags or just carrying on.
You’ll judge how early to arrive by considering security lines, peak travel periods, and personal comfort with risk. Aim to leave buffer time for unexpected delays like traffic or longer inspections.
- Small regional airport, carry-on only: arrive 60 minutes early.
- Medium airport or checked bag: arrive 90–120 minutes early.
- Large hub or peak travel: arrive 2.5–3 hours early.
- International flights: arrive 3 hours minimum.
How to Check Live TSA Wait Times and History
You can check the TSA’s real-time dashboard to see current security line lengths and estimated wait times.
Many airlines and airport apps also show live updates and alerts for your terminal.
If you want trends, look at historical wait time data to spot busy periods and plan accordingly.
Real-Time TSA Dashboard
While airline apps and airport monitors give a snapshot, the TSA’s Real-Time Dashboard lets you see live checkpoint wait times and historical trends so you can plan when to arrive at the airport. You can filter by airport, terminal, and date to compare typical busy periods.
Use the map view to spot which checkpoints report shorter queues and check historical graphs to avoid peak windows. The dashboard updates frequently, so refresh before leaving. It’s public, free, and handy when you need to decide between arriving early or cutting it closer.
- Check live waits
- View historical trends
- Filter by terminal
- Use map view
Airline And Airport Apps
Because your flight app already knows your itinerary, it can be the quickest way to check live TSA wait times and recent trends before you leave for the airport.
Open your airline or airport app to view current screening delays, gate-specific alerts, and estimated processing times.
Enable notifications for real-time updates about spikes or staffing changes that could affect security lines.
Compare the app’s live data with push alerts and airport maps to choose the best entry point or adjust arrival time.
Bookmark the app’s security page and refresh briefly before you depart so you won’t be surprised by unexpected delays.
Historical Wait Time Data
If you want to plan around security lines, check historical TSA wait-time data to see patterns by day, time, and season. You can use TSA’s website, airport dashboards, or third-party apps to view averages and peak trends.
Historical data helps pick *best* arrival times and anticipate delays.
- Review weekly and monthly averages for your airport.
- Compare holiday and weekday patterns to avoid spikes.
- Note early-morning and late-night lows for shorter waits.
- Save screenshots or export data so you can track changes before travel.
Use trends, not single reports, to plan confidently.
Reading Airport-Specific Security Time Data
When you consult airport-specific security time data, focus on the metrics that actually affect your trip—median and peak wait times, the time window they cover, and whether the figures include TSA PreCheck or other expedited lanes.
Check the sample size and date range so you know if data’s recent and representative. Note whether times are reported per checkpoint or averaged across the whole terminal.
Look for granularity by hour, day, and holiday periods to spot recurring bottlenecks. Prefer sources that flag anomalies (construction, staffing shortages).
Use the data to set arrival time buffers, not to predict exact waits.
Choosing the Fastest Terminal Entrance or Lane
Check the airport map to find the nearest terminal entrance and figure out which security checkpoints are quickest from your gate.
Watch for peak time patterns so you can avoid busy hours or choose an alternate entrance.
Also note lane types—TSA PreCheck, priority, and regular lanes move at different speeds, so pick the one you qualify for.
Nearest Terminal Map
Because terminal layouts and security lane placements vary, knowing the nearest terminal map helps you pick the fastest entrance and avoid crowds. Use the airport website or app to view terminals, entrances, and connections so you can plan which checkpoint is closest to your gate. Look for shortcuts like pedestrian bridges, tram stops, or cross-concourse corridors. Note accessibility entrances if you need them.
Compare walk times rather than distance; elevators and moving sidewalks change travel time.
- Check terminal maps before you leave home.
- Save screenshots for offline use.
- Trace a quick route from curb to gate.
- Mark alternative checkpoints.
Peak Time Patterns
If you travel during typical rush windows—early morning business departures, midday holiday surges, or late-afternoon commuter spikes—you’ll want to pick entrances and lanes that dodge the biggest crowds. Check arrival patterns and choose less obvious entrances, like those near lower-traffic gates or airline desks.
Watch real-time lines via airport apps or TSA wait-time displays, and arrive slightly before or after peak minute clusters. Join shorter queues, even if they look slower at first—they often move steadily.
If you travel with flexibility, stagger arrival by 15–30 minutes to avoid surges and shorten overall wait time.
Security Lane Types
When you’re choosing an entrance, know that not all security lanes move the same: standard lanes handle most travelers. TSA PreCheck lanes clear vetted passengers faster. Family/medical lines let you keep bulky items with you but can be slower. Expedited lanes like CLEAR speed you to the front.
Pick a lane based on eligibility and carry-ons. Watch posted wait times, ask staff which lane is shortest, and factor in travel companions. You’ll save time by using the right lane and avoiding bottlenecks.
- Use PreCheck if enrolled.
- Choose CLEAR for fastest access.
- Family lines for kids/needs.
- Standard if nothing else applies.
Pack Your Carry-On for the Quickest Screening
Streamline your carry-on so the TSA line moves faster for you and everyone behind you. Put electronics and liquids near the top in an easy-to-reach pouch, so you can remove them quickly when instructed. Wear shoes and minimal metal to avoid extra scans.
Keep receipts, boarding pass, and ID in a single, accessible place. Compress bulky items or wear your jacket through the scanner when allowed. Use clear, resealable bags for gels and meds to speed visual checks.
Avoid overpacking pockets with small items that trigger pat-downs or extra searches. A tidy bag reduces delays for everyone.
Prep at Home: Checklists to Shave Minutes
Before you leave, use a simple checklist to pack your carry-on strategically so liquids, electronics, and outerwear are easy to access.
Lay out your ID and boarding pass and tuck them in a designated pocket so you’re not fumbling at the checkpoint.
Those small habits shave minutes and keep the line moving.
Pack Carry-On Strategically
If you prep your carry-on with a clear checklist, you’ll move through security much faster and with less stress. Lay out liquids in a quart bag, keep electronics accessible, and stow shoes and belts where you can grab them quickly. Fold items so bins close easily and avoid overpacking.
- Liquids: quart bag at top, compliant sizes only.
- Electronics: laptop/tablet in an outer sleeve for quick removal.
- Shoes/belts: wear easy shoes; place belt near zipper pocket.
- Essentials: passport, boarding pass, meds in an accessible pocket.
Prepare Documents Early
When you prep documents at home, lay out your ID, boarding pass, and any required health forms together so you can grab them in one motion at security. Then check expiration dates, download digital copies to your phone, and place a printed backup in an easy pocket. Use a simple checklist to avoid last-minute searches and keep masks or vaccination cards nearby if required. At the gate, having everything ready speeds lines and reduces stress.
| Item | Where to keep |
|---|---|
| ID | Front pocket |
| Boarding pass | Phone + print |
| Health form | Wallet/back pocket |
Step-by-Step Through the TSA Checkpoint
Although it might feel stressful, the TSA checkpoint follows a predictable sequence that you can navigate more quickly if you know the steps. You’ll queue, show ID and boarding pass, and move to the screening area.
Keep shoes on if allowed, empty pockets, and place electronics and liquids in bins. Follow officer instructions and step through the scanner when directed.
- Queue and present ID/boarding pass.
- Remove required items: laptop, liquids, jacket, belt.
- Place bins on the belt; walk through the scanner.
- Retrieve items, repack efficiently, and proceed to your gate.
What to Expect If You’re Pulled Aside
Because extra screening can feel intimidating, know that being pulled aside is a routine part of security, not a personal accusation. You’ll be asked a few calm questions, may show IDs, and might undergo a pat-down, bag check, or hand-swab for explosives residue. Stay cooperative, answer briefly, and follow instructions to speed the process. You can request a private screening or a witness if you prefer. Expect polite officers focused on safety, not judgment. Keep belongings organized beforehand to reduce delays.
| Action | What to expect |
|---|---|
| Questions | Brief, safety-focused |
| Pat-down | Professional, optional privacy |
| Bag check | Officer searches items |
| Swab | Quick residue test |
Use CLEAR to Skip ID Checks Efficiently
If you want to speed past the ID check after screening, consider enrolling in CLEAR. You’ll use biometric verification — fingerprint or iris — so agents don’t need to manually inspect your ID. It’s not a security shortcut; it just moves you from the ID line to document-free lanes faster.
- You’ll save minutes during busy periods.
- You can pair CLEAR with other programs for faster throughput.
- Family options let kids and adults move together.
- Expect dedicated lanes at many major airports.
Check lane availability at your airport; CLEAR’s value depends on local service and crowding.
How to Enroll in CLEAR, Global Entry, and PreCheck
When you’re ready to skip lines more often, enrolling in CLEAR, Global Entry, and TSA PreCheck starts with quick online applications and a short in-person appointment for biometrics and ID verification.
First, pick the program(s): CLEAR at clearme.com, TSA PreCheck via tsa.gov, or Global Entry through cbp.gov with customs benefits.
Complete forms, pay fees, and schedule interviews—Global Entry/TSA PreCheck require fingerprinting; CLEAR needs a photo and biometric capture.
Bring passport/ID and proof of citizenship to your appointment.
After approval, link Known Traveler Numbers to airline profiles so your expedited status applies when you check in.
Troubleshooting Long Lines and Tight Connections
Enrolling in CLEAR, Global Entry, or TSA PreCheck will shave minutes—or even hours—off security waits, but you can still face long lines or tight connections; here’s how to handle them.
Enrolling in CLEAR, Global Entry, or TSA PreCheck speeds security—but lines and tight connections can still happen; be prepared.
- Check live TSA and airport wait-time apps before leaving so you can delay or speed up departure.
- Call the airline immediately if you’re tight; agents can rebook, hold the gate, or arrange earlier flights.
- Use priority lanes if eligible, keep documents ready, and streamline carry-ons to move faster through screening.
- If you miss a connection, stay calm, find the airline desk, and ask about vouchers, standby, or next available flights.
Airport and TSA Initiatives Reducing Wait Times
Although airports and the TSA can’t eliminate every delay, they’re rolling out technology and operational changes that cut screening times and smooth passenger flow. You’ll see expanded use of automated screening lanes, computed tomography scanners for carry-ons, and credential authentication technology that speeds identity checks.
Many airports use real-time queue monitoring and predictive analytics so staff redeploys where lines build. TSA PreCheck and CLEAR enrollment expansions let frequent travelers bypass standard lines.
You’re encouraged to use mobile boarding passes and follow signage for optimized entry. These initiatives reduce variability, so you can plan departures with more confidence and less stress.
Do COVID-Era Procedures Still Affect Screening?
Even though many strict pandemic-era protocols have been relaxed, you’ll still notice a few lingering changes at security checkpoints—like plexiglass, touchless options, and altered spacing in some lanes—that can subtly affect flow and expectations.
You’ll also see continued emphasis on sanitization and signage guiding passenger movement. These adjustments rarely add large delays, but they can change how you prepare and move through checkpoints.
- More touchless bins and biometric kiosks speed processing for prepared travelers.
- Plexiglass and barriers slightly change officer interactions.
- Occasional lane spacing reduces throughput during busy times.
- Enhanced cleaning schedules can briefly pause operations.
Travel Routines That Minimize Security Stress
When you build simple, repeatable routines for packing and checkpoint behavior, you’ll move through security more smoothly and with less stress.
Lay out liquids, electronics, and documents in a dedicated pouch so you can reach them fast.
Wear shoes and layers that are easy to remove.
Empty pockets before you reach the line and keep your ID and boarding pass accessible.
Use TSA PreCheck if you can; if not, mentally rehearse the steps so you don’t fumble.
Arrive early to avoid rushing.
After screening, restock your bag methodically so the next checkpoint is just as effortless.
Frequently Asked Questions
Can TSA Confiscate Items Purchased After Security in the Gate Area?
Yes — TSA can confiscate prohibited items you bought after security in the gate area if they violate federal rules. You’ll be asked to surrender them, possibly face fines, or disposition per the officer’s direction and local law.
How Do TSA Procedures Differ for Private Jet Terminals (FBOS)?
TSA procedures at FBOs vary: you’ll often go through screening arranged by the operator, may face less queuing, background checks and credentialed escorts can apply, and security layers depend on airport, aircraft type, and owner/operator policies.
Will TSA Allow Last-Minute Gate-Side Medication or Insulin Administration?
Yes—you can administer medication or insulin at the gate. You’ll need to notify TSA or airline staff, keep supplies screened, and follow crew instructions; they’ll accommodate medical needs while maintaining safety and security procedures.
Do Ride-Share Drop-Off Locations Affect Which Checkpoint I Must Use?
Yes—you might need a specific checkpoint. Airports map curbside and rideshare drop-offs to terminals or security lanes, so check your airline’s terminal, follow signs, and allow extra time if you’ll need to change terminals pre-security.
Can Frequent Flyers Get Lane Priority Without Precheck or CLEAR?
No, you usually won’t get dedicated lane priority without PreCheck or CLEAR; frequent-flyer status sometimes grants priority boarding or check-in perks, but security screening lines remain controlled by TSA and airport programs.
Conclusion
You can usually expect TSA to take anywhere from a few minutes to over an hour depending on airport size, time, and season, but planning cuts stress: arrive early, use TSA PreCheck if you can, travel during off-peak hours, and pack to breeze through screening. If you hit a long line, alert airline staff about tight connections and ask for assistance. With smart routines and awareness of factors that slow screening, you’ll get through security more reliably and calmly.