How Does Tsa Precheck Work: Step-By-Step Process Explained
You apply online, book a brief in-person appointment, bring ID and proof of citizenship, and get fingerprinted for a background check; once approved you’ll receive a Known Traveler Number (KTN). At the airport, add your KTN to reservations and use dedicated TSA PreCheck lanes to keep shoes, belts, light jackets and laptops in bags while moving faster through security. It’s a five-year membership with a fee, and more details on eligibility and troubleshooting follow.
Quick Checklist: Get and Use TSA PreCheck
1 quick checklist will get you from application to expedited security in no time.
You’ll apply online, schedule an enrollment appointment, bring ID and proof of citizenship, and complete a brief interview with fingerprints.
After approval, add your Known Traveler Number to reservations and loyalty profiles.
Use PreCheck lanes on departure, keep your NTV when renewing, and update details if they change.
How TSA PreCheck Speeds Up Security
With TSA PreCheck, you’ll spend less time waiting in shorter security lines.
The streamlined screening lets you keep laptops in cases and usually skip removing shoes and belts.
That means a quicker, smoother path through the checkpoint so you can get to your gate faster.
Shorter Security Lines
Most travelers notice the time savings immediately: TSA PreCheck keeps you in faster-moving lanes so you spend minutes instead of half an hour at security.
You join dedicated lines with fewer passengers and streamlined checkpoints, so wait times shrink steadily.
That predictability helps you plan arrival times, reduces stress, and gets you to your gate faster without changing how screening procedures themselves are performed.
Simplified Screening Steps
Beyond shorter lines, TSA PreCheck speeds you through a simplified screening routine that cuts common slowdowns.
You keep electronics and permitted liquids in your bag, move through screening without extensive bin swaps, and follow streamlined instructions from officers.
That efficiency reduces bottlenecks, lets you reach your gate faster, and makes the overall security experience smoother while maintaining safety standards.
Less Shoe And Belt Removal
One of the biggest time-savers in TSA PreCheck is that you usually keep your shoes and belts on, so you move through the checkpoint faster and with fewer interruptions.
You won’t pause to remove footwear or belts, which speeds lines and lowers hassle. This small change cuts seconds per traveler, adding up to noticeably quicker processing during busy travel periods.
Who Qualifies for TSA PreCheck
Although you don’t need a perfect travel record, you do need to meet specific eligibility criteria to qualify for TSA PreCheck.
You must be a U.S. citizen, U.S. national, or lawful permanent resident, pass a background check, and provide fingerprints.
Certain criminal convictions or security concerns can disqualify you.
Membership in participating Trusted Traveler programs may also grant access.
How Much TSA PreCheck Costs and Payment Options
TSA PreCheck has a set fee and renewal options you should know so you can plan ahead.
You’ll find the current application cost, how long your enrollment lasts, and the process for renewing when it expires.
The program accepts common payment methods at enrollment to make paying straightforward.
Cost And Renewal Options
Getting PreCheck typically costs $78 for a five-year membership, and you can pay by credit or debit card, or sometimes via mobile payment at enrollment centers.
When renewal’s due, you’ll pay the same fee or a prorated amount if eligible; renew online or at an enrollment center.
Keep your PASS ID current and renew within six months before expiration to avoid gaps.
Payment Methods Accepted
When you’re ready to pay for PreCheck—whether for a new five-year membership or a renewal—the standard fee is $78 and you can use a credit or debit card at enrollment centers or online.
You can also pay with other common methods depending on location:
- Major credit cards (Visa, MasterCard, AmEx)
- Debit cards
- Mobile wallets where accepted
- Pay at select enrollment centers
Online Application Requirements
You’ll start the online application by creating an account and providing basic personal details—full name, date of birth, address, and contact information—along with your citizenship or immigration status and valid ID numbers. You’ll also need payment details, a photo upload option, and consent to background checks.
| Item | Requirement |
|---|---|
| ID | Driver’s license/passport |
| Photo | Recent headshot |
| Payment | Card or electronic |
| Consent | Background check authorization |
Scheduling Your Enrollment Appointment
Next, you’ll find nearby enrollment centers using the TSA website or the appointment portal.
Once you pick a convenient location, you can book a time that fits your schedule and confirm any required documents.
Aim to book early to get the slot you want and avoid last-minute changes.
Finding Enrollment Locations
Before you schedule, pick an enrollment center that’s convenient—TSA has hundreds of locations at airports and standalone centers nationwide, and availability varies by site.
You’ll choose based on travel routes, hours, and wait times, and confirm required ID documents before going.
- Check TSA’s official site for nearby centers
- Filter by airport vs. enrollment center
- Note hours and holidays
- Confirm acceptable IDs
Booking An Appointment
Once you’ve picked a convenient enrollment center and confirmed your IDs, go online to schedule your TSA PreCheck appointment—appointments fill quickly, so book early to get your preferred date and time.
Choose a slot that fits your schedule, bring required documents, and arrive a few minutes early.
If plans change, cancel or reschedule online to free the slot for others.
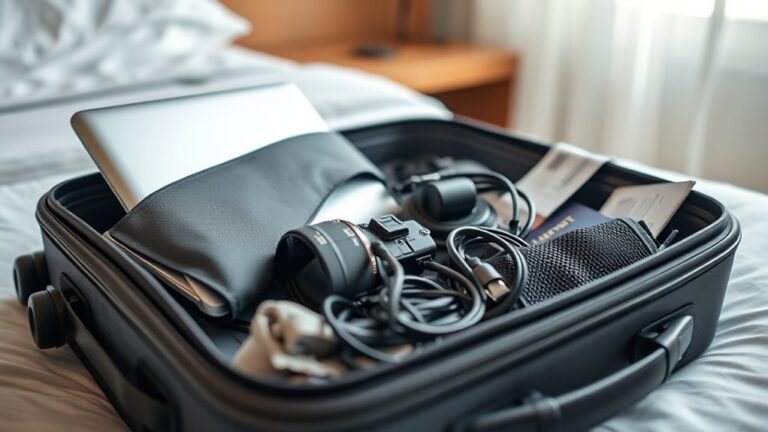
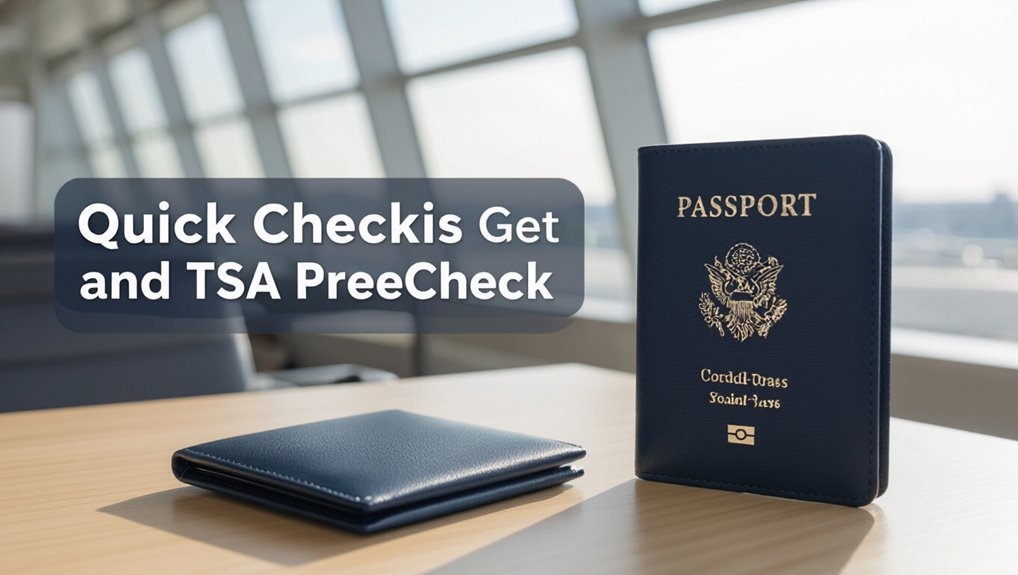
What to Bring to Your Enrollment
Bring two things you’ll rely on: a valid photo ID and proof of citizenship or immigration status.
Bring originals, not copies, and have documents ready to present. Also bring payment confirmation and appointment info.
- Government-issued photo ID (passport or driver’s license)
- Proof of citizenship/immigration (birth certificate, passport, or green card)
- Appointment confirmation/email
- Payment receipt or card used for application
What Happens During the In-Person Interview
When you arrive, an agent will check your ID and other documents to confirm your identity.
They’ll take your fingerprints using a scanner for the background check.
You’ll also answer a few brief questions about travel history and eligibility.
Document Verification
Because this step confirms your identity, the in-person interview focuses on carefully verifying the documents you provided online.
You’ll hand originals to the agent, who checks validity, matches names, and notes expiration dates. They’ll answer brief questions and return documents when done.
- Passport or birth certificate
- Driver’s license or state ID
- Proof of citizenship/immigration
- Secondary ID or name-change records
Fingerprint Collection
At the appointment, an agent will take your fingerprints using an electronic scanner—no ink or messy cards—so you’ll simply place each finger on the glass pad as they prompt you.
The technician confirms clear captures, may ask slight repositioning, and rescans any smudged prints.
The process is quick, secure, and links biometric data to your application for identity verification and background checks.
Interview Questions
Curious what they’ll ask during your in-person interview? You’ll meet an agent who verifies your ID, reviews your application, and asks brief background questions.
Be honest, concise, and ready to clarify details.
- Confirm identity and citizenship
- Employment and address history
- Travel habits and purpose
- Criminal or immigration history
Approval Timeline & How You’ll Be Notified
Most applicants hear back within a few weeks, but exact timing can vary based on background checks and appointment availability.
You’ll get an official notification by mail with your Known Traveler Number (KTN) if approved; sometimes you’ll receive an email first.
If approved, you’ll receive an official notification by mail with your Known Traveler Number—occasionally an email arrives first.
If denied, you’ll get a written explanation and appeal instructions.
Keep your contact info current to avoid delays in receiving results.
Add PreCheck to Flight Reservations
Anyone who’s been approved for TSA PreCheck can add the Known Traveler Number (KTN) to upcoming reservations so you get the expedited screening.
Add it when booking online, in your airline profile, or by calling the carrier. If your boarding pass lacks PreCheck, request an update at check-in or the ticket counter.
- Bookings online
- Airline profile
- Call carrier
- Check-in counter
Your Known Traveler Number (KTN): What It Is and How to Use It
Your Known Traveler Number (KTN) is the unique code you get after enrolling in TSA PreCheck that tells airlines you’re eligible for expedited screening.
You’ll add your KTN to your airline profile or enter it when booking so it’s printed on your boarding pass.
If your KTN isn’t on the reservation, you won’t get the PreCheck indicator at the airport.
What Is A KTN
A Known Traveler Number (KTN) is the unique identifier the TSA gives you when you join a trusted traveler program like TSA PreCheck, and you’ll use it to get expedited security screening on participating flights.
Use it to verify eligibility and speed screening.
- It’s tied to your enrollment and identity
- It’s numeric and unique
- It’s valid for program duration
- Keep it private and handy
Adding KTN To Bookings
When you book a flight, add your Known Traveler Number (KTN) to guarantee TSA PreCheck eligibility is applied to your reservation; enter it in your airline profile, during booking, or by updating an existing reservation so the KTN is transmitted to the TSA.
Double-check it matches your ID, add it to frequent flyer profiles, and confirm boarding passes display “TSA PreCheck” before arriving at the airport.
How PreCheck Lanes Work at Airport Security
1 clear advantage of TSA PreCheck is faster movement through airport security: you’ll use designated lanes where shoes, belts, light jackets, and laptops can usually stay on or in your bag, and you won’t have to remove most items that slow others down.
You’ll experience shorter lines, steady flow, and clearer instructions from agents.
- Quicker ID check
- Dedicated screening machines
- Smaller crowds
- Priority boarding prep
What You Can Keep On and In Your Carry-On (Laptops, Liquids, Shoes)
Since PreCheck speeds up the line, you’ll also notice different rules for what stays on you and in your bag — knowing them saves time and hassle.
You can usually keep shoes, belts, and light jackets on, and laptops can stay in your bag at participating checkpoints.
Liquids must still follow the 3-1-1 rule and be accessible for quick inspection if asked.
Airports and Airlines That Participate in PreCheck
Most major U.S. airports and many domestic airlines participate in TSA PreCheck, so you’ll find dedicated lanes at hundreds of checkpoints across the country; international carriers and smaller airports may offer PreCheck only on select routes or not at all.
- Check your airline’s website for enrollment and route coverage.
- Use the TSA website for participating airports.
- Look for PreCheck indicators on boarding passes.
- Expect variability on international itineraries.
Family Travel: Children, Companions, and TSA PreCheck
When you’re traveling with kids or companions, TSA PreCheck can make security much faster and less stressful. Children under 12 usually join you in PreCheck lanes; companions need their own approval. Plan seating and boarding accordingly, and always carry IDs for eligible travelers.
| Traveler | PreCheck Rule |
|---|---|
| Child <12 | Accompanies enrolled adult |
| Companion | Needs own membership |
| Infant | Follow airline policy |
| Group | Mix of statuses applies |
Renew, Replace, or Transfer TSA PreCheck
Travel plans change, and so do your TSA PreCheck needs — whether your membership is nearing expiration, you lost your Known Traveler Number (KTN), or you want to move eligibility to a new passport.
- Renew online or at enrollment centers before expiration.
- Request a replacement KTN via your account if lost.
- Update passport info online or at enrollment center to transfer eligibility.
- Pay required fees and bring ID for identity verification.
Troubleshooting: Common PreCheck Problems and Fixes
If you run into TSA PreCheck issues—expired KTNs, missing boarding pass indicators, or mismatched passport info—you can usually fix them quickly by checking your account, updating documents, or contacting customer support.
Verify your KTN in airline profiles, guarantee name and DOB match IDs, reprint boarding passes after changes, and call the enrollment center if problems persist.
Keep copies of confirmations.
Compare: Global Entry, CLEAR, and TSA PreCheck
Choosing between Global Entry, CLEAR, and TSA PreCheck comes down to where you want speed:
Global Entry gets you through international arrivals and includes TSA PreCheck for domestic security lanes;
TSA PreCheck speeds you through domestic security without removing shoes or laptops;
and CLEAR uses biometrics to bypass ID lines and pairs well with either program for the fastest airport experience.
- Global Entry: best for international travelers
- TSA PreCheck: fastest domestic security lane
- CLEAR: skips ID check with biometrics
- Combo: CLEAR + Global Entry gives ideal speed
Frequently Asked Questions
Can TSA Precheck Be Used for International Departures From U.S. Airports?
Yes — you can use TSA PreCheck for many international departures from U.S. airports when flying on participating airlines; you’ll keep expedited security benefits domestic-to-international, though entry/exit and customs rules at destinations still apply, so plan accordingly.
Does TSA Precheck Expedite Global Entry Interviews or Processing?
No, TSA PreCheck doesn’t expedite Global Entry interviews or processing; you’ll still complete Global Entry’s separate application, background check, and interview. However, if approved for Global Entry, you’ll automatically get TSA PreCheck benefits.
Are TSA Precheck Benefits Transferable to Military IDS or Other ID Types?
No, TSA PreCheck benefits aren’t transferable to other IDs; you’ll need an approved Known Traveler Number tied to your specific ID (including approved military IDs) to use PreCheck—so enroll or update your account accordingly.
How Does TSA Precheck Affect Gate Arrival Time Recommendations?
You’ll usually need less time; TSA PreCheck speeds screening, so you can arrive later than standard recommendations. Still, factor in airline check‑in, bag drop, security lines variability, and boarding times—don’t cut it too close.
Can TSA Precheck Be Suspended for Security Alerts or Temporary Bans?
Yes — TSA can suspend or revoke your PreCheck for security alerts, investigations, or eligibility changes. You’ll be notified of penalties or bans, and you can appeal or reapply once issues are resolved.
Conclusion
You’re set to breeze through airport security with TSA PreCheck when you apply, get approved, and add your known traveler number to bookings. It saves time by keeping shoes, belts, and laptops packed and often uses shorter lines. Kids under 12 ride free with you; renewals and replacements are straightforward. If issues pop up, check your account or contact TSA. Compare Global Entry and CLEAR to pick the right extra security perks.