What to Expect Going Through Tsa Step by Step Guide
You’ll place carry-ons on the belt, show your ID and boarding pass, remove shoes, belts, laptops and liquids, then walk through the scanner and follow officer instructions. If alerted, step aside for a brief additional check or pat‑down and request a same‑gender officer if you prefer. Keep meds, baby items and documents accessible, use TSA PreCheck or CLEAR if available, and stay calm and cooperative. Keep going to learn the step‑by‑step tips and exceptions.
TSA Screening: A 60‑Second Overview
If you’re short on time, here’s the gist:
You’ll place carry‑ons on the belt, remove shoes, belts, laptops, and liquids, then walk through the scanner.
Follow officer instructions, step back for additional screening only if alerted.
Keep documents ready and cooperate politely.
Most checks finish fast; expect brief bag inspection or pat‑down if necessary.
Stay calm and efficient.
Quick Checklist Before You Join the Line
Before you step into the queue, run a quick mental check: have your ID and boarding pass handy, electronics and liquids packed accessibly, shoes and belt easy to remove, and pockets emptied of metal. Check calmly, breathe, and move confidently.
| Calm | Ready |
|---|---|
| Breathe | Smile |
| Focus | Move on |
ID and Boarding Pass: What to Have Ready
When you reach the front of the line, have your government-issued photo ID and boarding pass ready to present—keeps things moving and avoids last-minute fumbling.
Keep documents accessible but secure: a clear pocket, wallet, or phone app for mobile boarding passes. If you’re traveling with minors or different last names, bring supporting documents.
Remove bulky covers so agents can scan quickly.
How ID Verification Works
TSA agents will compare the photo on your ID to your face and cross-check the name and birthdate against your boarding pass and the TSA secure flight watchlist; have your ID in hand so they can confirm quickly and move you through the checkpoint.
- Present government‑issued photo ID
- Verify name matches reservation
- Answer simple identity questions
- Cooperate with additional screening if flagged
Mobile vs Paper Boarding Passes
Whether you pull up a mobile boarding pass on your phone or hand over a printed copy, both are accepted at most checkpoints—but having your pass ready and the screen accessible speeds you through.
Keep your phone charged, disable screen locks if needed, and open the exact pass to the barcode. If printed, keep it flat and uncreased.
Present promptly when asked.
Choose the Right Security Line (Regular, PreCheck, CLEAR)
You’ll want to pick the security line that fits your time and comfort level—regular lines are standard, PreCheck keeps your shoes and laptop in your bag, and CLEAR speeds up ID verification.
If you travel often, PreCheck or CLEAR can shave off significant wait time.
Compare availability and cost at your airport to decide which makes sense for you.
Regular vs PreCheck Lines
Anyone can feel confused choosing between regular, TSA PreCheck, and CLEAR lines, but knowing the differences helps you pick the fastest option for your trip.
Pick PreCheck if you want quicker screening: shoes on, laptop and liquids stay packed. Regular is standard and slower. Consider cost, enrollment, and availability.
- Regular: standard process
- TSA PreCheck: expedited
- Lines vary by airport
- Choose based on time and convenience
Benefits Of CLEAR
If you want the fastest entry through airport security, CLEAR speeds you to the front by verifying your identity with biometrics so you skip the ID check line. You’ll move faster, reduce stress, and combine CLEAR with PreCheck for minimal removal of shoes or laptops. It’s worth it if you travel often.
| Benefit | Time Saved | Best For |
|---|---|---|
| Skip ID check | 5–10 min | Frequent flyers |
| Combine with PreCheck | Extra speed | Business travel |
| Reduced stress | Improved flow | Family travel |
Is TSA PreCheck Worth It?
Wondering if TSA PreCheck will actually speed up your travel routine? You’ll breeze through security with less stress, but value depends on your travel habits and airports.
Consider these factors:
- Frequent domestic flyers save significant time
- Shorter lines and no shoe/laptop removal
- Costs vs. annual travel frequency
- Limited availability at some airports and airlines
How to Enroll in TSA PreCheck
If you decide to sign up for TSA PreCheck, you’ll first want to confirm you meet the eligibility requirements like citizenship or lawful permanent residency and a clean background.
The online application only takes a few minutes, then you’ll schedule a brief in-person appointment for fingerprinting and ID verification.
After that, you’ll get a Known Traveler Number to add to your reservations and start using the expedited lanes.
Eligibility And Requirements
Before you apply for TSA PreCheck, know that most U.S. citizens, U.S. nationals, and lawful permanent residents are eligible, but you’ll need to meet identity and background-screening requirements and provide proof of citizenship or immigration status.
You’ll also need to:
- Be at least 18 years old
- Pass a background check
- Provide valid ID and documents
- Pay the nonrefundable fee
Application And Appointment
When you’re ready to apply for TSA PreCheck, start online to complete a short application and schedule an in-person appointment. You’ll provide basic personal details, answer eligibility questions, and pay the nonrefundable fee before choosing a convenient enrollment center and time.
At your appointment, you’ll verify identity and documents, provide fingerprints, and receive conditional approval or next steps. Expect confirmation by mail or email within days to weeks.
What CLEAR Does and When to Use It
Though CLEAR speeds up identity checks by using biometric data like fingerprints or iris scans, you still need to pass through standard security screening.
You’ll use CLEAR to skip ID lines, not avoid X‑ray or pat‑downs. Consider it when lines are long or you have tight connections.
- Faster ID verification
- Works at select airports
- Good for frequent travelers
- Not a security waiver
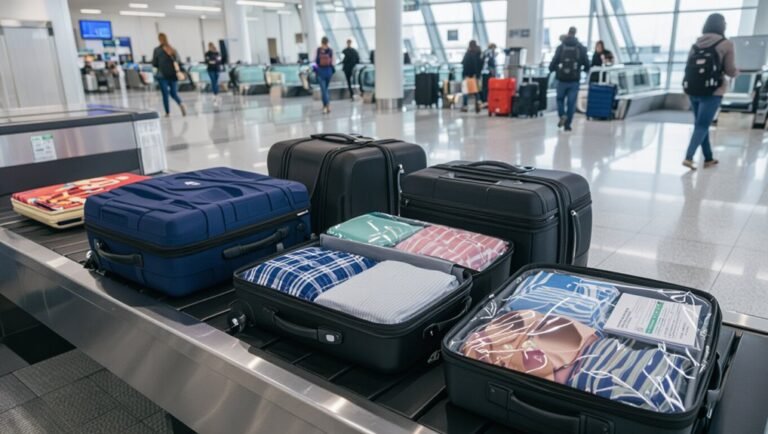
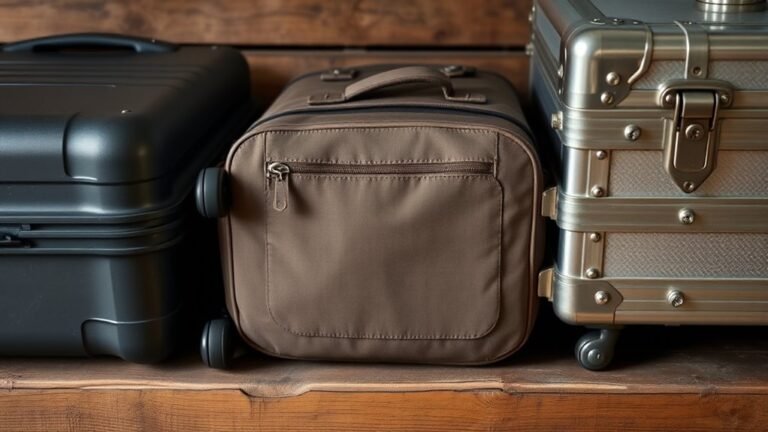
What to Pack in Carry‑On vs Checked Bags
When packing, think about what you’ll need during the flight and what can wait in checked luggage.
Keep essentials like travel documents, meds, electronics, chargers, and a change of clothes in your carry‑on.
Put bulkier items, extra toiletries, and anything you won’t need mid‑trip in your checked bag.
Essential Carry‑On Items
Because security lines can be unpredictable, pack your carry‑on with the items you’ll need during delays, in flight, and immediately after landing—think essentials like medications, travel documents, a change of clothes, electronics and chargers, toiletries in a TSA‑approved bag, and any valuables you don’t want checked.
- Medications and prescriptions
- Passport, boarding pass, wallet
- Phone, charger, power bank
- Lightweight change of clothes
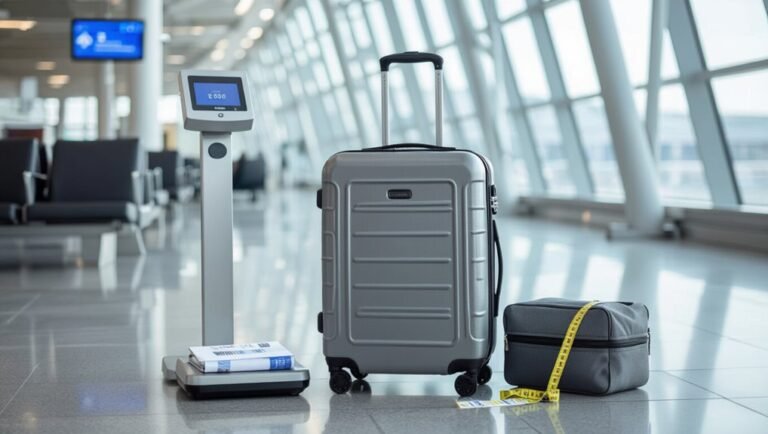
Checked Luggage Essentials
If you’re deciding what to stash in checked luggage versus your carry‑on, prioritize access, fragility, and rules: pack heavy, nonessential items, extra shoes, and bulkier clothes in checked bags; keep valuables, medications, travel documents, electronics, chargers, a change of clothes, and liquids under 3.4 ounces in your carry‑on.
Label checked bags and lock them with TSA‑approved locks for security and ease.
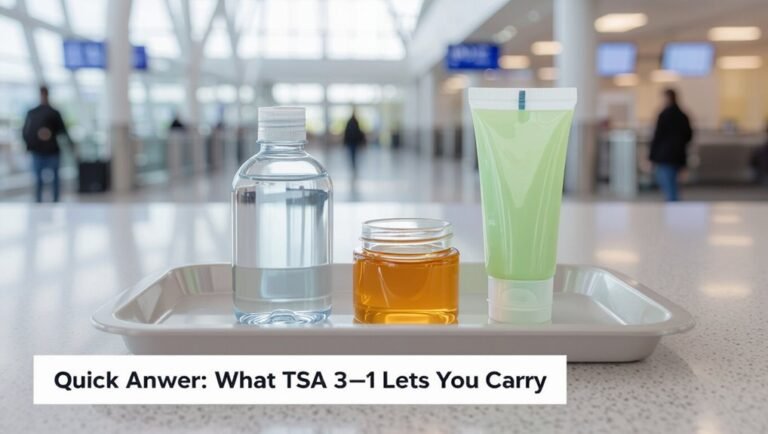
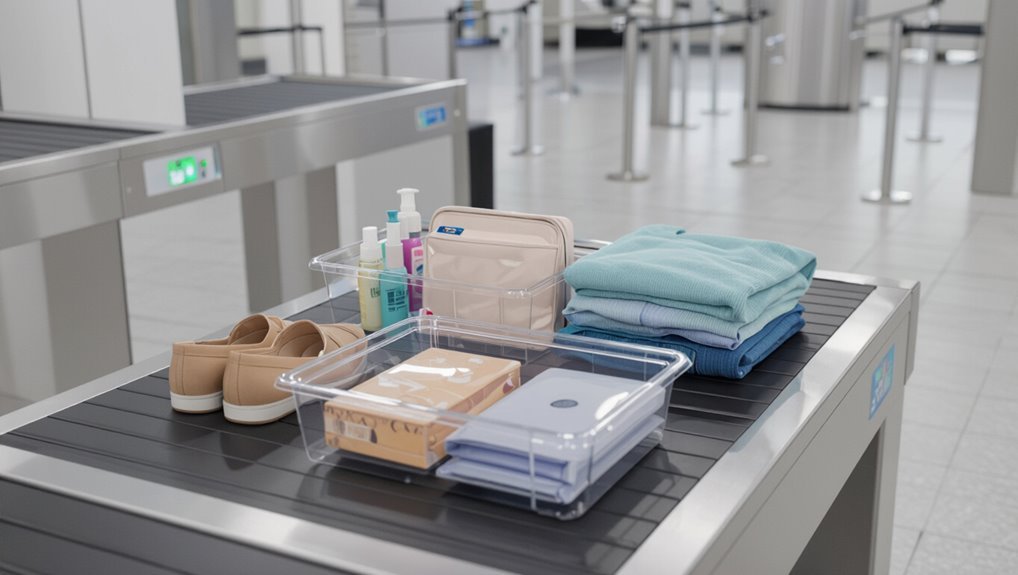
Liquids Rule: 3‑1‑1 Explained
1 clear rule makes packing carry-on liquids simple: follow the 3‑1‑1.
You’ll pack liquids in 3.4 oz (100 ml) bottles, fit them all in 1 quart‑size clear bag, and carry 1 bag per person.
TSA expects compliance for smoother screening.
- 3.4 oz (100 ml) max per container
- 1 quart clear resealable bag
- 1 bag per passenger
- Place bag for separate screening
Electronics: Packing and Screening Tips
Keep your electronics in your carry-on so they’re easy to access and protected.
Before you reach the checkpoint, power on larger devices and remove laptops or tablets from bags if required for screening. That’ll speed things up and reduce the chance of additional checks.
Electronics In Carry-On
When you pack electronics in your carry-on, organize them so they’re easy to remove and screen—laptops, tablets, and large devices usually need to come out into a bin unless you have TSA PreCheck.
Keep chargers accessible, protect devices, and avoid bulky cases that hide contents.
- Place devices on top
- Use thin sleeves
- Pack cords neatly
- Keep receipts/seals nearby
Screening Prep For Devices
Before you reach the scanner, arrange your devices so they’re easy to remove and quickly accessible—laptops and large tablets should sit at the top of your bag or in a dedicated sleeve, while phones, e-readers, and chargers should be reachable without digging. Remove electronics as instructed, place cords neatly, and follow TSA agent directions.
| Item | Action |
|---|---|
| Laptop | Sleeve/out |
| Tablet | Top/access |
| Phone | Quick reach |
| Charger | Bag pocket |
| Cords | Coil/neat |
What Must Come Out of Pockets and Bags
Although it can feel like a lot, you’ll be asked to empty pockets and show the contents of certain bags so agents can quickly screen for prohibited items and security risks.
You may need to empty pockets and display bag contents so agents can quickly screen for prohibited items.
Put items in a tray and keep essentials handy.
- Keys
- Wallets and loose cash
- Phones and small electronics
- Liquids and gels in clear bags
Clothing and Footwear: Dos and Don’ts
Wear slip-on or easy-to-remove shoes so you can breeze through the shoe check without fumbling.
Skip heavy metal accessories and belts that might trigger alarms, and keep jewelry minimal.
Opt for lightweight, layered clothing so you can adjust for comfort and quickly remove outer layers if asked.
Wear Easy-To-Remove Shoes
If you’re trying to move through TSA quickly, pick shoes you can slip on and off without fiddling with laces or buckles.
Choose comfortable, low-profile styles that won’t slow you or require extra screening. Keep socks and foot hygiene in mind.
Consider these options:
- Slip-on loafers
- Slip-on sneakers
- Low-cut boots with side zippers
- Sandals with secure straps
Avoid Metal And Accessories
After you’ve picked slip-on shoes, take a quick look at the rest of your outfit for metal and bulky accessories that slow screening.
Remove belts with large buckles, heavy jewelry, watches, and metal hairpieces before the checkpoint. Put them in your carry-on or a bin.
Small, nonmetallic accessories are fine. This saves time and reduces random alarms.
Choose Lightweight, Layered Clothing
Because airport temperatures and security procedures can change quickly, pick lightweight, layered clothing so you can add or shed pieces without holding up the line.
You’ll move faster and stay comfortable. Consider these tips:
- Wear breathable fabrics
- Choose slip-on shoes
- Bring a thin sweater or scarf
- Avoid heavy jackets with many metal parts
Medications, Devices, and Medical Paperwork
Bring your prescriptions, supplies, and paperwork and know what to expect when you reach the checkpoint. Carry meds in original containers, pack spare supplies, and have doctor notes or medical IDs ready. Inform the officer, request private screening if needed, and stay calm.
| Item | Tip | Feeling |
|---|---|---|
| Meds | Visible | Reassured |
| Devices | Accessible | Confident |
| Paperwork | Ready | Relieved |
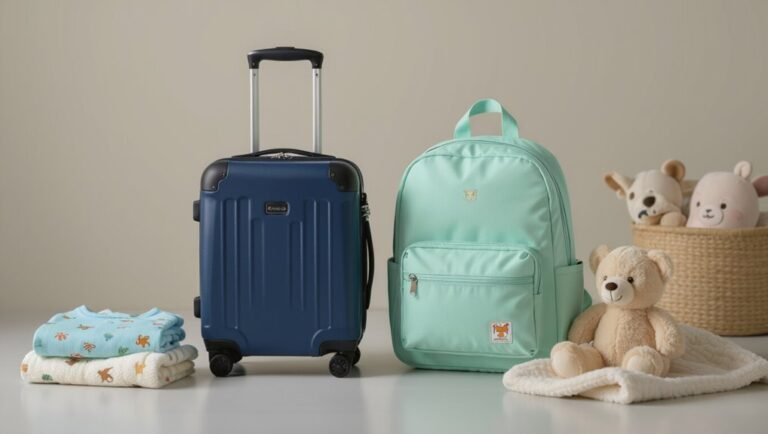
Traveling With Baby Supplies and Formula
Once you’ve handled meds and medical paperwork, shift your focus to baby supplies and formula so screening goes smoothly.
Keep items accessible, declare liquids, and expect testing. Bring extra bottles and pre-measured formula.
- Pack breast milk, formula, and juice separately
- Label containers and cooling packs
- Carry spare nipples and feeding tools
- Inform TSA agent before screening
Traveling With Pets, Emotional‑Support, and Service Animals
If you’re traveling with a pet, service animal, or emotional‑support animal, know that each type has different screening rules and documentation requirements, so keep paperwork handy, notify the airline in advance, and tell the TSA officer when you reach the checkpoint.
Expect separate screening: leashed or harnessed animals may be patted down, carriers scanned, and handlers asked brief questions; follow officer instructions and stay calm.
What to Expect From Carry‑On X‑Ray Screening
After you’ve checked in about animals and paperwork, get ready for carry-on x‑ray screening at the checkpoint.
Once animals and paperwork are settled, prepare your carry‑on for x‑ray screening at the checkpoint.
You’ll place bags on the conveyor, remove laptops and liquids, and follow agent instructions. Expect brief pauses for checks or swabs. Stay nearby and cooperative.
- Put liquids in a clear bag
- Remove electronics
- Empty pockets
- Watch for agent cues
How the Body Scanner Works
The body scanner uses millimeter‑wave or backscatter technology to create an image that highlights potential threats on your body without physical contact.
You’ll want to know about privacy safeguards and that radiation exposure is extremely low compared with everyday sources.
Before your scan, remove metal and follow the officer’s instructions so the process is quick and smooth.
How It Scans
Think of the body scanner as a smart camera that maps shapes and materials while you stand in place; it sends harmless millimeter-wave energy around your body and detects the reflections to build a detailed image that screeners use to spot concealed items.
You’ll:
- Stand with arms raised briefly.
- Wait while the scan rotates electronically.
- Let the machine flag anomalies.
- Follow any secondary screening instructions.
Privacy And Radiation
You’ll probably wonder what the scanner sees and whether it exposes you to harmful radiation.
It creates a generic outline of your body or uses automated target recognition, so officers don’t view detailed images.
The machines use very low-dose non-ionizing or ionizing waves within regulated limits, posing minimal risk.
If you have concerns, request an alternative screening.
Preparing For Scan
Because a body scanner maps shapes and anomalies rather than taking photos, you’ll be asked to remove metal items, belts, shoes in many cases, and anything bulky from pockets so the machine can get a clear read;
stand with your feet apart and arms raised or at your sides as the officer directs, follow the operator’s instructions promptly, and let them know if you have medical implants, a prosthesis, or difficulty holding a pose so an alternative screening can be arranged.
- Remove metal and bulky items
- Follow operator directions
- Declare implants or prostheses
- Request alternative screening
Can You Opt Out of the Scanner?
Wondering if you can skip the full-body scanner? You can decline the advanced imaging scanner and request alternative screening.
Tell the officer clearly you’re opting out; they’ll arrange a private screening option. Expect walk-through metal detection or a targeted pat-down if needed.
Keep shoes, belts, and electronics as instructed to speed the alternate process and reduce delays.
What Triggers a Pat‑Down and What Happens
If the scanner or a metal detector flags you or an officer needs to confirm something, you’ll be asked to undergo a pat‑down.
The screening entails a trained officer using gloved hands to check your clothing and body over for concealed items, and they’ll offer a private room if you prefer.
You can request a same‑gender officer and can ask questions about each step before it happens.
When Pat‑Downs Occur
When a scanner alarm goes off, a random selection hits you, or you decline the body scanner, TSA officers may perform a pat‑down to check for prohibited items; they’ll explain why it’s needed before starting and offer a private screening if you request one.
You’ll be told what they’ll touch, can request a witness, and can ask questions.
- You’ll stay standing
- Officers wear gloves
- Same‑gender request honored
- Private room option
What The Screening Entails
Although most screenings are routine, a pat‑down can be triggered by several specific things: an alarm from the body scanner, a random selection, objects detected on your carry‑on that need verification, or your choice to decline the scanner.
An officer will explain the process, ask permission, use gloved hands to check areas of concern, and offer a private screening if you prefer.
How Agents Conduct Respectful Pat‑Downs
Because agents aim to balance security with dignity, they’ll explain the pat‑down process before touching you.
They’ll ask your preference for a private screening if you’d like one, and use the back of their hands or gloved palms to conduct a careful, targeted search over clothing rather than probing sensitive areas directly.
- You’ll be told what they’ll check
- You can request a same‑gender agent
- They’ll minimize contact and time
- You’ll get verbal updates throughout
What Secondary Screening Looks Like
If you’re selected for secondary screening, agents will take you to a separate area to complete additional checks quickly and professionally. You’ll be asked questions, your carry‑ons may be inspected, and you’ll be screened with specialized equipment. Stay calm, follow instructions, and ask if you need clarification.
| Step | What Happens |
|---|---|
| 1 | ID/verbal questions |
| 2 | Bag inspection |
| 3 | Handheld scan |
| 4 | Possible pat‑down |
| 5 | Release/explain |
Common Items That Cause Delays (And How to Avoid Them)
You’ll speed through security if you know what commonly causes hold-ups and how to fix them.
Keep liquids in a clear quart bag and follow the 3-1-1 rule, stow sharp items in checked baggage, and have large electronics ready to be screened separately.
Doing these simple things cuts the chance you’ll get pulled aside.
Improperly Packed Liquids
Liquids are one of the most common reasons travelers get pulled aside at TSA checkpoints, since bottles, gels, and aerosols that don’t meet carry-on rules trigger extra screening.
Pack smart to avoid delays:
- Limit containers to 3.4 oz (100 ml) and fit them in a quart-size clear bag.
- Seal leaks with tape.
- Keep the bag accessible for inspection.
- Check larger liquids in checked baggage.
Prohibited Sharp Objects
Sharp objects are a frequent reason travelers get stopped at TSA checkpoints, since knives, box cutters, scissors, and similar items are restricted in carry-on bags and often require checking or special handling to avoid delays.
Pack blades in checked luggage, use TSA-approved travel scissors (if allowed), or mail prohibited items ahead.
Declare unusual tools at screening to speed the process and avoid confiscation.
Unscreened Electronic Devices
Many travelers get slowed down when electronic devices aren’t ready for screening, so pack and arrange them to move through checkpoints smoothly.
You should remove larger electronics, separate loose cords, and follow TSA laptop/phone rules to avoid pulled inspections.
- Laptops in accessible sleeves
- Tablets out of bags
- Loose chargers in a pouch
- Power banks in carry-on only
Speed Tips for Solo Travelers
If you’re traveling alone, you can move through TSA faster by planning and staying organized before you reach the checkpoint. Pack carry-ons smartly, wear easy shoes, have documents ready, and enroll in TSA PreCheck if eligible. Stay calm, follow directions, and handle bins swiftly to keep lines moving.
| Item | Tip |
|---|---|
| Bag | Organized compartments |
| Shoes | Easy to remove |
| Docs | Ready and accessible |
| Tech | Single bin |
| PreCheck | Use if eligible |
Tips for Families and Young Children
Solo travelers can move quickly, but traveling with kids calls for a different approach.
Stay calm, plan extra time, and explain security steps simply so kids know what to expect.
Stay calm, allow extra time, and explain security steps simply so kids understand what will happen.
Pack essentials in an easy-to-reach bag and use a lightweight stroller as a containment tool.
- Bring snacks and water
- Pre-arrange shoes and jackets
- Keep documents handy
- Label kids’ items
Accessibility Help and TSA Cares
When you need extra assistance at the airport, TSA Cares offers help from the moment you arrive through screening, so you can request support for mobility, medical devices, or sensory needs.
Call the helpline 72 hours before travel to arrange a passenger support specialist, notify officers of aids or implants, and expect respectful, private screening options tailored to your needs.
International Departures: Added Screening to Expect
Because international flights cross borders, you’ll face extra security steps beyond standard TSA screening: expect document checks, more thorough carry-on inspections, and possible enhanced electronic device screening or secondary questioning.
- Have passport and visa ready
- Power up electronics for inspection
- Pack liquids and meds accessibly
- Expect longer wait times and polite questioning
What to Do If Your ID or Boarding Pass Is Denied
What should you do if an agent can’t verify your ID or boarding pass? Stay calm and cooperate.
Provide alternate ID if available, explain discrepancies clearly, and follow the agent’s instructions.
If your ID doesn’t verify, offer alternate ID, explain discrepancies calmly, and follow the agent’s instructions.
You may be directed to a supervisor, secondary screening, or identity verification line.
Ask concise questions about expected wait times and next steps.
Comply with document requests to resolve the issue promptly.
Final Pre‑Line Checklist: Finish These Tasks First
Before you step into the security line, pause and finish a quick checklist so you don’t get held up:
- Put liquids and gels into a clear quart bag and place it on top of your carry‑on
- Remove belt, watch, and bulky jewelry
- Take laptops and tablets out into their own bin
- Empty pockets of keys, coins, and phones before reaching the scanner
Frequently Asked Questions
Can TSA Confiscate Prohibited Items From Checked Luggage Without Notifying Me?
Yes — TSA can remove prohibited items from checked luggage without notifying you. They’ll document, keep, or dispose of items per regulations; you can request information, but immediate notification isn’t guaranteed during routine screening procedures.
How Long Are Typical TSA Checkpoint Wait-Time Estimates Accurate?
They’re usually accurate for short windows—about 15–30 minutes—because conditions change. You’ll see real-time updates that’re reliable nearby; expect fluctuations during peak hours, weather, or security alerts, so check often before you go.
Are There Age Limits for Enrolling Children in TSA Precheck?
Yes — there aren’t age limits for enrolling children in TSA PreCheck; you can add any dependent child to your Known Traveler Number, but kids five and under often use the expedited lane free when accompanying a PreCheck adult.
What Recourse Do I Have for Damaged Luggage During Screening?
You can file a claim with the airline and notify TSA if screening caused damage; gather photos, receipts, and inspection tags, submit written documentation promptly, and follow up persistently—consider small claims court if resolution stalls.
Can I Request Proof of Screening or an Incident Report at the Checkpoint?
Yes — you can request proof; ask TSA officers for an incident report or screening documentation at the checkpoint, and they’ll provide guidance. If they can’t, ask a supervisor and file a complaint online afterward.
Conclusion
By now you know the TSA flow and how to prep so screening goes smoothly. Keep your ID and boarding pass handy, follow the quick checklist, and remove prohibited items before you reach the belt. Use mobile passes if you prefer, ask for TSA Cares help if you need it, and expect extra checks for international flights. If you’re denied, stay calm, show alternate ID or airline help, then rejoin the line—you’re ready to get through security confidently.