Is a Camera Bag Considered a Carry on Airline Policies
You can usually bring your camera bag as a carry-on or a personal item if it fits the airline’s size and weight limits, but rules vary by carrier and fare class. Measure your bag including wheels and handles, pack fragile gear with padded dividers, and be ready to remove cameras for X-ray screening. Low-cost airlines may charge or gate-check oversized bags, and international flights can have extra allowances or restrictions—keep going to see practical size checks and packing tips.
What This Guide Answers: Carry-On or Checked for Camera Gear
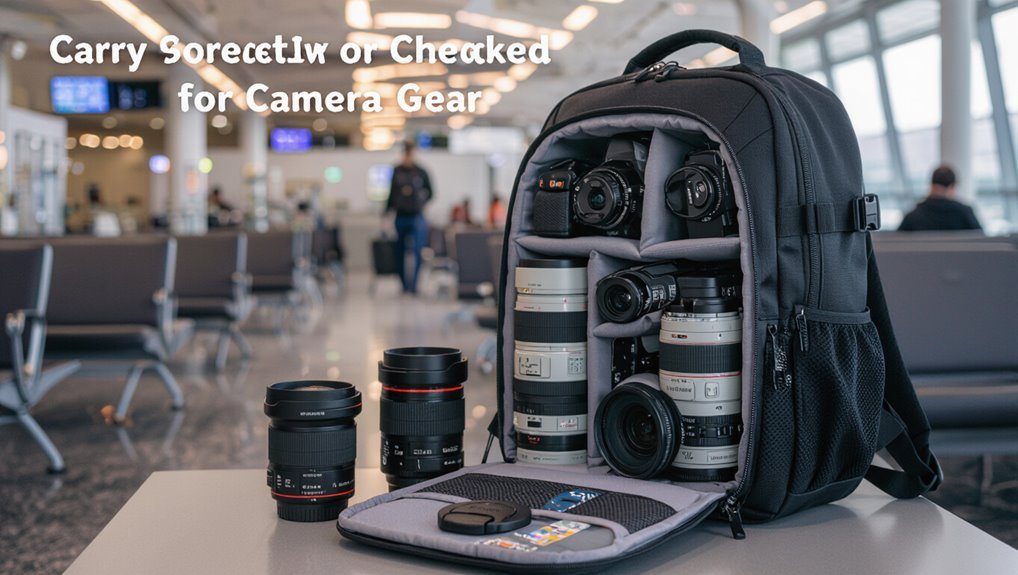
Wondering whether to stow your camera gear in the cabin or check it? This guide helps you decide based on gear value, airline rules, battery regulations, and space constraints.
You’ll learn how to assess risk, prepare protective padding, pack spare batteries, and handle oversized tripods. After reading, you’ll know when to insist on carry-on, when to gate-check, and how to document gear for claims.
Quick Answer: Is a Camera Bag a Carry-On?
Can you bring your camera bag into the cabin? Yes — most airlines let you carry a camera bag as your carry-on if it fits size and weight limits.
You should check your airline’s carry-on dimensions and security rules, remove batteries for screening when requested, and pack fragile gear securely.
If space’s tight, gate agents decide final placement.
Carry-On vs Personal Item : The Core Difference
Although both fit under your seat or in the overhead bin, a carry-on and a personal item serve different roles: a carry-on is your larger, primary bag for clothes and bulkier gear, while a personal item is smaller—like a camera bag, laptop case, or backpack—meant to hold essentials you need during the flight.
- Carry-on: bulkier items
- Personal item: immediate access
- Packing priority: weight vs reach
- Gate checks: likely for larger bags
Airline Carry-On Size and Weight Standards
Now that you know how carry-ons and personal items differ, you’ll want to check the size and weight limits before you pack your camera bag as either.
Airlines set maximum linear dimensions and weight caps that vary by carrier and fare class. Measure your bag, include wheels/handles, and verify limits online.
Overweight or oversized bags may incur fees or be gate-checked.
Typical Personal-Item Dimensions That Fit Camera Bags
You’ll usually see airlines list personal-item dimensions around 16 x 12 x 8 inches, so check those limits before packing your camera gear.
Many compact camera bags fall well within that range, often measuring roughly 10–14 inches wide and 6–9 inches deep.
Measure your bag and compare it to the airline’s personal-item size to avoid surprises at the gate.
Typical Carry-On Dimensions
Most airlines let carry-ons measure about 22 x 14 x 9 inches (56 x 36 x 23 cm), and personal items commonly max out around 18 x 14 x 8 inches (45 x 35 x 20 cm).
So check both sets of limits before packing a camera bag.
- Fit camera body plus one lens
- Add small accessories (batteries, cards)
- Keep dimensions under gate-check size
- Weigh to meet airline carry-on rules
Compact Camera Bag Sizes
Compact camera bags that qualify as personal items typically fall within about 18 x 14 x 8 inches (45 x 35 x 20 cm).
So you can expect them to hold a mirrorless or compact DSLR body, one or two small lenses, and a handful of accessories without exceeding airline limits.
Choose padded, compartmentalized designs to protect gear, measure before travel, and keep batteries and small items easily accessible.
When Your Camera Bag Counts as a Carry-On vs a Personal Item
Whether your camera bag counts as a carry-on or a personal item mostly comes down to its size versus the airline’s limits.
If it fits under the seat in front of you, airlines will often treat it as your personal item even if it holds lenses and a camera body.
But if your photographic gear makes the bag bulky or over the listed dimensions, expect it to be classified as your carry-on.
Size Versus Airline Limits
If your camera bag fits within the airline’s size limits, it’ll usually qualify as your carry-on; if it’s larger but still small enough to tuck under the seat, airlines may treat it as a personal item.
- Check airline dimensions before packing.
- Measure bag with gear inside.
- Expect stricter rules on budget carriers.
- Consider lightweight, compact cases to avoid gate check.
Bag Fits Underseat Space
One simple way to tell whether your camera bag counts as a carry-on or a personal item is to test whether it comfortably fits under the seat in front of you with gear inside.
If it slips under without sticking out, most airlines will accept it as a personal item, but if it needs the overhead bin it’s treated as your carry-on.
Measure, pack wisely, and orient the bag to maximize underseat space.
Photographic Gear Versus Personal Item
How do you know when your camera bag is treated as a personal item versus a carry-on? You decide by size, contents, and airline rules.
Check these factors:
- Dimensions: fits under seat or not
- Contents: lenses, batteries, tripod
- Airline policy: camera bag allowances
- Security: easily screened and accessible
Pack smart, confirm with the carrier, and avoid surprises at the gate.
US Majors: Delta, American, United Carry-On Rules
Curious how Delta, American, and United treat camera bags as carry-ons? You can usually bring a camera bag as your carry-on or personal item if it fits size rules.
Delta, American, and United let gate-check or stow smaller bags under seats; larger rolling camera cases must meet overhead dimensions and count toward your allowance.
Always confirm current policies before travel.
International Carriers: British Airways, Lufthansa, Air France
If you fly internationally, carriers like British Airways, Lufthansa, and Air France each have their own rules for camera bags that can differ from U.S. majors.
You should check size, weight, and whether it’s a personal item or cabin bag before you board.
- British Airways: flexible but check dimensions
- Lufthansa: strict size limits
- Air France: weight-conscious
Always gate-check if unsure.
Low-Cost Carriers and Stricter Camera-Bag Rules
On low-cost carriers you’ll need to be extra careful about carry-on size limits, because their overhead bins and gate-check rules are often stricter.
Check each airline’s exact dimensions and weight allowances before you pack your camera bag.
If your bag is over their limit, you’ll likely face extra fees or be forced to check it.
Carry-On Size Limits
Size matters more than ever when you’re flying with a camera bag, especially on low-cost carriers that enforce tighter carry-on dimensions and stricter gate-check rules.
You should measure and pack strategically to avoid surprises. Consider these quick tips:
- Confirm maximum linear dimensions before you fly
- Weigh your bag; some airlines limit weight
- Use a compact insert to reduce bulk
- Be ready to gate-check if asked
Airline-Specific Restrictions
Wondering why some airlines treat camera bags differently? Low-cost carriers often enforce stricter size and item counts, so you’ll face tighter limits or extra fees for a camera bag.
You should check each airline’s policy before booking, pack to measured dimensions, and be ready to gate-check or pay for priority boarding to avoid surprises if your bag’s deemed an extra carry-on.
Premium Cabins and Elite Status: Extra Allowances
If you fly in a premium cabin or hold elite status, you’ll often get extra carry-on allowances beyond the standard one-bag rule.
You can usually bring an additional personal item like a camera bag, get priority boarding, and avoid gate-checking.
Check your airline’s benefits to confirm dimensions and weight.
- extra personal item allowed
- priority boarding benefits
- relaxed gate-check risk
- confirm size limits
Gate Agents vs Check-In Staff: Who Enforces What?
Think of check-in staff as the paperwork gatekeepers and gate agents as the last line of defense: check-in agents primarily verify your ticket, travel documents, and whether your bags meet the airline’s posted carry-on dimensions, while gate agents enforce boarding limits, overhead bin space, and last-minute decisions about gate-checking items like camera bags.
| Who | Role |
|---|---|
| Check-in | Verifies size, docs |
| Gate agent | Manages boarding, gate-check |
How Gate Crowding and Overhead Limits Affect Enforcement
When a gate fills up and overhead bins start to jam, agents get stricter about which bags can stay with passengers and which must be gate-checked. You’ll often find that even a compliant camera bag gets flagged simply because there’s no room left overhead or boarding is running late.
- You’ll be asked to gate-check
- Priority boarding helps
- Smaller bags stay onboard
- Flight delays tighten rules
What to Measure on Your Camera Bag Before Flying
Because airlines enforce size and weight limits differently, measure your camera bag before you head to the airport so you won’t get surprised at the gate. Measure exterior dimensions, packed depth, and handles/wheels. Weigh the bag fully loaded. Note removable items and compression. Compare to airline limits.
| Item measured | Why it matters |
|---|---|
| Exterior dimensions | Bag must fit size rules |
| Packed depth | Bulky gear expands size |
| Handles/wheels | Add extra length |
| Loaded weight | Avoid overweight fees |
| Removables | Reduce carry bulk |
Packing Checklist to Make Your Camera Bag Fit Carry-On Rules
Check your airline’s size and weight limits before you pack so your camera bag won’t get gate‑checked.
Pack heavier items low and close to the back panel, and use padded dividers to keep gear secure and shock‑protected.
Keep essentials like batteries, memory cards, and a compact camera easily accessible in a top or front pocket for quick access and security checks.
Size And Weight Limits
Although airlines vary, most enforce strict size and weight limits for carry-ons, so you’ll want to measure your camera bag and weigh it fully packed before heading to the airport.
Check these points:
- Know maximum dimensions for overhead and underseat
- Weigh bag with gear, batteries, and accessories
- Remove or swap items to meet limits
- Use a compact, compliant bag model
Secure And Accessible Storage
After sizing and weighing your kit, make sure everything’s packed so it’s both secure and easy to reach during your flight.
Use padded dividers to prevent movement, lockable zippers for theft deterrence, and small pouches for batteries, cards, and cables.
Keep lenses and camera bodies separated, and place frequently needed items in an external pocket for quick access during security checks or turbulence.
How to Arrange Lenses, Bodies, and Accessories to Save Space
When you pack lenses, bodies, and accessories, prioritize shape and fragility so you can fit more without risking damage.
Place bodies with caps on beside padded lenses, nest smaller primes inside gaps, and keep chargers together. Balance weight to avoid crushing.
- body next to lens, mount protected
- lenses upright, rear caps tight
- small items in zip pockets
- chargers and cables coiled
Using a Small Camera Bag Inside Checked Luggage as a Workaround
If your camera bag barely exceeds carry-on size limits, you might consider placing a small padded insert inside checked luggage to meet airline rules.
Remember you’ll lose easy access in flight and security may need to open checked bags, so label it clearly and pack batteries separately per regulations.
Weigh the risk of damage or loss against convenience before you decide.
Carry-On Size Limits
Airlines set strict carry-on size limits, so stashing a small camera bag inside checked luggage can seem like a neat workaround to avoid gate checks or overhead-bin battles.
You should still consider dimensions, weight, and fragility before packing. Think about:
- measured dimensions vs. airline limits
- potential extra fees for oversize bags
- protection for gear inside checked bags
- ease of retrieval at destination
Security And Access
Many travelers tuck a small camera bag into checked luggage to dodge carry-on limits, but that choice raises real security and access trade-offs you should weigh.
You’ll risk theft, damage, and denied claims if valuables aren’t declared or packed properly. You’ll also lose quick access for filming, battery changes, or inspections.
Keep essentials with you to stay safe and operational.
Best Camera Bag Styles for Carry-On Travel
Whatever gear you carry, the right camera bag style makes airport travel smoother and keeps your equipment protected and accessible.
Choose a bag that fits airline size rules, offers quick security-friendly access, and balances weight.
Pick a bag that meets airline size limits, allows quick security-friendly access, and balances weight for travel.
Consider these styles:
- Sling bags for quick access and light kits
- Backpacks for heavier setups and organization
- Messenger bags for urban convenience
- Convertible roller bags for longer trips
Soft vs Hard Cases: Carry-On Trade-Offs
You’ll notice soft cases are lighter, more flexible, and easier to squeeze into tight overhead or under-seat spaces.
Hard cases give you better shock and crush protection for fragile gear, but they’re bulkier and often heavier.
Weigh the protection you need against the extra weight and lost packing space when choosing between them.
Soft Case Advantages
While a hard case gives maximum protection, a soft camera bag wins on flexibility and airport practicality: it compresses into tight overhead bins, slips under seats, and often meets strict airline size limits more easily, so you’ll get fewer gate-check headaches and more usable space for odd-shaped gear.
- Conforms to irregular items
- Lightweight for stricter limits
- Exterior pockets for quick access
- Easier to stow and retrieve
Hard Case Protection
Soft cases make packing and boarding easier, but when your gear needs real defense, a hard case steps up.
You get rigid impact protection, crush resistance, and sealed closures that shield against moisture and dust. Hard shells deter rough handling and theft, keeping lenses and bodies immobile.
Choose one sized for cabin rules so you still bring it aboard confidently.
Weight And Space Tradeoffs
Because hard shells pack more protective material and often thicker padding, they usually weigh more and eat up more cabin-allowed dimensions than their soft counterparts.
So you’ll have to decide whether added security is worth sacrificing spare pounds or internal space for accessories.
- Hard case: maximum protection, heavier
- Soft case: lighter, compressible
- Accessories: less room in hard shells
- Airline limits: watch size and weight
Laptop-Style Camera Bags and Combining Personal-Item Rules
If your camera bag looks like a laptop bag—slim, structured, and made to slide under the seat—airlines will often treat it as your personal item, but you’ll still need to follow size limits and staff discretion.
Combine it with a small carry-on wisely: airlines usually allow one personal item plus one carry-on, so pack essentials in the camera bag and larger gear in the suitcase.
Protecting Fragile Gear in Overhead Bins
When you stash a camera bag in the overhead bin, proper padding is your first defense—use foam inserts, wrap lenses in clothes, and tuck fragile items into snug compartments.
Place the bag on its flattest side and wedge it between soft items or other bags to prevent shifting during turbulence.
If possible, position heavier gear toward the rear of the bin and keep a small gap so nothing gets crushed when bins close.
Proper Padding Techniques
Padding is the difference between a scratched lens and a ruined shoot: you’ll want layers that absorb shock, prevent shifting, and block direct pressure from overhead bin mishaps.
Use foam, bubble wrap, or padded dividers, and wrap fragile pieces individually.
- Soft inner foam inserts
- Bubble wrap around lenses
- Padded dividers to isolate gear
- Compressible clothing as extra cushion
Secure Placement Strategies
Because overhead bins can be crowded and jostled, place your camera bag where it gets the least movement and pressure: above seats near the front of the cabin, directly above your row, or in a bin with similar-sized luggage.
Lay it flat, tuck straps inside, and wedge soft items around it to prevent shifting. Mark it visually so you can retrieve it quickly and avoid unnecessary handling.
TSA Screening: What Happens to Cameras and Cases?
Curious how TSA handles your camera gear at the checkpoint? You’ll usually remove cameras and larger cases for X-ray screening; agents may inspect bags further if items obscure images.
Expect polite requests and quick handling. Prepare to answer brief questions.
- Remove bulky cases
- Place cameras on the belt
- Keep straps tucked
- Cooperate with requests
Preparing Batteries, Memory Cards, and Accessories for Security
When packing your camera bag, follow airline and TSA rules for carrying lithium batteries in your carry-on so you won’t be stopped at security.
Keep spare batteries in their original packaging or in a protective case with terminals taped, and don’t stow them in checked luggage.
Also organize and secure memory cards in labeled cases so they’re easy to remove and inspect if asked.
Battery Transport Rules
If you’re packing camera batteries, memory cards, and spare accessories for a flight, prepare them so they’re easy to inspect and safe to carry:
- Place batteries in carry-on, not checked luggage, and cover terminals.
- Carry spares in original packaging or insulated pouches.
- Limit lithium-ion watt-hour ratings per airline rules.
- Tape loose cells, declare oversized packs at check-in.
Securing Memory Cards
Start by organizing your memory cards in clearly labeled, protective cases so you can pull them out quickly at security and avoid fumbling through loose cards.
Keep spares and adapters in a compact, zippered pouch inside your carry‑on. The TSA may ask to inspect them, so stay calm, hand them over in their case, and reclaim them promptly to avoid loss or damage.
When You Should Check (Not Carry) Your Camera Gear
Sometimes you’ll need to check your camera gear rather than carry it through the cabin—especially when lenses, tripods, or protected cases exceed airline size or weight limits, when you’re transferring between airlines with different rules, or when a destination’s security risks make stowing gear in the hold safer.
- Bulky tripod or heavy case
- Multiple large lenses
- Oversized protective hard case
- Connecting flights with tighter limits
Insurance and Declared Value for Checked Camera Gear
Peace of mind matters when you check camera gear, so make sure you understand insurance and declared-value rules before you hand over your bag.
Check your travel or equipment policy limits, note exclusions for checked items, and declare high-value gear with the airline if required.
Keep receipts and serial numbers, buy supplemental coverage if needed, and document condition before checking.
Handling Oversized or Heavy Camera Cases at the Gate
When your camera case is oversized or heavy, plan ahead so you won’t be scrambling at the gate: know your airline’s size and weight limits, measure and weigh the case at home or at the airport scales, and have a backup plan (a lighter bag, divided gear, or a checked option) ready if it exceeds limits.
- Redistribute gear into carryable pieces
- Use lightweight alternatives
- Pack fragile items in checked luggage if needed
- Keep receipts and serials for valuable kit
Asking Gate Agents for Priority Handling or Boarding
Need help getting your camera bag on board first? Ask politely at check-in and again at the gate, show boarding priority or fragile gear, and request priority handling or early boarding. Be concise, courteous, and ready to gate-check if needed.
| What to say | Why it helps |
|---|---|
| “Can I request priority?” | Signals need |
| “Fragile equipment” | Evokes care |
| “Early boarding?” | Avoids overhead bins |
| “Gate-check?” | Backup option |
How to Document Gear Damage or Loss With an Airline
If your camera bag gets damaged or gear goes missing despite asking for priority handling, you’ll want a clear record before you leave the airport.
Take these steps quickly and calmly:
Act promptly and stay calm: document damage, obtain a written report, and keep all tags, receipts, and staff details.
- Photograph damage, serial numbers, and packaging.
- Get a written irregularity report from the airline.
- Save boarding passes, baggage tags, and receipts.
- Note names and badge numbers of staff you contact.
Real Examples: Denied Camera Carry-Ons and Outcomes
Although airports and airlines try to be consistent, you’ll still run into situations where gate agents or security staff deny a camera bag as carry-on — and the outcomes vary widely depending on documentation, persistence, and the airline’s policies.
You might get a polite recheck, forced gate-checking with a fragile tag, or confiscation of extras.
Always show receipts, ask to speak with a supervisor, and remain calm.
Traveling With Drones, Gimbals, and Tripods
When you bring drones, gimbals, or tripods on a flight, know that each item carries different rules: drones face battery and registration limits, gimbals are usually fine in carry-on but can prompt questions about batteries or liquids, and tripods may be treated as carry-on, checked, or even a prohibited sharp item depending on size and airline.
- Declare spare Li-ion batteries and carry them in carry-on.
- Check registration and local drone rules before travel.
- Pack gimbals with controls secured and cables tucked.
- Verify tripod length against airline carry-on limits.
Budget Packing Supplies to Protect Camera Gear
Because you don’t need expensive cases to keep your camera gear safe, smart, affordable packing can protect lenses, bodies, and accessories without blowing your budget.
Use padded inserts, bubble wrap, or folded clothes to cushion gear.
Stash smaller items in zip bags or socks to prevent scratches.
Label compartments for quick access and keep batteries and memory cards in a separate, secure pouch.
International Travel: Customs, Declarations, and Carnets
If you’re traveling internationally with camera gear, you’ll need to understand customs rules, declare high-value items when required, and consider a carnet for professional equipment to avoid import taxes and delays.
You should:
- check destination regulations and duty thresholds
- carry receipts or serial numbers for gear
- get an ATA carnet for commercial shoots
- declare items timely to avoid fines or confiscation
Quick Decision Checklist: Carry-On vs Checked for This Trip
Wondering whether to carry your camera bag onboard or check it? Evaluate flight duration, gear value, and connection time.
If you need quick access, fragile lenses, or valuable equipment, keep it as carry-on.
If weight limits, size, or multiple large items force you, check it with sturdy protection and tracking.
Also consider airline policies, security rules, and your tolerance for risk.
Pre-Flight Action List: Measure, Pack, Photograph, Insure
Start by measuring and documenting everything: weigh your packed camera bag and note its external dimensions, then photograph every piece of gear and its serial numbers before you seal it.
Then follow this pre-flight action list to protect your kit:
- Verify carry-on size and weight limits.
- Pad and organize gear to prevent shifting.
- Back up memory cards and note models.
- Buy or confirm travel insurance coverage.
Frequently Asked Questions
Can I Bring Spare Camera Batteries in Carry-On Lithium Battery Rules Apply?
Yes — you can bring spare camera batteries in carry-on luggage; airlines require you to carry lithium batteries onboard, keep terminals protected (tape or original packaging), and usually limit capacity and quantity, so check your airline’s specific watt-hour rules.
Will a Camera Bag’s Tripod Attached Externally Count as Carry-On Size?
Generally, carriers won’t count an externally attached tripod as a separate carry-on, but you’ll need to fit overall dimensions and gate agent discretion matters; you should secure it, check your airline’s rules, and be prepared to gate-check it.
Do Rental Camera Bags or Borrowed Gear Affect Airline Allowance?
Yes — rented or borrowed camera bags and gear count toward your allowance just like yours; airlines assess the item in your possession at boarding, so you’ll need to meet size, weight, and prohibited-item rules accordingly.
Can I Gate-Check a Camera Bag With Valuable Equipment Inside?
You generally shouldn’t gate-check a camera bag with valuable gear; airlines often advise keeping valuables onboard. If you must, ask the gate agent, use hard cases, secure padding, and insure equipment—don’t assume liability coverage.
Are There Refundable Fees if Airline Damages My Camera Gear?
Sometimes — you’ll get refunds if the airline’s liable and you file a claim promptly with receipts, but compensation often covers depreciation, not full replacement; consider declared value coverage or separate insurance to guarantee full reimbursement.
Conclusion
You should usually carry your camera bag onboard—don’t check it—since you’ll want to protect fragile gear, batteries, and memory cards. Measure your bag and fit it within the airline’s carry-on or personal-item limits, pad gear with affordable protection, and photograph contents before travel. For international trips, declare high-value equipment or use a carnet if needed. If space or airline rules force you to check gear, insure and document everything first.