How to Draw a Luggage Easy Step by Step Tutorial
Grab basic supplies—pencil, erasers, ruler and reference—and set up a clean, well-lit space. Start with light construction shapes: a rectangle for the body, small rectangle for the handle, and ovals for wheels. Refine edges, round corners, add frame and panel lines, then sketch a telescoping handle and wheel housings. Shade consistently from one light source, using crisp highlights for hard-shell or soft strokes for fabric. Keep practicing variations and you’ll uncover more tips and templates.
Gather Drawing Supplies and Setup
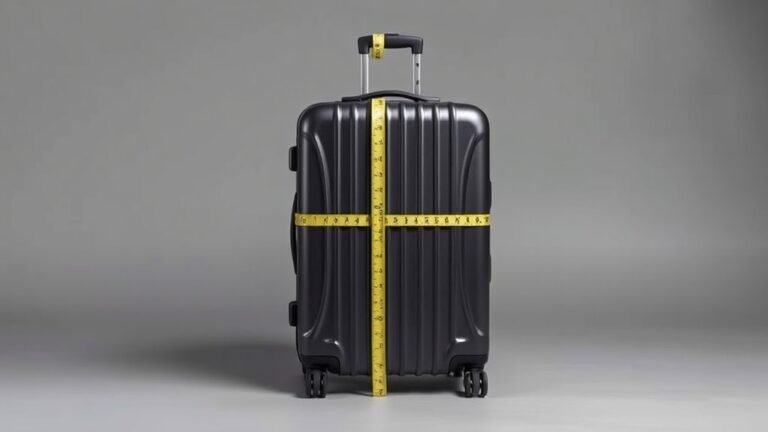
Start by setting up a clean, well-lit workspace and gathering the essential tools: a sketchbook or heavyweight paper, a range of pencils (HB, 2B, 4B), an eraser, a sharpener, and a ruler for straight edges.
Arrange materials within reach, secure paper with tape if needed, and keep reference images nearby.
Sit comfortably, maintain good posture, and test pencil tones before beginning.
What You’ll Be Able to Draw (Quick Demo Sketch)
With your workspace set and pencils tested, you’ll sketch a quick demo to see the finished goal before committing to details.
You’ll outline a simple suitcase shape, add handle and wheels, and mark where seams, pockets, and zipper will go.
This tiny study helps you judge proportions, balance, and style so you can refine confidently when you start the full drawing.
Sketch a Basic Suitcase Outline in 3 Steps
Start by choosing basic shapes like a rectangle for the body and rounded corners for a softer look.
Then add a handle on top and small circles or ovals for wheels at the bottom. You’ll have a clear suitcase outline to refine in the next steps.
Choose Basic Shapes
Even if you’re not confident in your drawing skills, begin by blocking the suitcase into three simple shapes: a rectangle for the main body, a smaller slim rectangle or rounded strip for the handle area, and two short rectangles or ovals for the wheels or feet.
Use light lines, get proportions right, then refine edges.
- Simplify
- Balance
- Guide
Add Handle And Wheels
Extend the basic shapes by sketching a simple handle and wheels so your suitcase reads clearly as luggage.
Draw a short, rounded handle centered on top, connecting it with small lines.
Add two tiny circles or ovals at the bottom corners for wheels, and include wheel housings if you like.
Keep lines light and proportional so you’ll refine details later.
Add Rounded Corners and Frame Lines
Now soften the sharp rectangle by rounding each corner so the suitcase reads as sturdy but worn.
Then trace a slightly smaller outer frame to show the shell edge, keeping the lines parallel and even.
Finish with inner frame lines to suggest panels and seams, varying line weight for depth.
Softening The Corners
When you round the suitcase’s corners and add subtle frame lines, the drawing instantly looks more realistic and finished.
You’ll smooth harsh angles, taper corner curves, and sketch light interior borders to suggest depth.
Apply gentle strokes, keep frame lines thin, and erase overlapping guides.
Focus on balance so corners match and the form reads as soft, sturdy luggage.
- Smooth corners
- Thin frame lines
- Match symmetry
Drawing The Outer Frame
Keep the softened corners as your guide and start defining the suitcase’s outer frame by drawing the rounded silhouette and thin frame lines that hug its edges. Keep strokes steady, varying pressure for subtle depth. Let the frame suggest sturdiness and welcome.
| Mood | Detail |
|---|---|
| Confident | Clean lines |
| Calm | Soft curves |
| Ready | Balanced form |
Adding Inner Frame Lines
As you refine the silhouette, add the inner frame lines and rounded corner details to give the suitcase structure and depth.
You’ll suggest padding and thickness with subtle parallel lines and softened corners. Be consistent with line weight and spacing so the form reads clearly.
- Sketch parallel inner edges.
- Soften corners with arcs.
- Match line rhythm to outer frame.
Draw the Telescoping Handle and Grip
Before you sketch the grip, extend two parallel lines upward from the bag’s back to mark the telescoping rods, keeping them evenly spaced so the handle will look stable and centered. Draw a small rounded rectangle connecting the rods for the grip, add subtle thickness, and erase guide lines.
| Step | Shape | Tip |
|---|---|---|
| 1 | Lines | Even spacing |
| 2 | Rectangle | Rounded ends |
Draw Top and Side Carry Handles Correctly
1. You’ll sketch sturdy top and side handles close to the shell, keeping proportions consistent with the telescoping grip.
Use slightly rounded rectangles for comfort, add short attachment stitches or rivets, and show subtle thickness to suggest padding.
Align handles symmetrically, keep perspective lines coherent, and vary line weight to indicate depth.
- Top handle
- Side handle
- Attachment details
Add Wheels and Wheel Housings That Roll
With the handles in place, you’ll move down to the base and fit wheels that actually roll.
Sketch small circles at each corner, add concentric rims for depth, and draw short axles connecting them to the suitcase.
Enclose each wheel with a curved housing, matching the case’s perspective.
Shade the inner rims and leave highlights to suggest smooth, functional rolling motion.
Draw Suitcase Seams, Zippers, and Textures
Now add the fine details that make your suitcase believable: draw stitch lines and panel seams to show construction, then sketch zipper teeth and a pull for functional clarity.
Use short, controlled strokes to suggest surface texture and scuffs without overworking the drawing.
Keep the marks consistent with the form so wear and highlights read naturally.
Stitch Lines And Panels
As you add stitch lines and panels, think of them as the suitcase’s structural language: seams define edges and join materials, zippers chart movement, and texture catches light to suggest fabric or hard-shell finish.
You’ll place panels to show construction, use stitch spacing for scale, and add subtle grain or ribbing for material cues.
- Mark panel seams
- Vary stitch rhythm
- Suggest material with texture
Zipper Teeth And Pulls
A zipper gives your suitcase a clear focal rhythm, so sketch its teeth as a steady, even pattern that follows the bag’s curve and corner turn; keep the teeth small and regularly spaced, tighten spacing where the zipper compresses at corners, and loosen it slightly where it flattens along panels.
Draw the slider as a simple rounded rectangle, attach a thin pull tab, and hint catches for realism.
Surface Texture And Wear
After laying in the zipper’s rhythm and slider, shift focus to how the suitcase’s surfaces tell a story of use and structure.
You’ll mark seams, scuffs, stitching, and panels with varied line weight and subtle shading to suggest material and wear.
Emphasize corners and handles; they show age first.
- Seams
- Scuffs
- Texture
Draw Luggage Tags, Stickers, and Logos
Someone’s personality can shine through small details, so start by deciding what kind of tag, sticker, or logo suits the bag—functional ID tags for travel, decorative stickers for flair, or a simple logo for branding.
Sketch tag shapes, attachment straps, and placement. Add sticker borders, simple icons, or text.
Keep logos minimal, proportionate, and consistent with the bag’s style for clarity and recognition.
Shade for Depth: Choose a Light Source and Shadows
Where does the light come from? Decide a single light source—top-left, top-right, or front—to keep shadows consistent.
Shade the suitcase planes darker away from light, add cast shadow beneath to ground it, and use softer gradients for curved edges.
- Establish direction first.
- Shade planes relative to that light.
- Add cast shadow for realism.
Add Highlights and Texture for Hard-Shell vs Fabric
Now think about how the same light source will hit different materials: hard-shell luggage needs crisp, bright highlights while fabric calls for softer, scattered reflections.
Use sharp, small strokes or a white gouache spot for glossy shells, and try cross-hatching, stippling, or directional grain to suggest woven fabric.
Keep your light source consistent so highlights and texture read realistically across the whole piece.
Hard-Shell Highlights
Think about how light behaves on different surfaces: for a hard-shell suitcase you’ll use crisp, defined highlights and subtle reflections, while fabric needs softer, more diffuse light and texture.
You’ll place sharp specular strokes, emphasize edges, and suggest curvature with gradients. Use contrast sparingly to sell rigidity.
- Strong edge highlights
- Soft mid-tone gradients
- Small reflective details
Fabric Texture Techniques
Fabric behaves differently from hard shell—so treat it like a soft plane that catches light and texture rather than crisp reflections.
Use short, varied strokes to suggest weave and seams, add subtle, broken highlights along folds, and darken creases for depth.
Blend edges softly to indicate pliability.
Add small, irregular marks for wear and seams to convey fabric realism without overworking the surface.
Light Source Considerations
Having established how fabric reads as a soft plane with broken highlights and softened edges, shift your attention to how light behaves on different luggage surfaces—hard-shell cases demand crisp, strong highlights while fabric needs scattered, softer ones.
You’ll adjust edge sharpness, contrast, and texture marks to match material.
- Emphasize specular spots on shells.
- Soften highlights on fabric.
- Use directional strokes.
Quick Variations: Roller Bag, Carry-On, Hard Case, Duffel
When you sketch luggage, small changes in shape and detail let you indicate very different types—rollers get telescoping handles and wheels, carry-ons stay compact with rounded corners, hard cases show crisp edges and molded panels, and duffels rely on soft contours and stitched straps. You’ll vary line weight and texture to suggest material and function quickly.
| Type | Key Detail |
|---|---|
| Roller | Wheels |
| Duffel | Soft seams |
Fix Common Luggage-Drawing Mistakes Fast
Those quick variations give you the cues to spot and correct common mistakes fast. You’ll fix proportion, perspective, and handle placement by comparing shapes, aligning vanishing points, and checking symmetry.
Use light construction lines, erase confidently, and simplify details. Apply these quick checks every time you sketch to save time and improve accuracy.
- Compare shapes
- Align perspective
- Verify symmetry
Next Steps: Practice Exercises and Downloadable Templates
Before you move on, pick a few focused exercises that target the mistakes you just fixed—draw the same case at three different scales, sketch it from two vanishing points, and practice handle placement with mirrored guides—so you’ll build muscle memory and confidence quickly.
Download printable templates to trace, modify proportions, and add details.
Repeat timed drills, compare versions, and track progress weekly.
Frequently Asked Questions
How Do I Digitize My Hand Drawing for Editing?
You scan or photograph your drawing, import it into Photoshop or Krita, use levels and contrast to clean it, trace with vector tools in Illustrator or Inkscape, adjust lines and colors, then export editable files.
What Pens or Markers Last Longest on Luggage Sketches?
Use archival pigment-based pens (like Sakura Pigma Micron) and alcohol-based markers (like Copic) for longevity; you’ll seal sketches with a clear UV-resistant spray or laminate to prevent fading and abrasion on luggage surfaces.
Can I Sell Artwork Based on Real Luggage Brand Designs?
You can, but you shouldn’t sell exact replicas of real luggage brands without permission because trademarks and designs may be protected; create original designs or obtain licenses, and consult an attorney if you’re unsure to avoid legal trouble.
How Do I Photograph My Drawing for an Online Portfolio?
You’ll photograph your drawing with even light, a neutral background, and a perpendicular camera angle; use a tripod, shoot in RAW, include a color card, slightly increase contrast in post, and export high-resolution JPEGs for your online portfolio.
Are There Etiquette Rules for Drawing Passengers’ Suitcases in Public?
Yes — you should respect privacy and avoid focusing on identifiable details; ask permission if you want close-up shots or sketches; be discreet, courteous, and ready to stop if someone seems uncomfortable or asks you to stop.
Conclusion
Now that you’ve learned the basics, keep practicing by sketching different sizes, angles, and materials until drawing luggage feels natural. Try quick 5-minute studies from reference photos, then refine one detailed piece each week. Use the downloadable templates to speed up progress and experiment with patterns, stickers, and wear marks to add character. With regular practice and these simple steps, you’ll confidently draw roller bags, carry-ons, hard cases, and duffels in no time.