How to Paint Luggage Creative Ideas and Steps
You can transform luggage by cleaning, sanding, and masking hardware, then priming for the material before applying thin, even coats of compatible paint. Use acrylics for hard shells and textile paints or fabric medium for soft bags, employ stencils or freehand for design, and seal with durable clear coats. Fix smudges by dabbing or sanding drips, touch up chips after trips, and add decals or patches for style—keep going to find step‑by‑step tips, materials, and troubleshooting.
Quick 6‑Step Guide to Painting Luggage (Beginner)
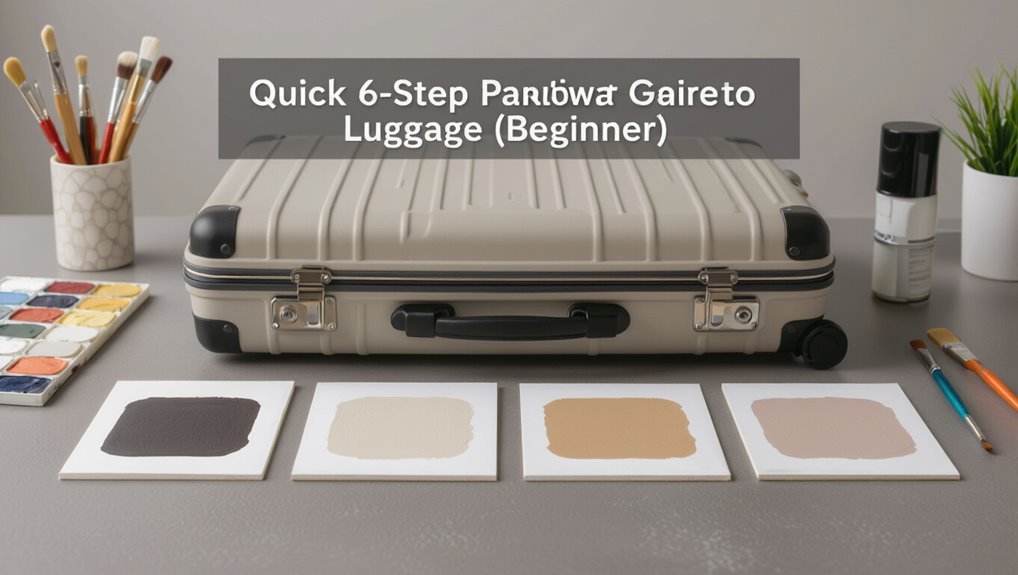
If you’ve never painted luggage before, don’t worry—you can get a durable, professional-looking finish in six straightforward steps.
You’ll clean and sand the shell, mask hardware, prime with appropriate primer, apply thin, even coats of paint, let each coat cure, then seal with a tough topcoat.
Follow drying times and work in a ventilated area for best results.
How Long Painting Luggage Takes and Costs
Now that you know the basic six steps, let’s look at how much time and money you’ll need to plan for.
Expect 2–6 hours active work: prep, base coats, detailing.
Drying between layers can extend the project over 24–48 hours.
Budget $15–60 for paints, primers, brushes, and sealant; higher for specialty paints or professional tools.
Best Luggage Materials for Painting
You’ll find hard-shell cases take paint well with the right primer and flexible paints, while fabric luggage needs specialty textile paints and stiffer application.
Pay attention to surface prep—cleaning, sanding or deglossing, and masking are essential for adhesion.
I’ll cover specific tips for each material so you know what to use and how to prepare it.
Hard Shell Compatibility
Hard-shell cases made from polycarbonate and ABS plastics take paint best because their smooth, non-porous surfaces bond well with primers and flexible topcoats; you’ll still need to sand lightly and use a plastic-specific primer to guarantee adhesion and prevent cracking.
Check for textured finishes, remove hardware, and mask seals. Apply thin, even coats, cure fully, and finish with a flexible clear to protect against chips.
Fabric Suitability Tips
While rigid polycarbonate cases take paint well, soft-sided luggage calls for a different approach because fabrics soak up and flex with coatings.
Choose tightly woven synthetics like ballistic nylon or polyester blends over loosely woven cotton. Use flexible fabric paints or textile mediums, test adhesion on a hidden seam, and expect some color shift.
Avoid heavy, brittle finishes that crack with movement.
Surface Preparation Needs
1 thing matters most before you paint luggage: the surface—so strip dirt, oils, and loose coatings until you have a clean, dry, and slightly abraded base.
Check material: hard shells (polycarbonate, ABS) need scuffing and plastic primer; metal frames accept metal primer; coated fabrics need deglazer and fabric medium; untreated canvas takes paint directly after washing.
Mask hardware and test a small patch.
Choosing Paint for Hard‑Shell Luggage
Start by matching the paint type to your suitcase material—polycarbonate, ABS, or aluminum each need different formulas—so your finish adheres and resists cracking.
Use flexible acrylic or polyurethane sprays for plastics, and metal primers plus enamel or lacquer for aluminum. Choose paints labeled for exterior durability and impact resistance.
Test on a hidden area, sand and prime properly, then apply thin, even coats.
Choosing Paint for Fabric and Soft‑Sided Bags
Because fabric flexes and breathes, you’ll need paints that move with the bag and survive repeated handling and cleaning.
Choose fabric or textile paints, flexible acrylics, or specially formulated leather/vinyl paints for coated fabrics. Look for washability, lightfastness, and abrasion resistance.
Test adhesion on a hidden patch, thin with medium if needed, and seal with a compatible flexible fixative to protect your design.
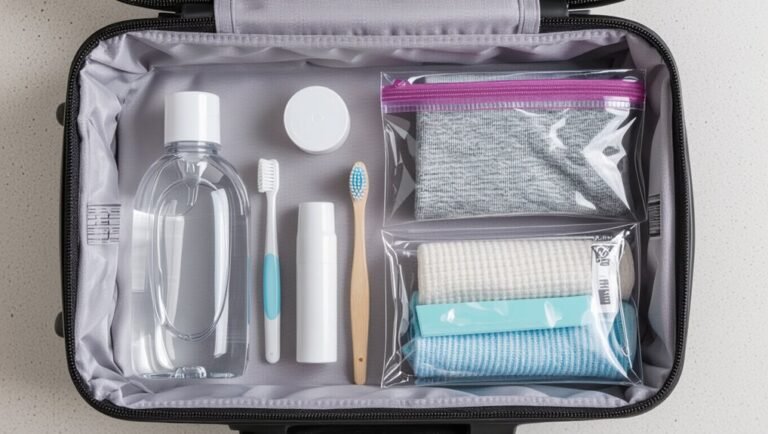
Essential Tools and Supplies to Buy First
Before you pick up a brush, gather a compact kit of essentials that’ll make the job cleaner, faster, and more durable: select fabric or acrylic paints, primer or fabric medium, assorted synthetic brushes, foam brushes, painter’s tape, disposable palettes, fine sandpaper, lint roller, soft cloths, nitrile gloves, clear sealer (spray or brush-on), and a well-ventilated workspace setup with drop cloths.
How to Test Paint on a Hidden Area
With your supplies ready, pick a small, out-of-the-way spot—inside a pocket seam, under a handle flap, or the luggage’s undersurface—and apply a quick test patch. Wait for full drying, check adhesion, color, and flexibility. If it passes, proceed; if not, adjust primer or paint.
| Test | Observation |
|---|---|
| Color match | True/Need adjust |
| Adhesion | Good/Peels |
| Flexibility | OK/Cracks |
Cleaning and Prepping Hard‑Shell Surfaces
Before you paint, clean the hard‑shell surface thoroughly with a mild detergent or isopropyl alcohol to remove dirt, oils, and residue.
Lightly sand the shell to scuff the finish and improve adhesion, then wipe away dust with a tack cloth.
Finish by applying a compatible primer and let it cure fully before painting.
Surface Cleaning Steps
1 key step in painting hard‑shell luggage is a thorough clean and prep, because paint won’t adhere to dirt, oils, or scuffs. You should remove stickers, wipe with degreaser, and let dry fully.
Follow this quick numeric checklist to guarantee adhesion and a smooth finish:
- Remove debris and stickers.
- Degrease with isopropyl or mild solvent.
- Dry and inspect for residues.
Sanding And Priming
Sand the hard‑shell lightly to scuff the glossy surface so paint and primer can grip; use 320–400 grit for most plastics, or 220–320 if there are deeper scratches to level. Wipe dust, tack cloth, then apply a plastic‑bonding primer in thin coats, letting each cure. Test adhesion before decorative coats.
| Step | Purpose |
|---|---|
| Sand | Texture |
| Clean | Remove dust |
| Prime | Bonding |
| Cure | Adhesion |
| Test | Confidence |
Cleaning and Prepping Fabric Luggage
Start by emptying pockets, removing straps or hardware you can take off, and shaking out loose dirt—this gives you clear access to every panel of the bag.
Empty pockets, detach removable straps and hardware, then shake out loose dirt to access every panel of the bag.
Clean with mild detergent and a soft brush, rinse, and air dry thoroughly.
Inspect for stains or damaged seams and mend as needed.
- Remove hardware
- Wash gently
- Repair flaws
Priming Luggage for Long‑Lasting Adhesion
You’ll want a quality primer to create a uniform, bite-ready surface that helps paint stick and resist scuffs.
Choose one formulated for the luggage material (fabric, faux leather, PVC, or hard shell) and follow the manufacturer’s instructions for application and dry times.
Apply thin, even coats, sanding lightly between coats if recommended, and allow full cure before painting to guarantee durable adhesion.
Plan a Travel‑Proof Design
When planning your design, pick paints made for high‑wear surfaces so colors stay true through travel.
Reinforce corners, handles, and wheels with extra coats or protective strips where abrasion hits hardest.
Finish everything with a tough sealant to lock the design in place.
Choose Durable Paints
Aiming for a travel‑proof design means picking paints that resist scratches, scuffs, and UV fading so your luggage stays looking sharp through rough handling.
You’ll choose flexible acrylics or enamel, match finish to material, and seal with a clear topcoat.
Consider:
- Durability: abrasion and UV resistance
- Flexibility: prevents cracking on flexing shells
- Compatibility: bonds to plastic, polycarbonate, or fabric
Protect High‑Wear Areas
Because high‑wear spots take the brunt of travel, plan your design to reinforce edges, corners, handles, wheels, and zipper areas with tougher paints, extra coats, or protective strips so the finish lasts through rough handling. Target these zones, test adhesion, and use contrasting accents for style without compromising durability.
| Area | Suggestion |
|---|---|
| Edge | Extra coat |
| Corner | Reinforce |
| Handle | Wrap |
| Wheel | Durable paint |
| Zipper | Strip |
Secure Design With Sealant
If you want your painted luggage to survive checked-bag tosses and rainy commutes, finish the job with the right sealant.
You’ll protect color, prevent scratches, and lock edges. Choose a flexible, UV-resistant topcoat and apply thin even layers.
Consider:
- Matte for subtle protection
- Gloss for vibrant color and abrasion resistance
- Satin for balanced durability and aesthetics
Using Stencils and Templates Effectively
Stencils and templates let you add crisp, repeatable designs to luggage quickly, so pick or make ones that match your bag’s curve and surface texture.
Secure templates with low-tack adhesive or clips, press edges to prevent bleed, and test on scrap.
Use dabbed or stipple strokes for even coverage, layer colors after drying, and remove templates slowly for sharp edges.
Mask Straight Lines With Painter’s Tape
When you need sharp, even stripes or clean color blocks, mask straight lines with quality painter’s tape so paint won’t seep under the edges. Press tape firmly, remove in the right order, and plan colors.
Use these steps:
- Clean surface and measure.
- Apply tape, burnish edges.
- Paint, wait, then peel slowly at an angle.
Freehand Techniques for Patterns and Images
While masking gives you clean edges, freehand work lets you add personality with organic shapes, hand-drawn patterns, and unique imagery—so pick a comfortable brush, sketch light guidelines with pencil or chalk, and work from large shapes to small details.
Keep strokes confident, layer colors thinly, pause to evaluate proportions, and use fine liners or tiny brushes for crisp accents. Trust mistakes as part of the design.
Create Weathered, Distressed, or Vintage Looks
If you want a luggage piece that looks lived-in and full of character, weathering techniques will get you there.
You’ll sand edges, layer muted tones, and dab metallic highlights for authentic wear. Use sealant sparingly to retain texture.
Try these steps:
- Sand and scuff edges lightly.
- Layer thinned paints, wipe for fade.
- Add small metallic rub-throughs and seal.
Prevent Paint Bleeding With Multiple Colors
Before you add another hue, make sure the luggage is clean, sanded, and primed so paint can bond properly.
Use sharp-edge masking tape and press it down firmly to keep lines crisp between colors.
Let each layer dry fully before taping or painting the next to prevent bleed-through and smudges.
Proper Surface Preparation
When you’re planning multiple colors on luggage, proper surface prep stops paint bleed and keeps lines crisp; clean, sand, and mask each area so paint adheres only where you want it.
- Remove dirt, oils, and old finish for reliable adhesion.
- Lightly sand to create tooth without gouging plastic or fabric.
- Use quality tape and allow primer to cure before painting.
Sharp Edge Masking
Now that your surfaces are clean, sanded, and primed, focus on sharp edge masking to keep color lines crisp and stop bleed.
Use low-tack painter’s tape, press edges firmly, and seal with a thin clear coat or base color before adding the next hue.
Remove tape slowly at a 45° angle once paint is tacky, not fully cured, for clean, precise shifts.
Layered Drying Time
If you’re layering multiple colors, let each coat reach a tacky-to-dry stage before applying the next so solvents don’t push wet paint and cause bleeding.
You’ll prevent color migration and preserve edges by timing dries and using light coats.
- Wait: 10–20 minutes tack, longer for thicker coats.
- Test: press a corner to confirm.
- Seal: clear coat after full cure.
Fast‑Dry Methods Between Travel Days
Because you’ll likely be on a tight schedule between trips, focus on fast‑dry methods that get paint set and durable without wasting time.
Use quick‑dry acrylics or spray paints labeled dry‑to‑touch in minutes. Thin even coats, warm dry air, and a fan speed up curing.
Test adhesion on scrap, avoid thick layers, and handle gently for 24 hours to prevent tacky marks.
Seal Painted Hard Shells Against Chipping
To keep your painted hard shell from chipping, pick a durable sealant like polyurethane or a tough clear coat designed for plastics.
Apply multiple thin coats rather than one thick layer, letting each coat dry fully before the next. That builds protection without drips or clouding.
Choose Durable Sealants
When you’ve finished painting a hard-shell suitcase, sealing it properly is the step that keeps chips and scratches from ruining your work.
Pick a durable topcoat designed for plastics or polycarbonate shells. You’ll want sealants that bond, resist abrasion, and remain flexible.
Choose based on performance and finish:
- Polyurethane clear coat
- Acrylic enamel for plastics
- Spray-on polycarbonate sealer
Apply Multiple Thin Coats
Apply several thin coats rather than one thick layer to build a strong, flexible finish that resists chipping. Thin layers dry faster, level better, and bond more evenly to the plastic shell.
Wait recommended drying times between coats, lightly scuff with fine grit or tack cloth, and apply 2–4 uniform passes.
Finish with a clear topcoat for added abrasion and weather protection.
Seal Painted Fabric for Washability and Wear
Because painted fabric needs protection against laundering and abrasion, you’ll want to seal it with a suitable finish that won’t stiffen or crack.
Use a flexible, washable fabric sealer; apply thin, even layers; let cure fully.
Consider:
- Test sealer on a scrap for adhesion and hand-feel.
- Machine-wash gentle cycle after 72-hour cure.
- Reapply yearly or after heavy wear.
Protect Hardware, Handles & Wheels While Painting
Before you paint, remove any removable hardware or mask fixed pieces to keep them paint-free.
For handles, secure them with tape or plastic wrap so they stay clean and usable.
Finally, shield wheels thoroughly with bags and heavy tape to prevent paint buildup and guarantee they roll smoothly.
Remove Or Mask Hardware
You’ll want to either remove or thoroughly mask all hardware—zippers, locks, handles, and wheels—so paint only hits the shell.
Take care to keep parts safe and labeled.
- Remove screws and store parts in labeled bags.
- Mask immovable pieces with painter’s tape and plastic.
- Inspect edges to prevent bleed and guarantee clean lines before painting.
Protect Handles Securely
Once hardware is removed or masked, secure the remaining handles and wheels so they don’t get paint on them or shift during spraying.
Use painter’s tape and thin plastic wrap to cover handle grips, then fasten ends with tape. Stabilize swivel wheels with foam blocks or folded cardboard taped beneath.
Check alignment before spraying and re-tape any exposed edges to prevent overspray.
Shield Wheels Thoroughly
Although wheels sit out of the way, you’ll still need to shield them thoroughly to keep paint off bearings and casters; you’ll protect function and avoid costly repairs.
Follow these steps:
- Clean wheels, tape bearings with high-quality painter’s tape.
- Cover casters with plastic wrap, secure with rubber bands.
- Mask hardware and nearby seams before spraying, remove tape after full cure.
Quick Fixes: Smudges, Drips, and Uneven Spots
If a smudge, drip, or patchy area shows up while you’re painting luggage, don’t panic — quick, targeted fixes will get the finish back on track without stripping the whole piece.
Dab fresh smudges with a damp cloth, sand drips lightly with fine grit, feather edges of uneven spots, and reapply thin layers. Let each coat dry before evaluating.
Refreshing and Touch‑Up After Trips
When you get home from a trip, give your luggage a quick inspection and a light touch‑up so small scuffs and grime don’t become permanent.
You’ll want to clean, repair, and protect painted areas promptly.
- Wipe with mild cleaner, dry fully.
- Sand tiny chips, touch with matching paint.
- Seal edges with clear coat to prevent future wear.
Add Decals, Patches & Tags to Complement Paint
To finish your painted luggage and make it unmistakable, add decals, patches, and tags that echo your color scheme and style.
Choose weatherproof decals and embroidered or PVC patches for durability. Position them to balance composition—corners, centers, or handles.
Use luggage tags for ID and a pop of contrast. Secure with adhesive or sew-on methods, then seal edges for travel resilience.
When to DIY vs. Hire a Pro Restorer
Because you’re weighing time, skill, and cost, decide whether the job fits your comfort level and tools before you start.
Weigh time, skill, and cost—only start projects that match your tools and comfort level.
You’ll tackle simple scratches, color changes, and creative paint confidently, but complex structural repair or vintage restoration needs pros.
Consider:
- Time vs. urgency
- Skill and specialized tools
- Value and sentimental importance
Frequently Asked Questions
Will Painted Luggage Affect Airline Baggage Handling Policies?
Generally no, painted luggage won’t change airline policies, but you’ll want to check restrictions on hazardous paints and security markings; carriers and TSA may inspect altered bags, so confirm with your airline and use safe, nonhazardous coatings.
Can I Use a Heat Gun Without Warping Hard-Shell Luggage?
You can, but you shouldn’t overdo it: use low heat, keep the gun moving, stay at least 6–8 inches away, test on an inconspicuous spot, and avoid prolonged exposure to prevent warping or softening of hard-shell luggage.
Are There Eco-Friendly Paint Options Safe for Travel?
Yes — you can choose eco-friendly paints safe for travel. Use low-VOC or water-based acrylics, plant-based dyes, or natural mineral pigments; let coatings fully cure, follow airline rules, and avoid solvents that off-gas during flights.
Will Painting Luggage Void Manufacturer Warranty?
It might. You’ll likely void warranty if alterations or coatings damage finishes; policies vary by manufacturer. Check your warranty terms or contact the maker first. If they allow customization, document approval to avoid disputes.
How to Remove Previous Paint From Vintage Suitcases?
You strip old paint by sanding, using chemical paint stripper suitable for the material, or gently scraping with a plastic scraper; you’ll clean residue with mineral spirits, rinse, then sand smooth before priming and repainting.
Conclusion
You’ve got the basics to transform tired luggage into something you love. Follow the simple steps, pick paints suited to your shell or fabric, and tackle smudges or touch‑ups right after trips. Add decals, patches, or tags for personality, or call a pro for complex restorations. With a little prep and patience, you’ll save money and travel with style—so go ahead, personalize your bag and enjoy the journey with luggage that stands out.