Can a Backpack Be Carry On Luggage TSA Guide
You can bring a backpack as carry‑on if it meets TSA rules and your airline’s size limits, so measure it including pockets, wheels and straps. TSA allows carry‑ons roughly 22 x 14 x 9 inches but airlines vary, and personal items must fit under the seat. Pack valuables and meds for easy access, use clear quart bags for liquids, and be ready to remove laptops at security. Keep your airline’s policy handy and continue for practical packing and gate‑check tips.
What Search Intent Does This Guide Satisfy?
Who are you when you look up “backpack carry-on”? You want clear, practical answers: size rules, TSA policies, packing tips, and flight prep.
This guide satisfies informational and transactional intent — helping you decide, prepare, and act (choose a compliant bag, pack efficiently, avoid gate check).
You’ll get concise rules, quick comparisons, and steps to minimize hassles at security and boarding.
Quick Answer: Is a Backpack Allowed as Carry‑On?
You’re now asking the practical question: can you bring a backpack as your carry-on? Yes, usually—airlines let backpacks as carry‑ons if they meet size and quantity rules.
Check airline limits and gate agent discretion. Pack essentials and keep liquids accessible.
- Verify your airline’s size and count policy
- Keep ID and boarding pass handy
- Stow oversized bags in checked luggage if denied
TSA Basic Carry‑On Definition and Allowed Personal Items
When you pack a backpack as your carry-on, you’ll want to match the TSA’s size limits—typically about 22 x 14 x 9 inches, though airlines can vary.
You can also bring a personal item, like a small daypack or laptop bag, that fits under the seat in front of you.
Knowing both the carry-on dimensions and what qualifies as a personal item helps you avoid gate check fees and boarding hassles.
TSA Carry‑On Dimensions
Most U.S. airlines follow the TSA’s basic carry‑on definition: a single bag that fits in the overhead bin and a smaller personal item that tucks under the seat, both subject to size limits and security screening.
Check dimensions with your carrier; backpacks often qualify if compact.
- Typical max: ~22 x 14 x 9 inches (varies)
- Measure when packed
- Weigh rules depend on airline
Allowed Personal Items
One small personal item — like a slim backpack, purse, or laptop sleeve — is allowed in addition to your carry‑on and must fit under the seat in front of you; the TSA doesn’t set exact dimensions, so airlines and gate agents ultimately decide what qualifies.
Check your airline’s rules before packing.
Prioritize essentials: documents, meds, electronics, and a compact charger to avoid gate refusal.
How Airlines Differ From TSA on Backpack Carry‑On Rules
You’ll notice TSA sets baseline rules for what counts as a carry‑on, but individual airlines often add their own size limits and restrictions.
That means a backpack that’s fine by TSA could be too large for your airline’s overhead bins or require gate checking.
Also check boarding priority and carry‑on allowances—your ticket class or loyalty status can let you keep a pack with you even if general rules are tighter.
TSA Vs. Airline Rules
Although the TSA sets baseline security rules for what you can carry through checkpoints, individual airlines often add their own size, weight, and gate-check policies for backpacks.
So a pack that clears TSA screening might still be denied as a carry-on by your carrier. You should check both TSA rules and airline policies before travel.
- Confirm airline carry-on dimensions
- Note weight and gate-check limits
- Verify overhead bin availability
Size And Boarding Priority
Different airlines treat backpack size and boarding priority in distinct ways, so check your carrier’s rules rather than relying on TSA alone.
You’ll find some let small backpacks count as personal items while others require carry‑on slots; boarding group, fare class, or loyalty status often determines whether you can stow a bag overhead.
Measure your pack and know your boarding privileges before you arrive at the gate.
Standard Carry‑On Size Limits for Major U.S. Airlines
Most major U.S. airlines set carry-on size limits around a similar range, but the exact dimensions and enforcement can vary, so check your carrier before you pack.
You should compare length, width, height and handle/wheel allowance. Typical maximums hover near 22 x 14 x 9 inches, but carry-on policies differ by airline and fare class.
- Typical dimension ranges
- Weight considerations vary
- Boarding priority affects allowance
How to Measure Your Backpack for Cabin Compliance
Start by laying your backpack flat and measuring its height, width and depth from the outside, including any wheels, handles or external pockets that stick out—airlines count those too.
Lay your backpack flat and measure its full exterior height, width, and depth—include handles, wheels, and pockets.
Use a tape measure, record the largest points, and include compression straps.
Compare dimensions to your airline’s allowance. If uncertain, measure packed and empty; airlines may check either.
Keep measurements handy for check‑in.
Common Backpack Dimensions That Typically Pass as Carry‑On
You’ll usually aim for backpacks around 22 x 14 x 9 inches (56 x 36 x 23 cm) to meet most U.S. carry‑on rules, but check the airline since international limits can be smaller.
Remember soft packs can compress a bit while hard‑shelled bags keep their full dimensions, which matters at gate checks.
Keep a quick list of each carrier’s size rules so you don’t get surprised.
Typical Carry‑On Measurements
Airlines generally let backpacks that fit roughly within 22 x 14 x 9 inches (56 x 36 x 23 cm) ride as carry‑on, though a few carriers tighten one or more dimensions—especially height or depth.
You should measure packed size, including wheels or straps, and compare with your airline’s limits before travel.
- Aim under maximum to avoid surprises
- Measure exterior, not internal volume
- Account for compression or expansion
Soft vs. Hard Dimensions
Because soft-sided packs compress while hard-shell bags hold their shape, you’ll want to treat their dimensions differently when judging carry-on fit: soft backpacks can often squeeze into tighter overhead bins, but you should still measure them packed (including straps and any protruding pockets).
Meanwhile, rigid or semi-rigid backpacks need their full external size checked against the carrier’s limits. Aim for around 20–22 x 14–9 inches.
International Size Variations
Wondering which sizes will actually clear international carry‑on checks? You’ll want a compact, compliant backpack to avoid gate hassles.
Measure height, width, depth including straps and pockets; airlines vary. Aim for conservative dimensions and lightweight construction so you can adapt at check‑in.
- 40 x 25 x 20 cm — ultra‑compact personal item
- 45 x 35 x 20 cm — common regional limit
- 55 x 40 x 20 cm — typical international maximum
When a Backpack Counts as a Personal Item Instead of Carry‑On
If your backpack is slim, fits under the seat, and holds just the essentials, an airline will often treat it as your personal item rather than your carry-on.
Check dimensions against the carrier’s policy, keep it underweight and compact, and avoid bulky gear.
Gate agents may inspect; be prepared to stow larger bags in the overhead if asked.
How Airline Seat Type and Class Affect Backpack Rules
Your seat pitch can limit how comfortably your backpack fits under the seat, so measure its depth if you want guaranteed stowage.
Also check whether your cabin class (economy, premium, business) gives you different carry allowances or an extra personal item.
Knowing both seat type and class helps you pick a backpack that meets the airline’s practical and policy limits.
Seat Pitch And Backpack Size
Because airlines cram different classes and seat types into the same cabin, the space you’ll have to stow a backpack can change a lot depending on seat pitch and class.
You should measure and choose slimmer bags for tight pitches and expect more room in premium seats.
- Check seat pitch before packing.
- Favor low-profile backpacks for economy.
- Use larger packs in premium or exit-row seats.
Cabin Class Carry Limits
While airlines publish uniform carry-on size rules, the class and seat type you book often change how strictly those limits get enforced and how much space you’ll actually have for a backpack.
In premium cabins you’ll usually get more overhead space and lenient enforcement; in basic economy or exit-row seats carriers may limit underseat storage, require gate-checking, or enforce tighter size checks, so pack accordingly.
Do Airlines Enforce Carry‑On Weight Limits?
Do airlines actually weigh carry‑ons at the gate? You’ll usually find enforcement varies: some carriers check frequently, others rarely, and enforcement ramps up on full flights.
You should expect occasional spot checks and staff discretion.
- Budget airlines often enforce strictly.
- Major carriers focus on size, not weight.
- Gate agents may gate‑check heavy bags.
What Happens If Your Backpack Is Borderline?
If your backpack looks borderline at the gate, the gate agent ultimately decides whether it flies or gets checked.
They’ll base that call on size, weight, and how full the overhead bins already are, so be ready for a quick measure or ask.
To avoid confiscation, lighten your load, carry valuables on you, and know the airline’s limits before you board.
Gate Agent Decision
When your backpack looks borderline, the gate agent decides whether it goes overhead, under the seat, or into checked baggage — and their call is final.
You can politely ask for clarification, but they’ll enforce limits to keep aisles safe and flights timely.
- Accept their decision calmly to avoid delays.
- Ask where to stow it if unclear.
- Be prepared to check it.
Tips To Avoid Confiscation
Although the gate agent has the final say, you can take simple steps to avoid having a borderline backpack confiscated or forced into checked baggage.
Weigh and measure it before you go, remove bulky items, and use compression cubes.
Be ready to move items to a personal item if asked, stay polite, and present receipts for recently purchased electronics or liquids to speed resolution.
Rolling vs. Structured Backpacks: Which Fits Better Overhead?
Curious which type of bag actually slides into the overhead bin with less fuss? You’ll prefer rolling backpacks if you want predictable shape and easy stow; structured packs protect gear but can be awkward.
Choose by how you pack, lift capacity, and bin dimensions. Consider:
Pick by packing style, lifting ability, and bin size—prioritize fit and function over looks.
- Rolling: smooth glide, rigid footprint
- Structured: protection, bulkier fit
- Your choice: function over style
Slim Daypacks and Under‑Seat Storage Tips
If you prefer keeping your carry-on within arm’s reach instead of wrestling with overhead bins, a slim daypack is your best bet for under‑seat storage. You’ll slide it beneath the seat, pack essentials, and keep inflight access simple. Choose a low-profile shape and soft shell for flexibility; compress bulky items first to maximize space.
| Feature | Benefit | Tip |
|---|---|---|
| Slim profile | Fits under seat | Measure seat space |
| Soft shell | Compressible | Pack clothes flat |
| Quick access | Reach items midflight | Keep essentials front |
Laptop Backpacks and TSA Laptop Screening Rules
When you pack a laptop in your carry-on, know the TSA rules for removing it at security and which bags are designed to speed the process.
Look for TSA-approved laptop backpacks with a lay-flat or checkpoint-friendly compartment so you don’t scramble at the gate.
Before you travel, power on your device and stow cords so agents can screen it quickly without delays.
Laptop Removal Requirement
Because laptop screening rules affect how you pack and move through security, it helps to know when you’ll need to remove your laptop from a backpack.
You’ll often remove it if asked, if it’s not in a clear compartment, or when using older X-ray lanes. Follow officer instructions and prepare to place the device in a bin.
- Airline security may request removal
- Non-clear bags usually require removal
- Older lanes need separate screening
TSA-Approved Laptop Bags
Security checkpoints often dictate how you pack, so choosing a backpack built for TSA laptop screening can save time and hassle.
Pick one with a dedicated, padded laptop compartment that lays flat or zips open for inspection. Look for TSA-friendly labeling, easy-access pockets, and sturdy construction.
That way you’ll move through security faster and protect your device without fumbling or repacking.
Preparing Devices Properly
If you want a smoother, faster checkpoint experience, prep your laptop and other electronics so they’re ready for inspection: power them on if asked, remove them from sleeves that don’t lie flat, and place them in the backpack’s padded compartment or an easy-access pocket that zips open to lay flat for TSA screening.
Follow these tips:
- Keep chargers and cables organized separately.
- Use a thin, removable sleeve for quick access.
- Remove tablets and e-readers when directed.
Packing Liquids and Gels in a Backpack
When you pack liquids and gels in your backpack, keep accessibility and rules top of mind so you can get through screening quickly and avoid spills.
Place all containers 3.4 ounces (100 ml) or less in a single clear quart-sized bag, seal it, and position it near the top for removal.
Double-bag leak-prone items, use travel-size bottles, and check airport guidelines beforehand.
Organizing Electronics and Cords for Faster Security
Because TSA and other checkpoints want quick visual checks, keep your laptop, tablet, and any larger devices in an easily accessible pocket or at the top of your backpack so you can slide them out or present them without digging.
Pack chargers and cords in a small pouch, label cables, and use cable ties to prevent tangles.
- Use a dedicated tech pouch
- Pre-charge devices
- Keep chargers reachable
Packing Medications, Medical Devices, and Travel Documents
Although you might feel pressured to cram everything into the main compartment, pack medications, medical devices, and travel documents in dedicated, easy-to-reach spots so you can access them quickly during travel and at security.
Keep prescriptions in original containers, bring copies of prescriptions and doctor notes, store devices with protective cases, and place passports and boarding passes in a front pocket for swift retrieval.
How to Pack Chargers and Power Banks Safely
If you want your devices charged and your gear safe, stow chargers and power banks where they’re protected, accessible, and compliant with airline rules.
Keep power banks in carry-on, check capacity limits, and pack cords in a small pouch for quick screening.
- Tape exposed connectors and pack separately.
- Use original or certified chargers.
- Label high-capacity batteries and know airline watt-hour rules.
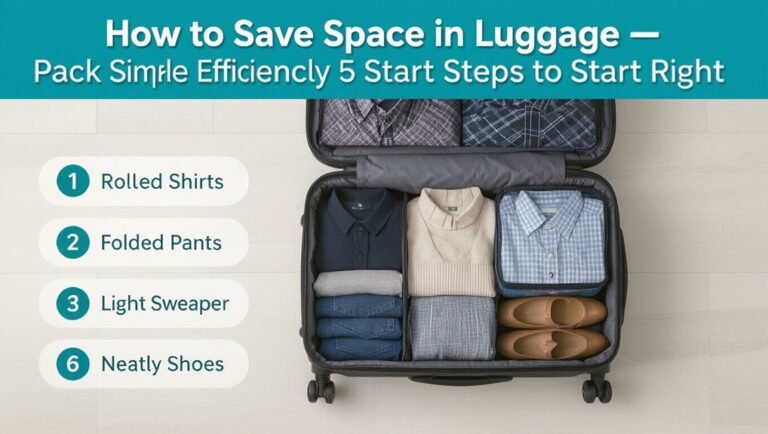
Packing Clothing and Shoes to Maximize Space
Start by rolling your clothes tightly to cut bulk and keep wrinkles down.
Pack versatile layers and neutral pieces so you can mix outfits without extra items.
Slip your one pair of multi-use shoes into a shoe bag or against the pack’s back panel to save space and protect fabrics.
Roll Clothes Efficiently
Roll your clothes tightly to compress fabric and create predictable, space-saving bundles that fit neatly into a backpack. You’ll save space, prevent wrinkles, and spot gaps for small items.
Roll by outfit or fabric type so unpacking’s faster.
- Roll shirts and light layers together
- Tuck socks/underwear inside rolls
- Use elastic bands or packing cubes to keep rolls compact
Choose Versatile Footwear
Once your clothes are rolled and tucked, pick shoes that do double duty to keep your pack light and organized.
Choose a neutral pair you can wear for walking, casual dinners, and light hikes. Pack one compact dressier shoe if needed.
Stuff socks or small items inside shoes to save space, and use shoe bags to keep clothes clean and separated.
How to Use Compression Cubes Without Problems
Compression cubes keep your bag organized and save space, but you’ve got to pack them smart to avoid wrinkles and busted zippers.
Roll, don’t fold, delicate items and layer heavier pieces beneath. Don’t overstuff a cube; leave a little give for the zipper.
Roll delicate items instead of folding, layer heavier pieces underneath, and avoid overstuffing—leave room for the zipper.
Use a laundry bag for dirty clothes to stop odors and snags.
- Roll soft garments
- Balance weight
- Protect zippers
Security‑Friendly Backpacks: Features That Speed Screening
Choose a backpack with a lay-flat laptop compartment so you can open it without rummaging and slide your device out quickly.
Look for quick-access zipper panels that let you reach essentials and show contents fast at security.
Keep metal hardware minimal to avoid extra alarms and delays.
Lay-Flat Laptop Compartment
A lay-flat laptop compartment lets you slide your computer out in one smooth motion so it can stay in the bag while passing through airport X‑ray lanes.
You’ll save time, avoid removing protective sleeves, and keep cables organized. Choose a padded, lockable design that fits your laptop snugly.
- Speeds TSA screening
- Protects device during handling
- Keeps accessories contained
Quick-Access Zipper Panels
When you’re rushing through security, quick-access zipper panels let you open just the section you need without dumping the whole bag, so you get through checkpoints faster and with less fuss.
Use designated exterior pockets for documents, boarding passes, and small electronics so TSA agents can inspect items rapidly.
Choose backpacks with smooth, snag-free zippers and clear internal organization to speed screening.
Minimal Metal Hardware
If you want to get through security faster, go for backpacks with minimal metal hardware—fewer buckles, snaps, and exposed zippers means fewer alarms and less time spent at checkpoints.
You’ll pass through scanners smoothly, avoid extra pat‑downs, and keep travel stress low. Choose lightweight plastic clips, hidden zipper pulls, and magnetic closures to stay TSA‑friendly.
- Plastic clips over metal
- Hidden zipper pulls
- Magnetic closures
What to Do If TSA Asks to Inspect Your Backpack
Though you’ll usually breeze through security, occasionally TSA will ask to inspect your backpack—stay calm, cooperate, and you’ll get through faster.
Step aside politely, follow instructions, and open compartments as requested. Remove electronics or liquids if asked.
Ask concise questions if unsure. Watch the process, but don’t interfere.
Once cleared, repack efficiently and thank the officer before proceeding.
How TSA PreCheck Changes Backpack Screening
If you have TSA PreCheck, you’ll move through shorter security lines and won’t need to remove your backpack as often.
That means fewer bag inspections and less fuss over small items.
Still, know what’s allowed in your carry-on so you don’t slow the line for others.
Faster Security Lines
When you have TSA PreCheck, you’ll move through security faster and won’t need to remove laptops, liquids, or sometimes even your backpack. This changes how you pack and what you place in easy-to-access compartments.
You’ll prioritize quick access, pack heavier items securely, and organize essentials for rapid retrieval.
- Place electronics near the top
- Keep liquids grouped and sealed
- Stow travel documents where visible
Less Bag Inspection
Because TSA PreCheck speeds screening and reduces required item removals, your backpack usually faces fewer hands-on inspections and stays closed more often.
You’ll move through checkpoints with less pat-down risk, and agents typically skip opening carry-ons unless alarms trigger.
That lowers wear on zippers and privacy intrusion, and it reduces chances of item shifting or accidental loss during manual checks.
International Travel: How Foreign Airports Treat Backpacks
Although airports vary widely, you’ll usually find that security and gate agents treat backpacks like other carry-ons, checking size and contents rather than the bag’s style.
You should expect similar X-ray and liquid rules, but enforcement can differ by country. Know local limits, pack accessibly, and be ready to gate-check if space’s tight.
- Check local size limits
- Pack liquids accessibly
- Be prepared to gate-check
Airline‑Specific Quirks and Baggage Fee Traps to Watch
If you fly with different carriers, you’ll notice each one treats backpacks and carry-ons a little differently—so check policies before you pack.
Airlines vary size rules, gate‑checked practices, and whether a personal item qualifies as a bag. Low‑cost carriers often charge for overhead space or enforce strict weight limits.
Confirm fees, boarding group rules, and carry‑on definitions to avoid surprise charges.
How to Handle Layovers and Multiple Carriers With One Backpack
When you’re traveling with layovers or switching carriers, plan for differing carry‑on rules, connection times, and potential gate checks so your single backpack gets you through without stress.
Pack essentials in easily reachable pockets, keep boarding passes and ID handy, and confirm size allowances before boarding.
- Verify carry‑on rules per airline
- Use a compact daypack organizer
- Expect occasional gate checks and adapt quickly
Tips for Flying With Camera or Photography Backpacks
1 smart move is to treat your camera backpack like fragile carry‑on: keep it with you, pack lenses and batteries in padded compartments, and store your most important gear in an easily reachable pocket so you can pull it out for security or quick shots.
Label gear, remove batteries for screening, use clear cases for memory cards, and lock zippers while keeping straps compact under seats.
How to Travel With Sports Gear or Bulky Items in a Backpack
Photography gear and sports equipment both demand thoughtful packing, but bulky items bring different challenges: size, shape, and airline rules.
You’ll want protective padding, flexible straps, and a plan for oversized items—check airline policies and gate-check if needed. Pack smartly to balance weight and save space.
Bring protective padding, adjustable straps, and an oversized-item plan—check airline rules and pack to balance weight and save space.
- Use soft cases or wrapables
- Distribute weight evenly
- Keep receipts and dimensions handy
Traveling With Children: Using Backpacks as Your Primary Carry‑On Strategy
If you’re traveling with kids, pack backpacks to make transit smoother and keep essentials within reach; assign each child a small daypack for snacks, a change of clothes, and comfort items while you carry a larger family backpack with first-aid, documents, and shared gear. You’ll organize gear, reduce gate chaos, and keep ID and meds accessible.
| Who | Pack | Key item |
|---|---|---|
| You | Family pack | First-aid |
| Child | Daypack | Snack |
| Child | Daypack | Change |
Packing for Red‑Eyes and Quick Weekend Trips in One Backpack
For red-eye flights and quick weekend escapes, choose a single backpack that balances sleep comfort, a change of clothes, and the essentials you’ll need on arrival.
Pack soft, compressible items near the back panel for cushioning. Put a fresh outfit and toiletries in an easy-access pocket, and keep electronics and travel documents close to the top.
- Sleep kit: eye mask, earplugs, travel pillow
- Quick outfit and socks
- Toiletries in a leakproof pouch
How to Choose a Backpack That Reliably Meets Carry‑On Rules
Wondering which backpack will actually fit in the overhead bin? Choose one within airline size limits (measure height, width, depth) and note exterior pockets that add bulk.
Pick a model with a structured but compressible shape so it slides into tight spaces. Confirm carry-on dimensions on your carrier’s website before you travel, and test packing to guarantee it closes comfortably.
Durable Materials and Theft‑Resistant Features for Travel Packs
Pick a backpack built from tough fabrics like 500–1000D nylon or high-denier polyester with taped seams and reinforced stress points. This will cut down on tears, abrasion and water seepage.
Choose lockable zippers, RFID-blocking pockets, and a slash‑resistant base or straps to protect gear and data.
- Lockable YKK zippers
- RFID-lined pocket
- Slash‑resistant straps and panels
What to Do If Your Backpack Is Gate‑Checked
If your backpack gets gate‑checked, act quickly: confirm the gate agent tags it clearly with your name and a fragile or priority sticker if possible.
Tuck any valuables or medications into a small carry pouch you keep on your person, and snap a photo of the bag and its tag for your records.
Keep the claim stub, note the flight number and seat, and stay near the gate until boarding.
Claims, Damage, and Lost‑Item Steps for Gate‑Checked Backpacks
Once you’ve kept the claim stub and snapped a photo at the gate, know how to handle things if your backpack is damaged, lost, or delayed.
Contact the airline immediately, file a report, and keep receipts for essentials. Follow up persistently and escalate if needed.
- File a damage/loss report before leaving the airport
- Keep all documentation and photos
- Ask about interim reimbursement and tracking
Seven Common Mistakes That Get Backpacks Gate‑Checked
A few simple errors are behind most backpacks getting gate‑checked, and knowing them helps you avoid handing your bag over at the jet bridge.
You cram oversized items, ignore airline size rules, overpack heavy gear, attach prohibited liquids or batteries, leave bulky tripods or umbrellas exposed, fail to use compression, or misplace essential documentation.
Fix these and you’ll board with your pack.
Quick Checklist: Prepare Your Backpack for Airport Travel
You’ve learned the common mistakes that force backpacks onto jet-bridge carts; now get your pack ready with a short, actionable checklist before you leave for the airport.
- Remove oversized items and consolidate to meet size limits.
- Place liquids in a clear, resealable bag and keep it accessible.
- Secure chargers, documents, and valuables in easy-to-reach compartments for screening and onboard use.
Where to Check Live TSA and Airline Carry‑On Rules
Check two sources before you leave: the TSA website for federal rules (liquids, batteries, and screening procedures) and your airline’s carry-on policy for size, weight, and gate-check practices.
Also check live updates: airline mobile apps, your reservation page, and TSA social feeds for delays or policy tweaks.
Confirm measured backpack dimensions and battery rules to avoid surprises at check‑in or the security line.
Frequently Asked Questions
Can a Backpack With External Water Bottle Pockets Be Denied at Security?
Yes — it can. If TSA officers believe those external pockets contain prohibited items or obstruct inspection, they’ll ask you to remove items or open the backpack; you’ll comply, repack, or risk having the bag searched or denied.
Are Fashion Backpacks With Metal Studs Allowed Through TSA?
Yes — you can bring a fashion backpack with metal studs through TSA, provided the studs aren’t sharp weapons; you’ll need to remove or explain any suspicious metal items during screening, and carry-on size and liquid rules still apply.
Do Inflatable Neck Pillows Inside Backpacks Need Separate Screening?
No, they usually don’t need separate screening; you’ll leave inflatable neck pillows inside backpacks unless TSA officer asks for removal, but be ready to take them out for inspection if they trigger alarms or obscure other items.
Can Duty‑Free Purchases Be Kept in a Carry‑On Backpack?
Yes — you can keep duty‑free purchases in your carry‑on backpack, but you’ll need receipts and sealed security bags for liquids over 100ml when transferring flights; keep them accessible for inspection and follow airline and customs rules.
Will Backpacks With Built‑In Locks Delay TSA Screening?
They usually won’t, but built‑in locks can slow screening if TSA needs access. You’ll be asked to open it or TSA may cut/disable non‑approved locks; use TSA‑approved locks to avoid delays and hassle.
Conclusion
In most cases you can bring a backpack as a carry‑on, but remember TSA focuses on security while airlines set size limits. Measure your pack, know your airline’s rules, and pack liquids and electronics accessibly to speed screening. If a gate agent asks you to check it, follow the claims steps and document damage immediately. Use the checklist in this guide before you leave home, and always verify current TSA and airline policies before your trip.