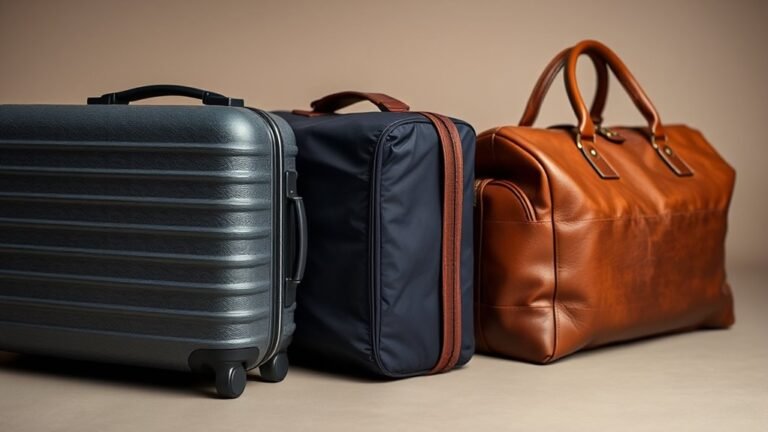
How to Replace Luggage Handle at Home
You can replace a luggage handle at home by identifying the handle type, sourcing a compatible part, then removing fasteners or drilling rivets to free the old unit. Support internal plates, fit the new handle, insert matching screws or rivets, and test the telescoping action and locks. Reinforce weak mounting points with backing plates or epoxy as needed, and lubricate moving parts for smooth operation. Keep going to learn tools, measurements, and troubleshooting tips.
What Search Intent This Guide Satisfies And Format Overview
Because you’re here, you probably want a quick, practical solution for replacing a broken luggage handle rather than a thorough exploration of brand history or buying guides.
Because you’re here, you want a quick, practical fix for a broken luggage handle—no fluff, just steps.
You’ll find this guide aimed at DIYers who need clear, actionable steps, tools lists, and troubleshooting tips. It targets people searching with intent to fix now, not compare models.
The format uses bite-sized sections: required tools, parts sourcing, step-by-step replacement, common issues, and safety notes. Each section’s concise instructions let you scan or follow sequentially.
Links and photos are suggested where useful so you can repair confidently and efficiently.
Quick Answer: Replace A Luggage Handle In Simple Steps
You’ll need simple tools and replacement parts to get started.
First, remove the old handle by unscrewing or popping out fasteners and keeping track of hardware.
Then, install the new handle, aligning it, securing the fasteners, and testing for smooth operation.
Tools And Materials
Before you start, gather the right tools and parts so the repair goes smoothly: a screwdriver set (Phillips and flathead), a small socket or nut driver, pliers, replacement handle or pull assembly, and a few spare screws or rivets in case originals strip or break.
Also grab a flashlight or headlamp for tight spots, masking tape to label parts, a magnet tray to keep fasteners, and a clean cloth to protect the shell.
If your handle uses rivets, have a small drill and matching replacement rivets or pop rivets. Check that the new handle matches hole spacing and load rating.
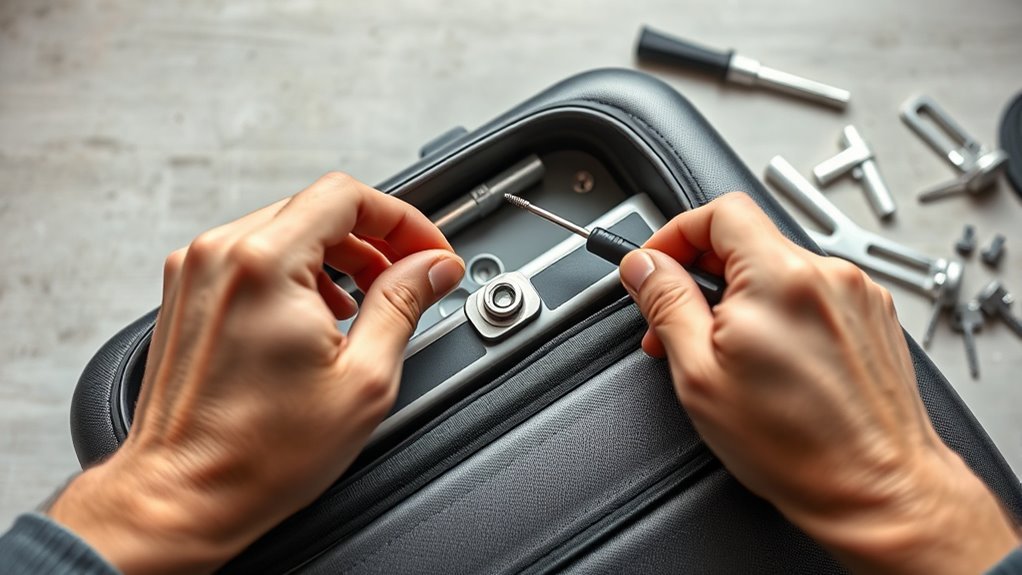
Remove Old Handle
With your tools and replacement parts at hand, you can start removing the old handle. Lay the suitcase flat and open any zipper flaps or interior linings to expose screws or rivets.
Use the appropriate screwdriver or socket to loosen and remove fasteners; keep them organized for reference.
If rivets hold the handle, drill them out carefully, avoiding fabric or shell damage.
Detach the telescoping rod from its housing by releasing catches or sliding pins.
Inspect surrounding material for cracks or corrosion and clean the area.
Set the old handle aside and confirm the mounting points are ready for the new handle.
Install New Handle
Ready to fit the new handle? Line up the replacement so mounting holes match the suitcase openings.
Insert screws or rivets, keeping components flush and aligned. If the handle has a spring or telescoping parts, compress them slightly to seat guides into their channels.
Hand-tighten fasteners first, then tighten securely with a screwdriver or wrench—don’t over-torque plastic parts.
Reattach any trim plates or covers, snapping or screwing them into place.
Test the handle by extending, retracting, and lifting with moderate weight to confirm smooth operation and firm attachment. Make minor adjustments if you feel wobble or binding.
How To Diagnose The Exact Handle Problem (Broken, Loose, Jammed)
Once you’ve inspected the telescoping mechanism and tested the pull, you’ll be able to tell whether the issue is a broken, loose, or jammed handle and what tools you’ll need to fix it.
After inspecting the telescoping mechanism and testing the pull, you’ll know if the handle is broken, loose, or jammed.
Check for cracking, bent rods, missing screws, or debris. Move the handle through its full range and listen for grinding or clicking. Wiggle connections to isolate play versus structural failure. Note whether retraction spring tension is absent or if a foreign object blocks travel.
- Visible cracks or snapped plastic
- Excessive side-to-side play at joints
- Handle won’t extend or retract smoothly
- Stuck mid-way with audible obstruction
- Missing or stripped fasteners
Identify Your Handle Type: Telescoping, Side, Top, Or Strap
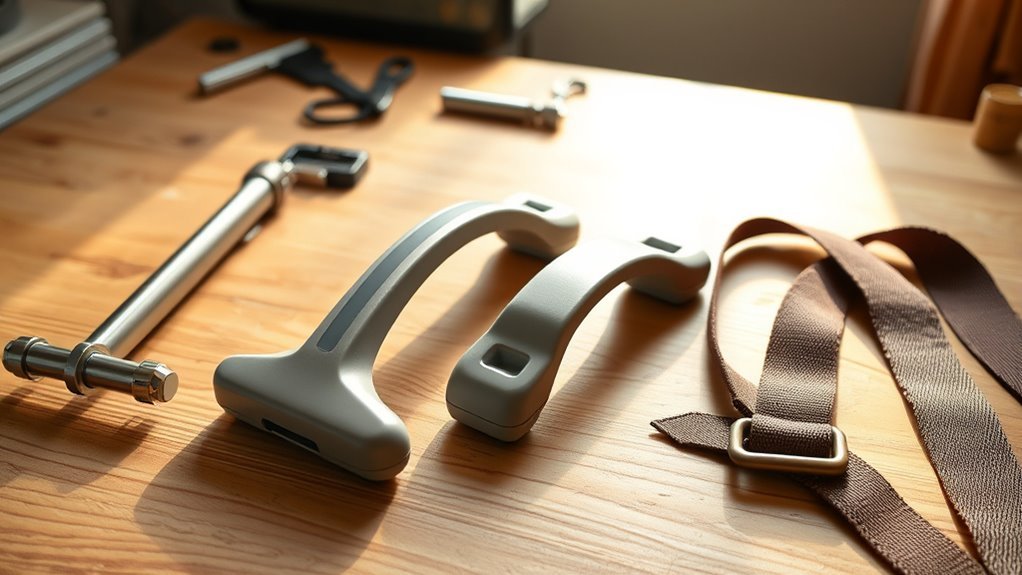
Before you start disassembly, identify which handle type you’re dealing with—telescoping, side, top, or strap—because each requires different parts and repair steps.
Check telescoping handles for pull rods, locking buttons, and inner tubes; they retract into a casing.
Inspect side and top molded or fixed handles for rivets, screws, or housing that attach them to the shell.
Look at straps for sewing points, buckles, or webbing worn through.
Note whether mounts are external or recessed and whether covers hide fasteners.
Photograph the area and test movement to confirm type before gathering tools or removing hardware.
Find Your Suitcase Model And Compatible Parts
After you’ve identified the handle type and documented how it’s attached, locate your suitcase model so you can order compatible replacement parts. Check the luggage tag, stamped model number, or inside lining for labels.
Identify your suitcase model before ordering parts—check tags, stamped numbers, or inside lining for model information.
If none are available, measure dimensions and note material, color, and hardware finish.
Contact the manufacturer or search their parts catalog online using those specifics. Verify part numbers, mounting hole spacing, and weight rating before buying.
Keep photos and measurements handy when ordering to avoid returns.
- Model number or name from label
- Measurements: hole spacing, length, width
- Material and color of shell
- Hardware finish and screw type
- Weight rating or load spec
Tools And Supplies You’ll Need For Most Handle Replacements
When you’re ready to swap the handle, gather a small set of tools and supplies so the job goes smoothly: a screwdriver set (Phillips and flathead), a Torx or hex key if required, needle-nose pliers, a utility knife, and a cordless drill with appropriate bits for stubborn rivets or screws.
Also have replacement screws, rivets, or mounting hardware matched to your model, plus washers and nylon spacers if needed. Keep a small container for removed fasteners, masking tape for marking, and a soft cloth to protect shell finishes.
Safety glasses and work gloves will protect your hands and eyes.
How To Measure The Existing Handle And Mounting Points Accurately
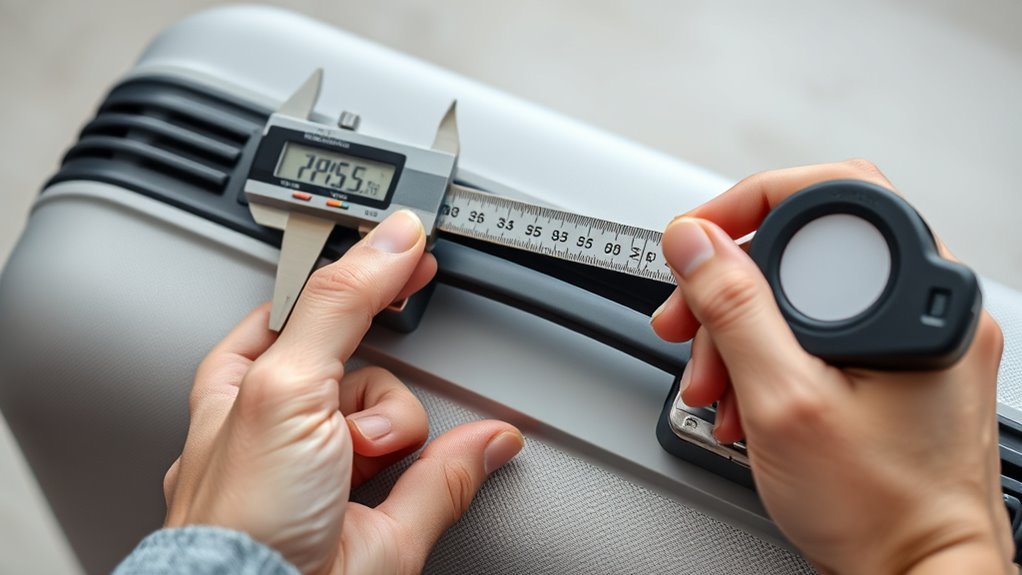
With your tools laid out, start by removing the old handle and keeping its screws and any spacers in your container so you can match sizes later.
You’ll measure mounting hole spacing, handle length, grip width, and any recessed pocket dimensions. Use calipers for precision and a ruler for quick checks. Record each measurement clearly.
- Measure center-to-center distance of mounting holes
- Measure total handle length and exposed grip length
- Measure screw diameter and thread pitch if possible
- Measure depth and shape of any recessed mounting pocket
- Photograph the mounting area with a ruler for reference
Where To Buy Replacement Handles And Compatible Parts Online
You can find replacement handles and mounting kits on major marketplaces like Amazon, eBay, and specialty luggage part sites such as LuggagePros or PartSelect.
Check compatibility by matching mount spacing, screw sizes, and handle style to your measurements so you don’t get the wrong part.
Compare prices, shipping speed, and return policies before you buy to balance cost and convenience.
Where To Buy Online
Looking for replacement handles online? You can find parts from specialty retailers, big marketplaces, and manufacturer stores that ship worldwide. Search product photos and part numbers, read reviews, and check return policies before buying. Order tools and fasteners at the same time to avoid extra trips.
- Manufacturer websites (official spare parts)
- Luggage repair shops with online catalogs
- Major marketplaces (filter by seller ratings)
- Hardware stores stocking rivets and screws
- Specialty travel-accessory shops
Buy from sellers offering clear photos, measurements, and easy returns. Keep receipts and tracking—so replacements arrive when you need them.
Compatibility And Sizing
How do you know a replacement handle will actually fit your suitcase? Start by measuring the existing handle’s mounting plate dimensions, hole spacing, tube diameter, and overall extended/retracted lengths.
Check your suitcase model number and manufacturer specs—many brands list compatible parts. When shopping online, use filters for brand, model, and measurements; read product descriptions and diagrams carefully.
Look for universal handles that list exact sizes or adjustable mounts. Save photos and measurements to compare with listings, and confirm return policies in case of mismatch.
If unsure, contact sellers with your details; a quick reply can prevent a wrong purchase.
Price And Shipping Options
Where should you shop for replacement handles without overpaying or waiting weeks for delivery? You’ll want reliable sellers that list exact dimensions, materials, and shipping speed. Compare prices across marketplaces, manufacturer sites, and specialty parts stores.
Look for free or expedited shipping, clear return policies, and customer photos showing fit. Factor in import fees for overseas sellers. Read recent reviews to confirm part compatibility and arrival time.
Prioritize sellers offering tracking and local warehouses if you need it fast.
- Manufacturer websites for guaranteed fit and OEM pricing
- Major marketplaces with fast shipping filters
- Specialty luggage-parts shops
- Local retailers with pickup options
- Used-parts listings for bargains
How To Decide Between OEM, Generic, And Universal Replacement Handles
When you’re choosing a replacement handle, weigh fit, durability, and cost so you get a solution that actually works for your luggage.
Decide by matching your priorities: pick OEM if you want exact fit, brand warranty, and original aesthetics. Choose generic if you need a close fit at lower cost and you aren’t picky about matching finishes.
Opt for universal when the original part’s unavailable and you value adjustable mounts and broad compatibility.
Check mounting hole patterns, tube diameter, and locking mechanisms.
Read materials and weight ratings to guarantee durability.
Measure carefully before ordering to avoid returns or poor performance.
How Much A DIY Replacement Typically Costs Vs Professional Repair
You’ll usually pay much less for parts when you go DIY—basic handles run $10–$40 depending on type.
Expect to spend 30–90 minutes replacing it yourself versus leaving it with a pro, which adds labor costs that often push total repair above $75–$120.
Factor in long-term value: DIY saves money now, but a pro may offer sturdier installation or warranty that’s worth the extra cost for frequent travelers.
DIY Parts Cost
On average, replacing a luggage handle yourself will cost you between $10 and $40 for parts, while a professional repair or manufacturer service typically runs $40 to $120 or more depending on labor and shipping.
You’ll save money by sourcing compatible telescoping handles, screws, rivets, sliders, or plastic end caps online or from salvage suitcases. Compare part quality and return policies so you don’t buy a mismatched assembly.
- Replacement telescoping handle assembly: $8–$30
- Mounting brackets or plates: $3–$12
- Screws, rivets, or fasteners: $1–$6
- End caps or grips: $2–$10
- Shipping or expedited parts: $0–$15
Labor Time Comparison
How long will it take you to swap a luggage handle versus sending it out for repair? You’ll typically spend 30–90 minutes on a DIY replacement, depending on tools and experience. Removing rivets or screws, aligning the new handle, and testing takes most of that time.
A shop turnaround often ranges from 2 days to 2 weeks, factoring in drop-off, technician scheduling, and parts ordering.
Labor cost at a repair shop can be $30–$80 plus parts, while your time is primarily free beyond tools.
Choose DIY for speed and control; pick pro service if you prefer convenience and guaranteed workmanship.
Long-Term Value
Although a DIY handle swap can take time upfront, it usually saves you money over the long run. You’ll pay mainly for a replacement handle and basic tools, avoiding labor markups.
Over multiple repairs, DIY amortizes tool costs and teaches you to spot simple fixes early, extending luggage life.
- Replacement handle: $10–$30
- Basic tools (spread across projects): $5–$20
- Professional repair labor: $40–$100
- Time per DIY repair: 20–60 minutes
Frequent DIYs reduce per-repair cost and can double the usable life of budget luggage
Prepare Your Workspace And Protect The Finish
Before you start, clear a well-lit, flat surface and lay down a soft protective layer—like a microfiber towel or cardboard wrapped in a clean cloth—so you won’t scratch the luggage finish or lose small parts.
Clear a well-lit workspace and lay a soft protective layer to avoid scratches and lost parts.
Gather tools (screwdrivers, pliers, small containers), a magnetic tray or labeled containers for screws, and masking tape for marking positions.
Keep a flashlight and phone for close photos.
Work near an outlet if you’ll use electric tools.
Remove jewelry and wear gloves if the finish is delicate.
Maintain good posture and slow, deliberate movements to avoid slips that could dent or scuff the case.
How To Safely Remove The Luggage Contents And Access The Handle Area
Once you’ve cleared your workspace and gathered tools, open the suitcase fully and empty it methodically, removing loose items, packing cubes, and any removable liners or straps so you won’t misplace small parts or damage the interior while working. Check all pockets and zip compartments, and set aside screws, tags, and small pieces in labeled containers.
If the lining is stitched, note seam locations before lifting; if it’s clipped, release clips gently. Lean the case on its side to expose the handle area. Keep a magnet tray nearby for metal bits and lay a soft cloth under the exposed area.
- emptied pockets
- labeled containers
- removed liners
- side-leaning case
- magnet tray
Remove A Telescoping Luggage Handle Assembly (Step-By-Step)
Start by finding the release mechanism—usually a button, latch, or small screw near the handle housing—and make sure the handle is fully extended so you can access it.
Press or unscrew the release to free the telescoping tubes, then slide the inner and outer sections apart.
Once disengaged, lift the entire handle assembly out of the suitcase and set it aside for replacement.
Locate Release Mechanism
To remove the telescoping handle, first find the release mechanism that locks the inner tubes in place — it’s usually a small button, lever, or pin inside the top grip or along the side rails. You’ll inspect the grip, feel for a recessed switch, and look along rails where a catch or spring might sit.
Use a flashlight and magnifier if needed. Don’t force anything; locating the mechanism prevents damage.
- Check under the top grip for a hidden button
- Run fingers along rails for a seam or notch
- Look for small screws near the grip
- Shine light into tube openings
- Note any spring tension or click
Remove Handle Assembly
Ready to take the handle out? You’ll work fast and careful: fully extend the tubes, press release buttons or levers you located, then slide the inner assembly upward until it clears the housing. Support the base so the suitcase won’t tip. If screws secure end caps, remove them first. Pull straight to avoid bending rails. Inspect rails and bearings as you withdraw the assembly. Clean debris, note damaged parts, and set the old unit aside for disposal. Reassemble in reverse when installing the new handle.
| Step | Tool | Action |
|---|---|---|
| 1 | Hands | Extend tubes |
| 2 | Screwdriver | Remove caps |
Replace A Side Or Top Carry Handle (Step-By-Step)
When you’re ready to replace a side or top carry handle, gather the replacement handle, a screwdriver or nut driver, pliers, and a small container for screws so nothing gets lost.
You’ll remove the old hardware, fit the new handle, and secure it in place in a few straightforward steps.
Start by removing visible screws or nuts and keep fasteners in the container.
Begin by removing the visible screws or nuts and place all fasteners in a small container.
If the handle uses threaded studs, hold the backside with pliers while you turn the nuts.
Align the new handle, insert fasteners, and tighten evenly.
Test the handle for movement and re-tighten if needed.
- Remove exterior screws
- Retain fasteners
- Hold studs with pliers
- Align and insert new handle
- Tighten and test
How To Replace Internal Mounting Plates And Rivets
Although the exterior handle looks simple, you’ll need to access and replace the internal mounting plates and rivets to restore proper support and prevent the handle from pulling free. Remove interior lining, note plate orientation, and drill out old rivets. Fit new plates flush inside, use matching rivets or screws, and hammer or press rivets firmly. Test for movement, then reseat lining.
| Step | Tool | Tip |
|---|---|---|
| Access | Screwdriver | Peel lining slowly |
| Remove | Drill | Use correct bit |
| Fit | Plates | Match orientation |
| Secure | Rivets | Press or hammer |
| Test | Handle | Check for play |
How To Fit And Align A New Telescoping Luggage Handle Correctly
Now that the mounting plates are secure, check the alignment and fit of the new telescoping handle by sliding it in and out to guarantee the tubes run parallel and don’t bind.
Tighten any adjustable screws or set pins so the handle sits snugly without wobble.
Finally, fully extend and collapse the mechanism several times and lock it in place to confirm it’s secure and operates smoothly.
Check Alignment And Fit
Before you secure the new telescoping handle, test its movement and alignment against the suitcase so it slides smoothly without wobble or binding. You’ll want to extend and retract it fully, watching for uneven gaps, rubbing, or tilted sections.
Check both tubes sit parallel and the mounting plates align with predrilled holes. If something’s off, loosen fasteners, reposition, and retest until movement is centered.
- Extend and retract slowly, watching for tilt
- Inspect gaps between tubes and suitcase shell
- Verify mounting plate holes line up perfectly
- Feel for lateral play at full extension
- Adjust shims or spacers as needed
Secure And Test Mechanism
With the handle properly aligned and sliding smoothly, it’s time to fasten it securely and run functional checks. Tighten mounting screws evenly, reattach clips, and torque to manufacturer specs. Extend and retract the tubes fully, listening for catches. Lock the handle in each position to confirm detents hold. Check interior brackets for shifting and re-tighten if needed. Roll the suitcase and tilt to stress the mechanism. Fix squeaks with a drop of lubricant and wipe excess.
| Checkpoint | Action |
|---|---|
| Screws | Tighten evenly |
| Locks | Engage fully |
| Slide | Smooth motion |
| Bracket | No play |
| Roll test | Stable handling |
How To Reattach Handles Using Screws Vs Rivets Vs Bolts
When reattaching a luggage handle, you’ll choose between screws, rivets, or bolts based on the damage, the handle’s design, and how much load it needs to bear. Each fastener type has distinct strengths and installation steps you should know.
Use screws for easy removal and adjustable fits. Rivets are suitable for permanent strong joins on thin shells. Bolts with nuts provide maximum clamping and replaceability.
Match fastener size to existing holes, use washers on soft materials, and pre-drill where required. Tighten without crushing the shell, and check alignment before finalizing.
- Screws: removable, requires tapped hole
- Rivets: permanent, uses rivet gun
- Bolts: strongest, needs clearance
- Washers: distribute pressure
- Pre-drill: prevents cracking
How To Adjust And Test Handle Movement And Locking Mechanisms
Although the mounting hardware is secure, you’ll still need to adjust and test the handle’s movement and any locking mechanisms to guarantee smooth operation and safety.
Although mounted securely, adjust and test the handle and locks to ensure smooth, safe operation before use.
First, extend and retract the handle several times, feeling for binding, wobble, or uneven travel. Tighten or loosen mounting screws incrementally until motion is smooth but not sloppy.
Check telescoping locks or push-button catches: clean contacts, apply a drop of lubricant, and verify springs compress and release fully.
Test locks under light load, then with packed weight, confirming they hold and release reliably.
Finish with a final full-extension check and visual inspection for play.
Common Mistakes When Installing A New Luggage Handle And How To Avoid Them
Because a seemingly small error can ruin your repair, pay attention to fit, fasteners, and alignment from the start. You’ll avoid common traps by checking measurements, using correct screws, and testing movement before finalizing.
Don’t force parts, skip threadlocker when needed, or overlook padding that prevents chafing. Take your time, keep parts organized, and re-check torque so the handle won’t wobble or strip later.
- Mismatched screw sizes causing loose mounts
- Over-tightening that cracks plastic or strips threads
- Ignoring gasket or cushion placement leading to rattles
- Skipping trial fits before final assembly
- Forgetting to verify handle alignment and travel
How To Repair A Jammed Telescoping Handle Without Full Replacement
Start by identifying exactly where the telescoping handle is sticking so you can focus your efforts.
Once you’ve located the jammed section, clean any debris, apply a light lubricant sparingly, and work the tubes back and forth to realign the rails.
If the rails are bent, gently straighten them with pliers or a soft mallet before testing the handle again.
Diagnose The Jammed Section
When your telescoping handle sticks, the first step is to isolate where it’s jammed so you can fix it without replacing the whole assembly. Extend and retract the tubes slowly while watching and feeling for the exact point of resistance.
Pinpoint whether the bind is at the grip, middle tube, or base. Inspect for dents, bent edges, foreign debris, or misaligned plastic guides.
Test with the locking button depressed and released to see if the mechanism catches. Note any uneven movement or scraping sounds so you know what to clean or straighten next.
- Visible dent on outer tube
- Grit lodged in seam
- Bent inner tube edge
- Sticky locking button
- Scraping metal-on-metal
Lubricate And Realign Rails
Now that you know exactly where the handle binds, you can free the rails by cleaning, lubricating, and gently realigning them.
First, extend the handle to the stuck section and wipe away dust and grime with a soft cloth and cotton swabs; use isopropyl alcohol for stubborn residue.
Inspect for dents or bends.
Apply a light, silicone-based lubricant inside each tube—avoid heavy oils that gum up.
Work the sections in and out several times to distribute lubricant.
If rails are slightly misaligned, press gently with padded pliers or tap with a mallet through a block until movement is smooth.
Test repeatedly.
How To Reinforce Weak Mounting Points For Long-Lasting Repairs
If your luggage’s handle mounts feel loose or cracked, reinforce them before reinstalling the handle so the repair actually holds up; you’ll prevent repeat breaks and keep stress off the new parts.
Clean the area, trim frayed edges, and assess whether plastic, fabric, or metal needs backing. Use appropriate reinforcement—epoxy with a fiberglass patch for plastic shells, a metal washer plate behind thin panels, or heavy-duty fabric tape for inner seams.
Secure fasteners with threadlocker or locknuts. Test by applying load gradually.
- Clean and dry the mount area
- Add a backing plate or washer
- Apply epoxy/fiberglass patch
- Reinforce seams with heavy fabric
- Tighten with threadlocker
How To Match Handle Color And Finish For A Neat Cosmetic Repair
First check the existing finish—gloss level, texture, and any wear—so you know what to match.
Pick a paint or dye that closely matches the color and sheen, testing on a scrap or hidden spot first.
After painting, carefully blend edges and apply a clear sealant to protect the repair and keep it looking seamless.
Assess Existing Finish
Wondering how to make the new handle blend in? You’ll first inspect the luggage finish closely: sheen, texture, wear, and any pattern. Note whether it’s glossy, satin, matte, leather-grain, or textured plastic. Check for scratches, sun-fade, or dirt that alter color perception.
Compare lighting—natural versus indoor—so you don’t misjudge shade. Photograph the area for reference when shopping or mixing finishes. Finally, decide if the handle needs surface prep like cleaning or light sanding to accept a finish match.
- glossy vs matte
- leather grain or smooth
- faded or original color
- textured scuffs
- lighting differences
Choose Matching Paint
Because a close color and sheen match hides the repair, start by identifying both the base color and the finish type—glossy, satin, or matte—before you shop. Then sample small swatches on hidden areas, letting them dry to confirm the match. Choose flexible, durable paint made for plastics or leather, depending on your handle. Pick a brush or applicator that suits the texture to avoid visible strokes. Keep notes of brand and color code for future touch-ups.
| Surface Type | Recommended Paint | Dry Time |
|---|---|---|
| Hard plastic | Flexible acrylic | 30–60 min |
| Faux leather | Leather dye | 15–30 min |
| Metal | Enamel spray | 1–2 hrs |
Blend And Seal Edges
After matching the color and finish, feather the paint into the surrounding area so the repair fades seamlessly into the original handle—work in thin, overlapping strokes and slightly thin the first and last coats to avoid visible ridges.
You’ll let each layer dry fully, then lightly sand with very fine grit to remove any nibs. Use a microbrush for tight joins and a soft cloth to wipe dust.
Seal with a thin clear coat matching sheen, applying two light layers. Inspect under good light and touch up tiny spots until edges disappear into the original surface.
- thin, overlapping strokes
- very fine sanding
- microbrush for seams
- soft cloth cleanup
- thin clear coat
How To Use Basic DIY Rivet And Metal-Repair Techniques Safely
When you tackle rivet and metal repairs on your luggage, work methodically and prioritize safety so small mistakes don’t turn into injuries or ruined pieces. Wear eye protection and gloves, secure the bag in a clamp or between blocks, and clear your workspace.
Match rivet size and material; drill out damaged rivets with a correctly sized bit, then deburr holes.
Use a hand riveter or hammer-set solid rivets as appropriate, keeping force controlled.
For bent brackets, use padded pliers and a flat surface to reshape slowly.
Inspect your work, test the handle under load, and re-tighten or replace fasteners as needed.
When To Replace The Whole Suitcase Instead Of Repairing The Handle
If the damage goes beyond the handle—like a cracked shell, broken frame, waterlogged lining, or persistent zipper and wheel failures—you should consider replacing the whole suitcase rather than repairing it. You’ll save time and often money when structural integrity, safety, or frequent faults occur.
Don’t patch a case that won’t protect contents or will fail again on a trip. Check warranty options and compare replacement cost versus cumulative repairs. Prioritize reliability for travel, especially for checked baggage or heavy use.
- Cracked polycarbonate shell with spreading fractures
- Bent or fractured internal frame rails
- Recurrent zipper separations
- Saturated, mildewed lining
- Multiple failing wheels and bearings
How To Troubleshoot Squeaks, Wobble, And Poor Locking After Install
Once you’ve confirmed the case itself is sound and decided on repair over replacement, you’ll want to address common post-install issues like squeaks, wobble, and poor locking to make sure the handle performs reliably.
Check fasteners for correct torque—loose screws cause noise and play; overtightening can bind mechanism. Inspect alignment of rails and sliders; misaligned parts bend or rub.
Lubricate moving surfaces with a light, non-staining silicone spray or dry PTFE, avoiding oils that attract dirt.
Test lock engagement repeatedly, adjusting striker plate or catch if it misses. Replace any stripped screws or worn plastic components rather than forcing fixes.
How To Maintain Your New Handle To Prevent Future Failures
Because regular care keeps the handle reliable, make a simple maintenance routine you can follow every few months: wipe tracks and rails to remove grit, check fasteners for proper torque, spray sliding parts with a dry PTFE or silicone lubricant, and exercise the handle through its full travel to spot binding or misalignment early.
Keep a small kit: microfiber cloth, hex wrench, lubricant, thread locker, and spare screws.
Inspect for corrosion, cracked plastic, or bent rails; tighten gently; replace worn parts promptly.
Store luggage upright to avoid stress on the handle and avoid overloading beyond rated capacity.
- Wipe debris from rails
- Lubricate sliding surfaces
- Tighten loose screws
- Swap damaged parts quickly
- Store upright and don’t overload
Quick Fixes And Temporary Handle Solutions For Travel Emergencies
When your telescoping handle jams or snaps mid‑trip, quick temporary fixes can keep you moving until you can make a proper repair. You’ll want compact, reliable solutions that require minimal tools and time.
Use a sturdy duct tape sling or wrap to secure the broken section to the case, keeping the handle extended for rolling. If the tube detaches, insert a wooden dowel or sturdy stick and tape it flush for grip and leverage.
For loose locks, tight zip ties can hold positions. Keep a small multi-tool, zip ties, duct tape, and a compact rod in your bag for emergencies.
Document Your Repair For Warranty Or Resale
If you want to protect a warranty claim or boost resale value, document the repair thoroughly: photograph the damaged area before you start, take step‑by‑step shots during disassembly and reassembly, and note parts used, dates, and any costs. Keep a simple repair log you can share with buyers or a manufacturer.
Label photos and store originals plus copies in cloud storage and a folder with receipts. Describe any modifications or replaced fasteners so future owners know what you did. Present clear, dated evidence to validate workmanship and parts provenance.
- Close-up of the broken handle area
- Each removed part laid out
- Serial/tag photo of the suitcase
- Receipt for replacement parts
- Final assembled handle from multiple angles
Further Resources: Video Guides And Part Suppliers
To make your repair easier and faster, tap into video walkthroughs for step‑by‑step visuals and reliable suppliers for the exact replacement parts you need. Search platform filters for your luggage brand and model, pause at key steps, and compare a couple of creators to confirm technique.
Use supplier photos, measurements, and SKU to verify fit — telescoping tubes, rivets, screws, and bushings must match. Bookmark reputable vendors, read return policies, and check reviews for genuine or OEM alternatives.
If in doubt, contact seller support with your photos. These resources cut guesswork and help you finish the job right.
Frequently Asked Questions
Can I Replace a Luggage Handle Without Voiding the Warranty?
Yes — you can sometimes replace a luggage handle without voiding the warranty, but you’ll need to check the warranty terms first, contact the manufacturer for guidance or authorized repair options, and keep receipts and original parts.
What Adhesives Are Safe for Cosmetic Handle Repairs?
You can use cyanoacrylate (super glue) for small cracks, epoxy for stronger bonds, and flexible PVC or contact adhesives for vinyl/leather trims; test compatibility on a hidden area first, and avoid solvent-based glues on plastics.
Can I Color-Match Handles With Spray Paint or Dye?
Yes — you can color-match handles with spray paint or dye, but you’ll need proper prep, compatible products for the material (plastic, leather, metal), test on scraps, use thin coats, and seal with a clear topcoat for durability.
How Do Airline Baggage Handlers Affect Handle Longevity?
Airline baggage handlers shorten handle life by tossing, yanking, and stacking bags; they’ll stress joints, scratch surfaces, and bend telescoping rods. You should expect wear, reinforce weak points, and choose rugged handles or protective covers.
Are There Weight Limits for Repaired or Reinforced Handles?
Yes — repaired or reinforced handles still have limits; you shouldn’t assume they match original ratings. Check material, fastenings, and any manufacturer specs, and avoid overloading so you won’t stress seams or hardware prematurely.
Conclusion
Now you can confidently replace a luggage handle at home. Diagnose the problem, identify your handle type, find compatible parts, and follow step-by-step fixes or temporary solutions for travel emergencies. Keep replacement parts clean and lubricated, and document the repair for warranty or resale. With basic tools and a careful approach, you’ll save money and avoid last-minute hassles—just take photos, keep screws organized, and test the handle before your next trip.