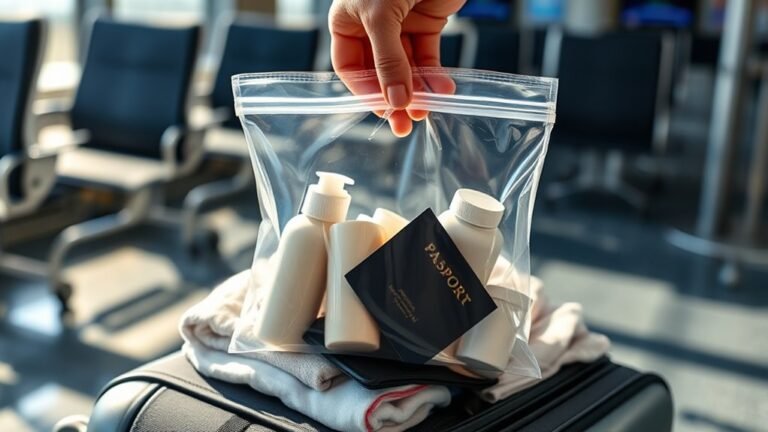
How to Set the Lock on Delsey Luggage Step by Step
Start with the current code (often 0-0-0), open the lock and keep the latch accessible. Locate the recessed reset pinhole or button, press it with a pointed tool and hold. While holding, turn each dial to your new three-digit code, making sure digits sit flush. Release the reset and test the combination several times with the case closed and loaded. If you keep going, you’ll find troubleshooting tips, TSA info, and maintenance steps to help.
Quick Steps to Set Your Delsey Lock
Before you begin, make sure the dials are set to the current combination (usually 0-0-0) and the shackle or zipper tabs are seated in the lock.
Then follow these quick steps to change it. Hold the lock steady, press the reset button or push the shackle down depending on model.
Rotate each dial to your new three-digit code, aligning numbers with the indicator line.
Release the reset button or return the shackle to its original position, ensuring it clicks.
Test the new code several times before closing your luggage.
Memorize or record the code in a secure place.
Which Delsey Locks This Covers
This section tells you which Delsey lock types the instructions apply to. It covers built-in TSA combination locks and luggage with zippers designed for external padlocks.
If you have a different lock style, check your model’s manual for specific steps.
Built-In TSA Combination Locks
Many Delsey suitcases use built-in TSA combination locks, and knowing which models have them helps you set the right procedure. Look for integrated locks near the zipper head or on the case frame; common lines like Chatelet, Helium, and Belmont often include them.
These locks accept TSA master keys for inspections and let you set a three-digit code. When yours has a built-in lock, follow its specific reset steps—typically open to factory code, press/reset button or slide switch, enter new code, then release.
Keep your code recorded and test locking/unlocking several times before travel.
External Padlock-Compatible Zippers
If you prefer using your own padlock, look for Delsey models with external padlock-compatible zippers—the zippers have reinforced holes or a metal loop that lets you secure the sliders together with a standard padlock.
These appear on selected Delsey backpacks and soft-sided suitcases; check product specs or photos for the small metal eyelets near the zipper heads.
To use them, align both sliders so their holes match, thread your padlock shackle through, and lock.
You’ll keep a more familiar lock style and can use TSA-approved padlocks.
Inspect the stitching and metal for durability before relying on it for valuable items.
Tools Needed: None
Because the Delsey lock is user-friendly, you won’t need any tools to reset or operate it — just your fingers and the combination you set. You’ll manipulate the dials, press the reset mechanism, and align numbers by hand. No screwdrivers, wrenches, or specialty devices are required, so you can adjust or check the lock anywhere.
That simplicity reduces prep time and means you won’t misplace parts. If you travel light, this is ideal: maintenance and setting happen quickly. Keep fingernails trimmed for easier grip, and work in good light so you can see the digits clearly.
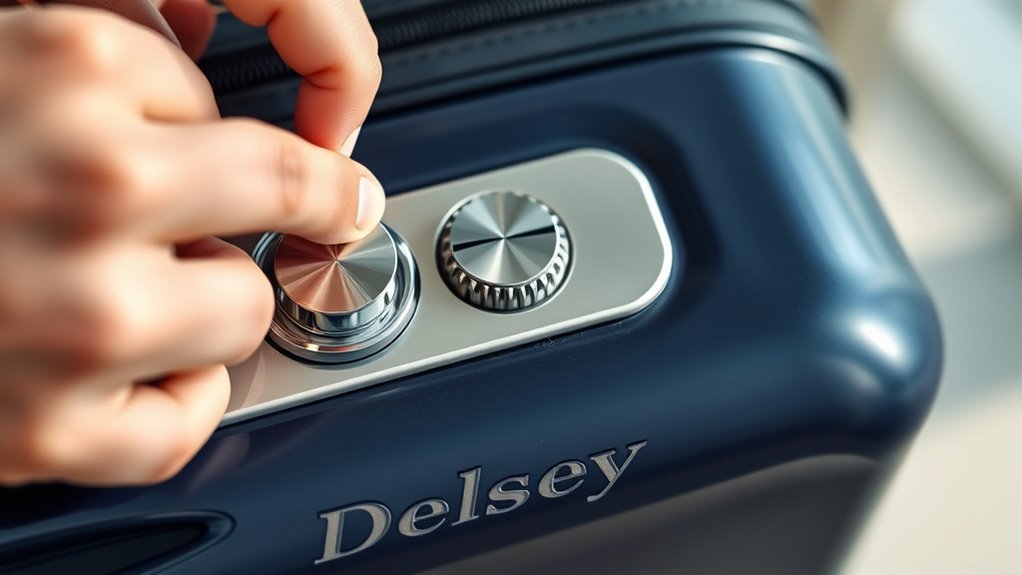
Find the Dials and Reset Pin
Before you start, flip the suitcase so the lock faces up and locate the three numbered dials—usually set to 0‑0‑0 by default—alongside a small recessed reset pin or button.
You’ll see the dials arranged horizontally; each clicks as you turn it. Use your fingertips to align digits smoothly, noting any tactile stops.
Scan the lock housing edge for a tiny hole or a shallow depression near the dials—that’s where the reset mechanism sits.
Keep the case steady so you don’t misalign numbers. Familiarize yourself with the placement now; this makes the actual resetting quicker and prevents accidental code changes.
Identify the Reset Button or Pinhole
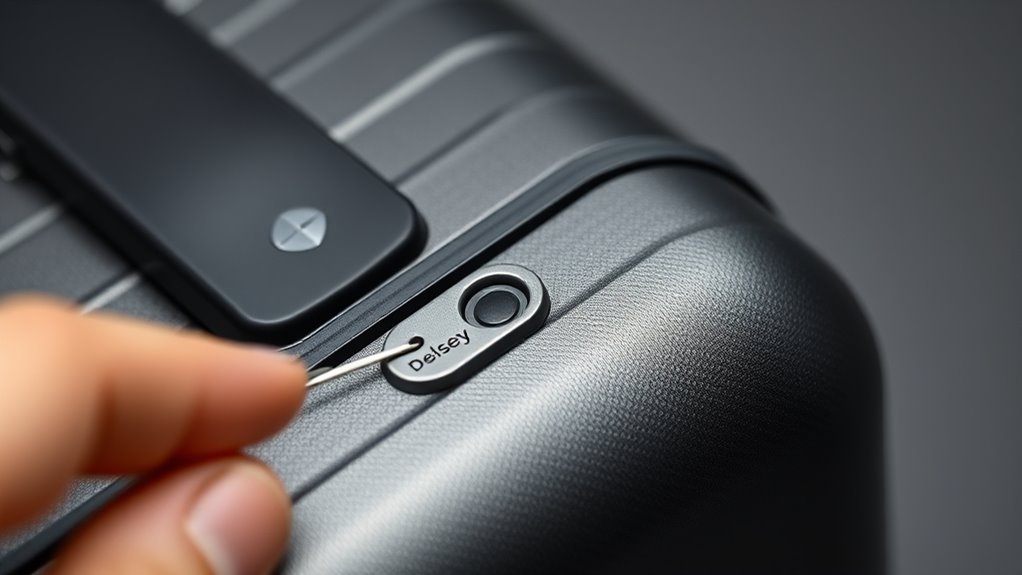
Look for a small pinhole near the dials—that’s usually the reset spot.
If you don’t see a hole, check for a tiny recessed button instead.
Use a straightened paperclip or similar small tool to press it when you’re ready to reset.
Locate The Reset Pinhole
Wondering where the reset pinhole is on your Delsey lock? Look along the lock’s edge near the dials or on the back plate. The pinhole’s small, circular, and often labeled “reset” or recessed to prevent accidental presses.
Use good light and tilt the lock to catch reflections that reveal the tiny opening. Some models place it beside the keyhole or under a rubber flap—don’t pry unless needed.
If you spot a tiny dot about the size of a sewing needle hole, that’s it. Keep a paperclip or pin ready; you’ll use it in the next step to actuate the reset.
Check For A Button
Once you’ve located the general area, check the lock closely for either a recessed pinhole or a small push button—these are the two common reset mechanisms on Delsey locks.
Look for a tiny circular depression or a slightly raised plastic button near the dials or housing seam. The pinhole is usually flush; the button may sit a little proud and sometimes contrasts in color.
Note its position relative to the combination window so you’ll know where to press when resetting.
If you don’t see either, inspect the opposite side or under a protective flap—some models hide the reset slightly.
Use A Small Tool
After you’ve located the reset area, grab a small, pointed tool—like a straightened paperclip, the tip of a sewing pin, or a precision screwdriver—and position it over the tiny button or pinhole.
Press gently but firmly until you feel slight resistance or hear a click; that indicates the lock’s internal mechanism is ready to accept a new code.
Hold the tool in while you set your desired combination, align each wheel precisely, then release the button.
If the button won’t depress, try a thinner implement or check for debris.
Don’t force it; excessive pressure can damage the mechanism.
Confirm the Factory Default Code
How do you know your Delsey lock is still set to the factory code? Check the product manual or label; many Delsey locks ship with 0-0-0 or 1-1-1 as the default.
Inspect the lock visually for a tiny sticker or imprint indicating the code. If documentation’s missing, set all dials to 0s and try opening the shackle or zipper tabs—if they release, the default was intact.
Don’t force the mechanism. Note serial or model details on the case to confirm defaults online. Once you verify the factory code, you’re ready to proceed to aligning dials.
Step 1: Align Dials to the Factory Code
Before you begin, make sure the lock sits flat and the dials move freely; then set each dial to the verified factory code (commonly 0-0-0 or 1-1-1). You’ll align numbers carefully so the mechanism recognizes the default.
Use steady pressure and rotate each wheel until digits line precisely in the groove. Check alignment by viewing from straight-on; slight misalignment can prevent opening. If a dial skips, reroll it back and try again.
Confirm all three are identical to the factory code before proceeding.
- Hold the case steady
- Rotate each dial deliberately
- Verify digits sit flush
Step 2: Open Zipper or Latch to Access Reset
Once the dials show the factory code, unzip or unlatch the compartment that gives you direct access to the lock mechanism so you can reach the reset button or lever.
Hold the suitcase steady and pull the zipper or release the latch slowly to avoid snagging fabric or teeth.
Next, find the small pocket or panel where the lock sits — it may be behind a fabric flap or within a molded plastic housing.
Clear debris, spread the opening wide enough for your fingers, and position good light.
Keep tension on the zipper so it won’t close while you access the internal reset area carefully.
Step 3: Press and Hold the Reset Button
When you can clearly see the lock mechanism, press and hold the small reset button or move the reset lever inward with steady pressure; you’ll usually feel a slight click indicating it’s engaged.
Hold it while you position the dials or sliders (don’t let go). Maintain steady pressure—a quick tap won’t register.
Keep holding steady while you set the dials or sliders — a quick tap won’t register.
Release only after confirming the mechanism reset.
- Keep the latch open so the mechanism stays accessible.
- Use a pointed tool if the button is recessed, but avoid excessive force.
- If it won’t engage, check alignment and try again after re-seating the zipper pulls.
Step 4: Choose and Set a Three‑Digit Code
Although you can pick any combination, choose a code you’ll remember but others won’t guess—avoid obvious sequences like 000, 123, or your birthday—and write it down temporarily if needed.
With the reset button held, rotate each dial to your chosen digits one at a time, aligning numbers precisely with the indicator line. Move slowly to ensure each wheel seats properly.
After setting all three, double-check the sequence visually and by gently testing each dial for smoothness. If a wheel slips, repeat the process from the first digit.
Keep your temporary note until you’ve confirmed the lock works dependably.
Step 5: Release Reset and Lock the Code
After you’ve confirmed the digits, let go of the reset button to lock the code into place; you should feel or hear a slight click as the mechanism settles.
After confirming the digits, release the reset button and listen for the click as the code locks in.
Now verify the dials sit flush and don’t turn freely. Hold the lock body steady while releasing any pressure on the shackle or latch so the mechanism engages fully.
- Check that each wheel aligns snugly with the indicator.
- Make sure the reset button has returned to its original recessed position.
- Visually inspect the shackle or zipper pull to confirm it’s seated.
If anything feels loose, repeat the set procedure carefully.
Test Your New Combination Now
Now try your new code several times to make sure it opens the lock reliably.
If it slips or sticks, reset and repeat the setup until you get consistent success.
Don’t move on until you can open it repeatedly without trouble.
Try Multiple Opens
Because you just set a new code, test it immediately by trying several opens and closes to confirm the dials line up and the latch releases smoothly.
Do each attempt deliberately so you notice resistance, misalignment, or sticking. If something feels off, reset the code following the lock’s instructions before relying on it for travel.
Check from different angles and with normal finger pressure to simulate real use.
- Open and close the lock three times in succession.
- Try the combination while the luggage is empty and slightly loaded.
- Rotate dials slowly, then at your usual speed, noting any hesitation.
Confirm Repeated Success
When you’ve set the code and the lock seems smooth, prove it by opening and closing the lock repeatedly under realistic conditions to confirm the combination reliably works.
Now test with the suitcase packed and empty, using normal hand pressure and casual motions you’ll use while traveling. Try opening after jostling the case, after zipping and unzipping, and after brief tugging on handles.
Repeat the cycle ten times, noting any sticking or misalignment. If it fails, reset and repeat.
Once it opens consistently, write the code somewhere secure and practice one more full cycle before you travel.
If the Lock Won’t Reset: First Checks
If the reset procedure won’t work, start by checking the basics: confirm the dials actually line up on the current code, make sure the reset button or pin isn’t stuck or obstructed, and verify the shackle or zipper pull is fully closed so the mechanism can engage.
Next, try small adjustments and gentle pressure while attempting reset to seat internal parts. If that fails, inspect for debris or visible damage. Consider lubrication sparingly.
Check these three quick items:
- Dials precisely aligned and clicking into place
- Reset pin/button moves freely and isn’t bent
- Shackle/zippers fully seated without gaps
Change the Combination Later
After you’ve used your new code for a while, you’ll probably want to change it to something easier to remember or more secure; doing so is simple as long as you follow the lock’s reset steps again.
First, open the lock using your current combination. Locate the reset button or lever—usually inside the shackle cavity—then press or slide it into the reset position.
Open the lock with your current code, find the reset lever in the shackle, and set it to reset.
Set your desired digits, ensuring each clicks into place, then return the reset control to its original position.
Test the new combination several times before closing the lock. Keep the combination recorded in a secure place in case you forget.
Tips for Memorable but Secure Codes
Because you’ll want a code that’s both easy to remember and hard for others to guess, pick a pattern that ties to something personal but not obvious—think a non-sequential date turned into a simple arithmetic rule, a short phrase converted to numbers, or a unique digit repeat you can visualize.
Use a method you’ll recall under stress and avoid obvious choices like birthdays or repeated zeros.
Store a hint somewhere separate from the luggage.
Examples:
- Map a favorite word to phone keypad digits and add one to each.
- Use the last two digits of a year, then reverse them.
- Pick a geometric shape and translate corner counts to digits.
Test it mentally before locking.
Top Mistakes That Lock You Out
When you rush through setting the combination or pick an obvious sequence, you’ll often lock yourself out later; common slip-ups include using birthdays, sticking with factory codes, mistyping while scrambling, or failing to test the lock after changing it.
Rushing when setting combinations leads to lockouts—avoid birthdays, factory codes, typos, and always test the new code.
You also forget to write the new code down securely, assume you’ll remember under stress, or share the code verbally in crowded areas.
Jammed dials from forcing them when misaligned, and skipping instructions for resetting mechanical models, create preventable lockouts.
Prevent mistakes by taking your time, confirming each digit, testing the lock several times, and storing the code safely but accessibly.
How TSA-Approved Delsey Locks Differ
Although TSA-approved Delsey locks look like regular luggage locks, they include a special master-key feature that lets Transportation Security Administration agents open and relock your bag without damaging it.
You’ll notice they’re marked with a red diamond Travel Sentry logo and use a keyed or combination mechanism that cooperates with TSA master tools. That means fewer forced openings and preserved seals.
- Allows official inspection without cutting or breaking locks
- Comes in keyed or combination styles compatible with Delsey designs
- Reduces risk of lost or damaged straps, zippers, or closures
You should still confirm TSA approval before travel.
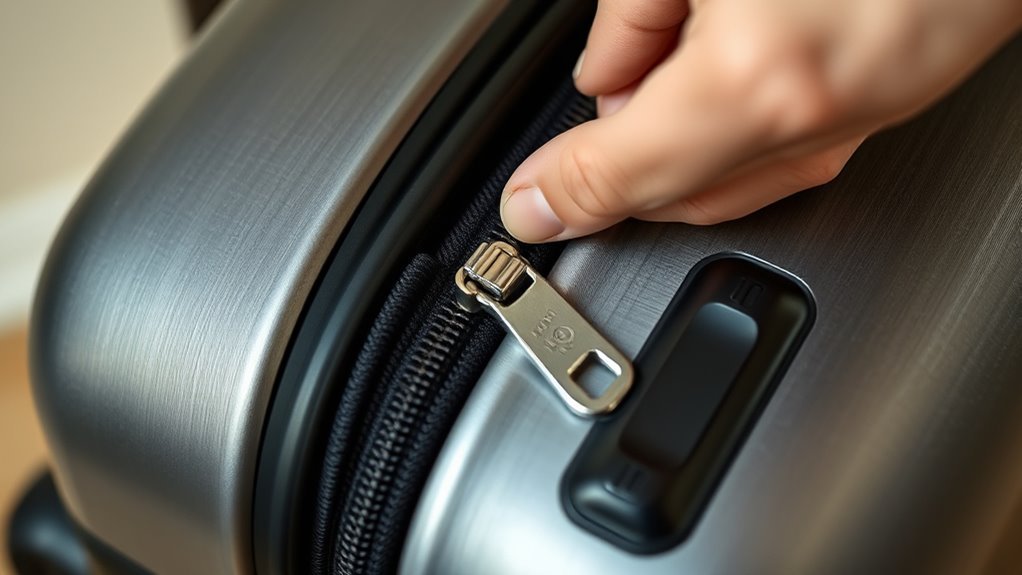
Identify the TSA Keyhole on Your Case
Look for a small, round keyhole near the zipper or lock mechanism on your Delsey case. You’ll usually see the TSA logo (a red diamond) stamped nearby to show it’s accessible to agents.
If you can’t find the mark, check the user manual or examine the lock area closely.
Locate The Small Keyhole
Before you try the combination, find the small TSA keyhole near the zipper or latch—it’s usually a tiny, rectangular opening stamped with “TSA” or a red diamond logo.
You’ll inspect the lock area closely, feel for a recessed slot, and clear debris that might hide the hole. Use good light and a magnifier if needed.
If you can’t see it, gently move the zipper head or latch while watching for the opening.
Note the keyhole orientation so you insert a key correctly.
- Look for a recessed rectangular slot
- Clean surrounding dirt or fabric
- Confirm orientation before inserting
Check For TSA Logo
How can you tell if your Delsey lock accepts a TSA master key? Look for a small red diamond logo near the keyhole or on the lock body. That symbol indicates TSA approval and tells you airport security can open and relock your case without damage.
Inspect the lock edge, zipper pull housing, or molded frame area—manufacturers place the logo where it’s visible. If you don’t see the diamond, consult your owner’s manual or Delsey support; some models hide the mark or use alternative placements.
Never assume TSA access without confirmation, especially before traveling to or from the United States.
What to Do If TSA Opens and Re-Locks
If TSA inspects your Delsey and re-locks it, check the zipper pull and lock body for the white or red inspection tab that shows they opened it. Note any damage or missing items before leaving the airport.
If TSA re-locks your Delsey, inspect the zipper and lock for a white or red inspection tab before leaving.
If the tab’s present, you can relock and continue. If not, report it immediately.
- Document: take photos of the tab, lock, and contents.
- Report: notify the airline or airport lost-and-found and file a claim if items are missing.
- Secure: use the original lock or a TSA-approved replacement; keep receipts and case numbers for follow-up.
Resetting a Delsey Key (Non-Combo) Lock
Now that you know what to do when TSA inspects and relocks your bag, you may need to reconfigure a Delsey key lock that isn’t a combination model.
First, locate the small reset hole or switch near the lock body; you’ll need the original key inserted and turned to the open position.
Press and hold the reset button with a paperclip or push the switch while you remove the key.
Release the reset mechanism, then reinsert and turn the key to confirm the new alignment.
Test the lock several times to verify it operates smoothly before travel.
Troubleshoot Jammed Dials and Sticky Parts
If your dials stick or won’t turn, start by aligning the combination precisely and testing each ring for resistance.
You’ll want to clean sticky mechanisms with compressed air and a mild lubricant sparingly to free any grime.
If that doesn’t work, reset the lock following the manufacturer’s steps to restore proper function.
Aligning The Combination
When the dials stick or refuse to turn, work methodically to free them before trying to reset the combination. You’ll align numbers precisely so the lock recognizes the code. Center each digit in its viewing window, nudge slightly if a dial feels caught, and check that the indicator line sits squarely at the mark.
- Set each dial to the known code one at a time, confirming alignment.
- Apply gentle pressure on the shackle while turning to help engage internal gears.
- If a digit slips between numbers, back it to the previous number and advance slowly to the target.
Test the lock before finishing.
Cleaning Sticky Mechanisms
After you’ve confirmed the combination aligns and the shackle responds, move on to cleaning sticky dials and components so the mechanism will keep working.
Use a soft brush or compressed air to remove dust from between dials and around the shackle housing. If grime persists, dampen a cotton swab with isopropyl alcohol and gently clean contact points; avoid soaking internal parts.
Work the dials and shackle repeatedly to loosen residue. Once dry, apply a tiny drop of light lubricant (graphite powder or silicone spray recommended) sparingly to pivot points—never over-lubricate.
Test operation several times before travel.
Resetting The Lock
Although jammed dials and sticky parts can feel stubborn, you can usually reset the lock yourself by following a few careful steps.
First, make certain the lock is aligned and in the open position; if it’s stuck, apply gentle pressure while rotating each dial to find the correct numbers.
Use a cotton swab with isopropyl alcohol to clean residue, then dry thoroughly.
If dials still stick, tap the case lightly to free internal catches.
Finally, set your new code and test it several times before travel.
- Align lock before adjusting
- Clean with alcohol, dry well
- Test code repeatedly
When to Claim Travel Insurance vs DIY
If you can fix a broken zipper or replace a lost strap quickly and cheaply, handle it yourself; claim travel insurance only when repair costs, medical bills, or lost-value exceed your deductible or paperwork will be more time-effective than DIY.
Assess damage, collect receipts, and photograph items.
Check your policy exclusions, claim deadlines, and coverage limits before filing.
For minor cosmetic dents or low-cost replacements, DIY saves time.
For theft, significant structural luggage damage, lost checked baggage with high value, or injury requiring treatment abroad, file a claim.
Keep clear notes on timelines and communications to support any insurance case.
Open a Delsey Lock If You Forget the Code
When you forget your Delsey lock code, don’t panic—there are straightforward ways to open it without damaging the suitcase.
First, try common combinations you might’ve used: birthdays, repeated digits, or simple sequences.
If that fails, use these non-destructive steps to regain access:
- Gently apply pressure to the release button while rotating each wheel slowly to feel a slight catch at the correct number.
- Inspect the gap at the shackle; subtle alignment shifts reveal the right digits when you nudge each wheel.
- Use a thin tool to depress the latch if wheels align but lock won’t release.
Work patiently and avoid forcing components.
When to Call a Locksmith or Pro Help
If your Delsey lock is visibly damaged or the reset mechanism won’t respond, don’t try to force it and risk breaking the zipper or suitcase.
You should call a locksmith or contact Delsey support when you can’t reset the combination or the lock won’t open despite correct steps.
A pro can safely repair or replace the lock without causing further damage.
When Lock Is Damaged
Because locks can fail in ways you can’t fix with a reset or a slim tool, you’ll want to call a locksmith when the mechanism is visibly broken, jammed beyond movement, or missing key parts. If the zipper pull or latch is snapped, tumblers are stripped, or internal springs are loose, a pro can assess repairability without causing more damage.
Don’t force the lock—you’ll worsen the problem. A locksmith can replace the lock, source manufacturer parts, or advise on safe case entry. Consider cost versus replacement, and keep proof of ownership ready for service.
- Visible breakage or missing parts
- Internal binding or seized mechanism
- Signs of tampering or stripped tumblers
Unable To Reset Combination
Should you try the reset steps and the combination still won’t change, it’s time to get professional help—especially if the dial won’t turn, the reset lever slips back, or the lock isn’t responding to the correct sequence.
Don’t force parts; you could worsen damage or seal the mechanism. Contact a locksmith or Delsey-authorized repair service who knows TSA-style suitcase locks. They’ll diagnose seized tumblers, broken springs, or misaligned gears and either repair on site or advise replacement.
Bring proof of ownership to avoid delays. Expect a modest fee; weigh repair cost against replacing the lock or luggage before authorizing work.
How to Document Your Code Safely
When you document your code, focus on clarity, relevance, and safety so teammates can understand intent without exposing secrets. Keep comments and docs specific, avoid hard-coding credentials, and store sensitive setup details in secure configuration rather than inline notes.
Document clearly and safely: be specific, avoid embedded credentials, and reference secure configs instead of secrets.
You’ll write concise function summaries, note assumptions, and reference external secrets managers. Use examples that exclude real keys and scrub logs before sharing. Keep docs versioned and review them like code so they reflect current behavior and permissions.
Prefer links to secure runbooks over embedding procedures.
- Explain purpose, inputs, outputs
- Reference secure configs, not secrets
- Use examples with placeholders
Best Practices for Locking Case at Home
When you set your Delsey combination at home, pick a spot away from doorways and high-traffic areas so curious hands can’t watch.
After you lock it, test the combination several times to make sure it opens reliably before you travel.
Doing those two simple checks will save you headaches later.
Set Combination Away From Doorways
Because doors are high-traffic spots, set your Delsey combination a few feet away from any doorway so no one can watch you enter the numbers. Choose a spot with limited sightlines and good lighting, so you can see the dials without drawing attention. Face away from entry paths and keep the case angled toward a wall or furniture to block casual views. Consider who’s in the room and any reflections in mirrors or windows.
- Stand with your back to the door to minimize exposure.
- Use a counter or chair as a shield.
- Avoid hallways or open foyers.
Test Lock Multiple Times
After you set your combination, test the Delsey lock several times before you leave home to make sure it opens and closes reliably; try both the numbered dials and the latch so you catch any misalignment or stiffness early. You should rotate the dials, push the latch, and close the case repeatedly to confirm smooth action. If it binds, reset and re-seat the shackle or dials. Do this with the suitcase empty and with a typical load so you see real behavior. Visualize results:
| Action | What to watch for |
|---|---|
| Rotate dials | Smooth clicks, aligned numbers |
| Push latch | Firm engagement, no wobble |
| Close loaded | Latch closes easily |
Check Lock After Rough Baggage Handling
If your bag went through rough handling, inspect the Delsey lock immediately for dents, misalignment, or debris that can impede its mechanism. You’ll want to check visual alignment, test movement, and clear any foreign material. Don’t force a jammed shackle; instead troubleshoot gently.
- Look for bent components, cracks, or gaps that stop the lock from seating properly.
- Try the combination and latch several times to confirm smooth operation and correct reset function.
- Use compressed air or a soft brush to remove grit; avoid liquids that could corrode internal parts.
If issues persist, get professional repair to prevent failure.
Humidity, Temperature, and Combination Locks
You should be aware that high humidity can corrode internal parts and make the dials sticky, so keep the lock dry when possible.
Rapid temperature swings can change metal dimensions and briefly affect combination alignment, so avoid exposing the lock to extreme heat or cold.
Regularly test your combination after travel through varying climates to confirm it still opens smoothly.
Humidity Effects On Mechanism
Because humidity and temperature change how metal and plastics behave, they can make a Delsey combination lock feel stiff or slippery when you try to open it. You should check and respond to moisture before assuming a jammed mechanism is permanent.
Keep the lock dry, rotate the dials gently, and avoid forcing them.
- Wipe visible moisture; use a soft cloth to prevent grit buildup.
- Apply a tiny amount of silicone-based lubricant to moving parts, not oil that attracts dust.
- Store luggage in a breathable bag or cool, dry place to minimize corrosion and plastic swelling.
Address humidity early to prevent sticking and misalignment.
Temperature And Combination Stability
How does temperature affect your Delsey combination lock’s reliability? Cold can stiffen tumblers and hot air can expand metal, so you’ll notice tighter or looser dialing. Avoid sudden temperature swings and store luggage indoors when possible. Test your combination after exposure and reset if digits feel sticky.
| Condition | Effect | Action |
|---|---|---|
| Cold | Tumbler stiffness | Warm gradually |
| Heat | Expansion, slippage | Cool before use |
| Humid | Corrosion risk | Dry and lubricate |
Regular checks keep combinations stable; lubricate sparingly and avoid solvents that attract dirt.
Lubricate and Maintain Delsey Lock Parts
When parts start sticking or the combination feels gritty, it’s time to lubricate and maintain your Delsey lock to keep it operating smoothly. You’ll need just a small spray of silicone or graphite, a soft brush, and a lint-free cloth.
Work methodically: spray sparingly into the dials and shackle pivot, move the mechanism through combinations to distribute lubricant, then wipe excess.
Spray sparingly into the dials and shackle, cycle the combination to spread lubricant, then wipe away excess.
- Use silicone or dry graphite—avoid oil that attracts dirt.
- Cycle the wheels and open/close the latch several times after application.
- Clean visible debris with a soft brush before lubricating.
Do this yearly or after exposure to sand, salt, or moisture.
Replace a Broken Built-In Lock Assembly
If your Delsey’s built-in lock is cracked or won’t turn, you’ll need the right tools and a compatible replacement assembly to fix it. Start by gathering screwdrivers, a small pick or needle-nose pliers, and the exact lock model or OEM part.
I’ll walk you through a clear, step-by-step replacement so you can swap the assembly and restore secure function.
Tools And Parts
Before you start, gather the right tools and replacement parts so the repair goes smoothly: a small Phillips and flathead screwdriver, precision hex keys or Torx bits (depending on your model), needle-nose pliers, a thin pry tool or spudger, and a replacement Delsey-compatible lock assembly or OEM part with its rivets or mounting screws.
You’ll also want a soft cloth and tray for fasteners. Verify compatibility by matching part numbers or dimensions to the original lock. Check rivet style—solid or pop rivets—so you bring the right replacement. Consider ordering a spare set if travel soon.
- Verify part number and fit
- Match rivet style—solid or pop rivets
- Gather small fastener tray
Step-By-Step Replacement
Although the job looks fiddly, you can replace a broken built-in Delsey lock assembly in about 20–45 minutes with the right tools and parts on hand.
First, open the case and remove interior lining screws to expose the lock. Disconnect any cables and note orientation.
Unscrew the lock housing and lift the old assembly out.
Fit the new lock in the same orientation, reconnect cables, and tighten screws evenly.
Test the mechanism and combination before reassembling the lining.
Replace fabric and screws, then test on the closed case.
If the lock sticks or won’t set, recheck alignment and connections.
Contact Delsey Support for Lock Issues
When your Delsey lock won’t reset or the combination won’t respond, contact Delsey Support so they can walk you through troubleshooting or arrange a repair or replacement.
Reach out via their official website, phone, or email; have purchase details handy. You’ll get clear steps and guidance, and they’ll tell you if service is needed or if a simple fix will restore the lock.
- Prepare serial, purchase date, and a clear photo of the lock.
- Describe the problem, steps you tried, and any error signs.
- Ask about warranty coverage, shipping instructions, and expected timelines.
Find Your Model Number for Lock Instructions
If Delsey Support asks for model details or you want to find instructions on your own, locate the model number next.
Check the luggage tag, inside the main compartment flap, and the manufacturer’s label sewn into a pocket; many Delsey pieces have a small fabric or plastic tag with alphanumeric codes.
Check inside the main compartment flap, luggage tag, and sewn label for small fabric or plastic tags with alphanumeric codes.
Also inspect the back or base of telescoping handles and the underside of the suitcase; some models stamp numbers on metal plates.
Note the full code, any series name, and the color or size if listed.
Record a clear photo and the exact code before searching manuals or contacting support.
Use the Delsey App or Registration After Issues
Because you’ve already tried locating the model and gathering photos, next register your suitcase or use the Delsey app to log the issue so support has your details immediately. Open the app, create or sign into your account, and attach photos and serial information. Submit a brief description, include purchase proof if available, and choose warranty or repair options.
Expect a case number and follow-up email.
- Upload clear photos of the lock and serial plate
- Select warranty, repair, or troubleshooting in the app
- Note the case number and estimated response time for reference
You’ll get faster help this way.
Travel Safely With Valuables in a Locked Case
When you lock valuable items in your Delsey case, follow secure storage best practices like using internal pouches and keeping fragile items cushioned.
Keep one key or code on your person and a backup recorded in a secure app or paper stored separately.
Don’t share codes casually and change combinations after any suspicious access.
Secure Storage Best Practices
While you’re traveling, keeping valuables in a locked case lets you control access and reduce theft risk, so choose a lockable bag or a hard-shell suitcase with an integrated lock and store items in concealed pockets or a padded internal organizer.
Pack essentials together, wrap fragile items, and keep a lightweight tracking device inside.
Keep receipts and copies of important documents separate from originals, and put small high-value items in inner compartments or a sewn-in pouch.
Stay mindful of where you place the case in transit and avoid obvious labels.
- Keep items organized by priority
- Use padding and concealment
- Separate originals from copies
Managing Keys And Codes
How will you keep access secure without losing it? Store a spare key and a written copy of your combination separately—one with a trusted travel companion, another locked in your home safe or digital password manager.
Memorize a simple mnemonic for the code, avoid obvious numbers like birthdays, and change combinations after someone else accesses your bag.
Label keys discreetly; don’t mark them “luggage.” Before travel, test keys and codes several times.
If a key breaks or code is forgotten, contact Delsey or a certified locksmith rather than forcing the lock.
Record serial numbers and photos of valuables for insurance and recovery.
Add a Secondary Cable or Padlock for Extra Security
If you want an extra layer of protection, add a secondary cable or padlock to the Delsey’s zipper pull or luggage loop so opportunistic thieves face a clear deterrent. Pick a compact, TSA-approved lock or a coated steel cable that fits through the zipper sliders and won’t damage the fabric.
You’ll thread the cable through both sliders or attach the padlock to the bag’s reinforced loop, then secure and test it.
Choose corrosion-resistant materials, keep the key or combination separate from the bag, and inspect before travel.
- Use a TSA-approved padlock
- Prefer coated steel cable for flexibility
- Test fit and durability before packing
Sync Lock Settings Across Multiple Delsey Bags
When you own more than one Delsey, syncing their lock combinations makes packing and airport checks quicker and reduces the chance of forgetting which code goes with which bag.
Decide on a single memorable code and record it securely (password manager or encrypted note).
Reset each suitcase following the manufacturer’s steps to that chosen combination, testing each lock multiple times.
Label bags discreetly with a matching symbol or color-coded tag to confirm synced status at a glance.
Periodically verify combinations after storage or long trips.
If you ever change the code, update all bags and your secure record immediately.
Train Frequent Travelers to Set Locks Fast
Because you’re often short on time at the airport, train travelers to set Delsey locks quickly by practicing the reset sequence until it becomes automatic: align the dials, pull or press the reset lever, enter the new code, and confirm the lock engages.
Teach a simple routine, repeat it in real situations, and use timed drills to build speed and confidence.
Emphasize consistency so everyone uses the same steps and code patterns.
Keep instructions short, demonstrate once, then supervise practice.
- Demo the sequence aloud
- Time short practice sessions
- Use the same code template for all bags
Avoid Accidental Code Changes While Handling
Keep the zipper pulls fully closed and aligned before you touch the lock so the teeth can’t slip and change the code.
Hold the lock body steady with one hand while you turn the dials with the other to prevent unintended rotations.
If your lock has a recessed dial, press it gently into the housing as you set the numbers to keep them from shifting.
Secure Zipper Positioning
Although it’s simple to overlook, positioning the zippers correctly prevents accidental rotation of the combination while you handle the suitcase.
You should align both zipper pulls into the lock slot before closing, so they can’t shift during transport.
Tuck any excess fabric away from the zipper path and keep pressure off the dial area while moving the bag.
Follow these quick checks each time you lock:
- Align zipper pulls flush inside the lock housing
- Remove slack and secure loose fabric around the zipper track
- Hold the zipper ends steady while you set the combination
Do these and you’ll avoid inadvertent code changes.
Stabilize Lock Dial
When you’re setting or moving the suitcase, steady the dial with your thumb so it won’t rotate by itself; a single nudge can change the code and lock you out.
Keep pressure on the dial while you glance at each wheel to confirm digits align.
If your case has a recessed or textured dial, rest fingers around the housing to prevent slips.
Work on a flat surface, gripping the handle for stability.
Avoid gripping the faceplate or pressing buttons while turning numbers.
After setting, gently shake the suitcase to verify the code holds before release and travel.
How Airline Handlers Interact With TSA Locks
Because TSA-approved locks have a universal master key, airline handlers can open and reseal your checked bag without damaging the lock, so you’ll usually find your zipper pulls neatly tucked back or a small tag showing the bag was inspected.
You should know handlers inspect when security flags a bag, look for prohibited items, or follow random checks.
Trust TSA procedures but inspect your luggage on arrival. If you find evidence of a search, report missing items immediately.
To stay prepared, consider these tips:
- Use a clear exterior pocket for travel documents
- Pack valuables in carry-on
- Note lock position before check-in
Prepare Your Delsey Lock for Long-Term Storage
If you’re storing your Delsey for months, start by cleaning and drying the lock mechanism and surrounding zipper area so dirt and moisture won’t corrode the components while it sits.
Next, set the lock to an easy-to-remember code, note it somewhere safe, and leave the zipper pulls engaged in the locked position to maintain alignment.
Set a simple, memorable code, record it safely, and keep zipper pulls locked to preserve alignment.
Apply a small amount of graphite or silicone lubricant to the shackle and tumbler, avoid oil-based sprays, and cycle the combination several times.
Store the suitcase in a cool, dry place away from direct sunlight, elevated off the floor to prevent damp exposure.
Spot Counterfeit Delsey Locks and Why It Matters
After prepping your lock for storage, you’ll also want to know how to spot fake Delsey locks so you don’t get stuck with inferior security. You should check branding, build quality, and functionality before relying on any lock.
Genuine Delsey pieces have consistent logos, clean seams, and smooth mechanisms.
- Inspect logo and serial/tag details for typos or poor printing.
- Examine construction: sturdy materials, even gaps, and no loose parts.
- Test operation: dials click smoothly, TSA feature engages correctly, and the lock resets predictably.
Knowing these signs helps prevent theft, travel delays, and wasted replacements.
Pre-Departure Checklist: Set, Test, Secure Your Lock
Ready to leave without lock-related stress? Before you head out, set your Delsey lock to your chosen code, then scramble the dials and re-enter the combination to confirm it opens smoothly.
Set your Delsey lock to your code, scramble the dials, then re-enter to confirm it opens smoothly.
Test the latch and zipper pulls under light tension so you’re sure they engage. Note your code in a secure place or use a password manager, never in pant pockets or on luggage tags.
If your lock has a TSA keyway, verify it’s unobstructed. Carry a small tool or know your model’s reset procedure in case of issues.
Only depart once the lock functions reliably and zippers sit flush.
Frequently Asked Questions
Can I Reset a Delsey Lock Without Knowing the Original Factory Code?
You usually can’t reset a Delsey lock without the original factory code; you’ll need that code or proof of ownership to get manufacturer or locksmith help, otherwise you’ll likely have to have the lock replaced or the luggage opened.
Are Replacement Combination Dials Available Separately From Delsey?
Yes — you can often buy replacement combination dials separately from Delsey or authorized dealers; check Delsey’s parts/service page or contact customer support, and they’ll guide you on model compatibility, availability, and ordering options.
Will Using a Different Number of Digits Void My Warranty?
No, using a different number of digits typically won’t void your warranty, but you should check Delsey’s specific terms; if the lock’s altered mechanism causes damage, that could affect coverage, so document and contact support first.
How Do I Prove Ownership if Delsey Needs to Unlock My Suitcase?
You’ll show proof of purchase, ID matching the reservation or traveler, and clear photos of the suitcase and serial number; if you don’t have receipt, provide credit card statement or airline tag to verify you’re the owner.
Can Firmware Updates Affect Electronic Delsey Lock Behavior?
Yes — firmware updates can change electronic Delsey lock behavior. You’ll notice altered features, bug fixes, or new vulnerabilities; always review release notes, keep firmware current, and test your lock after updates to guarantee it behaves as expected.
Conclusion
Now you’re ready: set your Delsey combination, test it several times, and secure the lock before travel. Remember to note your code somewhere safe and avoid obvious numbers like birthdays. If it’s a TSA lock, airline handlers can open it without damage—keep that in mind for checked bags. Store the lock open for long periods to prevent stiffness, and verify authenticity if something looks off. Safe travels and enjoy peace of mind.