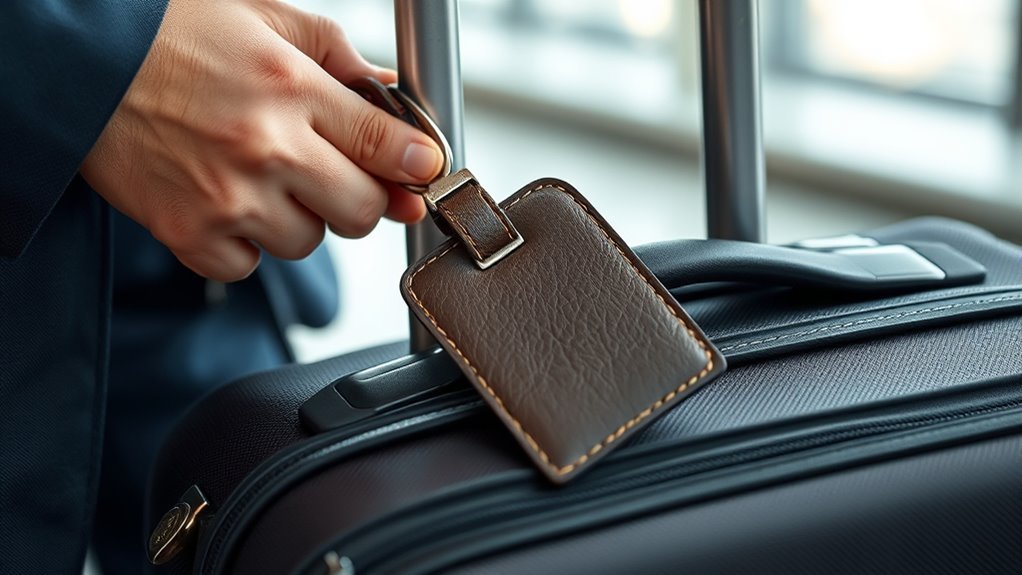
How to Tie a Luggage Tag Correctly
Thread the loop or strap through a sturdy handle, D‑ring, or sewn loop, then pass the tag back through its opening so it sits flat against the bag; snug it so it won’t flap but leave slight slack to avoid stress on the fibers. Tuck or trim excess tail and dress the connection flat to prevent snags. For metal cables, loop back through the locking head and pull tight. Keep info minimal and visible—learn more tips ahead.
Quick: Attach a Luggage Tag in 60 Seconds
Want to get your bag tagged fast? You’ll need a sturdy tag, a clear ID card, and a simple method.
Thread the loop or strap through the tag’s slot, then feed the free end through the luggage handle or zipper pull. Pull tight so the tag sits snug against the handle; avoid twisting. Tuck excess strap to prevent snagging.
Thread the strap through the tag slot, loop it through the handle, pull tight, and tuck away excess.
If your tag uses a buckle, click it shut and test the connection by tugging firmly.
Write legible contact info and shield private details. Double-check attachment before you leave — a secure tag saves time and worry at baggage claim.
Loop vs Strap vs Adhesive Luggage Tags : Which Do You Have?
Do you have a loop, a strap, or an adhesive tag on your bag? Loop tags are simple and durable but can be fiddly to thread.
While adhesive tags stick flat but may peel off. Let’s compare the pros and cons of loop tags and weigh adhesive versus strap options so you can pick the best fit.
Loop Tags: Pros & Cons
While loop tags may look simple, they offer a specific set of advantages and trade-offs you should know before choosing one for your bag. You’ll appreciate their low profile and ease of attachment: thread the loop through a handle, pull tight, and it stays put without buckles.
They’re lightweight, inexpensive, and won’t snag fabric as much as bulky hardware. On the downside, some loops can be less durable under rough handling and offer limited security—determined thieves could cut them. You’ll also find fewer customization options than straps.
Choose based on how often you travel and how rough your trips get.
Adhesive Vs Strap Comparison
When you’re choosing a luggage tag, the main differences come down to attachment style, durability, and how visible or secure your info will be.
You’ll find adhesive tags stick flat and won’t dangle, so they’re low-profile and often airport-friendly, but they can peel off and aren’t reusable.
Strap tags loop around handles, stay put during rough handling, and you can swap them between bags; thin straps may break, thicker ones resist wear.
Loop (integrated) tags combine convenience with permanence.
Pick adhesive for short trips or sleek cases, choose straps for longevity and peace of mind.
Best Materials for Durable Luggage Tags
Because your luggage tag has to survive checked-bag slings and overhead-bin scrambles, pick materials that resist tearing, moisture, and UV damage. Choose thick thermoplastic like PVC or TPU for flexibility and abrasion resistance; they won’t crack in cold or warp in heat.
Consider silicone for shock absorption and long-term elasticity. Metal tags—aluminum or stainless steel—offer maximum durability and resist cutting, though they add weight.
For clear ID windows, use polycarbonate; it’s tough and won’t yellow quickly. Reinforce attachment points with metal grommets or double-layered material so straps won’t rip through during rough handling.
Where to Place a Luggage Tag for Best Visibility
Place your primary tag where it’s instantly seen, like looped onto an outside handle so agents and baggage handlers spot it fast.
You can add a front-facing pocket tag for quick scans without opening the bag.
Tuck a copy in an interior sleeve as a backup in case the outer tag gets lost.
Outside Handle Attachment
Looking for the most visible spot for your luggage tag? Attach it to the outside handle: airlines, baggage handlers, and you all glance there first.
Loop the strap securely around the handle base, not the middle where it can flop; tuck excess strap to avoid snagging.
Use a durable, weather-resistant tag and position the ID face outward so names and flight info are readable at a glance.
For spinner suitcases, fasten to the stationary top or side handle to prevent rotation.
This placement speeds identification, reduces misrouting, and keeps your tag visible without blocking zippers or pockets.
Front-Facing Pocket Placement
When you want quick, scan-friendly ID without opening the bag, attach the tag to a front-facing pocket—ideally near the zipper or pocket flap where it stays visible and doesn’t flap around.
Place it high enough to clear obstructions and low enough to avoid catching on conveyor belts.
Use a short, secure loop or tuck the strap under the pocket trim so the tag lies flat against the fabric.
Choose a pocket with contrasting color or minimal patterns to aid visibility.
Make sure the tag won’t obscure pocket function, and test it by walking and lifting the bag to confirm stability and visibility.
Interior Sleeve Backup
If you prefer a hidden backup that still stays accessible, tuck a duplicate ID into an interior sleeve—ideally the zippered or mesh compartment inside the main compartment—so it’s protected but easy to grab when needed. You’ll want the duplicate to mirror your external tag: name, phone, and email.
Place it in a clear sleeve or a small resealable bag to prevent moisture damage. Secure it behind clothing or a divider so it won’t shift during handling.
When gate agents or lost-baggage staff inspect, the interior tag provides verification without exposing your primary tag to theft or wear.
Protect Personal Info While Keeping Tags Useful
Because you want your luggage to be returned without handing over every detail, keep contact info minimal and visible: include your name, a phone number (consider a travel-only or family member’s number), and an email but omit your full home address.
Use a durable tag and legible print so staff can read it quickly.
Add a discreet interior card with fuller details as backup.
Balance visibility with privacy by avoiding social media handles or passport numbers on tags.
- Choose limited, readable contact info.
- Use a secure attachment and clear font.
- Keep extra info inside the bag.
When to Use a Visible Tag vs a Privacy Sleeve
Wondering whether to leave your tag exposed or tuck it into a privacy sleeve? You’ll choose based on visibility needs and privacy risks.
Use a visible tag when airlines, baggage handlers, or pickup services must identify your bag quickly; it speeds claims, avoids delays, and shows contact info when security isn’t a concern.
Use a privacy sleeve when you’ll leave baggage unattended, travel to crowded areas, or want to hide personal details from casual viewers.
For best results, combine both: keep an easily readable ID on the outside with minimal info and a detailed contact card tucked inside a sleeve for privacy.
How to Attach a Loop-Style Luggage Tag (Step-by-Step)
Start by picking a loop that’s the right length and material for your bag so it won’t snag or slip.
Thread the loop through the handle or strap, then pass the tag through the loop to form a secure connection.
Finish by tightening and adjusting the knot so the tag sits snugly and won’t twist loose.
Choose The Right Loop
When picking a loop-style tag, focus on material, length, and closure type so it stays secure and won’t damage your handle. You’ll want a loop that’s sturdy, short enough to avoid flapping, and closes reliably. Consider your luggage and travel style when choosing.
- Material: Pick leather or coated nylon for durability; avoid abrasive metals that scratch.
- Length: Choose a snug loop that won’t catch or tangle, but long enough to fasten without forcing.
- Closure: Prefer a locking buckle or reinforced snap over simple ties; make sure it resists accidental opening.
Thread Through Handle
Ready to attach your loop-style tag? Feed the tag’s loop through the bag handle or strap opening, keeping the loop folded so it slips easily. Push the folded loop all the way through until enough shows on the far side to work with.
Take the free end or tag body and pass it through that exposed loop, pulling gently so the loop tightens around the handle. Make sure the tag sits flat against the handle and won’t catch on zippers or hardware.
Leave room to adjust later, but guarantee the loop is seated securely so the tag won’t pull free in transit.
Secure And Adjust Knot
With the loop seated around the handle, secure and tighten the knot so the tag stays put through handling. You’ll pull both ends evenly, snugging the knot against the loop base so it won’t slip. Test by tugging gently; if it shifts, loosen slightly, reposition, then retighten.
Trim any excess tail close to the knot or tuck it under the loop to prevent catching. Check periodically during long trips.
- Pull both ends evenly until firm.
- Tug gently to confirm security.
- Trim or tuck excess tail neatly.
How to Attach a Strap-Style Luggage Tag (Step-by-Step)
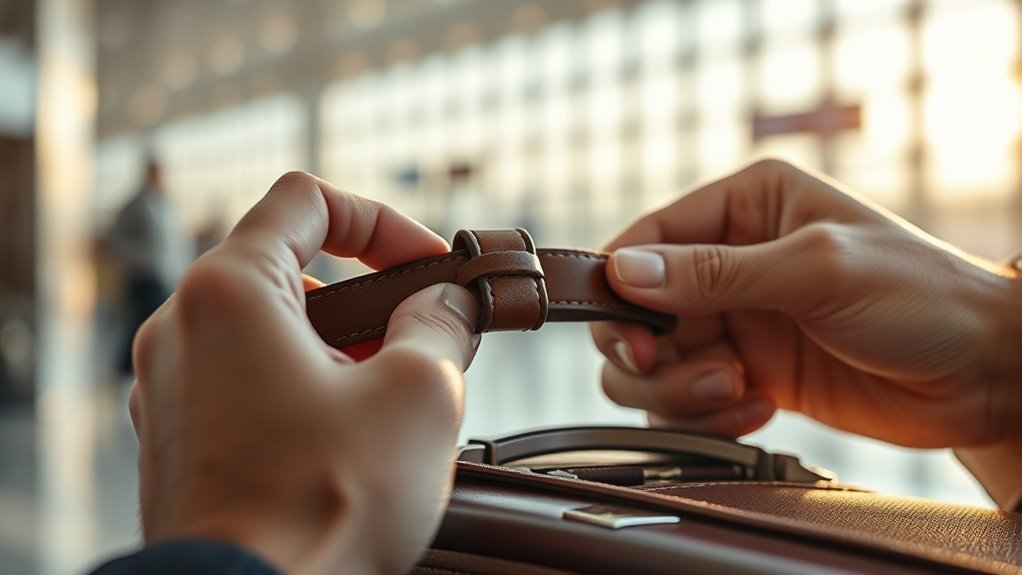
If you prefer a secure, professional look, a strap-style luggage tag is quick to attach and stays put through handling. The steps below walk you through threading, fastening, and checking the connection so your tag won’t come loose in transit.
Loop the strap around a sturdy handle or strap, feed the free end through the tag’s buckle or slot, then pull until the tag sits snug against the luggage.
Thread any keeper loop or tuck excess into the strap’s channel to prevent flapping. Fasten the buckle, snap, or stud firmly.
Finish by giving the tag a sharp tug to confirm it’s secure.
Secure a Metal Cable Tag : No Tools Needed
Slide the cable through the tag’s locking head so the end feeds cleanly.
Loop the free end around your bag handle and thread it back through the locking head.
Pull the cable snug until the loop cinches tight and won’t slip.
Thread Through Locking Head
When you’re securing a metal cable luggage tag, thread the tail end through the locking head until it seats firmly; you won’t need tools, just steady fingers.
Guide the cable so the ridged side aligns with the catch, then push steadily until you feel a click.
Check that the cable moves only one way; backward movement means it’s not seated.
Pull gently to confirm engagement before trimming excess or tucking it.
- Align the cable with the slot.
- Push the tail through until it clicks.
- Test by pulling; if it holds, you’re done.
Loop And Cinch Tight
After you’ve threaded the tail through the locking head, form a snug loop around the luggage handle and pull the tail to cinch it tight so the tag sits flush and won’t shift.
Check that the cable lays flat against the handle and that the locking head engages fully; you should feel resistance as the tail tightens.
Tug the tag gently to confirm it won’t slip. If the cable still moves, rethread and repeat, keeping the loop as small as practical.
Trim excess tail only if the tag permits; otherwise, tuck extra cable neatly to avoid snagging during transit.
Tie the Luggage-Loop Hitch (Quick Knot)
Because the Luggage-Loop Hitch holds snug without slipping, you’ll use it when you want a quick, secure attachment that’s easy to undo.
You’ll form a small loop, pass the tag strap through, then feed the free end around the standing part and tuck it back through the loop.
Dress the knot so turns lie flat; that keeps it tidy and reliable.
When you need to remove the tag, pull the free end and it releases cleanly.
- Make a neat loop first.
- Thread strap through and wrap once.
- Tuck end through loop and snug.
Tightening Tricks to Stop Tag Slippage
If the luggage-loop hitch gives you a tidy, easy-to-release hold but the tag still shifts on bumpy rides, tighten things smartly to stop slippage. First, pull both working ends evenly while holding the tag close to the loop; balance prevents twisting.
Next, form a half hitch with one end around the standing part and snug it down—this locks tension without making removal hard. For extra security, add a second half hitch opposite the first or a small overhand knot tucked behind the tag.
Check tightness by shaking the bag; adjust until the tag holds firm but still comes free when you need it.
Hide a Tag Discreetly Without Losing Visibility
Want to keep your tag low-profile without making it unreadable? Tuck the tag face inward under a flap or handle so only the ID window peeks out; that shields info but keeps it readable. Use a slim, clear window or cover to prevent glare and moisture from hiding text. Attach the strap so the tag lies flat against the bag to avoid flapping or snagging.
Tuck the ID face under a flap so only the clear window peeks out—protected, readable, and snug against the bag.
- Position: slide tag under a handle or seam for concealment and visibility.
- Cover: use a transparent sleeve to protect and maintain legibility.
- Secure: fasten snugly so the tag stays flat and readable.
Reinforce a Frayed or Worn Tag Strap
When a strap starts to fray, you should act quickly to prevent loss of the tag; a few simple fixes will restore strength without replacing the whole piece. Inspect the damage, trim loose threads, and apply clear adhesive or fabric glue to bind fibers. Wrap tight with strong thread or thin cord, knot securely, and melt synthetic edges briefly with a lighter to seal. For leather, use a dab of leather cement and wrap with waxed thread.
| Step | Material | Result |
|---|---|---|
| Trim | Scissors | Clean edge |
| Bind | Thread | Reinforced |
| Seal | Glue/lighter | Prevents fray |
Use Zip Ties and Backup Fasteners Safely
Although simple, zip ties and backup fasteners give your luggage tag extra security, so you should pick the right size and attach them correctly. Use UV-resistant ties for outdoor trips, trim excess tail flush, and avoid over-tightening to prevent strap damage. Consider a metal split ring as a secondary connector if the primary strap looks weak. Check fasteners before each trip to verify they haven’t loosened.
Use UV-resistant zip ties or a metal split ring, trim tails flush, and check fasteners before every trip.
- Choose durable, travel-rated zip ties or a small padlock.
- Thread ties through reinforced holes or tag loops only.
- Inspect and replace any corroded or cracked backup fasteners routinely.
Attach an ID Inside a Clear Sleeve for Flights
If you’re flying, slip a printed ID into a clear sleeve and place it inside your luggage so airline staff can quickly verify ownership without exposing your personal details to prying eyes.
Use a sleeve that’s durable, water-resistant, and clear on both sides so names, flight numbers, and emergency contacts are readable at a glance.
Attach the sleeve to an interior loop, zip pocket, or seam using its built-in slot or a small carabiner to prevent shifting.
Include only essential info—name, phone, reservation code—and keep paper flat.
Replace the ID and sleeve after heavy trips or if they show wear.
Tag Soft or Fabric Handles the Right Way
When you’re tagging soft or fabric handles, pick a secure knot like a double half hitch or bowline to keep the tag from slipping.
Wrap any rough cord with a small piece of tape or heat-shrink tubing to protect delicate straps.
Check the knot and strap before travel so the tag stays put without damaging the handle.
Secure Knot Choice
Because soft tags and fabric handles compress and twist under tension, you’ll want a knot that grips without cutting into the material. Choose a secure, low-profile knot that spreads pressure and resists slipping. Test tension before travel and adjust for thickness.
- Double over a looped constrictor variant to increase surface contact and reduce bite.
- Use a slipped figure-eight or alpine butterfly for easy release and balanced hold on flat straps.
- Finish with a short tail tucked under the standing part to prevent fluttering and abrasion.
You’ll preserve the handle and keep the tag firmly attached without harsh pinching.
Protect Fabric Straps
How can you keep a soft or fabric handle from wearing out under a tag’s pressure? Wrap a small piece of thin leather, fabric tape, or heat-shrink tubing around the strap where the tag will sit to distribute pressure and reduce abrasion.
Thread the tag loop through a sewn loop or D-ring instead of directly through delicate fibers. Avoid overtightening; leave a little slack so the tag can move without cutting into the strap.
Inspect the area regularly for fraying and replace the protector when it wears. These simple steps prolong straps’ life while keeping tags secure and neat.
Attach Tags to Telescoping Handles and Wheels
If your suitcase has a telescoping handle or exposed wheels, loop the tag through the handle tube or around the wheel axle so it stays visible and won’t snag in baggage handlers’ gear. You’ll want a short, secure loop that won’t catch when the handle retracts. Use a durable strap or cable tie, tuck excess length, and choose a tag that resists dirt and abrasion.
Place the ID facing outward so scanners and staff can read it without removing the tag.
- Thread through tube or axle securely.
- Shorten and tuck excess strap.
- Use rugged, weatherproof tags and fasteners.
Tag Backpacks, Duffels, and Odd-Shaped Bags
When tagging backpacks, duffels, and other oddly shaped bags, aim for a visible, secure spot that won’t interfere with straps, zippers, or packing—attach tags to a sturdy handle, a reinforced lash point, or a dedicated ID sleeve so they stay put and readable.
Choose low-profile tags or slim loops that don’t snag. Thread ties through reinforced fabric or metal hardware, cinch knots tight, and tuck excess cord to prevent catching.
For soft-sided bags, position the tag where it won’t fold or hide under gear. Inspect attachments before travel and periodically during long trips to guarantee tags remain secure and legible.
Label Checked Luggage vs Carry-On Differently
For checked bags, you’ll want your ID tag visible on the outside and securely fastened so handlers can read it without opening the suitcase.
For carry-ons, consider using a privacy tag or a covered ID window so your personal details aren’t on display during security lines.
Think about placement and visibility for each type to balance quick identification with your privacy.
Checked Luggage ID Placement
Why should you treat checked luggage and carry-ons differently when placing ID tags? For checked bags, you’ll place durable, visible tags where handlers see them quickly — usually on the handle or a sturdy external loop.
Protect paper tags in clear sleeves and secure them so they won’t snag or fall off during baggage handling.
- Attach tags to the main exterior handle or reinforced strap.
- Use a covered, durable tag and fastener to resist tears and weather.
- Include airline-provided tags inside a sleeve near the exterior tag as backup.
Carry‑On Privacy Tags
Because your carry-on stays with you, treat its ID differently than checked luggage: hide personal details and still keep enough info for identification. Use a privacy flap or business card with limited data. Choose a durable tag you can secure tightly.
Keep an emergency contact name and city, not full address. If you use a cover, guarantee the airport code or initials are visible for quick ID without exposing your phone number.
Check the tag after security to confirm it’s readable and fastened. Replace damaged tags promptly to maintain privacy and identification reliability.
Make a Temporary One-Way Trip Luggage Tag
When you need a quick, disposable identifier for a one-way trip, make a temporary luggage tag from simple supplies like cardstock, clear tape, and a marker—you’ll have it ready in minutes and it won’t cost much.
Cut a rectangle, write your name and phone on one side, fold or punch a hole for attachment, and seal both sides with clear tape to protect against moisture.
Slip it onto your handle with a zip tie or loop of string, trim excess, and knot securely. Remove at journey’s end.
- Cut and write
- Seal with tape
- Attach and trim
DIY Durable Luggage Tag From Household Items
If you liked the quick disposable tag, you can build a sturdier one from items around the house that’ll survive multiple trips and rough handling.
Start with a thin piece of hard plastic—an old credit-card-sized promo card or cut from a milk jug. Punch a reinforced hole with a grommet or wrap with tape.
Write or print your info, then laminate with clear packing tape or contact paper.
Attach using a cable tie, zip loop, or braided paracord looped and knotted securely.
Trim excess, tuck knots under luggage handles, and inspect edges so nothing snags during transit.
Test Your Tag Setup Before You Travel
Before you head out, give your luggage tag a real-world check to make sure it stays secure and readable through the kinds of handling it’ll face. You’ll want to simulate bumps, weather, and crowding so you catch weak points now.
Before you leave, test your luggage tag—shake it, wet it, and tuck it to catch any weak spots.
- Shake and swing the bag for a minute to test knots, loops, and fasteners.
- Rub the tag and info card with a damp cloth to confirm water resistance and legibility.
- Tuck the tag into a crowded pocket or under straps briefly to ensure it won’t snag or hide important details.
Fix any issues before travel to avoid surprises.
Troubleshooting: Tag Came Off in Transit – Next Steps
If your tag comes off in transit, check with the nearby airport or carrier baggage office right away to see if it was turned in.
You should also replace the tag immediately with a more secure option before your next connection or trip.
Keep a record of the incident and any staff you spoke with in case you need to file a claim.
Inspect Nearby Airports/Carriers
Wondering where your missing tag might be? Check nearby airports and carriers quickly — tags often fall off during transfers. Contact the baggage office at each airport your bag passed through and ask lost-and-found about detached tags. Call the airlines involved; they’ll note tag details and may flag your bag.
- List airports/carriers on your route and contact them in order.
- Provide flight numbers, dates, tag description, and baggage claim info.
- Ask staff to check conveyor areas, transfer zones, and maintenance logs.
Act fast and keep records of every contact to speed recovery and any claims.
Replace Tag Immediately
When your tag comes off in transit, replace it immediately so your bag stays identifiable and claimable — don’t wait until you reach your destination.
First, attach a temporary tag with your name, phone, and destination; use a durable strap or zip tie. If you have airline or luggage stickers, place one inside and outside the bag.
Photograph the bag and any identifying marks, and note the flight, time, and location. Report the lost tag to airline staff or ground personnel so they can flag your bag.
Keep receipts for replacement tags and follow up if the bag is delayed or misrouted.
How Airlines Handle and Remove Luggage Tags
Because airports deal with thousands of bags every day, airlines use standardized procedures to scan, secure, and—when appropriate—remove luggage tags quickly and reliably.
You’ll see staff or machines verify barcodes at check-in and transfer points, matching tags to flight manifests to prevent misrouting.
If a tag is damaged or duplicated, agents replace it and attach a new tag while logging the change.
If you’re nearby, they’ll often ask to confirm your identity or destination.
- Scan: barcode/readable info verified.
- Secure: tag fastened or reattached.
- Remove: old/damaged tags discarded and logged.
Replace Contact Info Quickly After a Change
If your phone number, email, or home address changes, update the contact details on your luggage tag and any airline profiles right away so lost-bag teams can reach you. Check tags before packing, edit online travel accounts, and save a digitized copy in a secure note. Quick updates cut retrieval time and prevent misdelivery.
| Where to update | What to include | When to check |
|---|---|---|
| Luggage tag | Name, phone, email | Before you leave |
| Airline profile | Full contact, alt phone | After any change |
| Travel apps | Digital tag image | At booking and departure |
Make Tags Theft-Resistant Without Looking Suspicious
Updating contact details helps recovery, but you also want tags that don’t advertise valuables or invite theft. Use discreet designs and avoid flashy labels that shout “expensive electronics.” Conceal personal info so only finders can contact you without broadcasting your full name or address.
Choose sturdy attachments that resist casual snipping but aren’t bulky.
- Use a phone-only contact card or email alias instead of full address.
- Pick matte, low-profile tags and muted colors to avoid attracting attention.
- Secure tags with tamper-resistant straps or cable loops that require tools to remove.
Packing Tips to Protect Luggage Tags in Transit
When you pack, protect your luggage tags by placing them where they won’t rub against zippers or get caught in conveyor belts—tuck tags inside a clear sleeve on the bag’s handle or under a flap so they stay visible but shielded from wear and snags.
Pack heavier items away from the tag area to avoid pressure that can bend or crease ID cards. Use a small zip pouch or resealable bag for extra moisture protection.
Fasten straps snugly so tags don’t flap, but don’t overtighten hardware. Before check-in, inspect attachment points to guarantee stitching, loops, and clips are secure.
Common Mistakes That Make Tags Fall Off
Because luggage goes through rough handling, tags come off more often than you think; you’ll usually see it happen when straps are too thin, clips aren’t locked, or the tag’s loop is threaded improperly.
You can prevent loss by checking attachment points before travel and choosing sturdy fastenings. Inspect straps for wear, confirm clips snap fully, and thread loops so tension tightens around a secure handle rather than a loose strap.
- Use wide, reinforced straps instead of narrow ones.
- Lock or snap clips until they click into place.
- Thread loops through solid handles, not flimsy trim.
When to Replace a Luggage Tag: Clear Signs
If you’ve already tightened straps and checked clips but still worry about a tag’s reliability, watch for clear signs that it’s time to replace it. You’ll want a new tag when straps crack, fasteners bend, or ID info fades. Replace tags after rough trips, visible wear at attachment points, or any time the closure feels loose. Don’t risk lost baggage over a cheap, failing tag — swap it out.
| Sign | What it means | Action |
|---|---|---|
| Cracks | Material weakened | Replace now |
| Faded info | Hard to read | Update/replace |
| Loose clip | May detach | Replace immediately |
Frequently Asked Questions
Can I Use a Luggage Tag on a Pet Carrier?
Yes — you can use a luggage tag on a pet carrier, but you’ll want one that’s durable, securely fastened, and weatherproof. Include your contact info, your pet’s name, and any essential medical or travel notes.
Are Electronic Smart Tags Worth the Cost?
Yes — smart tags can be worth it if you travel often, value real-time tracking and remote notifications, and want easier recovery for lost luggage; they’ll cost more, but you’ll likely appreciate the convenience and peace of mind.
How Do Customs Inspect Tags When Crossing Borders?
Customs usually inspect tags visually and scan barcodes or RFID chips; they’ll open luggage if needed, compare tag info to travel documents, and may remove suspicious tags. You should cooperate, show IDs, and follow officer instructions promptly.
Can I Register My Tag With a Lost-And-Found Service?
Yes — you can register your tag with many lost-and-found services; just create an account, link your tag ID, and they’ll notify you if it’s found. Keep contact details current and enable any offered recovery options.
Do Hotels Remove or Tamper With Guest Luggage Tags?
Hotels typically won’t remove or tamper with your luggage tags, but staff might inspect bags for safety or lost items; if you’re concerned, secure tags firmly, label discreetly, and ask management about their handling and privacy policies.
Conclusion
You’ve learned fast, practical ways to attach and protect luggage tags so your bag stays identifiable without putting your personal info at risk. Choose the right type and durable material, place tags where agents and conveyors can see them, and secure or conceal details to deter thieves. Check tags before and after trips, replace worn straps, and avoid common mistakes that cause loss. Do this and you’ll travel smarter, with less hassle and more peace of mind.