What Do I Need to Study Abroad
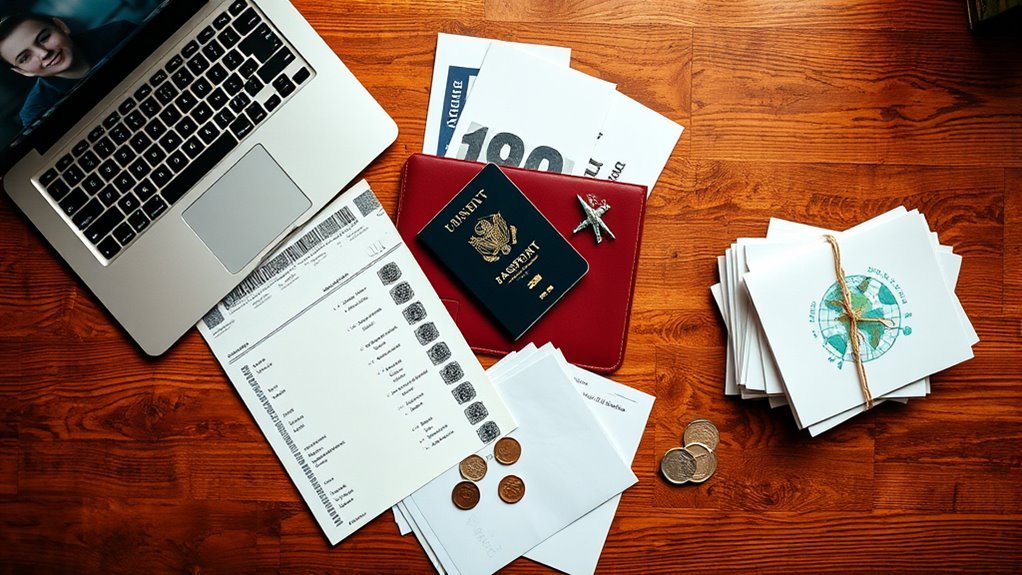
You’ll need a valid passport (often with six months’ validity), the right student visa or permit, proof of funds and health insurance, and official academic records plus any required language scores. Lock in housing and temporary arrival plans, schedule vaccinations or medical checks, and sort banking for tuition and expenses. Pack copies of key documents and emergency contacts. Follow a clear timeline for renewals, applications, and travel — keep going to find detailed checklists and timelines.
Who This Study Abroad Guide Is For and What You’ll Need
Whether you’re a first-year exploring options or a senior finalizing your plans, this guide shows what you need to apply, travel, and succeed abroad. You’ll find practical checks for students from community colleges to grad programs, whether you’re on a short exchange, semester, or year-long program.
Expect clear lists: academic prerequisites, language basics, financial planning, visas and entry requirements, health preparations, and housing options. You’ll learn how to confirm credits, secure funding, prepare documents, and manage time zones and communication.
This section helps you assess readiness, prioritize tasks, and build a concise, actionable plan for studying overseas.
Do You Need a Passport to Study Abroad?
You’ll usually need a valid passport to study abroad, but the exact requirement depends on your destination and program type.
Some short-term programs within certain regions or territories may accept alternative ID or proof of citizenship, so check with your program provider and the embassy.
If you don’t have a passport yet, start the application early since processing times can vary.
Passport Requirement Basics
If you plan to study abroad, you’ll almost always need a valid passport to enter another country and return home; the exact requirements depend on your destination and citizenship. Check your passport’s expiration date—many countries require at least six months validity beyond your planned stay.
Apply or renew early; processing can take weeks. Keep a digital and paper copy of the passport ID page and store them separately from the original. Confirm your name matches school and visa documents.
If you’re a dual citizen, bring both passports when applicable. Notify your embassy if your passport is lost or stolen while abroad.
Exceptions And Alternatives
Although most programs require a passport, some short-term, border-region, or intra-country exchanges let you travel on other ID or under a special agreement, so check your program’s rules and destination entry laws before assuming you must get or renew one. You should confirm whether your host country accepts national ID cards, enhanced driver’s licenses, or student travel documents.
Military or diplomatic travelers use different papers. Regional accords like Schengen or CARICOM can simplify movement if you meet residency or nationality criteria.
If a passport isn’t mandatory, you’ll still need proof of identity, health documentation, and any required visas or permits.
Check Passport Validity and Renew It Fast
Before you book flights or sign up for orientation, check your passport’s expiration date—many countries require at least six months of validity beyond your planned return date, and some won’t let you board without it.
If your passport expires soon, apply for renewal immediately; expedited services shorten processing but cost more. Confirm required photos and documents, fill forms accurately, and track submission deadlines.
If you need a new passport, allow extra time for name changes or lost-passport procedures. Keep a digital copy and a paper photocopy separately.
Renewing early avoids last-minute stress and protects your ability to travel for study.
Which Program Type Fits Your Goals and Visa Needs?
When choosing a study-abroad program, match your academic goals, budget, and desired visa flexibility to the program type so you don’t end up stuck with unexpected restrictions or costs.
Decide whether you need full-degree credit, short-term cultural exposure, or internship and research experience.
Decide if you need full degree credit, brief cultural immersion, or internship/research experience before choosing a program
Consider work permissions: some programs allow part-time jobs or paid internships, others forbid any employment.
Factor housing, health insurance, and program support for visa paperwork.
Short programs often use tourist visas; semester or degree tracks usually require student visas with stricter rules.
Pick the option that aligns with your timeline, finances, and immigration tolerance to avoid surprises.
University Exchange vs Direct Enrollment vs Study Tours
Curious which route fits you best? You’ll weigh exchange programs, direct enrollment, and study tours.
Exchanges let you attend a partner university with credit transfer, lower tuition, and built-in support; they’re structured and semester-length.
Direct enrollment puts you on a local campus independently—more freedom, broader course choices, but you handle registration, housing, and credit approvals.
Study tours are short, faculty-led, and immersive—great for travel, sampling a culture, or fulfilling practical requirements without committing to a semester.
Consider cost, length, academic goals, campus integration, and how much administrative independence you want to determine the best fit.
Do You Need a Student Visa or Permit?
Choosing between exchange, direct enrollment, or a study tour also affects whether you’ll need a student visa or permit, because eligibility often depends on program length, host-country rules, and your enrollment status.
Check your destination’s immigration website to see thresholds for short stays, semester programs, and internships. Some countries let tourists study briefly without permits; others require formal student visas for any academic activity.
Ask your home and host institutions if they issue acceptance letters or visa support documents. Plan ahead—processing times vary—and confirm whether visa conditions let you work, extend your stay, or travel regionally while enrolled.
Apply for a Study Visa: Step-by-Step
Now you’ll go through the concrete steps to apply for your study visa, starting with a required documents checklist so you know exactly what to gather.
You’ll also prepare for the visa interview by practicing common questions and organizing supporting evidence.
Finally, you’ll map out an application timeline to meet deadlines and avoid last-minute issues.
Required Documents Checklist
Before you submit your study-visa application, gather every required document so you won’t face delays or last-minute rejections; missing paperwork is the most common cause of processing setbacks.
Collect passport (valid six+ months), recent photos, admission letter, proof of tuition payment or scholarship, financial evidence (bank statements, sponsor letter), accommodation proof, travel itinerary, and health insurance.
Include academic transcripts, language-test scores, and any police clearances or medical exams specified by the consulate.
Fill and sign application forms, pay fees, and keep certified copies where required.
Organize documents in labeled folders and check the consulate’s checklist twice before submission.
Visa Interview Preparation
Because the visa interview often decides your application’s fate, you should prepare clear, honest answers and have your documents organized and accessible. Practice concise responses about your study plan, program choice, financial backing, and post-graduation intentions.
Anticipate common questions: why this school, how you’ll fund living costs, and ties to return home. Bring originals and copies of acceptance letters, financial statements, passport, and academic records; arrange them logically.
Dress neatly, arrive early, and stay calm. Speak confidently, avoid memorized scripts, and answer directly. If you don’t know something, admit it and offer to follow up.
Application Timeline Planning
When should you start the visa process? Plan early: you’ll coordinate university offers, finances, medical checks, and appointment slots. Map deadlines backward from term start, build buffer time for delays, and track document validity.
Prioritize time-sensitive items like police clearances and medical exams.
- Reserve visa appointment slots as soon as you have acceptance.
- Collect and certify documents; set internal deadlines.
- Schedule medical exams and biometrics with recovery days.
- Prepare funds and transcripts early to avoid last-minute issues.
Stick to a clear timeline, update it weekly, and adjust when notifications or requirements change.
Common Visa Documents by Country and Program
Although requirements vary by destination and program type, you’ll commonly need proof of identity, program acceptance, financial means, health insurance, and sometimes a criminal record check or vaccination records.
Requirements differ, but expect ID, acceptance, proof of funds, health coverage, and possibly background or vaccination records.
Check country-specific lists: student visas often require enrollment letters, passport photos, and visa application forms; exchange programs may ask host institution confirmation and a sponsorship letter; internships or research visas can demand detailed itineraries and supervisor invitations.
Prepare bank statements, scholarship letters, proof of accommodation, and return travel plans.
Translate and notarize documents if requested, and reserve extra time for consulate appointments, biometric data, and any document legalization or apostille steps.
Academic Records You’ll Need: Transcripts and Syllabi
You’ll need official transcripts to prove your academic standing, and many programs require sealed or certified copies.
You should also gather detailed course syllabi showing topics, credit hours, and assessment methods so host institutions can evaluate transferability.
Check each program’s submission format and deadlines to avoid delays.
Official Transcripts Required
Because your host university and visa office will need official proof of your academic standing, you’ll have to request sealed transcripts from every college or university you’ve attended.
Order them early, confirm delivery method (electronic or sealed paper), and check whether translations or notarizations are required.
Keep copies for your records and verify that course titles, credits, and grades match what your home institution reports.
- Request transcripts well before deadlines
- Specify recipient format and address clearly
- Translate and notarize only if requested
- Track shipments and confirm receipt with the host university
Course Syllabi Details
Along with sealed transcripts, many host universities will ask for detailed course syllabi so they can evaluate equivalency and approve credit transfer. You should gather syllabi showing course title, description, learning outcomes, weekly topics, assessment methods, credit hours, and instructor contact. Translate or summarize non-English documents and get signatures if possible. Provide PDFs named clearly (e.g., BIO101_Syllabus_2024.pdf). Check host guidelines for formatting, required components, and deadlines. Below is an example layout to guide your preparation.
| What to include | Why it matters |
|---|---|
| Learning outcomes | Shows alignment with host courses |
| Assessment details | Clarifies rigor and workload |
How to Request Official Transcripts and Course Descriptions
When you’re applying to a study abroad program, request official transcripts and course descriptions early so your host institution can evaluate your credits without delays. Contact your registrar for sealed transcripts and ask professors or department chairs for detailed course descriptions showing topics, textbooks, and contact hours. Verify preferred formats (PDF, hard copy) and delivery methods (mail, secure upload).
Track request processing times and retain confirmation receipts. If translations are needed, use certified translators. Follow up politely to ensure materials arrive before deadlines so credit transfer decisions won’t be held up.
- Ask for sealed, stamped transcripts
- Request syllabus-level course details
- Confirm format and delivery
- Keep confirmations and deadlines
What Language Tests and Proof Will You Need?
You’ll need to check which language exams the program accepts—common ones include TOEFL, IELTS, DELE, and HSK.
Some schools want official score reports while others accept institutional certificates or faculty letters as proof of proficiency.
Confirm the required minimum scores and accepted documentation before you submit your application.
Required Language Exams
Although some programs teach in English, many universities and visa authorities will require you to show language proficiency before you can enroll or get a permit. You’ll need to check which exam each school accepts—TOEFL, IELTS, Duolingo, or national tests—and the minimum scores they expect.
Some countries ask for different tests for visas than for admission. Register early, prepare with targeted practice, and plan retakes if necessary. Keep official score reports ready for applications, and confirm validity periods so scores don’t expire during processing.
- Know each institution’s accepted exams
- Note minimum score requirements
- Verify score validity windows
- Prepare and schedule early
Proof Of Proficiency
If you need to prove language proficiency, start by matching each program and visa requirement to the specific tests and score thresholds they accept—TOEFL, IELTS, Duolingo, local national exams, or institutional certificates.
Next, register early, prepare with targeted practice, and book your test to meet deadlines. Keep official score reports ready for applications and visa interviews; many institutions accept direct electronic delivery.
If you studied in a language of instruction previously, request an institutional letter confirming medium and dates.
Check whether exemptions apply (e.g., citizenship or prior degree). Finally, verify validity periods—expired scores often won’t count.
Options If You Don’t Meet Language Scores
Not ready for the required language score? You’ve got options. You can enroll in conditional admission or a pathway program to improve skills while starting your degree. Short-term intensive courses boost scores quickly.
Retake tests after targeted practice, focusing on weak areas with tutors or apps. Some schools accept alternative evidence like successful academic interviews or local language diplomas—check specifics.
- Pursue a university-run language pathway for guaranteed progression.
- Take an intensive exam prep course with mock tests.
- Retake the official test after focused tutoring.
- Ask admissions about acceptable alternative proofs or interviews.
Proof of Funds: Bank Statements, Sponsors, and Scholarships
You’ll need to prove you can cover tuition and living costs, typically with recent bank statements showing sufficient funds.
If your accounts don’t meet requirements, you can secure a sponsor who provides a formal affidavit and supporting documents.
Also look for scholarships and grants that reduce the amount you must show or replace personal funds altogether.
Demonstrating Bank Statements
When you apply for a study visa, consulates usually want clear, verifiable bank statements showing you—or an official sponsor—have enough funds to cover tuition, living expenses, and travel. You’ll provide recent statements (often 3–6 months), originals or certified copies, and translations if not in the required language.
Guarantee balances meet the minimum, show consistent deposits, and explain large one-time inflows with supporting documents. Prepare to combine accounts if allowed, and include scholarship award letters separately.
- Use official bank letterheads or stamped copies
- Keep transaction descriptions clear and consistent
- Provide certified translations when necessary
- Organize documents chronologically
Securing A Sponsor
If your bank statements don’t clearly show sufficient funds, securing a sponsor becomes the next practical step to meet visa financial requirements. Identify a reliable sponsor—parent, relative, employer—who can prove steady income and willingness to fund your studies.
Obtain a formal sponsorship letter detailing relationship, amount, duration, and commitment to cover tuition and living costs. Include the sponsor’s bank statements, employment proof, and ID copies.
Guarantee documents are translated and notarized if required. Confirm the sponsor meets the destination country’s eligibility rules and that both of you understand potential legal and financial obligations before submitting paperwork.
Applying For Scholarships
Looking for ways to reduce the money you must show for a visa? Apply for scholarships early: they can cut required proof of funds, replace some bank statements, or complement a sponsor’s commitment. Search university, government, and private awards; meet eligibility and deadline requirements; and prepare clear financial documentation showing awarded amounts.
If a scholarship covers tuition only, you’ll still need living-cost proof. Keep official award letters, bank statements, and sponsor affidavits together for visa interviews. Communicate with the admissions or financial aid office to confirm how scholarships affect required documents.
- Confirm award letter formatting
- Track deadlines precisely
- Combine funding sources logically
- Keep originals accessible
Create a Realistic Study Abroad Budget
Because you’ll be managing money in a different country, start by listing all likely expenses—tuition, housing, food, transport, visa fees, insurance, textbooks, and a modest entertainment buffer—and compare them to your available funds and potential income sources.
Break costs into fixed (rent, tuition) and variable (groceries, transport), then set monthly limits.
Factor in one-time costs like deposits and emergency cash.
Use conservative exchange rates and track actual spending for the first month to adjust projections.
Prioritize essentials, identify areas to cut, and build a small contingency fund.
Review and update your budget before each term.
How to Pay Tuition and Fees From Abroad
Paying tuition and fees from abroad requires planning and choosing the most cost-effective payment method for your situation. You’ll compare bank transfers, international payment platforms, and sending payments through your home university. Check foreign transaction fees, exchange rates, and processing times. Confirm recipient details and payment deadlines to avoid late penalties. Keep records of confirmations and receipts for refunds or disputes.
- Use a low-fee bank or specialist transfer service to save on exchange margins.
- Consider paying in local currency if the school accepts it to avoid double conversion.
- Explore installment plans or deferment options with the school.
- Verify tax or reporting implications for large transfers.
Health Insurance for Study Abroad: Options and Rules
You’ll need to check mandatory coverage requirements from your program and host country to make sure you meet minimum benefits and network rules.
If your school allows private policies, compare premiums, emergency evacuation, and repatriation options to find the best fit.
Learn how claims work abroad—what documentation you’ll need, where to file, and how cashless or reimbursement systems operate.
Mandatory Coverage Requirements
Wondering what insurance you’ll need before you go? You must meet host-school and visa mandates: many programs require minimum medical, evacuation, and repatriation limits. Check required coverage amounts, in-country provider acceptance, and policy duration matching your stay.
Keep documentation handy—official certificate, policy number, emergency contact, and translations if needed. If a school offers a mandatory plan, enrollment may be automatic or required.
- Verify minimums for medical, evacuation, and repatriation
- Confirm the insurer is accepted locally and by your host school
- Ensure coverage dates match your program exact dates
- Carry official proof and emergency contact details
Private Policy Options
How do you choose between plans when multiple private options are available? You’ll compare coverage limits, network access, and premiums. Prioritize plans that cover emergency care, repatriation, and pre-existing conditions if needed. Check whether your host university accepts the provider and whether referrals or authorizations are required. Consider deductible size versus monthly cost and confirm prescription and mental health benefits. Read exclusions carefully and note policy length and renewal rules. Use the table below to weigh three quick factors.
| Factor | Low Cost Plan | Comprehensive Plan |
|---|---|---|
| Premium | Low | High |
| Coverage | Limited | Broad |
| Best for | Short stays | Long programs |
Claim Procedures Abroad
Where do you start when you need to file a medical claim while studying abroad? You’ll act fast: document care, keep receipts, get provider notes, and understand your policy’s deadlines. Contact your insurer and campus health office immediately, follow required forms, and ask if pre-authorization’s needed. Know currency rules, claim language, and whether reimbursements go to you or the provider. Save digital and paper copies of everything.
- Note deadlines and required documents
- Verify in-network vs out-of-network procedures
- Obtain itemized bills and medical reports
- Confirm reimbursement method and timeline
Vaccinations and Medical Records to Bring
Before you leave, check which vaccinations are required or recommended for your destination and bring official documentation—vaccination cards, digital records, and any medical waivers—so you can prove your status at borders, schools, or health clinics. Pack a copy of prescriptions, allergy info, and contact details for your home physician. Keep originals and scanned backups in secure cloud storage and hard copies in your carry-on. Notify your program of major conditions and emergency contacts. Share essential medical info with a roommate or coordinator.
| Document | Format | Where to Store |
|---|---|---|
| Vaccination card | Paper + photo | Carry-on, cloud |
| Prescriptions | Original | Carry-on |
| Allergy letter | Doctor-signed | Wallet, cloud |
| Medical history | Summary | Coordinator, cloud |
| Insurance card | Physical + photo | Carry-on, phone |
Study Abroad Housing Options: Dorms, Homestays, Private Rentals
When you pick housing for your study abroad program, weigh factors like cost, privacy, cultural immersion, and proximity to campus or transit; dorms offer convenience and social life, homestays give cultural immersion and support, and private rentals grant independence but need more logistics.
You’ll consider budget, meal options, rules, and roommate fit. Think about safety, study space, and ease of commuting. Ask your program about mediation or emergency contacts.
Compare what’s included — utilities, internet, laundry — and how flexible leases are.
- Community vs. solitude
- Cultural learning through daily life
- Financial trade-offs
- Personal responsibility and independence
How to Lock in Housing Before You Arrive
Before you leave, book temporary accommodation so you’ve got a safe place to stay while you sort longer-term options.
Review and confirm lease details—dates, deposit, cancellation policy—before signing anything.
Keep copies of all confirmations and contact info so you can resolve issues quickly on arrival.
Secure Temporary Accommodation
A smart move is to lock in temporary accommodation before you land so you have a reliable place to sleep, store luggage, and start apartment hunting without added stress. Choose a short-term option—hostel, Airbnb, university guest room, or budget hotel—that’s near transit and campus. Book refundable rates when possible, confirm check-in times, and note cancellation policies. Pack a printed reservation and contact details.
Arrive prepared to view longer-term housing within days, using your temporary base for addresses and phone numbers.
- Prioritize safety and proximity
- Verify amenities and Wi‑Fi
- Keep receipts and confirmations
- Share arrival plans with contacts
Confirm Lease Details
Although you’ll often handle details remotely, confirm lease terms in writing so you know exactly what you’re signing and can lock in housing before arrival. Read the full lease, check move-in and move-out dates, rent amount, deposit rules, utility responsibilities, and notice periods.
Verify included furnishings, internet access, and maintenance procedures. Ask for photos, an inventory, and a clause about subletting or early termination.
Confirm landlord identity and payment methods, and get a receipt for deposits. If anything’s unclear, request revisions or an addendum before you sign so you avoid surprises when you arrive.
Flights, Arrival Plans, and Airport Pickup Tips
When you book your flight, aim for arrival during daylight hours and leave extra time for delays so you can clear immigration and reach your accommodation without rushing.
Plan arrival logistics: confirm campus pickup, know transport options, and share flight details with contacts. Keep digital copies of key confirmations and notify your host of any changes.
Expect queues and local COVID or health checks; budget time for those.
- Confirm pickup time and meeting point with your host.
- Research transit routes and fares from the airport.
- Share live flight updates and contact numbers.
- Prepare local currency for immediate expenses.
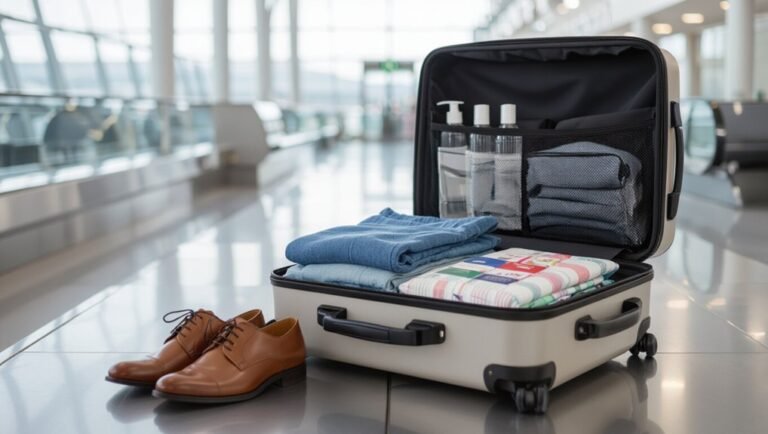
What to Pack: Documents, Electronics, and Cultural Items
Because you’ll rely on a few key items every day, pack documents, electronics, and cultural items with purpose. Bring passport, visa copies, acceptance letter, health records, and emergency contacts in a waterproof folder. Carry chargers, adapters, a power bank, headphones, and a locked laptop bag. Pack a few small cultural gifts, a phrasebook, modest clothing respecting local norms, and a reusable tote.
| Documents | Electronics | Cultural Items |
|---|---|---|
| Passport & copies | Charger & adapter | Small gifts |
| Visa & acceptance | Power bank | Phrasebook |
| Health records | Headphones | Modest clothing |
| Emergency contacts | Laptop bag | Reusable tote |
Accessing Money Overseas: Cards, Cash, and Digital Wallets
If you want to avoid fees, fraud, and cash shortages, plan how you’ll use cards, local currency, and digital wallets before you go. You’ll carry a primary travel card with low foreign transaction fees, plus a backup card kept separately.
Use small amounts of local cash for markets, transport, and places that don’t take cards. Set up a mobile wallet linked to a secure card and enable notifications for every transaction.
Notify your bank of travel dates, know ATM and card safety practices, and learn which payment methods are common where you’ll study.
- Carry one backup payment method
- Keep cash in small, secure amounts
- Use contactless payments where accepted
- Enable transaction alerts
Manage Banking Abroad and a Basic Tax Checklist
While you’re abroad, set up banking that keeps your money accessible, secure, and tax-compliant. Open an international-friendly account, notify your home bank, and link a local account for daily use. Track spending, keep digital backups of statements, and use two-factor authentication. Know withdrawal fees, exchange rates, and transfer limits. For taxes, gather year-round income records, scholarship details, and proof of residency or study status. File required forms back home and consult a tax advisor if you earn abroad.
| Task | Document | Frequency |
|---|---|---|
| Banking setup | ID, proof of address | Once |
| Monitoring | Statements | Weekly |
| Taxes | Records, advisor | Annually |
Safety Plan: Local Laws, Emergency Contacts, and Registration
When you prepare a safety plan, start by learning local laws, registering with your embassy or consulate, and compiling emergency contacts so you’re ready for unexpected situations. You should know visa rules, local customs, and what’s illegal to avoid trouble.
Registering makes it easier for officials to help during crises. Build a compact emergency card with phone numbers, your address, health info, and a local contact. Share your itinerary with family and program staff, and update them if plans change.
Register with your embassy, carry a compact emergency card, and share your itinerary so loved ones can help quickly.
Keep digital and physical copies of important documents and memorize basic emergency phrases in the local language.
- Know laws and customs
- Register with embassy
- Emergency contacts list
- Copies of documents
Transfer Credits and Track Degree Progress
Beyond safety and registration, you’ll also want a clear plan for how study abroad courses will count toward your degree and how you’ll track progress. Meet with your academic advisor and study abroad coordinator early to map course equivalencies, pre-approve syllabi, and understand credit transfer rules.
Keep detailed records: course descriptions, syllabi, grades, and official transcripts. Know grading conversion, credit limits, and residency requirements your home institution enforces.
Use degree audits or tracking tools to monitor fulfilled core, major, and elective requirements. Plan contingency options if credits don’t transfer, so you won’t delay graduation.
Cultural Prep: Etiquette, Norms, and Communication Tips
Because cultural cues shape everyday interactions, take time to learn local etiquette, social norms, and basic communication patterns before you go. You’ll avoid awkwardness, show respect, and build rapport faster by observing gestures, greetings, personal space, and formality levels.
Learn local etiquette and communication patterns before you go to avoid awkwardness and build rapport quickly.
Know dining manners, gift-giving expectations, punctuality rules, and appropriate dress for settings you’ll enter. Watch locals, ask hosts for guidance, and mirror tone and formality. Be open to correction and apologize if you misstep.
Use politeness markers, avoid sensitive topics, and prioritize listening over speaking until you gauge conversational rhythms.
- Observe first, imitate respectfully
- Prioritize formality when unsure
- Respect personal boundaries
- Ask when unsure
Quick Language-Learning Strategies Before Departure
Good cultural habits will make locals more receptive, but learning some of the language before you go speeds up connection and daily life. Focus on survival phrases, pronunciation, and listening practice. Use apps for daily micro-lessons, label items at home, and practice shadowing short dialogues. Join language exchange chats or find a tutor for targeted role-play: ordering, directions, and introductions. Review key grammar patterns but don’t overlearn. Pack a pocket phrasebook and flashcards for transit. Stay consistent—15–30 minutes daily beats marathon cramming.
| Quick Task | Purpose |
|---|---|
| Phrase app | Instant practice |
| Label items | Vocabulary recall |
| Tutor role-play | Real speech |
| Flashcards | Rapid review |
Stay Connected: SIM Cards, eSIMs, and VPNs
You’ll want to compare getting a local SIM with activating an eSIM so you can pick the cheapest, most convenient option for calls and data.
Check carrier compatibility, plan sizes, and whether your phone is unlocked before you leave.
Also plan to use a reliable VPN for secure banking and to access home services while you’re abroad.
Local SIM vs eSIM
Wondering whether to grab a local SIM or switch to an eSIM on your study-abroad trip? You’ll weigh cost, convenience, and device compatibility.
Local SIMs give cheap data and easy top-ups but need a locked-free phone and physical swaps.
eSIMs activate instantly, suit short stays, and keep your home number reachable, yet some countries or carriers limit availability.
Decide based on length of stay, phone support, and whether you need multiple profiles.
Keep backup options: a secondary SIM slot or a travel hotspot can save you.
- Cost vs convenience
- Phone compatibility checks
- Data plan flexibility
- Backup connectivity plan
Using VPNs Abroad
If you need secure access to home services or want to protect your browsing on unfamiliar networks, use a VPN while abroad to encrypt your traffic and mask your location. Choose a reputable provider with strong encryption, a no-logs policy, and servers near your study country for better speed.
Install the app on all devices before leaving, test connections, and enable kill switch and automatic reconnect features. Be aware some countries restrict VPN use—check local laws.
Avoid free VPNs with questionable privacy. Use split tunneling to keep local services accessible while routing sensitive traffic through the VPN.
Background Checks and Notarized Forms You Might Need
Because many programs involve working with minors, vulnerable adults, or secure facilities, background checks and notarized documents are often required before you depart. You’ll likely submit criminal record checks, child-protection clearances, or employment verifications; some places ask for fingerprinting.
Many programs require background checks and notarized releases—criminal records, child-protection clearances, and sometimes fingerprinting—so prepare documents early.
Notarized consent forms, medical releases, and parental permission for minors are common. Check deadlines, accepted agencies, and whether originals or certified copies are needed. Keep digital and paper copies organized.
- Criminal record check (local and national)
- Child protection/working with children check
- Notarized medical release or power of attorney
- Employment or university verification notarized
How to Get Documents Apostilled or Legalized
You’ll first need to determine whether your destination country accepts an apostille or requires full legalization.
Gather the required original documents, any notarizations, and translations before you submit them.
Then send everything to the appropriate authority—usually your state’s apostille office or the foreign embassy/consulate—for processing.
Determine Apostille vs Legalization
When preparing documents for use overseas, you’ll need to decide whether they require an apostille or full legalization — two different processes that authenticate documents for foreign authorities. You’ll check the destination country’s status under the Hague Apostille Convention: if it’s a member, an apostille suffices; if not, you’ll follow consular legalization, often involving notarization, state authentication, and embassy certification.
Confirm requirements with the receiving institution or embassy, factor time and fees, and choose a reliable service or government office to handle steps. Keep originals safe and track processing to avoid delays.
- Confirm country’s Hague status
- Verify institution or embassy rules
- Compare time, cost, and complexity
- Use official or trusted services
Prepare Required Documents
Before you submit anything, gather every document the receiving institution or embassy lists—transcripts, diplomas, birth certificates, affidavits, and any notarized forms—and check whether each needs an apostille or full consular legalization.
Next, verify each document’s formatting: originals, certified copies, translations with certified translators, and notarization where required. Keep originals safe and make multiple certified photocopies.
Note processing times and fees so you won’t miss deadlines. Label files clearly and create a checklist tracking status for each document.
Finally, scan certified versions into PDF backups and store them in secure cloud and local folders for easy retrieval.
Submit To Appropriate Authority
Because different countries and institutions accept only specific forms of authentication, start by confirming whether your documents need an apostille under the Hague Convention or full consular legalization.
Then submit each document to the exact authority specified—state-level apostille offices, the national foreign ministry, or the destination country’s embassy/consulate—and follow their submission, fee, and processing instructions precisely.
You’ll prepare originals and certified copies, track requirements, and allow extra time for courier or in-person steps.
Check turnaround times and refund policies.
Keep receipts and authenticated originals together for travel or enrollment.
- Verify the exact authority and form required
- Follow submission and fee instructions
- Track processing times and retain receipts
- Keep authenticated originals accessible
Common Application Mistakes and How to Avoid Them
If you want your study-abroad application to stand out, avoid common slip-ups that cost time and reduce your chances—missing deadlines, inconsistent information, weak essays, and incomplete financial documentation top the list. Proofread every field, match spellings across forms, and use consistent dates. Tailor essays to program goals, show clear finances with authentic documents, and request recommendations early. Verify application portals before submitting and keep copies of confirmations. Ask a mentor to review materials for clarity and tone. Stay organized so small errors don’t derail your plan.
| Mistake | Fix |
|---|---|
| Deadlines | Calendar alerts |
| Inconsistency | Cross-check |
| Weak essay | Revise with purpose |
| Missing docs | Checklist |
| Late recs | Early request |
Timeline Checklist: 6+ Months, 3 Months, and 2 Weeks Out
Now that you’ve tightened up documents and fixed common mistakes, it’s time to map deadlines and actions across the months ahead.
Six-plus months out, confirm program acceptance, apply for visas, arrange housing, and book flights.
Six+ months ahead: confirm acceptance, start visas, secure housing, and book flights to lock in your plan.
Three months out, schedule vaccinations, finalize finances, and enroll in pre-departure orientations.
Two weeks out, pack essentials, copy documents, and set communication plans.
- Prioritize deadlines by immovability.
- Create a shared checklist with contacts.
- Backup digital and physical documents.
- Keep an emergency fund and local embassy info.
Stick to this timeline, and you’ll reduce last-minute stress and focus on arrival logistics.
What to Expect in Your First Week Abroad
When you step off the plane, expect a busy blend of orientation sessions, paperwork, and settling in as you learn your new neighborhood, meet classmates, and sort practicalities like SIM cards, bank access, and local transit. You’ll register courses, attend health briefings, and set up essentials while juggling jet lag. Explore nearby shops, test transit routes, and introduce yourself to roommates. Keep important documents organized and note campus contacts. Pace socializing; prioritize rest and deadlines. Use checklists to track tasks and deadlines so you don’t miss meetings or paperwork.
| Task | Tip |
|---|---|
| Orientation | Arrive early |
| Registration | Bring ID |
| Banking | Ask fees |
| Transit | Buy passes |
| Groceries | Find hours |
How to Stay Connected With Family and Support Networks
Staying connected with family and support networks takes a little planning. You’ll set communication expectations, pick reliable apps, and schedule regular check-ins that fit time zones.
Share emergency contacts, your local address, and campus support resources so others know where to turn if needed. Balance staying in touch with building local friendships and independence.
- Choose two primary apps (video and messaging) and test them before you leave.
- Set a weekly call time and stick to it unless plans change.
- Share digital copies of important documents securely.
- Join student groups and local communities for backup support.
Extend Your Stay or Change Visas: Next Steps
If you decide to extend your stay or switch visa types, start by checking the host country’s immigration rules and your program’s deadlines so you don’t miss filing windows.
Next, contact your university’s international office and an immigration advisor to confirm eligibility, required forms, fees, and processing times.
Gather documents: passport copies, enrollment verification, financial proof, medical records, and any sponsor letters.
Prepare translations and certified copies if needed.
Submit applications early, track receipts, and follow up promptly on requests.
Keep copies of everything and maintain legal status while awaiting decisions; don’t travel until your new visa is secured.
Frequently Asked Questions
Can Study Abroad Credits Affect My Financial Aid Eligibility Back Home?
Yes — study abroad credits can affect your financial aid eligibility back home. You’ll need to confirm credit transfer, enrollment status, and program accreditation with your home financial aid office, since changes can alter awards or repayment terms.
Will Studying Abroad Impact My Eligibility for Student Housing Upon Return?
Yes — returning from abroad can affect your student housing eligibility and priority; policies vary by school, so check deadlines, residency requirements, and housing application timelines early, and contact housing to secure your spot and clarify any holdovers.
Do I Need a Local Driver’s License to Rent a Car Briefly Abroad?
Usually you don’t, but you’ll need your home license plus an International Driving Permit in many countries; rental companies and local laws vary, so check host-country requirements, bring translations, and confirm with the rental agency in advance.
How Do International Work-Study or Campus Jobs Work for Short-Term Students?
You can usually’t work on a student visa if you’re short-term; some schools offer unpaid or volunteer campus roles, while paid work-study usually requires full-time, long-term enrollment and specific visa authorization—check your host institution’s rules.
Can I Take a Leave of Absence From My Home University for Study Abroad?
Yes — you can often take a leave of absence from your home university to study abroad, but you’ll need to get formal approval, confirm enrollment/credit transfer policies, meet deadlines, and maintain communication with advisors and housing offices.
Conclusion
You’ve got the essentials to make studying abroad happen: a valid passport (renew it early), the right program and visa for your goals, and a clear timeline for preparation. Expect an adjustment period your first week, stay connected with family and campus supports, and know how to extend your stay or switch visas if plans change. With organization and flexibility, you’ll turn this experience into personal growth, academic progress, and lasting international memories.