What Do You Have to Take Out of Your Bag at Airport Security
You’ll usually need to pull out laptops, tablets and other large electronics from your bag and place them in separate bins, plus your quart-sized liquids bag with containers 3.4 oz or smaller. Remove shoes or bulky outerwear when prompted and keep prescription meds, baby formula or medical devices accessible for inspection. Chargers, loose batteries and duty‑free liquids may be checked too. Follow officer instructions calmly for extra screening, and keep items organized so you can learn more helpful tips.
Quick Checklist: What Security Will Ask You to Remove
When you step up to the security line, expect agents to ask you to remove a few items so they can screen them quickly. You’ll take out electronic devices larger than a smartphone—laptops, tablets, and e-readers—and place them in a separate bin.
Remove liquids exceeding allowed sizes and pack them where agents can spot them easily.
Metal items like keys, belts with big buckles, watches, and loose change should go in your tray.
Grooming tools with blades belong in checked luggage.
Keep medication and baby necessities accessible and declare anything unusual when asked so screening moves smoothly.
Shoes & Outerwear: When to Remove
You’ll usually need to remove shoes if a TSA agent asks or if you trigger the scanner, so wear slip-ons to speed things up.
Follow TSA guidance on coats and jackets—you’ll typically place them in a bin unless an officer says otherwise.
Keep exceptions in mind (small children, medical needs, or certain outerwear) and have documentation ready if required.
Shoes: When Required
If security staff ask you to remove your shoes, step out of them and place them on the conveyor belt so they can pass through the X-ray machine. This usually applies to bulky footwear, sneakers with hidden compartments, or when TSA officers spot something unusual on the scanner.
You’ll step through the metal detector or scanner barefoot or in socks. Keep shoes easy to slip back on, pull pockets empty, and follow officer directions promptly to speed the line.
Be prepared to unwrap taped shoes or show insoles if requested.
- Wear slip-ons
- Avoid taped or bulky boots
- Keep shoes visible
Outerwear: TSA Guidelines
Because outerwear can set off alarms or hide prohibited items, you’ll often be asked to remove coats, jackets, and bulky sweaters before screening. Place them in a bin or on the conveyor belt for X-ray inspection.
Lightweight layers like cardigans or thin hoodies may stay on if they don’t trigger additional screening, but follow officer instructions.
Remove items with metal accents or large pockets that could obscure images.
Hold onto small personal items and be ready to repack quickly after scanning.
If a secondary check is needed, cooperate promptly to keep lines moving and avoid delays for yourself and others.
Exceptions And Tips
When airport staff ask you to remove shoes or outerwear, follow their guidance but know there are common exceptions and practical tips that can save time and hassle. You’ll usually take off heavy coats, boots, and layered jackets, but travelers with mobility devices, medical needs, or certain religious garments often get exceptions.
Keep shoes easy to slip off, pack sweaters in carry-ons, and have ID accessible. If you’re unsure, ask the TSA agent before the scanner.
- Wear slip-on shoes and minimal jewelry.
- Carry a lightweight jacket in a clear bag.
- Have documentation for medical or religious exceptions.
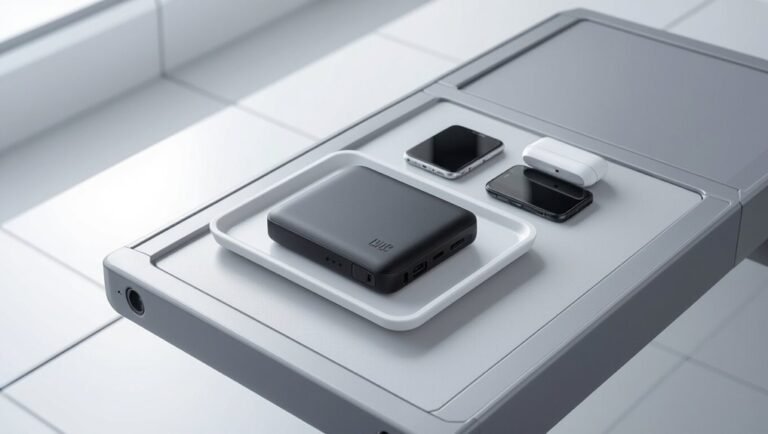
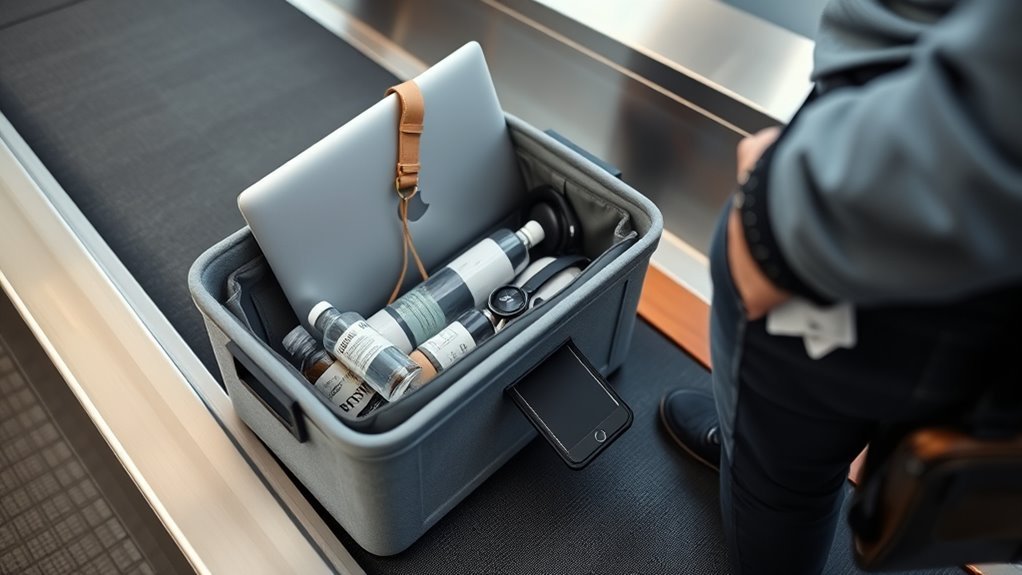
Laptops & Large Electronics: Airport Security Rules
You’ll need to take laptops out of their bags and place them in a separate bin for X-ray screening.
Other large electronics—like tablets or gaming consoles—may also require individual screening depending on the checkpoint.
If you have TSA PreCheck, you usually won’t have to remove laptops or large electronics, but follow the officer’s instructions.
Laptops Must Be Removed
If you’re carrying a laptop or a similarly large electronic device, take it out of your bag and place it in its own bin before you reach the X-ray. You’ll speed the line and avoid delays since officers need a clear view. Remove it gently, close any loose lids, and hold accessories like chargers separately if requested. Keep the laptop near the top of your carry-on for quick retrieval after screening.
- Power off or set to sleep mode to prevent accidental inputs.
- Use a thin sleeve to protect from scratches.
- Have ID and boarding pass ready for faster processing.
Large Electronics Screening
Wondering what counts as a “large electronic device” and how to handle it at security?
You’ll usually remove laptops, tablets larger than a phone, e-readers, and portable gaming consoles from your carry-on for screening. Place them in their own bin, powered on if requested, with chargers and cables tucked away.
Smaller electronics like phones and smartwatches typically stay in your bag unless asked.
Foldable devices may need removal depending on size and enclosure.
If an item’s size or case prevents a clear X-ray image, agents will ask you to take it out.
Follow instructions promptly to keep the line moving.
Exceptions For TSA PreCheck
Because TSA PreCheck speeds up screening, you usually won’t need to remove laptops and most large electronics from your bag when you go through the dedicated lane. Still, there are exceptions you should know so you aren’t delayed.
You might be asked to remove items if your bag triggers additional screening, contains unusual gear, or trips the X-ray algorithm. Be ready to take out anything oversized, dense, or suspicious.
If a TSA officer requests removal, comply promptly to keep the line moving. Keep devices accessible and powered; a quick demonstration can resolve most secondary checks.
- Random checks
- Oversized batteries or equipment
- Dense or unclear X-ray images
Tablets, E-Readers & Small Electronics Rules
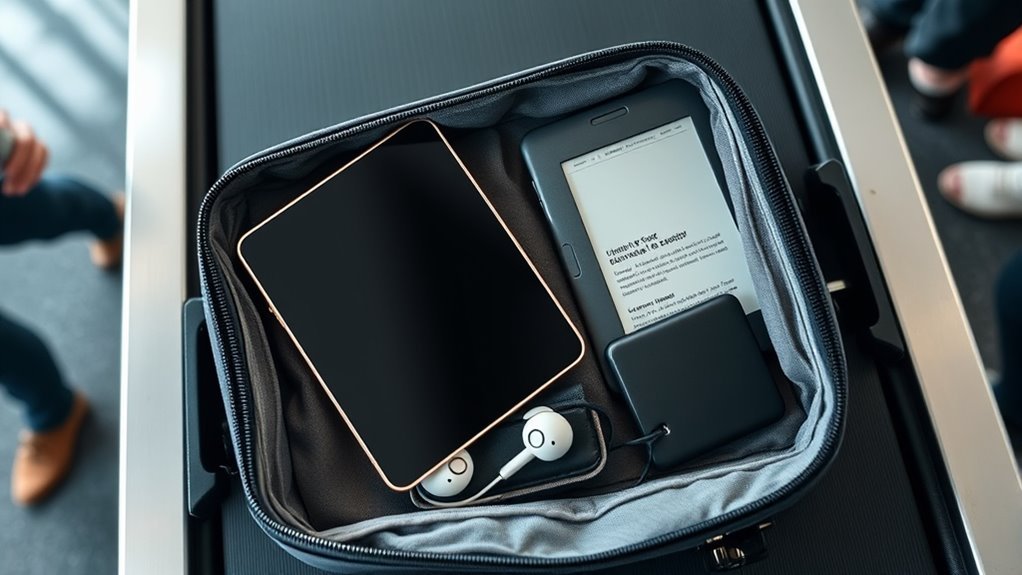
When you approach the security checkpoint, pull out tablets, e-readers and other small electronics larger than a smartphone and place them in a separate bin so agents can get a clear X-ray view. Remove cases that might obscure screens or internal components; leave chargers and cables in your bag unless an agent asks otherwise.
If you’ve got multiple devices, stack them neatly in one bin to speed the process. Be ready to power devices on if asked to prove functionality.
Foldable devices may need special handling—follow staff instructions. Return items promptly after they clear screening to keep lines moving.
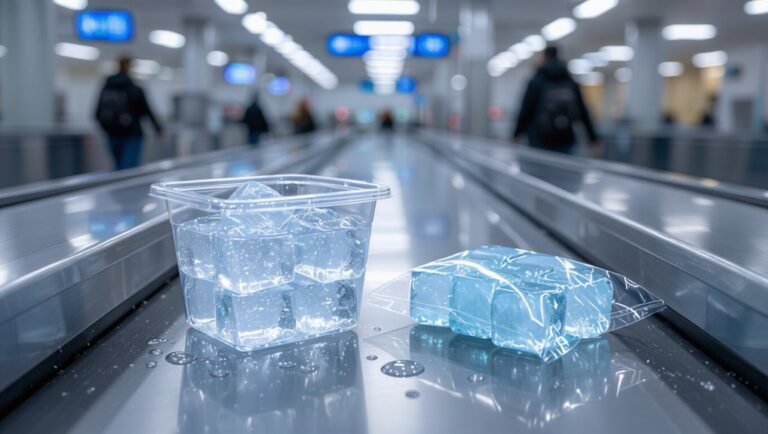
Liquids & the 3-1-1 Rule
If you’re carrying liquids through security, follow the TSA’s 3-1-1 rule: each passenger may bring liquids, gels, creams and aerosols in containers of 3.4 ounces (100 milliliters) or less. All containers must fit comfortably in a single 1-quart clear, resealable bag, and you’re limited to one such bag per person—place that bag in a bin for screening and remove it from your carry-on.
Pack travel-size toiletries, medications and duty-free liquids properly. Keep the bag accessible and avoid overstuffing. Be ready to present prescriptions separately if asked.
- Consolidate containers to save space.
- Seal the bag fully.
- Don’t exceed limits.
Solid Food & Baby Formula Screening
Along with your liquids bag, be prepared for screening of solid foods and baby formula, which follow different rules. You should remove bulky or dense foods—sandwiches, salads, cakes—if requested, placing them in a bin for X-ray inspection. Pack wrapped snacks separately to speed up checks.
Baby formula, breast milk, and sterilized water are allowed beyond standard liquid limits; declare them to the officer and present them for testing. Officers may open containers or use test swabs; don’t worry, they’ll reseal when possible.
Keep feeding items accessible to avoid delays, and cooperate promptly to move through security efficiently.
Medications & Medical Devices to Separate
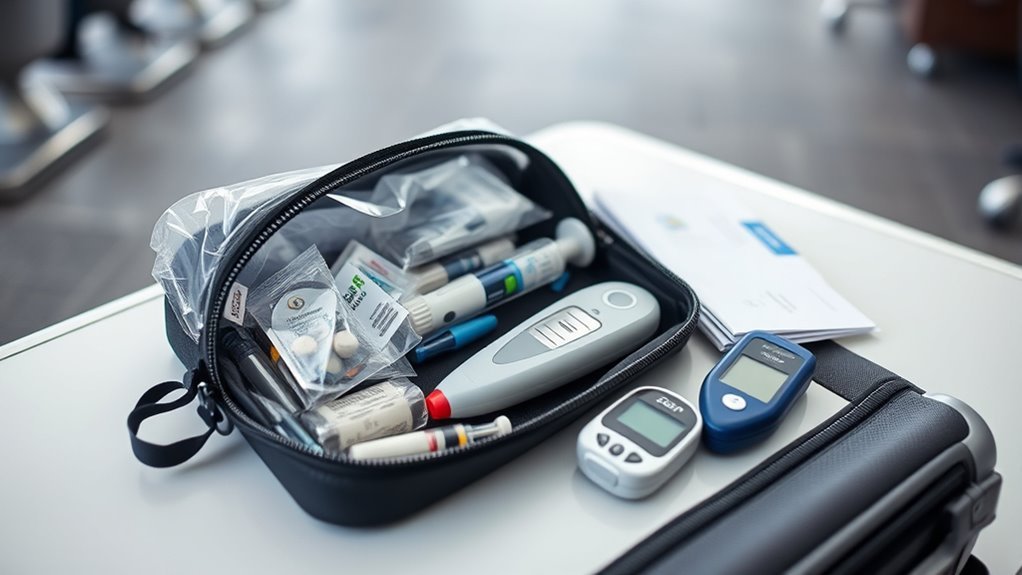
Keep your prescription meds, insulin and supplies, and any portable oxygen devices easy to access so you can pull them out for screening.
Let security know you have medical items before you reach the X-ray machine so agents can handle them appropriately.
You’ll usually keep meds with you in carry-on luggage and may need to show prescriptions or notify TSA for special handling.
Prescription Medications
Because TSA and airline rules can vary and you may need quick access, take your prescription medications out of your carry-on bag and keep them with you at the security checkpoint. Keep meds in their original labeled containers when possible, carry a copy of prescriptions or doctor’s note, and separate any liquids or gels exceeding 3.4 ounces for inspection.
- Pack essential pills and inhalers in your personal item for immediate access.
- Inform the TSA officer about medications and any screening concerns before screening begins.
- Store extra prescriptions in checked luggage only if you won’t need them during travel.
Insulin And Supplies
When you travel with insulin and its supplies, carry them in your carry-on and pull them out at the security checkpoint so they can be inspected separately. Label containers when possible and bring a doctor’s note or prescription to verify medical need.
Pack insulin pens, vials, pumps, syringes, lancets, glucagon, and spare batteries together for easy screening.
Keep liquids exceeding standard limits separated and declare them to the officer. Use a clear pouch to show items quickly.
If you use an insulin pump, tell the officer before screening so alternative inspection methods can be used without disconnecting your device.
Portable Oxygen Devices
If you travel with portable oxygen devices, you should carry them in your carry-on and pull them out for separate inspection at the security checkpoint. Tell TSA officers about your device and have prescriptions or paperwork ready.
You’ll usually keep the concentrator or cylinders with you; they’ll screen it visually and may test small batteries. Follow staff instructions to guarantee safe handling and avoid damage.
- Bring prescription and device documentation.
- Remove batteries if asked and present separately.
- Notify officers before screening to expedite inspection and minimize delays.
Travel-Size Toiletries That Can Stay Packed
Although you’ll remove larger liquids at the checkpoint, small travel-size toiletries that meet the 3-1-1 rule can stay packed and save time—think single-use cleansing wipes, solid bar soap, sealed travel toothpaste tubes, and TSA-approved travel sprays.
Pack items in a clear quart-sized bag, keeping containers 3.4 ounces (100 milliliters) or less. Keep gels, creams, and liquids consolidated to avoid searches.
Solid alternatives like shampoo bars and balm deodorants reduce scrutiny. If an item’s label is unclear, be ready to show it.
You’ll breeze through security faster when you organize and follow the size limits precisely.
Chargers, Batteries & Power Banks to Remove
Bring chargers, spare batteries, and power banks to the front of your bag and place them in the bin for inspection—TSA agents often ask to see loose lithium batteries and external battery packs because they pose fire risks in checked luggage.
You’ll need to remove large power banks and loose lithium cells from checked bags and carry them through the checkpoint. Keep smaller device chargers in your carry-on but in an accessible spot. Label or keep originals if possible to speed things up.
Be ready to turn on devices if asked.
- Power banks: carry-on only, accessible
- Loose lithium batteries: remove and present
- Device chargers: easy-to-reach location
Wearable Tech & Metal Items: When to Keep Them On
You can usually keep small wearables like fitness trackers and smart rings on during screening, but remove larger metal items—belts, heavy jewelry, and metal-watch bands—to avoid alarms.
If an alarm goes off, security may ask you to remove items or undergo a secondary check, so be prepared.
Remember there are exceptions for medical devices and implants, so tell an officer if you need special handling.
Small Wearables Stay On
If your items are small and nonmagnetic—think fitness bands, lightweight watches, or certain smart jewelry—you can usually keep them on through the security checkpoint, since most modern scanners won’t be triggered by them.
Still, be ready to remove anything that alarms the officer or sets off a secondary screening.
Leave thin earbuds, silicone rings, and simple accessory watches on unless instructed otherwise.
Check airline or TSA guidance for exceptions like thicker smartwatch batteries.
Pack unfamiliar or hefty metal pieces in your carry-on to avoid delays.
- Thin fitness bands
- Lightweight watches
- Simple smart jewelry
Large Metal Items Removed
Smaller wearables can usually stay put, but larger metal items usually need to come off before screening. You’ll remove belts with big buckles, bulky jewelry, and metal orthopedic braces that trigger alarms. Place them in a bin or your carry-on so they don’t delay you.
| Item | Action |
|---|---|
| Large belt buckle | Remove |
| Chunky bracelet/necklace | Remove |
| Metal brace or cast | Remove if possible |
If an item is medically necessary, tell the officer before screening. Otherwise, take off large metal pieces to speed through the checkpoint and avoid extra inspection.
Security Screening Exceptions
Wondering when you can keep gadgets and metal wearables on during screening? You usually can if they’re on your person and won’t set off detectors: sleek fitness bands, smartwatches, and small jewelry often stay. Still, follow agent instructions and be ready to remove anything that alarms the scanner or obscures an inspection.
- Ask: if your device is bulky, remove it and place it in a bin.
- Declare medical implants or prosthetics before screening; agents may use alternative methods.
- Keep coins, keys, and large metal belts in your carry-on for X-ray, not on your body.
Always comply promptly.
Jewelry, Belts & Accessories That Trigger Alarms
Because metal detectors and advanced imaging pick up even small bits of metal, you’ll want to remove jewelry, belts, and metal accessories before screening to avoid delays and extra checks.
Take off watches, rings, necklaces, cufflinks, and body piercings you can safely remove; stow them in a carry-on or bin.
Unbuckle belts with metal buckles and place them in the tray.
Keep eyeglasses, hairpins, and coins accessible so you can quickly separate them if asked.
If you’re wearing items you can’t remove for medical or religious reasons, notify the officer before screening to speed verification.
Duty-Free Liquids: Sealed-Bag Screening Rules
Flying with duty-free liquids? You can usually keep them sealed in the transparent tamper-evident bag (STEB) if you bought them airside and the receipt’s visible. Be ready to remove the bag if security asks for separate screening.
Flying with duty-free liquids? Keep them sealed in the transparent tamper-evident bag with your receipt visible.
If connecting through another country, check that transfers honor STEBs; some require resealing or placing items in checked luggage. Always keep receipts and avoid mixing other liquids into the bag.
- Show the sealed STEB and receipt on request.
- Remove the STEB only when instructed by officers.
- Repack carefully—broken seals can mean confiscation.
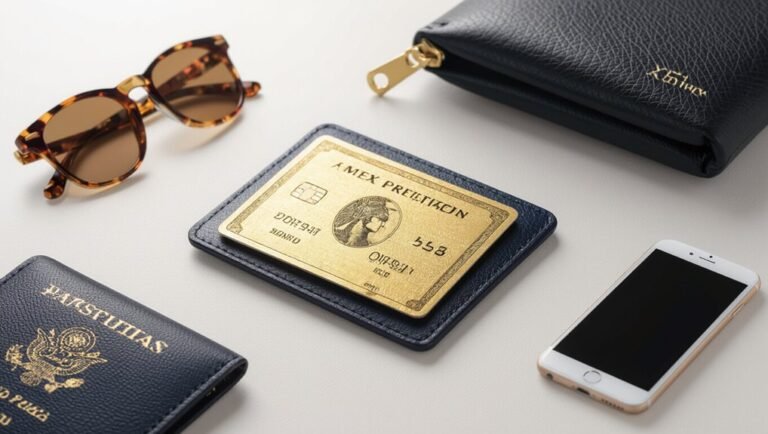
Boarding Passes & Documents to Have Ready
After you’ve handled duty-free screening, get your boarding pass and travel documents ready — security officers will often ask to see them alongside your ID. Keep your boarding pass accessible in a passport holder, phone wallet, or top compartment so you don’t fumble.
Have your passport or government ID out and unzipped for quick inspection. If you need visas, vaccination cards, or printed itineraries, place them with your ID to present together.
Keep loose receipts, loyalty cards, and unrelated papers tucked away to speed the process. Present documents when requested, follow officer instructions, and stow items again before moving on.
TSA PreCheck & Trusted-Traveler Exceptions
If you’re enrolled in TSA PreCheck or another trusted-traveler program, you’ll usually skip the shoe, belt, and laptop-out lines and move through a shorter security lane — but keep your known-traveler number handy and check your boarding pass for the PreCheck indicator, since eligibility isn’t guaranteed on every flight.
When you do have PreCheck, you still need to follow rules for liquids, prohibited items, and device screening. Know that some flights, aircraft types, or international connections can negate PreCheck even with your membership.
Even with PreCheck, you must follow liquid and device rules — and note some flights or connections may void eligibility.
- Confirm PreCheck on your boarding pass before leaving home.
- Keep liquids compliant and accessible.
- Have ID matching your known-traveler name.
If an Item Is Flagged for Extra Screening
When a bag or item triggers extra screening, TSA agents will pull it aside for a closer look while you wait nearby; they’ll usually explain what they’re checking and give you options for how to proceed. Stay calm, follow instructions, and avoid touching the screened items unless asked.
You can request the screening in a private room for sensitive items or personal concerns. If agents open containers, they’ll handle contents carefully; you can observe.
Expect swabs for explosives, additional X-rays, or manual searches. Cooperate, answer questions succinctly, and retrieve your belongings promptly once cleared to keep lines moving.
Packing Tricks to Speed Through Security
While you’re packing, think like TSA: organize items to show and remove quickly—place liquids in a clear quart-sized bag, keep laptops and tablets near the top, and stow shoes and belts where you can access them without unpacking your whole carry-on. You’ll move faster if things are visible and reachable.
Think like TSA: pack for quick screening—clear liquids, top-access electronics, and shoes/belts where you can grab them fast.
Layer clothing so a sweater can be pulled instead of unpacked.
Keep travel documents and wallet in an easy-to-grab pocket.
Use a small pouch for chargers and cords to prevent loose items from scattering.
- Wear slip-on shoes for quick removal.
- Keep liquids consolidated and labeled.
- Use a top-access compartment for electronics.
Frequently Asked Questions
Can I Carry Frozen Food Through Security?
Yes, you can usually carry frozen food through security, but it must be completely frozen when screened. If it’s partially thawed or contains liquid, it may be subject to liquid rules or additional inspection, so pack accordingly.
Are Duty-Free Cigars Allowed in Carry-On?
Yes, you can carry duty-free cigars in your carry-on, but you’ll need to follow airline and destination tobacco limits, declare them if required, and keep them accessible for inspection; restrictions vary, so check rules before flying.
Do I Need to Remove Neck Pillows or Travel Blankets?
You usually don’t need to remove neck pillows or travel blankets; TSA screens them in your bag or separately if requested. If they trigger inspection, agents might ask you to take them out for X-ray or manual check.
Are Disposable Vapes Permitted in My Carry-On?
Yes, you can usually carry disposable vapes in your carry-on, but you can’t put them in checked baggage; airlines and countries differ, so check TSA rules and airline policies, and remove batteries or packaging if requested.
Can I Bring Sharp Sewing Needles or Knitting Needles?
Yes, you can bring knitting needles in carry-on, but sharp sewing needles may be restricted; check your airline and TSA rules, pack them safely in a case, and be prepared for officer inspection at security.
Conclusion
Now you know what to pull from your bag and when: shoes or outerwear if required, laptops and big electronics, small devices if asked, and liquids following the 3-1-1 rule, plus your boarding pass and ID. If something’s flagged, cooperate and you’ll be through quickly. Use TSA PreCheck or pack smartly—keep essentials accessible and liquids organized—to move through security with less stress and get to your gate faster. Safe travels.