What Is 62 Linear Inches Luggage
62 linear inches means your suitcase’s length + width + height add up to about 62 inches (158 cm), and airlines use that as a common checked-bag size limit. Measure the exterior from the outermost points—include wheels, handles, bumpers and any protrusions—using a tape measure with handles extended. If your total exceeds 62 in, you’ll likely face oversized fees or need to repack. Keep measurements precise and follow airline rules; more tips below will help you avoid surprises.
What 62 Linear Inches Means for Luggage

What does 62 linear inches mean for your luggage? It’s the combined length, width, and height limit many airlines set for checked bags. If your suitcase’s three dimensions add up to 62 inches or less, it typically qualifies as standard checked luggage and avoids oversized fees.
You’ll still need to follow weight limits and airline-specific rules, but meeting this measurement helps guarantee smoother check-in. Use it as a quick compliance check when choosing or packing a bag for travel.
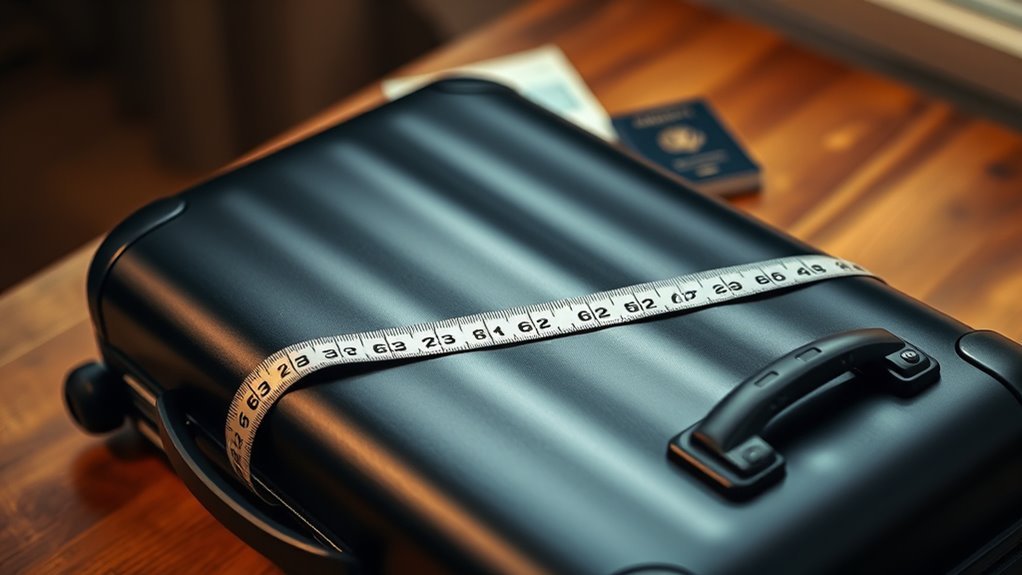
How To Calculate 62 Linear Inches
Now that you know why 62 linear inches matters, here’s how to measure it. You’ll add length + width + height using a tape measure. Lay the bag flat and measure its longest points. Ignore packing, focus on the empty exterior dimensions.
| Dimension | How to measure | Example |
|---|---|---|
| Length | Longest side, tip to tip | 28 in |
| Width | Across the front, widest point | 12 in |
| Height | From base to top, excluding wheels/handles | 22 in |
Add the three numbers. If total ≤ 62 in, the bag meets the common airline limit.
Where To Measure: Exterior, Wheels, Handles
When you measure for the 62-inch rule, stick to the bag’s exterior and include permanent parts like wheels and fixed handles—those are what airlines check. Measure height, width, and depth from the outside: include molded corners, wheel housings, bumpers, and any fixed carry or retractable-handle housings.
Don’t compress or flatten rigid components to shave inches; airlines measure as packed. Remove detachable straps or tags unless they’re permanently affixed. If handles retract but stay within a housing, you usually don’t count them extended; if they protrude when stowed, they count.
Record total linear inches to confirm compliance.
Measuring Soft-Sided vs Hard-Shell Luggage
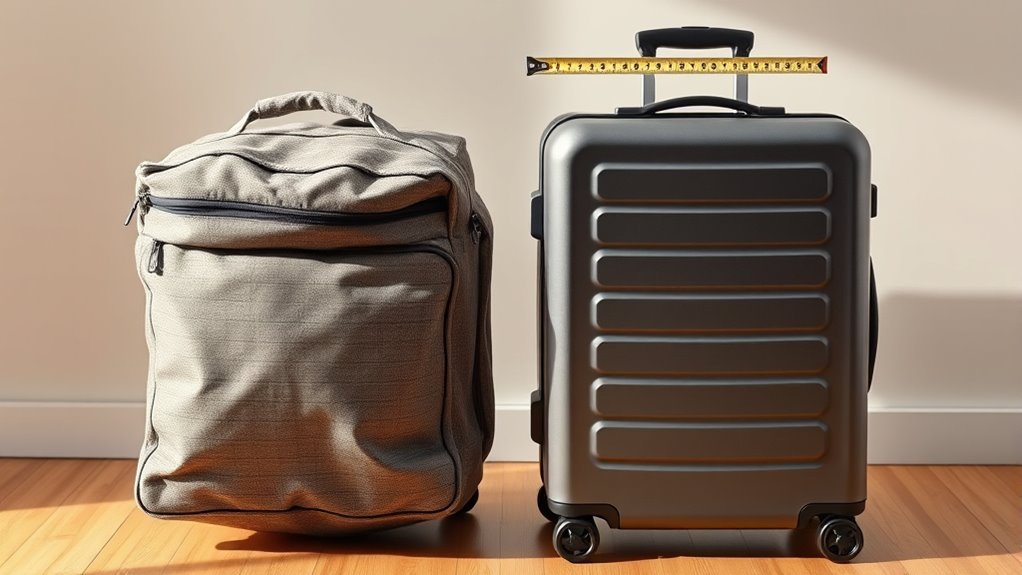
When you measure soft-sided luggage, remember its fabric and compression give you more wiggle room but also less structural protection than hard-shells.
Hard-shell bags keep their shape, so you’ll measure true exterior dimensions and account for heavier, rigid construction.
Consider how weight and packing compression change what fits and whether you’ll exceed a carrier’s 62 linear inches limit.
Weight And Flexibility
Although hard-shell suitcases often feel sturdier, soft-sided luggage usually gives you more flexibility and lighter base weight, which matters when airlines enforce strict 62-linear-inch and weight limits.
You’ll find soft-sided cases compress slightly to fit odd spaces and let you add a few extra items without exceeding linear dimensions.
Hard shells resist deformation, so they protect fragile goods better but can force you to shift or remove items to meet weight caps.
Check tare weight before packing: a heavier case eats allowance.
Choose based on what you carry—bulky clothes favor soft sides; fragile gear favors rigid shells.
Packing Compression Differences
Soft-sided luggage lets you compress and squish gear into tight spaces, while hard-shell cases keep their shape no matter how much you press. You’ll pack more into soft bags by squeezing clothes, but you’ll risk wrinkles and uneven weight. Hard shells protect fragile items and keep dimensions predictable for airline checks, though you can’t expand them. Choose soft for flexibility and odd-shaped items; choose hard for protection and rigid limits. Consider a hybrid approach: soft exterior pockets with a rigid frame. Compare features against your packing habits to hit 62 linear inches without surprises.
| Feature | Impact |
|---|---|
| Compressibility | Soft wins |
| Protection | Hard wins |
| Expandability | Soft wins |
| Weight distribution | Hard wins |
| Airline sizing | Hard predictable |
Common Measurement Mistakes to Avoid
When you measure for the 62 linear inch limit, make sure you’re measuring the outside dimensions — including wheels and handles — since airlines check the total.
Don’t forget to convert units correctly if you’re switching between inches and centimeters, or you’ll end up over the limit.
Double-check each dimension once more before you pack so you don’t get surprised at the gate.
Measuring Outside Dimensions
Before you measure your suitcase for the 62 linear inches rule, make sure you’re measuring the outside dimensions—the total height, width, and depth including wheels, handles, and any protrusions—because airlines check exterior size, not interior capacity.
Measure from the furthest points, hold the tape straight, and record each dimension; then add them to get linear inches.
Common slip-ups happen when people guess, round incorrectly, or forget detachable pieces. Avoid these by double-checking measurements and comparing to airline limits.
- Measure straight lines only, no curves
- Record to the nearest inch
- Re-measure after packing to confirm
Including Wheels And Handles
Because airlines measure the suitcase from its outermost points, include wheels and extended handles when you measure, not just the shell of the bag.
When you measure, lay the suitcase flat and measure height, width, and depth including protrusions like wheels, bumpers, and handle housings.
Extend telescoping handles to their full locked length and add that to the height if the airline counts it.
Don’t guess—use a tape measure and record each dimension.
Remember that removable wheels or covers still count if attached during travel.
Accurate measuring prevents surprises at check-in and keeps you within the 62-inch limit.
Using Correct Unit Conversions
If you’re converting inches to centimeters or feet to inches, use the exact factors—1 inch = 2.54 cm and 1 foot = 12 inches—rather than rough estimates that can push you over a 62-inch limit.
You’ll avoid surprises by measuring carefully and converting precisely. Don’t round up prematurely; airlines enforce strict limits.
- Measure length, width, and height including wheels and handles.
- Convert each dimension with the exact factor before summing.
- Double-check totals and record values to the nearest tenth.
Follow those steps and you’ll confidently stay within 62 linear inches and avoid extra fees.
Do Wheels/Handles Push a Bag Over 62 Inches?
When you measure a bag for the 62 linear-inch rule, include wheels and handles because airlines count the total outside dimensions—length + width + depth—so protruding handles or bulging wheels can push a suitcase over the limit. You should extend handles and measure from the furthest points, including wheel housings. Compressible pockets and retractable handles might be ignored if stowed, but don’t assume. Measure with what you’ll actually travel with. If your dimensions exceed 62 inches, you’ll face fees or gate check. Plan for a margin to avoid surprises.
| Item | Measurement tip |
|---|---|
| Wheels | Measure widest point |
| Handle | Measure extended |
| Pockets | Measure filled |
| Margin | Allow 1–2 in buffer |
Major U.S. Airlines and 62-Inch Rules
Now that you know to measure with wheels, handles, and any bulging pockets in place, let’s look at how the big U.S. carriers actually enforce the 62‑inch rule. You’ll find similar basics but small differences matter: fees, gate checks, and discretionary enforcement by staff. Check each airline before you travel.
- American, Delta, United: commonly charge oversize fees and may gate‑check bags exceeding 62 inches.
- Spirit and Frontier: stricter, higher fees, and may refuse oversized carry‑ons.
- Alaska and JetBlue: enforce fees but sometimes allow flexibility for irregular shapes.
Always confirm current policies on the carrier’s website.
Do International Airlines and IATA Use 62-Inch Rules?
You’ll find that IATA offers a general guideline on baggage size but doesn’t force every carrier to follow a strict 62-inch rule.
Many international airlines set their own policies that can be larger or smaller than IATA’s suggestion, so you should always check your carrier’s specific limits.
That affects how you pack—knowing the exact allowance helps you avoid surprise fees or having to reconfigure your bag at the gate.
IATA Guideline Overview
Although IATA sets recommended standards for checked baggage, it doesn’t enforce a universal 62-inch rule for every international carrier; instead, airlines adopt IATA’s 62-inch guideline variably, so you should always check your specific airline’s size and weight limits before travel.
IATA advises that combined length + width + height around 158 cm (62 in) balances passenger convenience and safety, but its guidance is nonbinding. You’ll find airlines reference IATA for consistency, yet they may tweak limits.
Consider these practical points:
- IATA guidance is a recommended maximum framework.
- Compliance depends on each airline’s operational choices.
- Check confirmations to avoid surprises.
Airline Policy Variations
How do airlines actually apply the 62-inch guideline? You’ll find variation: IATA recommends 62 linear inches (height + width + depth) for checked bags, but it’s a guideline, not a binding rule.
Many international carriers adopt it for international economy allowances, yet some set different limits or use weight instead.
Low-cost airlines often impose stricter size or weight limits and charge extra.
Codeshare and regional partners might follow the operating carrier’s policy.
Always check the specific airline’s baggage rules before travel — airline websites or your ticket terms state exact measurements, fees, and exceptions for oversized items.
Practical Packing Implications
Most international airlines and IATA treat the 62‑inch guideline as a practical benchmark rather than a universal rule, so you should plan packing around it but verify each carrier’s actual allowance before you fly.
You’ll usually face different rules for checked baggage size, weight limits, and surcharges, so pack smart to avoid fees and gate hassles.
Consider these tactics:
- Choose a suitcase that measures just under 62 inches to maximize capacity without triggering oversize fees.
- Weigh luggage at home and redistribute items to meet weight caps.
- Pack compressible clothing and essential items in carry-on to stay flexible.
How Size and Weight Limits Affect Fees
Curious what 62 linear inches means for your wallet? Airlines set size and weight thresholds that trigger extra charges. If your bag exceeds 62 linear inches or the airline’s stated dimensions, you’ll pay oversized fees; if it’s over the weight limit, you’ll pay overweight fees.
Those fees vary by carrier, route, and whether you prepay online or pay at the counter. You can avoid surprises by weighing and measuring before you leave, redistributing items, or choosing a checked bag within limits.
Sometimes upgrading fare or buying a larger allowance in advance costs less than paying penalties at the airport.
What Happens at the Airport for Oversized Bags?
If your bag exceeds 62 linear inches, expect extra steps at the airport: agents will measure and weigh it, then assess oversized or overweight fees based on the carrier’s policy. You’ll be directed to a dedicated counter or curbside agent, and staff will record dimensions. Processing may take longer, so allow extra time.
Security may screen oversized items differently, and some carriers note restrictions for certain aircraft.
- Be prepared to show purchase or packing info if questioned.
- Expect payment options at the counter; they’ll explain charges.
- Understand that airline policies vary, so staff decisions are final.
Options When Your Bag Is Oversized at Check‑In
When your bag measures over the airline’s 62 linear inch limit at check‑in, you’ve got a few clear options: pay the oversized fee and have it accepted as checked baggage, ask whether it can be gate‑checked or transported as air cargo, or repack and redistribute items into carry‑ons or another suitcase to meet size rules. Decide quickly: fees vary, cargo adds handling time, and repacking saves money but costs effort. Use this quick comparison:
| Option | Consideration |
|---|---|
| Pay fee | Fast, expensive |
| Gate‑check/cargo | Possible, slower |
| Repack | Cheapest, time‑consuming |
Ask staff politely and confirm costs.
How To Choose Luggage Under 62 Inches
Because airlines measure luggage by adding length + width + height, you’ll want a suitcase whose dimensions total 62 inches or less so you don’t hit oversized fees. Pick a model that balances capacity, durability, and weight. Measure external dimensions including wheels and handles before buying, and check airline limits for your typical routes.
- Choose a lightweight hard or soft shell to maximize packing without exceeding inches.
- Opt for compression straps or expandable sections that don’t push total linear inches over 62.
- Prefer brands with clear published dimensions and a return policy if measurements differ.
Best Carry‑On vs Checked Sizes for Travelers
While deciding between carry-on and checked luggage, think about trip length, access needs, and airline limits. Carry-ons keep essentials at hand and cut baggage fees, but checked bags give you more capacity without squeezing dimensions.
Choose a carry-on that fits your airline’s size limit (typically 22 x 14 x 9 inches) to avoid gate check. For checked bags, aim for dimensions that keep your total linear inches under 62 to dodge oversize charges—common is 27 x 21 x 14 inches.
Prioritize lightweight, durable shells and smooth wheels so your selected size serves you efficiently throughout travel.
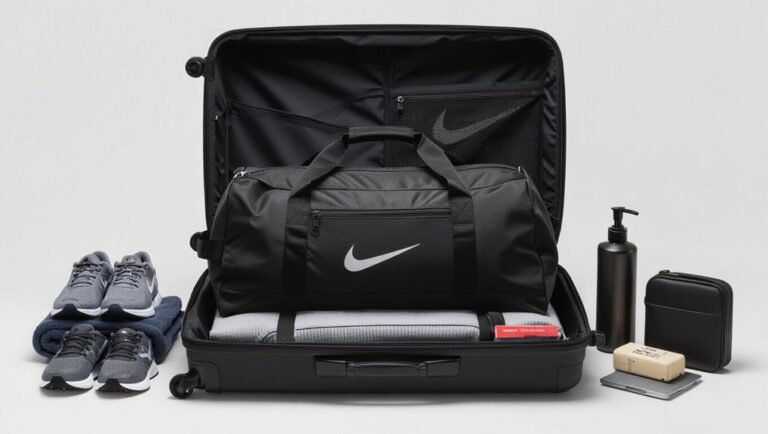
Packing Tips To Reduce Bulk and Meet Limits
When you’re trying to stay within 62 linear inches, compressing your clothes with packing cubes or a vacuum bag will save serious space.
Pick versatile, multiuse pieces that can be layered and worn in different settings so you don’t overpack.
Limit shoes to two or three pairs — wear the bulkiest on the plane and tuck the rest into gaps.
Compress Clothing Techniques
If you want to fit more into a bag that must stay within 62 linear inches, compressing your clothes is essential: roll and bundle items, use lightweight packing cubes, and employ a small vacuum or compression bags for bulky pieces.
You’ll want to prioritize compact methods that protect fabrics and save space. Roll tees and thin layers tightly; fold structured items flat and nest socks inside shoes. Use compression cubes to separate outfits and squeeze air out; vacuum bags are great for sweaters and jackets but don’t crush delicate garments.
- Roll soft items tightly
- Use slim compression cubes
- Vacuum-bag bulky pieces
Choose Multiuse Items
Because space is limited, pick pieces that pull double duty so you can pack less and still look pulled together. Choose clothing with versatile cuts and neutral colors that shift from day to night.
Pack a light blazer that dresses up tees, a reversible jacket, and a scarf that serves as a wrap or pillow.
Pick shoes that suit multiple activities but aren’t bulky.
Bring convertible accessories—belts that work with casual and dress pants, a tote that folds into a crossbody, and a tech charger with multiple connectors.
Prioritize fabrics that wash and dry quickly so you can rewear confidently.
Limit Shoe Quantity
You’ve pared down clothing and picked multipurpose pieces, so now focus on shoes—one of the bulkiest items you’ll pack. Limit yourself to essentials that match outfits and activities. Choose lightweight, versatile pairs and wear the heaviest during travel to save space. Use packing hacks to protect and compress.
- One neutral pair for walking/touring
- One dressy option that doubles as evening wear
- One sport or beach shoe if needed
Stash socks or small items inside shoes to maximize space. Count shoes against your linear inches allowance and prioritize flexibility over fashion to stay under the 62-inch limit.
Combine Bags or Ship Items To Avoid Fees
When your luggage exceeds the airline’s 62 linear inches limit, combining items into fewer bags or shipping extras ahead can save you hefty oversize or extra-bag fees. You’ll assess what’s essential, redistribute weight, and pack dense items in one carry-on-friendly suitcase. For bulky or fragile goods, compare shipping costs versus checked-bag surcharges; ground shipping often beats repeat overweight fees. Label shipments, insure valuables, and track delivery. At the airport, present consolidated bags to gate agents to avoid surprises. Use this quick checklist:
| Action | When to use | Benefit |
|---|---|---|
| Consolidate | Small overages | Avoid extra bag |
| Ship | Bulky items | Lower cost |
| Insure | Valuables | Peace of mind |
Budget Suitcases That Stay Under 62 Inches
You can stick to budget suitcases under 62 linear inches by choosing compact carry-on options that fit overhead bins. Look for durable hardshell picks that protect your gear without adding bulk.
If you want easy maneuvering, lightweight spinner choices give mobility and room without blowing your size limit.
Compact Carry-On Options
While staying under the 62-inch limit, you can find compact carry-ons that balance capacity, durability, and price—perfect if you’re packing light or trying to avoid checked-bag fees. You’ll want a lightweight softside or compact spinner that fits overhead and maximizes interior organization.
Look for smooth zippers, reinforced corners, and a reliable telescoping handle without splurging. Consider these practical features:
- Expandable main compartment for souvenirs without exceeding limits
- Multiple internal pockets and compression straps to keep outfits neat
- Quiet, multidirectional wheels for easy boarding and tight cabins
Choose a trusted brand on sale, and you’ll travel smartly.
Durable Hardshell Picks
A durable hardshell can protect fragile items and still meet the 62-linear-inch limit, so look for lightweight polycarbonate or ABS models that pack strength without bulk. You’ll want reinforced corners, secure zippers, and a rigid frame that resists warping while staying within size restrictions.
Choose simple interiors with zippered dividers to keep contents organized without adding weight. Compare warranty terms and read impact-test reviews to avoid duds.
For budget buys, prioritize build quality over flashy features; a well-made basic shell often outperforms cheaper “feature-rich” options that fail after a few trips.
Lightweight Spinner Choices
Moving from sturdy hardshells to lightweight spinners gives you easier handling and lower checked-bag fees without sacrificing durability. You’ll find budget options that hit the 62-inch limit while staying light, maneuverable, and tough enough for frequent travel.
Look for reinforced corners, smooth bearings, and compression straps to maximize capacity. Consider these practical picks:
- A 20–24 inch polycarbonate spinner with double wheels for steady rolls.
- A soft-sided 22 inch model with exterior pockets and expandable capacity.
- A hybrid spinner combining lightweight frame and abrasion-resistant fabric.
You’ll save weight and money without compromising packing power or airport agility.
When Buying a Larger Bag Is Worth It
When do you need a larger bag? You’re traveling with bulky items, extended stays, or shared gear that won’t compress — then upsizing makes sense.
Choose a bag that stays within airline linear-inch limits for checked baggage to avoid fees, unless extra capacity justifies the charge.
Buy larger if you value fewer trips to check baggage, need protected compartments for equipment, or plan shopping at your destination.
Factor maneuverability, storage at home, and transport between sites.
If you rarely exceed carry needs, stick with smaller spinners; otherwise, a larger bag saves hassle and protects valuables.
How To Dispute an Oversize Measurement or Fee
If an agent tags your bag as oversize and you disagree, stay calm and ask for a clear measurement and the basis for the fee so you can contest it on the spot. You’ll want evidence, polite persistence, and a plan: photograph the tape measure, note the agent’s name, and request a supervisor if numbers seem wrong.
If airport resolution fails, keep receipts and measurements for follow-up with the airline’s customer service or social channels.
- Photograph measurement and bag from multiple angles.
- Record agent name/time and ask for a supervisor.
- File a formal complaint with documentation if needed.
When Exterior Pockets or Compression Push You Over 62 Inches
After you’ve disputed a measurement or fee, check how exterior pockets, straps, or packed compression can quietly push your bag past 62 linear inches. You’ll want to inspect all outward features—buckets, side pouches, water-bottle holders, and any protruding gear.
Compressing soft items can bulge fabric or stretch seams, adding length, width, or height. Adjustable straps and external wheels often extend beyond nominal dimensions when tensioned or loaded.
If you suspect overage, loosen straps, redistribute contents, or empty external pockets and flatten bulges before remeasuring. Small changes can bring you back under 62 inches and avoid repeat fees.
Quick Checklist: Measure and Pack Before Flying
Because airlines enforce size limits strictly, you should measure and pack with intention. Before you head to the airport, confirm your carrier’s linear-inch allowance and check your bag’s dimensions including wheels and handles.
Use this quick checklist to streamline packing:
- Measure length + width + depth, including protrusions; record the total.
- Remove or compress external pockets, redistribute items, and avoid overstuffing seams.
- Weigh the bag and ensure carry-on fits overhead or meet checked limits; repack if needed.
Do a final zip test and re-measure after closing; that last check can prevent surprises and fees.
Frequently Asked Questions
Can Oversized Sports Equipment Count Toward the 62-Inch Limit?
Yes — oversized sports equipment can count toward the 62-inch limit if the airline treats it as checked baggage; you’ll need to measure length plus width plus height, and you may face oversize fees if it exceeds that total.
Are Soft Duffels More Likely to Be Inspected Than Hard Shells?
Yes — you’re more likely to have soft duffels inspected since they can be compressed, conceal irregular shapes, and trigger gate agents’ curiosity; hard shells look rigid and sealed, so agents often glance less and inspect less frequently.
Do Airlines Ever Waive Oversize Fees for Elite-Status Flyers?
Yes, some airlines waive oversize fees for elite-status flyers as a perk; you’ll often get fee waivers or higher size limits, but it varies by carrier, fare class, and specific elite tier—check your airline’s policy.
Can Rideshare Drivers Refuse Oversized Luggage at Pickup?
Yes — you can refuse oversized luggage at pickup if it creates safety, space, or policy issues; you should tell the passenger calmly, offer alternatives, and follow your rideshare company’s rules to avoid penalties or disputes.
Do Carry-On Personal Item Rules Interact With 62-Inch Limits?
Yes — you still follow carry-on and personal-item size rules, but carriers also check the 62-inch limit for checked baggage; if your combined dimensions exceed limits, they’ll require checked or oversized handling and may charge fees.
Conclusion
Now you know 62 linear inches means length + width + height must total 62″ or less, and that you should measure the exterior including wheels and extended handles. Measure soft-sided bags while packed and compressed; hard shells at their widest points. Avoid common mistakes like ignoring wheels or pockets. If you’re billed for oversize, politely dispute with measurements and photos. Before you fly, measure and pack to be sure your bag meets the airline’s limit.