Can Tsa Open My Locked Luggage
Yes — you can lock your bag, but TSA can and will open it if needed for security checks. They’ll usually use master-keyed TSA-approved locks so they can re-lock your bag, but non-TSA locks may be cut or damaged. Inspections happen for X-ray anomalies, prohibited items, alarms, or suspicious behavior, and agents should leave a notice if they open your luggage. Keep valuables accessible and use TSA-approved locks — keep going and you’ll learn practical ways to protect your items.
How to Use This Guide
Before you plunge in, skim the guide to find the sections that match your situation—packing tips, lock options, what TSA can and can’t do, and what to do if your bag’s opened.
Use this guide as a quick reference: start with your travel scenario (checked or carry-on), then read the short summaries for immediate answers. Follow links or headings for deeper detail when you need specifics.
Look for bolded quick-action steps and examples to apply immediately. Keep the FAQ nearby for common concerns.
If something’s urgent—damaged lock or missing item—jump to the troubleshooting section first.
Short Answer: Can TSA Open Locked Luggage?
If you’re traveling with locked luggage, yes—the TSA can open it when needed for inspection, and they’ll do so without your permission if agents believe it’s required for safety or screening.
You should expect agents to try non-destructive methods first, like using approved TSA locks or specialized tools.
If they open your bag, they’ll typically leave a notice explaining why and how it was accessed.
You can use TSA-recognized locks to reduce forced damage.
Why TSA Might Open Your Checked Bag
Because TSA’s job is to keep air travel secure, agents will open checked bags when screening equipment, intelligence, or routine procedures indicate a need to inspect contents more closely. You might be selected because X-ray images look ambiguous, sensors flag explosives, or behavioral detection raises concerns.
Random inspections also occur as part of standard security sampling. If declared items require verification, or if a ticketed flight, destination risk level, or specific intelligence triggers scrutiny, your bag can be examined.
Agents document openings, reseal when possible, and leave a notice. You should pack valuables thoughtfully and use TSA-approved locks to balance security and access.
When TSA Inspects Carry-On vs Checked Luggage?
When you go through the security checkpoint, carry-ons are usually screened by X-ray and may be pulled aside for a quick bag check if officers spot something suspicious.
Checked bags go through separate, often more thorough, automated screening and may be opened later for a manual inspection if the imaging flags an issue.
Knowing these differences helps you decide how to pack and whether to lock your luggage.
Carry-On Inspection Process
Curious about whether the TSA will inspect your carry-on instead of your checked bag? You should know carry-ons go through X-ray screening first.
TSA agents may pull yours aside for manual inspection if they see a potential threat, prohibited item, or unclear image. You’ll be asked to open compartments and remove electronics or liquids.
If you’re present, agents will conduct the check in front of you and offer a private screening on request. Locks that block inspection might be cut.
Stay cooperative and pack transparently to speed the process.
- Expect: X-ray, possible manual check
- Be present: you can watch
- Prepare: easy-access packing
Checked-Bag Screening
If agents screened your carry-on, they’ll follow a different routine for checked baggage: checked bags go through more automated explosive detection and manual inspection off the concourse, so you won’t be present for most checks.
When your checked bag triggers an alarm, TSA may X-ray, swab for explosives, or open it to inspect contents. You’ll get a notice if they open and reseal your lock with a TSA-approved device or place a tag explaining the action.
You should avoid packing prohibited items and consider using TSA-recognized locks so agents can relock your bag after inspection.
Why TSA Can Legally Open Your Bag
Because airports are public safety zones and screening is mandated by federal law, the TSA has broad authority to inspect carry-on and checked bags. Agents can open your locked luggage if they believe it’s necessary for security screening. You don’t own an absolute right to prevent inspections; TSA focuses on threats, not property.
If agents detect an alarm, prohibited item, or unclear contents, they’ll open your bag to verify safety. Know that locks can be bypassed; using a TSA-approved lock may let them relock.
Stay cooperative to reduce delays and keep a record of any damage.
- Safety priority
- Legal mandate
- Practical cooperation
How TSA Notifies You After Opening a Bag
After agents open your bag for inspection, they’ll usually leave a written notice inside explaining why it was opened and whether anything was removed or damaged. You’ll find a TSA notice or tag stating the reason (alarm, random check), time, and agent ID. Check contents immediately; if something’s missing or damaged, report it at the airport or online. Keep the notice for claims. Photograph damage and packaging. Expect polite, brief explanations; agents won’t leave detailed reports. Below is a simple visual to imagine the notice and context.
| Notice Type | Location Found | Action Needed |
|---|---|---|
| Tag | Inside bag | Inspect items |
| Slip | Outer zipper | Photograph |
| Sticker | Handle | Report loss |
| Form | File claim |
What a TSA Inspection Tag Looks Like
When TSA inspects your bag they’ll usually leave a small paper or plastic tag with bold lettering and a checkbox area. You’ll often find it tucked into a pocket, looped through a zipper, or attached to the handle so you can spot it quickly.
The tag also has codes and brief notes that explain why the bag was opened and which agency handled the inspection.
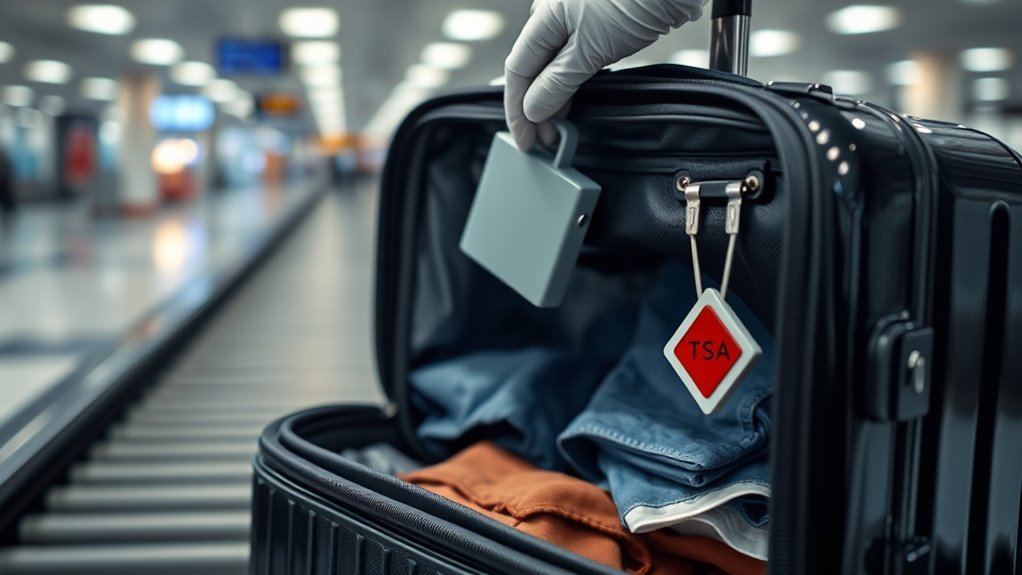
Appearance Of The Tag
If TSA inspects your checked bag and needs to open a locked suitcase, they’ll usually leave a small, clearly marked inspection tag attached to the zipper, handle, or internal lining so you know an officer accessed your luggage.
The tag is typically bright (often neon or red), stamped with “TSA” or “Baggage Inspection,” and includes a short written note or code indicating reason.
It’s made of durable paper or plastic and often affixed with a staple, tie, or adhesive.
Check it first; it documents access and provides a contact or reference if you have questions.
- Visibility
- Identification
- Durability
Placement On Luggage
Now that you know what the inspection tag looks like, you’ll usually find it attached where an officer could easily access and document the opening: the zipper pulls, near the main lock, the handle, or sometimes inside the bag clipped to the lining. When you spot a tag, check its placement for signs of entry and any loose fastenings. Common spots are visible without fully unpacking, so you can quickly confirm an inspection. Keep tags until you leave the airport in case you need to report damage or missing items.
| Spot | Visibility | Action |
|---|---|---|
| Zipper pulls | High | Inspect seals |
| Near lock | Medium | Check lock |
| Handle | High | Note scuffs |
| Interior clip | Low | Look inside |
What The Codes Mean
Although the tag might look simple, its printed letters and numbers tell you exactly why and how your bag was inspected. You’ll see a location code, an inspector ID, and sometimes a reason code. Learn to read them so you know what happened and where.
- Location code: identifies the airport or checkpoint that opened your bag, helping you trace inspections.
- Inspector ID: a unique number or initials showing which officer conducted the search, useful for reporting concerns.
- Reason code: indicates routine screening, random check, or alarm-triggered inspection, so you understand the cause.
How Often TSA Opens Bags for Inspection
How often does TSA actually open checked or carry-on bags for inspection? You won’t know exact odds—frequency varies by airport, threat level, and random screening protocols—but most bags aren’t physically opened.
TSA relies on X-ray, explosive trace detection, and behavior detection; agents open bags when screening flags an anomaly or when a secondary inspection is required. If they do open your secured luggage and can’t access contents, they’ll either request that you unfasten it or cut the lock, documenting the action.
You’ll typically get a notice left inside. Inspections aim to balance safety with minimal disruption to travelers.
Common Triggers That Prompt Bag Searches
When a scan, detector, or behavior pattern raises suspicion, TSA agents may pull your bag for a closer look. You should know common triggers so you can reduce delays and avoid surprises.
Unusual item shapes, dense masses, or ambiguous images on X-ray screens often prompt manual checks.
Alarmed sensors — like explosives trace or metal detectors — lead to targeted searches.
Traveler behavior, such as nervousness, inconsistent statements, or prohibited items in carry-on, can also draw attention.
- Ambiguous X-ray images or unusual densities
- Positive trace or metal detector alerts
- Suspicious traveler behavior or prohibited items
How TSA Does Non-Destructive Inspections
If a bag flags for closer inspection, TSA officers will first try non-destructive methods to verify contents before opening anything. You’ll often see them use X-ray imaging to review interior items, comparing images to known threat signatures.
They may also swab exterior surfaces for trace explosives and run those swabs through detection equipment. If images or tests are inconclusive, officers might ask you to open the bag yourself for a visual check.
Canines trained to detect explosives may screen your luggage without contact. These steps aim to resolve alerts while preserving your property whenever possible.
Tools TSA Uses to Open Locks
Although TSA prefers to avoid damaging your luggage, officers carry tools that let them open locks when inspections require it. You should know they use techniques aimed at quick, controlled access while minimizing harm.
Common tools include picks for delicate manipulation, shims to release simple latches, and cutters when locks are obstructive. You won’t see theater; officers follow procedures and document forced openings.
If your lock shows signs of tampering after screening, report it immediately and keep receipts for claims. Knowing tools used helps you choose compliant locks or pack to reduce chances of forced entry.
- Picks
- Shims
- Cutters
TSA Master Keys Explained
You should know that TSA master keys are designed to open specific certified locks by engaging hidden internal mechanisms, which lets agents access luggage without damaging it.
There are several types of TSA keys and keyways tied to different lock manufacturers, so not every master key works on every lock.
That convenience raises real security and privacy risks because copies of some master keys have leaked and those universal openings can be exploited.
How Master Keys Work
Curious how TSA agents can open so many different locks without breaking them? You’ll see master keys use precise matching to standardized lock pins. They’re designed to align specific pin combinations so one key can turn many locks built to that specification. You won’t need to pick or force anything.
- Master key engages common pin depths shared across approved locks.
- It lifts select pins to a shear line without altering individual lock security.
- Agents use protocol: identify approved lock, insert correct master key, and document opening.
You’ll understand it’s about design compatibility, not magical access.
Types Of TSA Keys
While TSA master keys look simple, they come in several distinct types that correspond to different lock manufacturers and generations. You’ll see why each matters when traveling.
You’ll encounter standard tubular keys for older luggage, flat-bar master keys used by specific brands, and newer electronic override tools for smart locks. Each type matches a family of locks with unique pin patterns or electronic protocols, so not every key opens every TSA-approved lock.
When you choose a lock, check which key type it accepts and whether it’s maintained by the Transportation Security Administration or a private manufacturer.
Security And Privacy Risks
Because TSA master keys let agents bypass numerous baggage locks, they create tangible security and privacy risks you should understand. You rely on locks for protection, but master keys defeat that expectation. That means your valuables, documents, and personal items can be accessed without your consent, and you mightn’t know who inspected them or why.
- Unauthorized access: Anyone with a key copy can open many locks, raising theft risk.
- Privacy exposure: Inspectors or others may view sensitive contents, risking identity or data breaches.
- Chain-of-custody gaps: Opened bags complicate accountability after loss or damage.
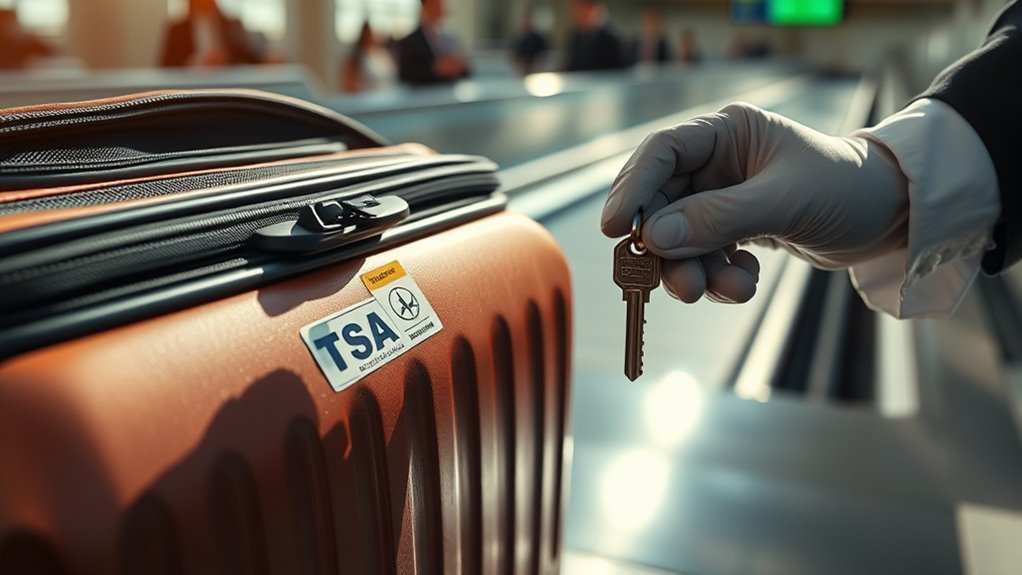
What “TSA-Approved” Lock Means
When a lock is labeled “TSA‑approved,” it means Transportation Security Administration officers can open it with a master key or special tool without damaging your luggage. You’ll still control access for regular use, but inspectors can bypass the lock during security checks.
That label signals compliance with TSA protocols so screening agents can inspect contents if needed. You should know the mark doesn’t guarantee privacy or prevent all tampering—it simply allows authorized inspection without forced entry.
Always use a reputable brand, register combinations if available, and inspect locks after travel so you can detect unauthorized openings or damage.
Types of TSA-Approved Locks
Now that you know what “TSA‑approved” means, it helps to understand the different kinds of locks that carry that designation. You’ll choose based on convenience, security, and the type of luggage you use. Consider options that let agents access contents without damaging your bag.
- Cable locks — flexible, good for soft bags, let you lock multiple zippers; moderate security.
- Combination padlocks with Travel Sentry or SafeSkies logo — keyless, resettable, widely accepted by screeners.
- Luggage with built‑in TSA locks — integrated, convenient, low profile; replaceable if broken.
Pick the style that matches how you travel.
How to Spot a TSA-Approved Lock on Your Bag
If you want assurance that screeners can open your bag without breaking the lock, look for the Travel Sentry or SafeSkies logo stamped or printed on the lock or luggage near the zipper. Those marks mean approved master keys exist for screening.
Check the lock body, zipper pull, or tag for the red Travel Sentry diamond or the SafeSkies keyhole symbol.
Check the lock body, zipper pull, or tag for the red Travel Sentry diamond or SafeSkies keyhole symbol.
Inspect packaging or product tags when buying; manufacturers often list approval in specs. If you don’t see a logo, assume it’s not approved.
Keep receipts or manuals showing approval for disputes, and photograph the logo location before travel.
Keyed TSA Locks: Pros and Cons
Spotting a TSA-approved logo tells you screeners can open your bag, but you’ll also want to weigh whether a keyed TSA lock fits your needs. You get straightforward access control and simple setup, but you also carry a physical key that can be lost, and locks may be forced if inspectors need quick entry.
Consider security, convenience, and replacement cost when choosing.
- Convenience: keyed locks are easy to use but require key management.
- Security: they deter casual tampering yet aren’t pick-proof against determined intruders.
- Replacement: lost keys mean lock swap or locksmith expense.
Combination TSA Locks: Pros and Cons
Thinking about a keyed alternative, have you considered combination TSA locks? You can set codes, avoid carrying keys, and still allow TSA agents to open luggage with master tools.
They reduce lost-key hassles and offer quick access when you forget combinations by using manufacturer reset procedures.
Downsides: combinations can be guessed or observed, mechanical dials may jam, and cheap models are easier to bypass.
You’ll need to remember or securely store your code, and reset complexity varies.
For higher security, choose reputable brands with durable mechanisms and clear reset instructions so you balance convenience and protection.
Cable and Zipper Locks: Pros and Cons
Cable and zipper locks give you quick, flexible closure but they trade off stronger security for convenience. You’ll appreciate how light and easy they’re to use.
Yet you should know many can be cut or forced more easily than hard locks. Consider durability and how vulnerable the materials are when choosing them for travel.
Security Versus Convenience
While zipper and cable locks can make your bag feel more secure, they trade off convenience in different ways: zipper locks are lightweight and cheap but easy to pry or cut.
Cable locks resist cutting better and can secure bulky items but are bulkier and sometimes harder to thread through small zipper pulls.
You’ll weigh speed, portability, and flexibility. Zipper locks let you move fast; cable locks give more attachment options.
Think about typical trips and how often you access items.
- Choose speed when you access luggage often.
- Choose attachment strength for odd-shaped items.
- Balance portability and function.
Durability And Vulnerability
If you picked a lock type based on speed or attachment needs, the next question is how long it’ll last and how it fails.
Cable locks resist cutting better than cheap cables but can be snipped with strong wire cutters; they flex, so zippers can be forced aside if the bag’s fabric or stitching is weak.
Zipper locks are lightweight and quick but rely on delicate zipper pulls and sliders that can break or be bypassed with a pen or shim.
Both suffer wear: corrosion, fraying, and broken components.
Choose robust materials, test closures, and accept that no portable lock is invulnerable.
Are Luggage Straps and Tamper Seals Useful?
Wondering whether a strap or tamper seal will actually protect your bag? You’ll get deterrence, not impenetrability.
Straps can keep a burst case closed and signal rough handling, while tamper seals show if someone opened your zipper. Both slow casual snooping and make tampering obvious, but neither stops determined thieves or official inspections.
- Straps: add visible reinforcement, reduce accidental openings, help ID your bag.
- Tamper seals: provide clear evidence of opening but are single-use and easy to cut.
- Use both plus smart packing and locks for layered protection—don’t rely on them alone.
Locks TSA Can’t Open Without Breaking
If you use non‑TSA‑recognized locks, know the TSA won’t be able to open them with their master keys and may cut them off.
The same goes for homemade or custom locks — they often force agents to break them to inspect your bag.
Consider whether you want that risk before locking luggage that can’t be opened by TSA.
Non-TSA Recognized Locks
- You get stronger deterrence, but risk damage when inspections occur.
- Inspectors prioritize safety; they’ll break non‑recognized locks rather than bypass them.
- Consider removable locks or keeping receipts to prove ownership after forced entry.
Homemade Or Custom Locks
Although a homemade or custom lock can give you strong peace of mind, remember TSA agents will break any device they can’t open to inspect a bag for safety reasons. You might prefer unique designs, but those locks aren’t TSA-recognized. If your bag gets selected, agents will cut or shatter the lock rather than delay screening. To avoid surprise damage, use TSA-approved locks or remove custom locks before travel. Consider clear labeling so agents know how to handle your luggage.
| Type | Recognized? | Likely Outcome |
|---|---|---|
| Homemade | No | Cut/broken |
| Custom | No | Cut/broken |
| TSA lock | Yes | Opened/relocked |
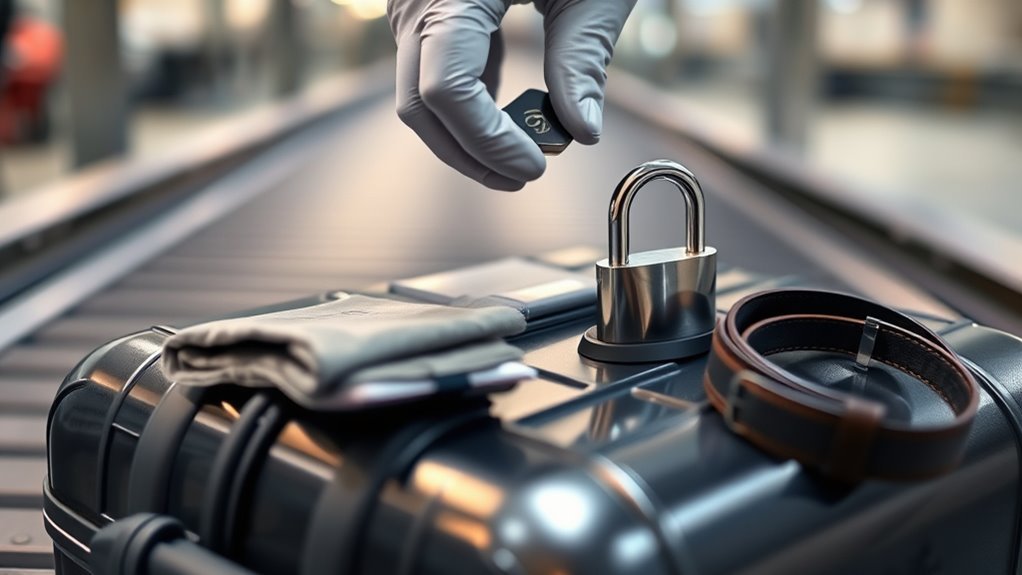
What Happens If TSA Breaks Your Lock
When TSA needs to inspect your checked bag and can’t access it with the key or combination, agents may cut or break the lock to get inside. You’ll still have access to your belongings, but the lock may be unusable. TSA tries to use TSA-approved locks; if yours isn’t, expect it to be removed.
- Expectation: You won’t be penalized for inspection; breaking a noncompliant lock is standard procedure.
- Practical step: Replace broken locks with TSA-approved ones for future travel to avoid repeat damage.
- Liability: TSA isn’t automatically responsible for cosmetic damage; check your carrier’s policies for recourse.
How to Document Damage by TSA
How should you document damage caused by TSA inspections?
First, photograph the damaged luggage, locks, and contents from multiple angles immediately after discovery, including close-ups and wide shots with a timestamp if possible.
Note date, time, flight number, and where you found the damage.
Keep original packing materials and any broken parts.
Write a clear, concise inventory of damaged items with estimated values and receipts if available.
Get statements or contact info from witnesses, airline staff, or TSA agents present.
Preserve your bag and evidence; avoid repairing anything until you’ve documented it thoroughly for any follow-up.
How to File a Claim for Damaged Luggage or Locks
Before you contact anyone, gather your evidence and decide whom to claim against: the airline, TSA, or your travel insurance provider. Start by notifying the carrier immediately at the airport and filing a written report (PIR) for checked luggage.
If TSA caused damage during screening, contact TSA through their web form; for airline handling, use the airline’s baggage claim process. Keep copies of receipts, repair estimates, and correspondence.
Meet deadlines—many carriers require claims within 24 hours for damaged baggage. If needed, escalate to your travel insurer or small claims court with organized documentation.
- File promptly
- Keep records
- Escalate if denied
Evidence to Collect Before and After Travel
Before you travel, take clear photos of your locked luggage, note the lock type and serials, and keep receipts for locks or luggage.
After inspection, photograph any damage, record the TSA tag number, and list missing or disturbed items. These records will strengthen any claim you file.
Pre-Travel Documentation
Although you can’t predict every inspection, documenting your luggage and valuables before and after travel gives you strong evidence if TSA damages or searches your bag.
Before you go, photograph the closed exterior, interior contents arranged neatly, and any serial numbers or unique marks. Note the lock type and its condition, recording timestamps and flight details.
Keep receipts for high-value items and a packing list saved to cloud storage so you can access it anywhere.
If you suspect tampering, those pre-trip records make claims clearer and faster, proving ownership, condition, and the timeline of your belongings.
- Photograph exterior, interior, serials
- Note locks, timestamps, flight info
- Save receipts and cloud-stored lists
Post-Inspection Evidence
When TSA inspects your bag, gather clear, time-stamped evidence both immediately after discovery and from your pre-trip records so you can document what changed and when. Take well-lit photos of seals, locks, zippers, and contents before you repack, and photograph inspection notices or damaged items.
Keep original receipts, serial numbers, and packing lists scanned with timestamps. Note names, badge numbers, and location of the inspection; record the date and time. If possible, get a written receipt from the inspector.
Store all files securely in cloud and on-device copies. This evidence supports claims and helps resolve disputes efficiently.
How Airlines Differ From TSA in Baggage Handling
Because airlines focus on getting your bags from check-in to the plane and TSA focuses on security screening, their roles and priorities in baggage handling look very different. You rely on airlines to transport, sort, and load luggage efficiently; they prioritize routing, weight limits, and timeliness.
TSA inspects for prohibited items and may open bags for safety reasons, prioritizing security over intact delivery. Knowing the split helps you set expectations about delays, damage, or inspections.
Consider these distinctions:
- Airlines manage logistics, routing, and claim procedures.
- TSA enforces security screening and may inspect contents.
- Accountability and remedies differ between carriers and TSA.
How to Minimize the Chance TSA Opens Your Bag
Now that you know TSA inspects for safety while airlines handle transport, you can take practical steps to reduce the likelihood an officer will need to open your bag.
Pack only allowed items, declare restricted ones, and keep liquids within limits and in clear bags. Place electronics and shoes where X-ray operators can clearly see them.
Use TSA-recognized locks so agents can re-lock after inspection. Leave space so items aren’t densely packed, which reduces suspicion.
Label your luggage with contact info and keep receipts for high-value items. Clear, compliant packing and transparency cut the chance of a manual search.
Best Packing Practices for Fragile Items
When you pack fragile items, wrap each piece individually to prevent contact and scratches.
Cushion them with soft materials like clothing or bubble wrap to absorb shocks.
Use dividers or compartmentalize your bag to keep everything from shifting.
Wrap Items Individually
If you want your fragile items to survive transit, wrap each piece individually so nothing rubs, bumps, or shatters against another. Use protective layers like paper, bubble wrap, or cloth, and secure seams with tape so coverings don’t shift. Label wrapped items if they’re delicate or oddly shaped, so you handle them gently when packing and unpacking.
Separate hard and soft items to avoid pressure points. Place wrapped pieces where they’ll stay put, avoiding tight compression.
- Wrap progressively: inner layer, padding, outer wrap.
- Secure closures to prevent unraveling.
- Label for careful handling.
Cushion With Soft Materials
Because fragile items need gentle support, cushion them with soft materials that absorb shocks and fill gaps so pieces don’t shift during transit. Choose bubble wrap, foam sheets, microfiber cloths, or clothing to create a soft bed around each piece.
Pack heavier items toward the center and surround them with padding to prevent contact with hard suitcase walls. Fill voids with socks or crumpled tissue to stop movement, and add a final layer of soft material on top.
Check for snugness by gently shaking the bag; nothing should rattle. Replenish padding if you notice any compression before travel.
Secure With Dividers
Although you’ll already have soft materials surrounding fragile items, add rigid or semi-rigid dividers to keep pieces from colliding and to maintain organization inside your luggage. You’ll create separate compartments that stop movement and let you pack efficiently.
Use foam inserts, corrugated board, or hard plastic panels cut to fit; secure them with tape or elastic straps so they don’t shift. Label sections for quick inspection and to guide TSA if they need access.
When dividers are removable, TSA can open without disrupting your arrangement, reducing breakage risk and preserving privacy.
- Foam inserts
- Corrugated board
- Hard plastic panels
Items TSA Is Most Likely to Inspect in Checked Bags
When TSA agents screen checked bags, they focus on items that pose safety risks, raise alarm on X-ray images, or require closer verification — like liquids over the allowed limit, electronics, powders, and anything that looks suspicious or obstructs clear imaging. You should expect checks on common triggers: large bottles, dense batteries, loose powders, and oddly shaped items. Keep essentials accessible and documented to speed inspection.
| Item type | Why inspected | What you should do |
|---|---|---|
| Liquids | Risk, unclear volumes | Pack limits, label |
| Electronics | Batteries, heat | Power off, separate |
| Powders | Concealment | Keep in original containers |
| Odd shapes | Imaging obstruction | Explain contents, declare |
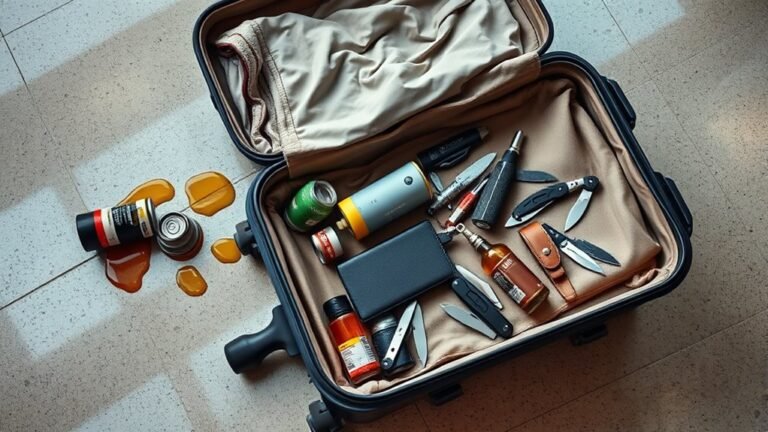
What Never to Pack in Checked Luggage
Don’t pack irreplaceable valuables or fragile electronics in checked bags since they can get lost, damaged, or inspected without your presence.
Skip perishable food and anything hazardous—like aerosols, lithium batteries, or flammable liquids—that can spoil, leak, or violate safety rules.
Keep these items with you in carry-on luggage to stay safe and in control.
Valuables And Electronics
Because checked bags go out of sight and can pass through multiple hands, you shouldn’t pack irreplaceable items like jewelry, passports, cash, or high-end electronics in them. Protect essentials by carrying them with you: keep backups, documents, and small valuables in your carry-on so you can monitor and react quickly if something’s missing.
- Laptop and tablet — expensive, fragile, and full of personal data; keep them with you.
- Cameras and lenses — costly and prone to damage; you’ll want them insured and in sight.
- Portable drives and phones — contain sensitive info; losing them can be worse than losing hardware.
Perishable And Hazardous Items
Although it might seem convenient to toss perishables or hazardous materials into checked baggage, you shouldn’t—airlines and TSA restrict items that can spoil, leak, combust, or pose health risks. You should never pack fresh food, batteries, aerosols, or certain chemicals in checked bags. Perishables attract pests and leak; hazardous items can start fires or injure baggage handlers. Declare anything questionable and ship perishables separately. When in doubt, consult airline rules or TSA guidance before you pack.
| Item type | Risk | Action |
|---|---|---|
| Fresh food | Spoilage | Ship or carry on |
| Batteries | Fire | Carry on |
| Aerosols | Pressure/combustion | Avoid |
| Chemicals | Toxic/leak | Don’t pack |
Alternatives to Locking Checked Luggage
Looking for ways to protect your checked bags without using a lock? You can secure contents and deter tampering by using alternative approaches that stay TSA-friendly. Consider durable packing, clear labeling, and strategic carrying choices to reduce risk and simplify inspections.
- Use sturdy packing cubes and hard-sided suitcase inserts to prevent shifting and hide valuables, making casual rummaging less appealing.
- Label bags with contact info and unique identifiers so lost items are returned and handlers treat them carefully.
- Keep valuables, medications, and documents in your carry-on so checked luggage holds less tempting or sensitive items.
Using Tamper-Evident Bags and Pouches Inside Luggage
You can add tamper-evident bags or pouches inside your luggage to protect valuables and make any unauthorized access obvious.
Make sure you follow the manufacturer’s sealing instructions and check that seals click or change color as designed.
Properly sealed pouches give you an extra layer of security and clear evidence if someone’s opened your bag.
Tamper-Evident Bag Benefits
When you pack valuables or sensitive items in tamper-evident bags or pouches inside your luggage, they give a clear visual signal if someone’s tried to access them during screening or transport.
You’ll gain reassurance, deter casual tampering, and simplify inspections when agents need to verify contents.
Use them as an added layer, not a replacement for locks or documentation.
Choose durable, single-use seals that visually change when opened.
Keep receipts or photos of sealed items to support claims if tampering occurs.
- Visible deterrent
- Easier verification
- Evidence for disputes
Proper Sealing Techniques
Because a tamper-evident bag only works if it’s sealed correctly, learn a few simple techniques to make sure your valuables stay protected and inspections go smoothly. You’ll press edges, expel air, and use the adhesive strip fully. Label contents and date, place fragile items cushioned, and keep receipts or serial numbers nearby. If TSA needs access, they’ll reseal with a notice—inspect that on return. Use clear pouches for visibility and single-use seals for evidence.
| Step | Action | Tip |
|---|---|---|
| 1 | Press edges | Remove air |
| 2 | Fold flap | Align adhesive |
| 3 | Label | Write date |
| 4 | Cushion items | Use bubble wrap |
Travel Safes and Lockboxes: Pros and Cons
If you’re carrying valuables or need extra peace of mind, a travel safe or lockbox can add a layer of protection that standard luggage locks don’t provide. You get a rigid, often tamper-evident container that deters opportunistic theft and keeps small items organized.
Downsides include added weight, bulk, and the need to secure the box to a fixed object or inside luggage. Consider where and how you’ll use it, and whether airport security might inspect contents.
Keep in mind added weight and bulk — you’ll need to secure the box and may face airport inspections.
- Durability vs. portability: choose based on trip length and transport mode.
- Visibility vs. discretion: flashy safes deter but attract attention.
- Attachment options: anchor points reduce theft risk.
Smart and Bluetooth Locks: Are They TSA-Friendly?
Lockboxes and travel safes offer physical security, but smart and Bluetooth-enabled locks add convenience—and new questions about airport screening.
You can use app-controlled or Bluetooth padlocks to avoid keys, but TSA doesn’t universally accept them. Only locks labeled “TSA-approved” (with a Travel Sentry or SafeSkies logo) let agents open luggage without damaging electronics or locks.
Smart locks without those approvals risk being cut if inspection is needed. Also expect possible battery or connectivity issues during screenings; agents won’t troubleshoot your device.
Before travel, choose a certified model or be prepared to surrender access if TSA inspects.
How to Travel With Valuables Safely
When you travel with valuables, plan proactively so you reduce loss and stress. Pack essentials in carry-on and use a slim, locked pouch under your clothes. Photograph items and keep receipts or serial numbers in cloud storage you can access if needed. Notify your insurer about high-value items before departure.
- Keep items on your person: wear money belts or discreet necklaces for passport and cash.
- Use tamper-evident pouches: they deter casual theft and show if luggage was opened.
- Limit what you bring: prioritize replaceable items and leave irreplaceables at home or in secure storage.
International Security: How Other Countries Differ
How do security checks abroad really differ from what you’re used to? You’ll find variation in authority, procedure, and legal powers: some countries let officers cut or open locks without notice, others require owner presence.
Screening tech varies—advanced scanners are common in major hubs, while manual inspections persist elsewhere.
Privacy rules and liability for damaged goods differ, so you should research destination regulations and airport policies before traveling.
Customs might inspect luggage for contraband more aggressively.
To minimize issues, use TSA-approved locks when flying to the U.S., keep valuables with you, and document your bag’s condition before checking it.
Airline Policies That Affect Locked Luggage Handling
Beyond national rules, the airline you fly with can shape how locked luggage gets handled at every step—from check-in to claims. You should check carrier policies before travel because some airlines forbid certain lock types, require declared valuables, or reserve the right to open bags for inspections. Knowing procedures reduces surprises and helps protect your items.
- Baggage rules: weight, lock types allowed, and inspection rights vary by airline.
- Valuables policy: airlines may ask you to carry high-value items onboard.
- Claims process: documentation and timelines differ; follow carrier instructions exactly.
TSA Rules vs Airport Security Procedures
Although TSA sets nationwide screening standards, airport security procedures and the people who enforce them can vary, so you’ll see differences in how locked luggage is handled from one terminal to another.
You should know TSA authorizes screening and may open locks when necessary, but local policies dictate when agents escalate, notify you, or use bolt cutters. Some airports use specialized teams or supervisors for locked bags; others clear items on the spot.
You can minimize surprises by using TSA-approved locks, labeling items, and checking airport-specific guidance before travel. When officers act, cooperate politely to speed resolution and retrieve belongings.
Real Traveler Experiences With TSA and Locked Bags
You’ve seen how TSA standards and local practices can affect locked luggage, and real travelers’ stories bring those differences to life. You learn quickly: outcomes vary by airport, officer, and inspection reason.
Some found locks intact after routine x-rays; others discovered cuts after manual searches. You felt frustration when notified post-travel, relief when TSA left a notice, and resolve to choose different locks.
Some locks sailed through x-rays; others were cut during manual searches—frustration, relief, and a vow to switch locks.
- A business traveler lost a cheap zipper lock but kept valuables safe.
- A family discovered a padlock cut for random inspection.
- A solo traveler received a TSA notice but no damage.
TSA Master Key Myths Debunked
When you hear about a single TSA “master key” that opens every travel lock, it sounds ominous—but the reality is more nuanced. You should know TSA-approved locks use standardized keyways, and authorized agents hold sets that fit many models, not one mystical key for all.
That increases convenience for inspections but also raises security concerns—duplicate keys exist outside TSA and designs can be picked. You can reduce risk by using tamper-evident seals, choosing stronger locks, or guarding valuable items in carry-on luggage.
Don’t assume absolute safety; balance convenience and protection when choosing locks for travel.
Recent Policy and Tech Changes to TSA Inspections
As TSA updates inspection rules and adopts new technologies, you should know how those changes affect locked luggage and passenger privacy. New policies emphasize imaging and risk-based screening, so agents often inspect bags without breaking locks when possible.
Advanced scanners can see contents more clearly, reducing physical searches, but they don’t guarantee privacy of sensitive items. You should expect selective manual checks and occasional lock replacement for safety or law compliance.
Stay informed about policy updates and signaled inspections at checkpoints to minimize surprises.
- Less breaking: better imaging reduces forced entry.
- Targeted checks: risk-based selection increases variability.
- Transparency: policy notices guide expectations.
Checklist: Prepare Locked Bags Before Check-In
Given the increased use of imaging and selective manual checks, you should take simple steps to prepare locked bags before check-in.
Lock only with TSA-approved locks so officers can reopen without damaging your lock.
Remove fragile or prohibited items from checked luggage and pack them in carry-ons.
Keep receipts, serial numbers, and a lightweight inventory list inside and with your travel documents.
Label your bag externally and internally with contact info.
Test zippers and seams; repair or reinforce weak spots.
Arrive early to allow time for re-keying or resealing if inspection is requested.
Keep keys accessible if using key locks.
What to Do If TSA Left a Notice on Your Bag
Wondering what that bright notice tucked into your bag means? It means TSA opened your luggage for inspection. Don’t panic. Check the tag for contact info, reason, and checkpoint details.
Inspect your bag and contents immediately, note any missing or damaged items, and take photos.
If you find problems, follow the reporting steps on the notice or the TSA website.
- Document: photograph the notice, bag, and contents—timestamp if possible.
- Contact: use the phone/email on the notice or file an online claim within the timeframe.
- Keep receipts: for missing/damaged items and repair costs for claim support.
When to Report Theft Versus Inspection Damage
If you find damage or missing items after TSA opened your bag, you’ll need to decide whether to report a theft or file a claim for inspection damage.
Inspect contents immediately, document everything with photos and a list, and keep the TSA notice and boarding pass.
Report obvious missing valuables or signs of targeted removal to airport or local police right away; theft reports support criminal investigation and insurer claims.
For broken locks, ripped lining, or general rough handling without clear item loss, file an inspection-damage complaint with TSA and your carrier.
Act quickly—timely reports strengthen your case and speed resolution.
Choosing Luggage Built for Secure Travel
When you’re picking luggage that stands up to airport screenings and rough handling, prioritize sturdy construction, reliable locks, and TSA-approved features that let agents inspect without destroying your bag.
Choose hard-shell cases with reinforced corners to resist impacts. Pick zippers with lockable pulls or integrated compartments to protect contents. Look for clear manufacturer guidance on permitted locks and inspection access so you won’t guess when TSA needs entry.
Choose hard-shell luggage with reinforced corners, lockable zippers, and clear manufacturer guidance for TSA-friendly inspection access.
- Prioritize durability to avoid damage during handling.
- Choose lock systems compatible with TSA inspection.
- Opt for practical organization to limit exposure during searches.
Recommended TSA-Approved Lock Brands
When you’re picking a TSA-approved lock, look at trusted brands like Travel Sentry, TSA Accepted, Master Lock, and Samsonite for proven key or combination options.
Prioritize features such as metal shackles, resettable combinations, and clear TSA keyway markings so agents can open luggage without damage.
You can buy these locks from luggage retailers, big-box stores, or reputable online sellers—check reviews and warranty details before you buy.
Top TSA-Approved Brands
Although you don’t have to pick a specific brand, choosing a well-known TSA-approved lock makes traveling simpler and more secure. You’ll find trusted names that balance reliability, acceptance by TSA, and user-friendly designs. Pick brands with consistent approval codes and good reviews so agents can open luggage without damage.
- Travel Sentry — widely recognized, compatible with most agents and systems.
- SafeSkies — durable options, common among frequent flyers.
- Master Lock TSA — reputable, easy to reset, and broadly accepted.
These options help you avoid surprises at security checkpoints while keeping your belongings protected.
Features To Prioritize
If you’ve narrowed your options to trusted TSA-approved brands, focus next on the features that matter most for everyday use and airport inspections. Choose locks with clear TSA keyhole markings, sturdy metal construction, and reliable dials or key systems. Prioritize easy reset mechanisms, corrosion resistance, and compact design that fits luggage zippers or built-in hasps. Consider low-profile indicators that show TSA access without damaging your lock.
| Feature | Why it matters |
|---|---|
| TSA keyhole | Allows inspected access |
| Durable build | Prevents breakage |
| Resettable code | Lets you change combos |
Where To Buy
Where should you buy TSA-approved locks? You’ll want trusted retailers and reputable brands so your lock opens for TSA without compromising security. Buy from official brand sites, major retailers, or specialty luggage stores to guarantee authenticity, warranty, and clear key/code replacement policies. Look for clear TSA Approval markings and easy returns.
- Amazon — wide selection, verified sellers, user reviews.
- Travelpro/Samsonite — direct brand assurance and warranty.
- REI or luggage boutiques — hands-on testing and expert advice.
Choose sellers with transparent return policies and documented key/code recovery options to avoid travel headaches.
Cost-Effective Ways to Protect Your Belongings
When you’re traveling on a budget, protecting your belongings doesn’t have to mean expensive locks or fancy cases; simple, smart choices can cut risk without breaking the bank.
Use inexpensive TSA-approved cable ties or zip-ties to deter casual tampering, and label bags discreetly with your contact info.
Secure bags with budget-friendly TSA cable ties or zip-ties, and discreetly label them with contact details to deter casual tampering.
Wrap fragile items in clothing and use resealable bags for liquids to prevent spills.
Carry valuables in a small, concealed daypack or money belt rather than checked luggage.
Photograph contents and serial numbers before travel for claims.
Opt for inexpensive hardshell suitcases with integrated locks only if they fit your budget and needs.
Final Practical Tips for Traveling With Locked Luggage
Although TSA may occasionally open checked bags, you can still minimize hassle and loss by packing smart, using TSA-approved locks, and keeping valuables with you. Check the lock type, photograph contents and locks, and place fragile or irreplaceable items in carry-on gear so a search won’t ruin your trip.
Use clear labeling, note serial numbers, and zip smaller items in sealed bags. Keep documentation accessible for customs or claims.
Before you lock, remove batteries and prohibited items. Share a spare key or combination with a trusted contact.
- Inspect locks
- Document contents
- Separate valuables
Frequently Asked Questions
Are TSA Agents Allowed to Search My Carry-On Without My Presence?
Yes — TSA agents can search your carry-on without you present if security needs require it; they’ll try to notify you, but you can ask about the reason and inspection results, and report any concerns to TSA afterward.
Can TSA Open Luggage for Reasons Unrelated to Security Screening?
No, they generally won’t open your luggage for non-security reasons; TSA opens bags only for screening, threats, or legal orders. If they do, you’ll be notified; you can file a complaint and request documentation.
Will TSA Inspect Checked Bags Differently During Holiday Travel Periods?
Yes — during holiday travel you’re likely to face more random and targeted inspections, and TSA may inspect checked bags more frequently due to higher passenger volume and risk indicators, so expect slightly increased screening likelihood and delays.
Do Airline Employees Ever Open Locked Luggage Instead of TSA?
Yes — airline employees might open your locked luggage if they need to access it for safety, security, or operational reasons; they’ll usually document or notify you, and they’ll try to reseal or secure your items afterward.
Can I Refuse a TSA Inspection and Keep My Bag Locked?
No, you can’t refuse a TSA inspection and keep your bag locked; if agents need to inspect, they’ll either use a TSA key for approved locks or open it, and refusal can result in denied boarding or further screening.
Conclusion
You should expect that TSA may open your locked luggage for inspection, so use TSA-approved locks and pack valuables, meds, and fragile items in your carry-on. When possible, lock only checked bags and secure items with tamper-evident seals to spot interference. Choose durable luggage and reputable TSA-approved lock brands, and keep receipts and an inventory of important contents. With practical precautions and realistic expectations, you’ll reduce inconvenience and better protect your belongings when traveling.